5th Swap Page 2
New 5th
swap info for MK2 16V and MK3 2.0L trans at the bottom of the page
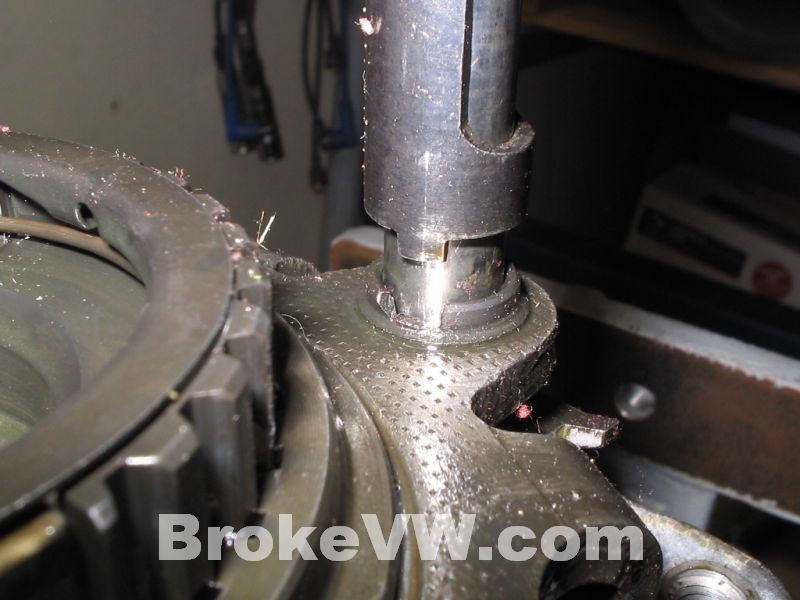
To get the gear off, you need to remove the 12mm XZN or triple-square bolt from
the center of the main shaft (this pic was taken later, after the bolt was
loosened)....
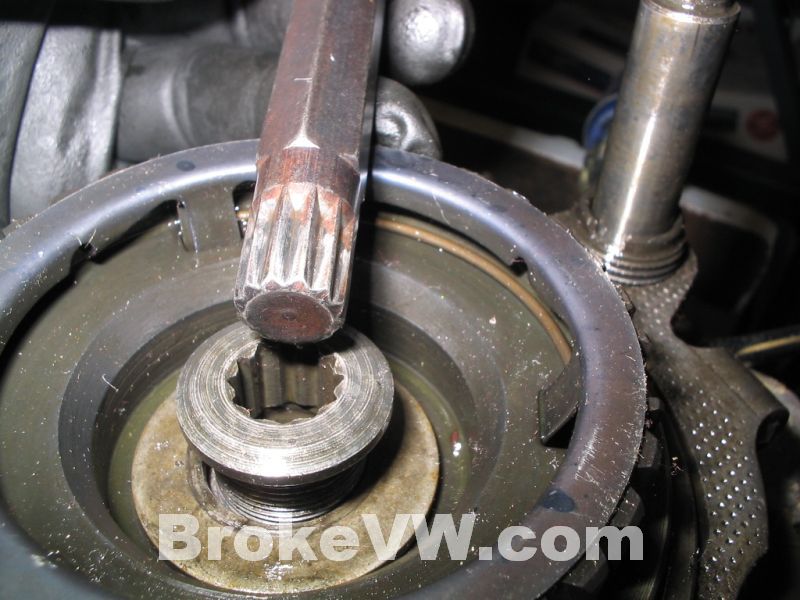
In order to remove the 5th retaining bolt, you need to stop the main shaft from
spinning around. To do this, select 2 gears at one time. This is why the
selector shaft was removed, so we could select 2 gears. In the pics, I use 5th
and reverse.
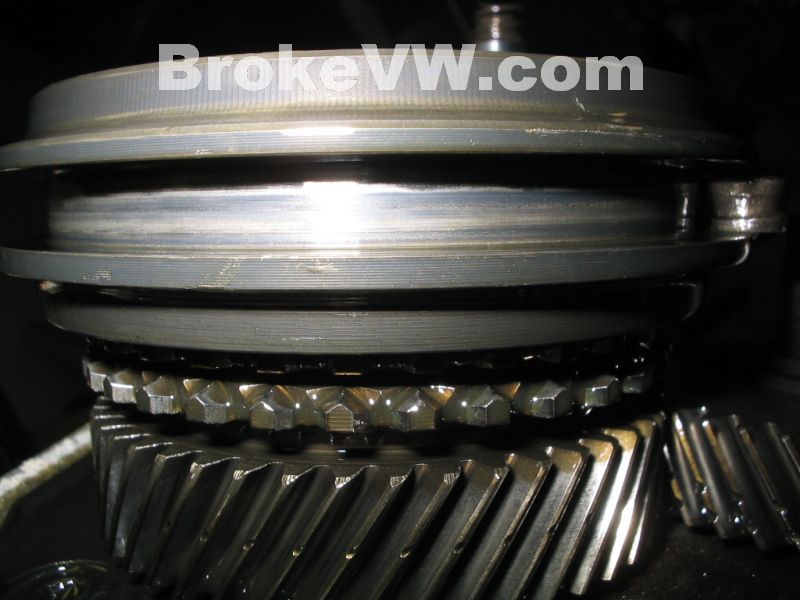
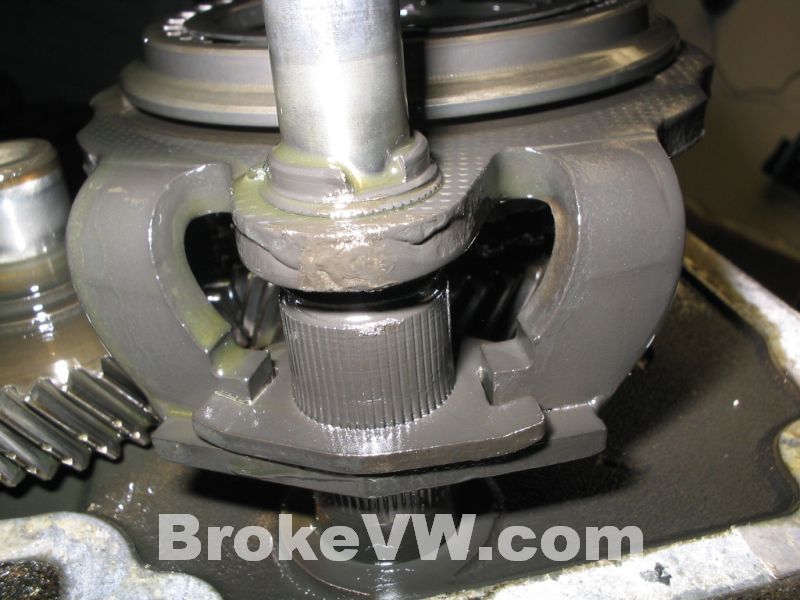
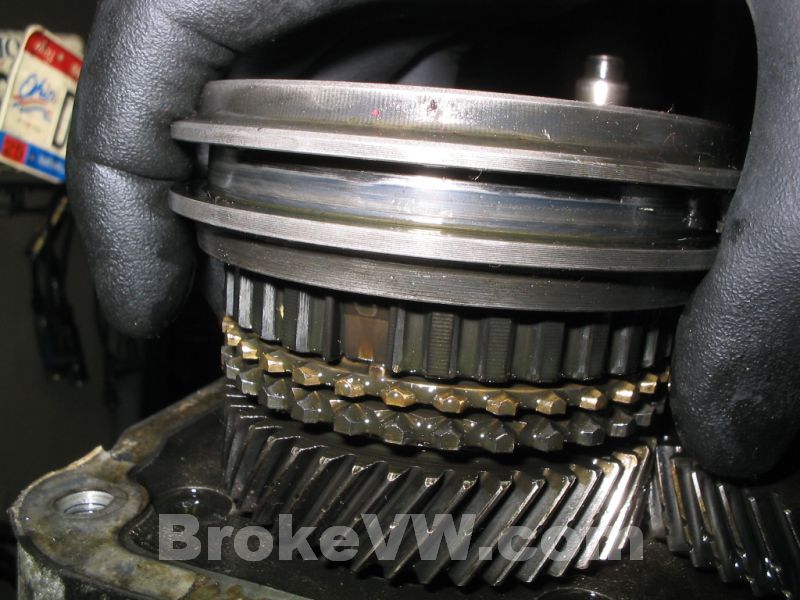
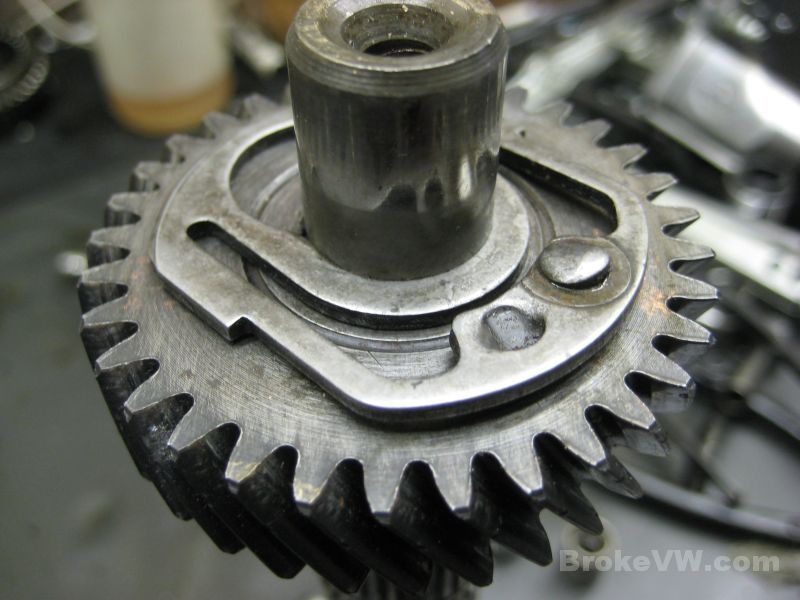
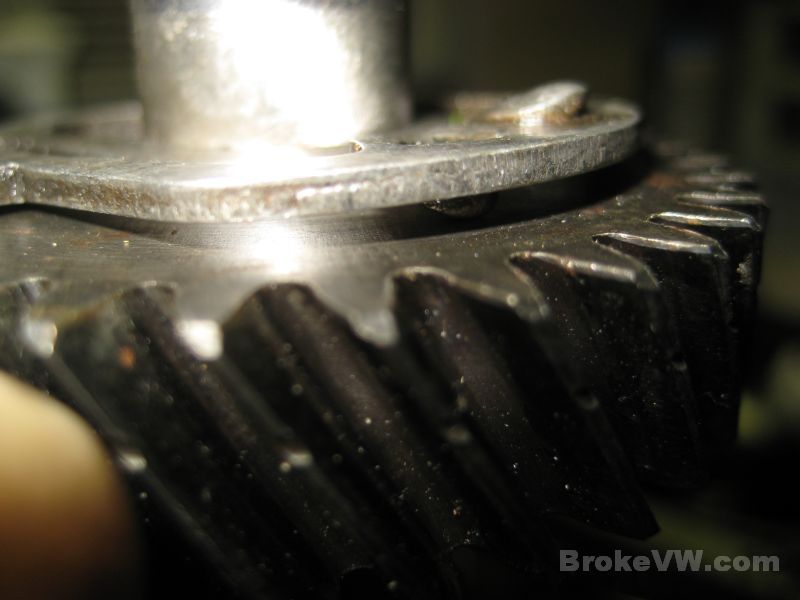
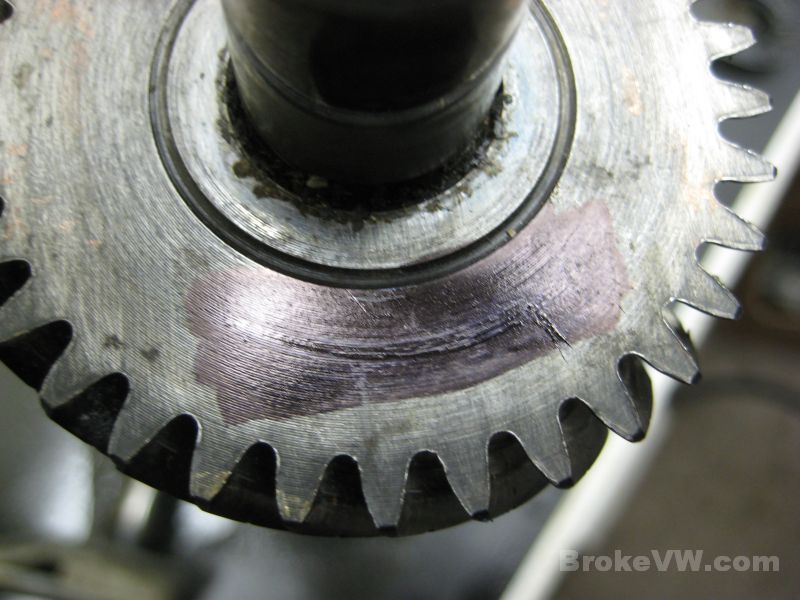
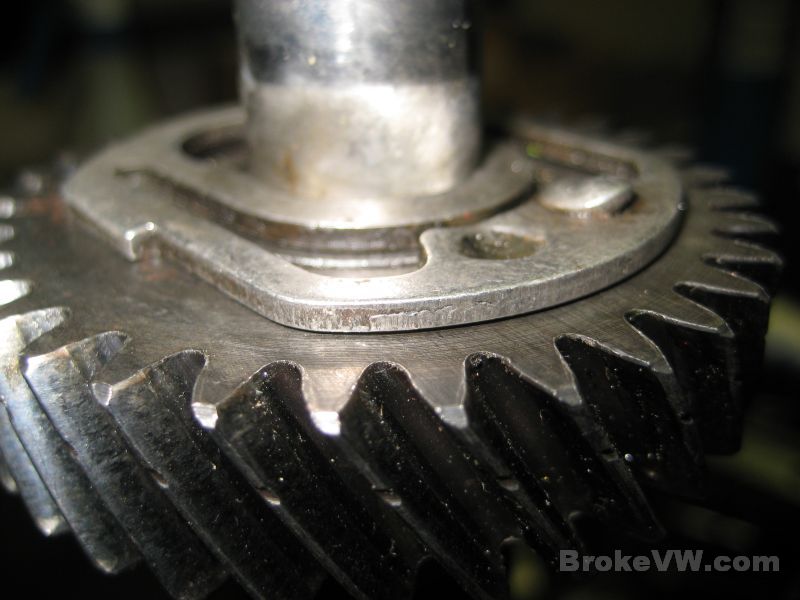
Here is a pic of the 5th synchronizer sliding collar, when 5th is not selected.
You can see the small teeth of 5th gear under the ring, and if you look close,
you can just make out the small teeth of the brass synchronizer ring in the
shadow of the sliding collar. When you hear grinding, those are the teeth that
grind. They are grinding against the inside of that sliding collar. They are
easily damaged, so remember that grinding = bad ;)
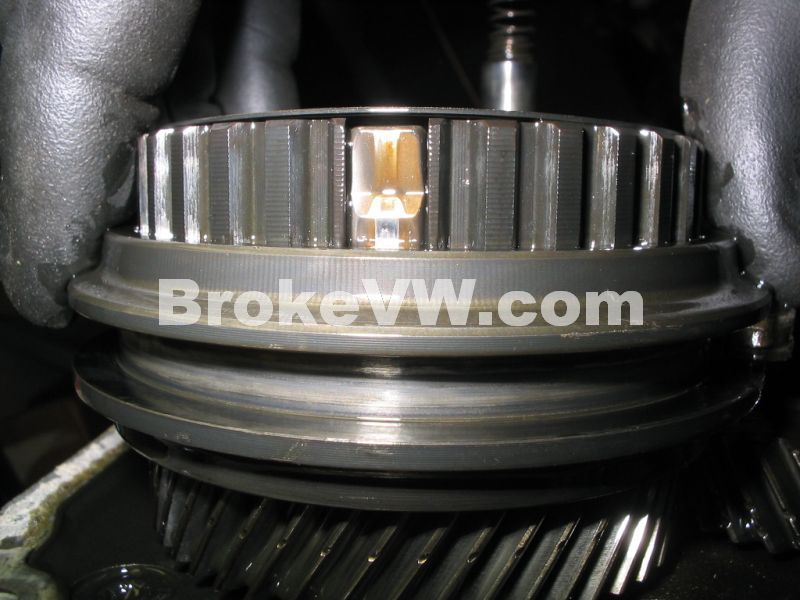
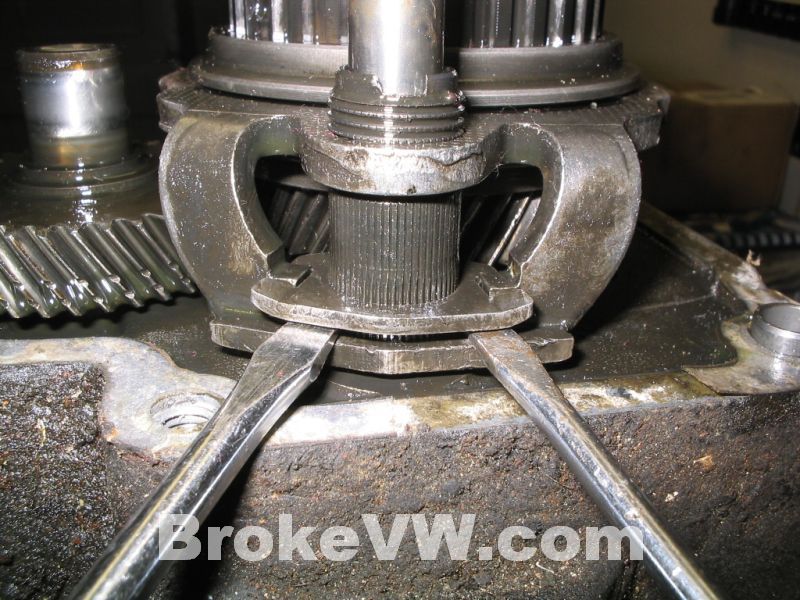
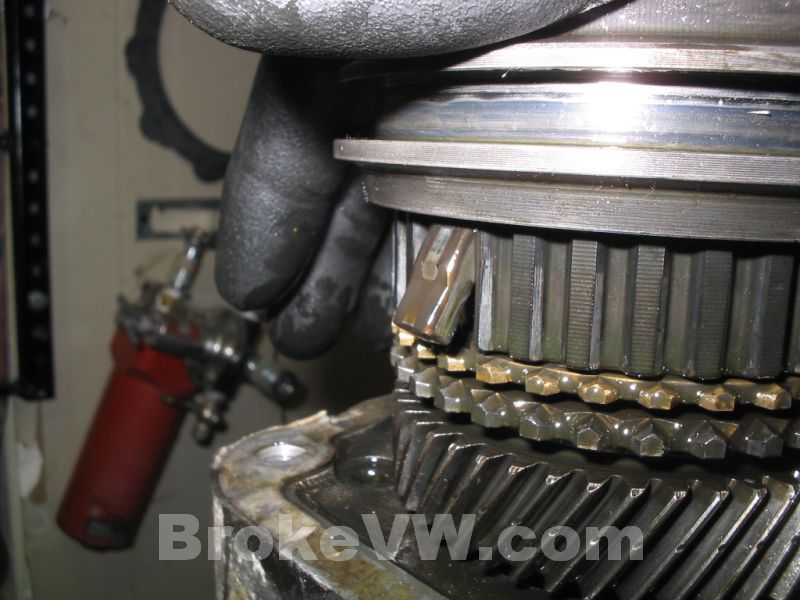
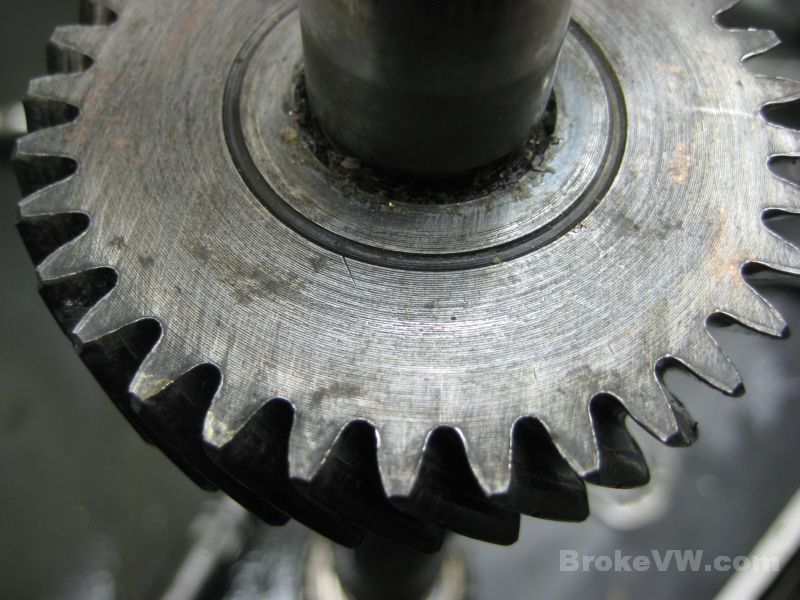
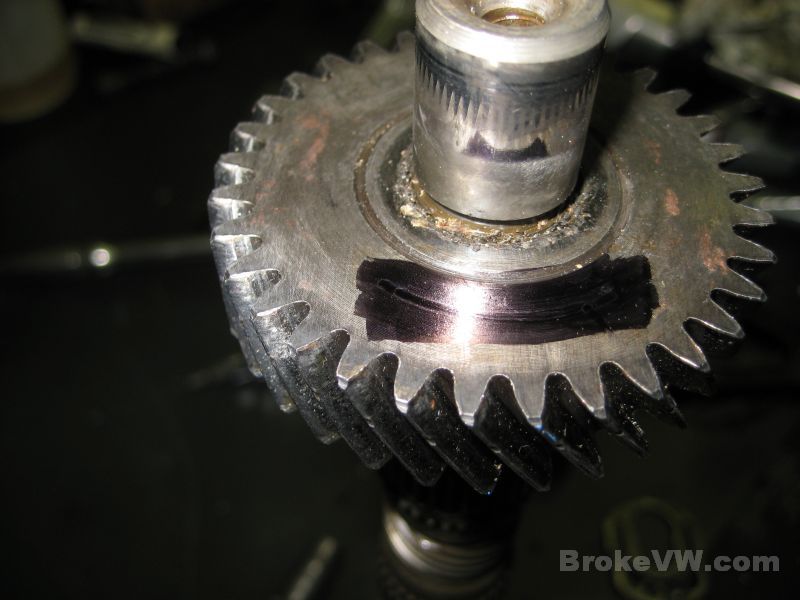
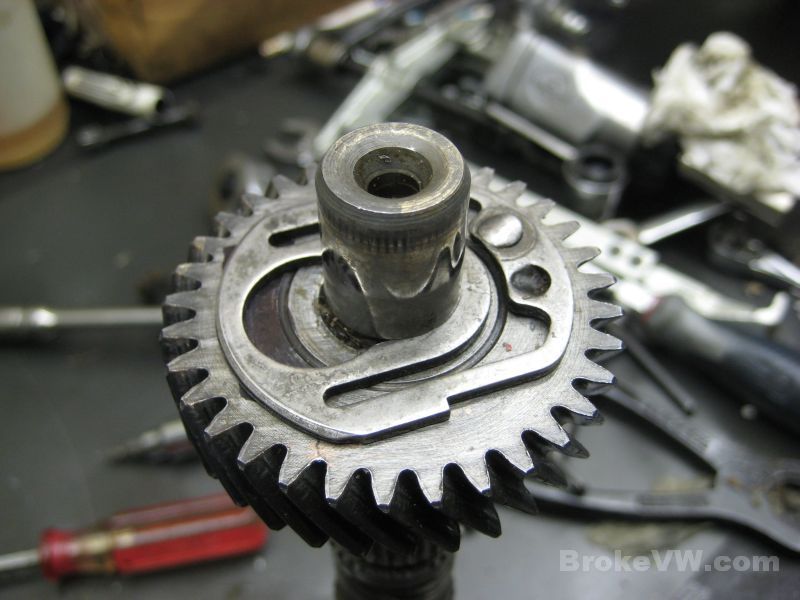
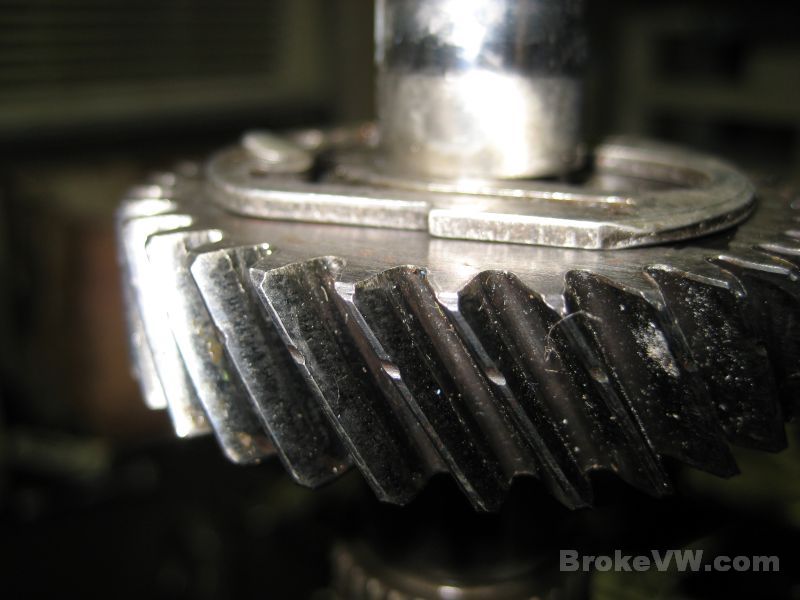
Here is a pic showing the 5th gear selected, after I pushed the sliding collar
down and engaged it with the small teeth on 5th gear. The trans is in 5th gear
now...
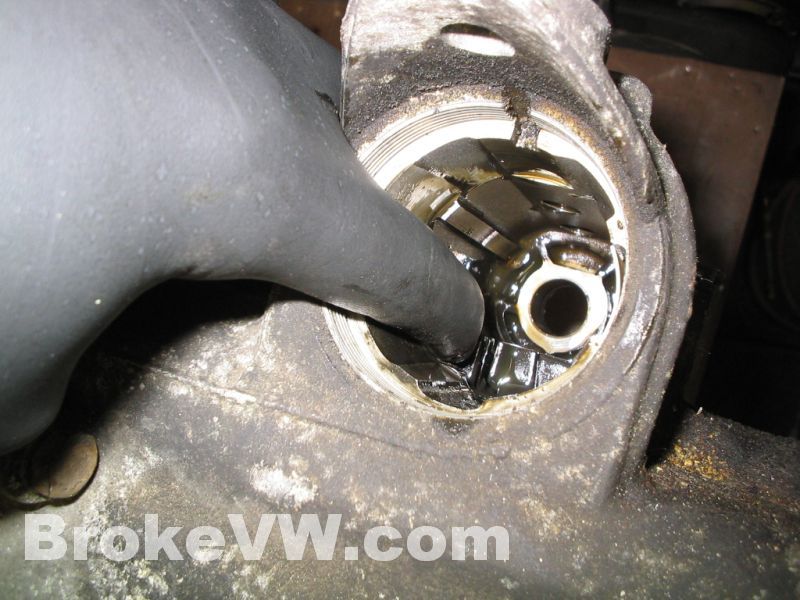
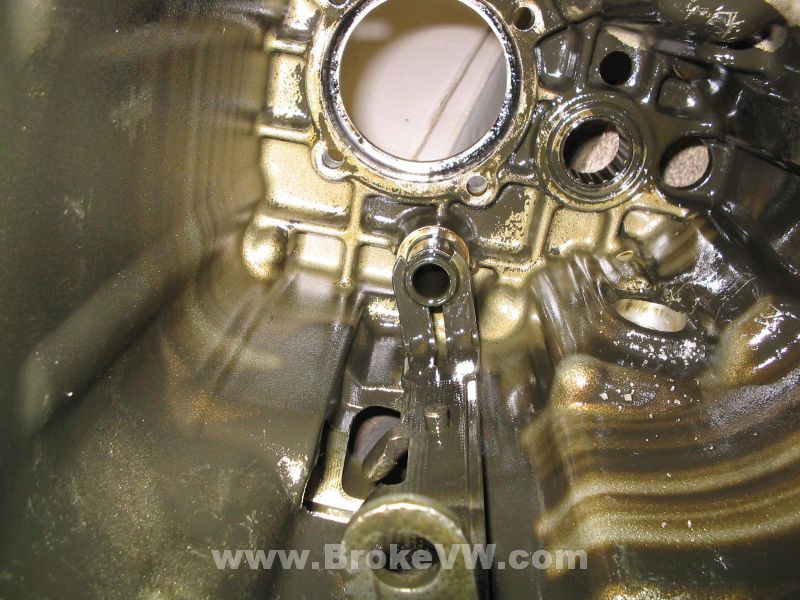
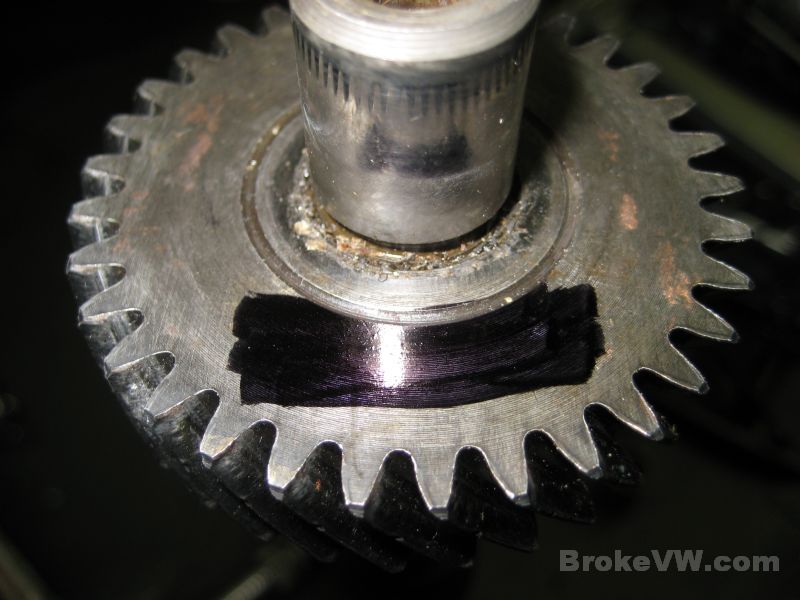
If you look inside the selector hole now, you can see the fork furthest from the
camera has moved towards the engine...
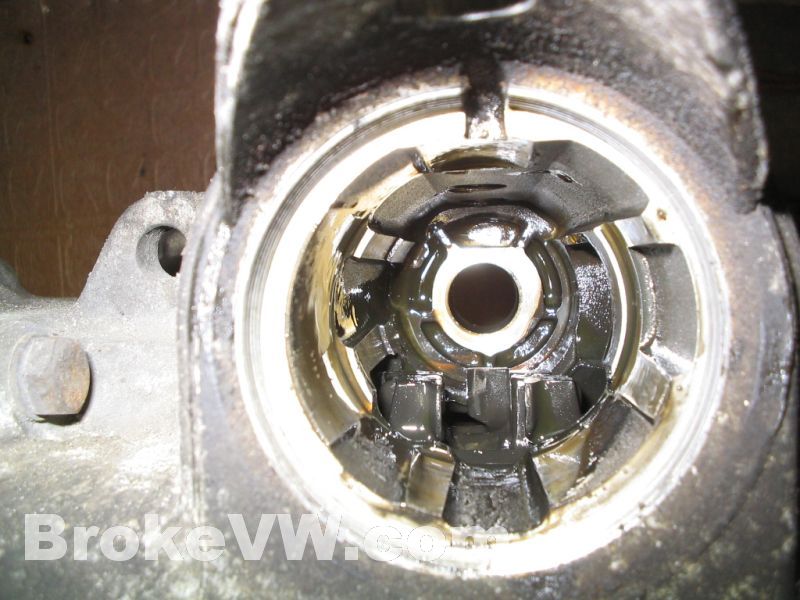
Reach in and push the fork closest to the hole towards the engine as well. This
will engage reverse gear. You can select any of the forks to pick any 2 gears,
but reverse is closest.
As Vdubs pointed out, it is possible for the trans to slip out of reverse on
earlier trans models not using a reverse over-center spring inside, so you might
want to use a flatblade screwdriver to reach in and move one of the other forks
to one side or the other. :P
The first fork only moves towards the engine, and that's reverse gear, then the
second fork moves back and forth for 1st/2nd, then the next fork works 3rd/4th,
then the last fork is 5th as you've already seen.
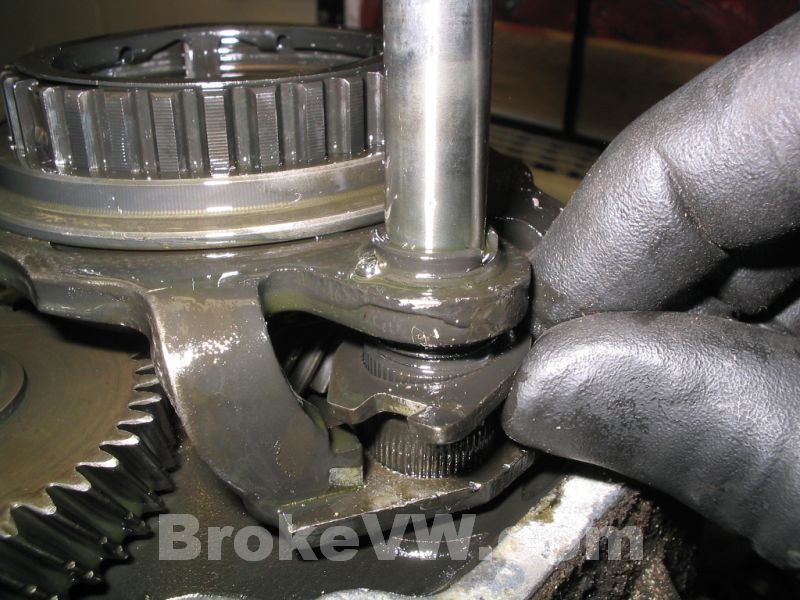
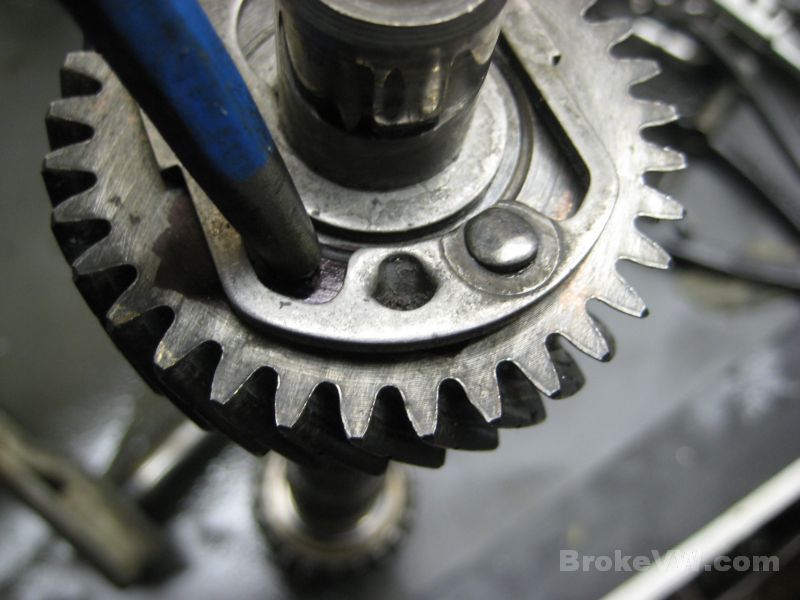
Here is a pic again into the selector bore, showing now the closest fork moved
towards the engine as well, so the trans is in both reverse and 5th gears, and
is completely locked up now.
Now you can remove the big XZN hollow 5th retaining bolt. It is in there kind of
tight, so have a cheater bar ready. It is installed at 111 ft-lbs, and it is
old, and thread locked. ;)

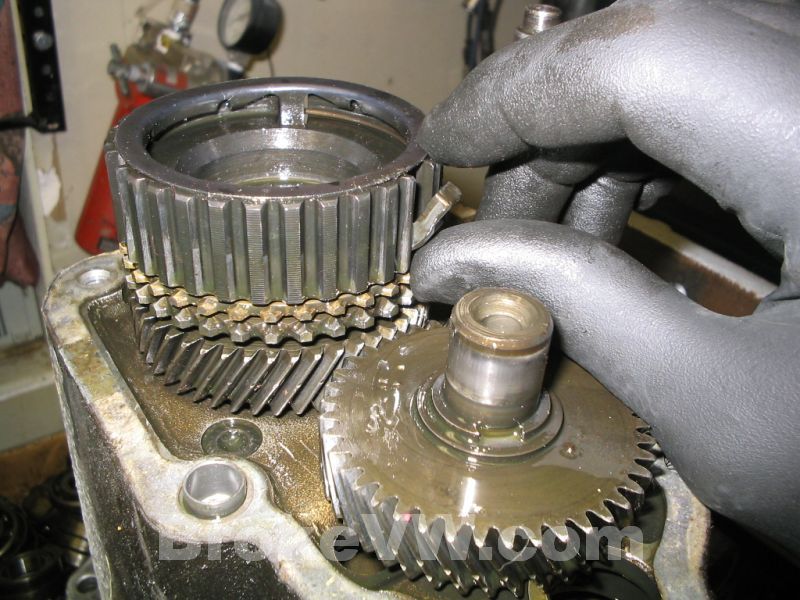
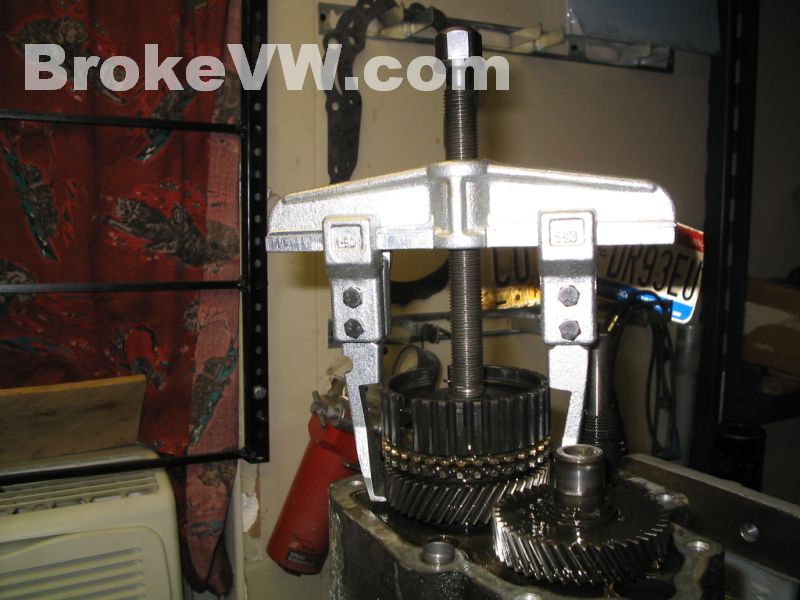
Once the bolt is removed, you can remove the 5th gear from the main shaft. It
will either wobble up fairly easily with finger force, or fight you and be
seized on. Either way, you'll notice the shift fork is keeping you from fully
removing the gear, so it needs to be removed. Ideally, you can lift the 5th
gear, and the sync hub and collar and shift fork all off in one piece. Ideally
;)
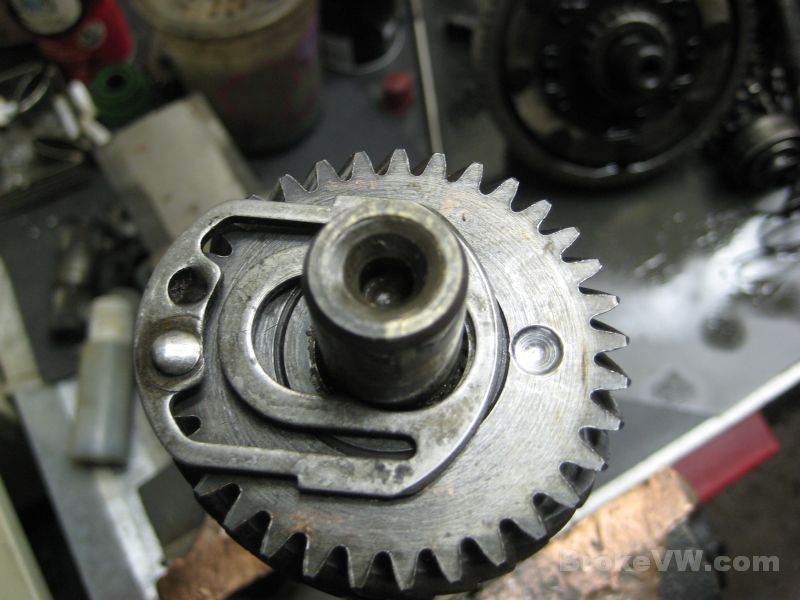
To start, you need to unlock the 5th adjustment tube. It is locked with this bar
which is pressed onto some splines preventing the splined/threaded tube from
spinning. Use a screwdriver to pry the bent ends up a bit, then pry the bar up
all the way, once the bar is up, turn it sideways so it won't fall back down
again. If you don't have one of these, and have a tube peened in place, see the
bottom of this page for more info...
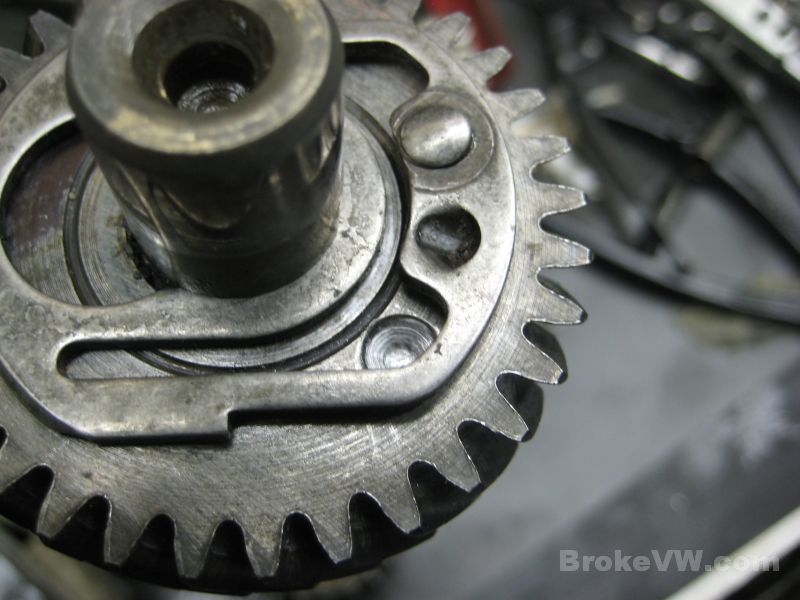
Use either the VW special tool or some homemade version to engage the splined/threaded
tube (the tube has 2 notches in it, and the tool has 2 tabs to engage them) and
spin it CCW...
The shift fork will unscrew from the threaded tube, and allow the fork to be
lifted free of the tube which will stay in the trans....

If things work out well, you should be able to wobble the gear and lift the
entire assembly from the shaft....

If things didn't work out to well, then the hub is stuck onto the shaft.
You will need to pull the gear, and to do so will probably require the removal
of the shift fork to let the puller hooks in close enough to get under the gear.
Lift the sliding collar upwards after you have unthreaded the tube from the
fork...
When you lift this collar up, the 3 locking sync keys will want to pop out of
the hub...
After the sliding collar is lifted off the hub, if there are any locking keys
remaining, go ahead and remove them....
Attach a puller to the gear and yank it off the main shaft...
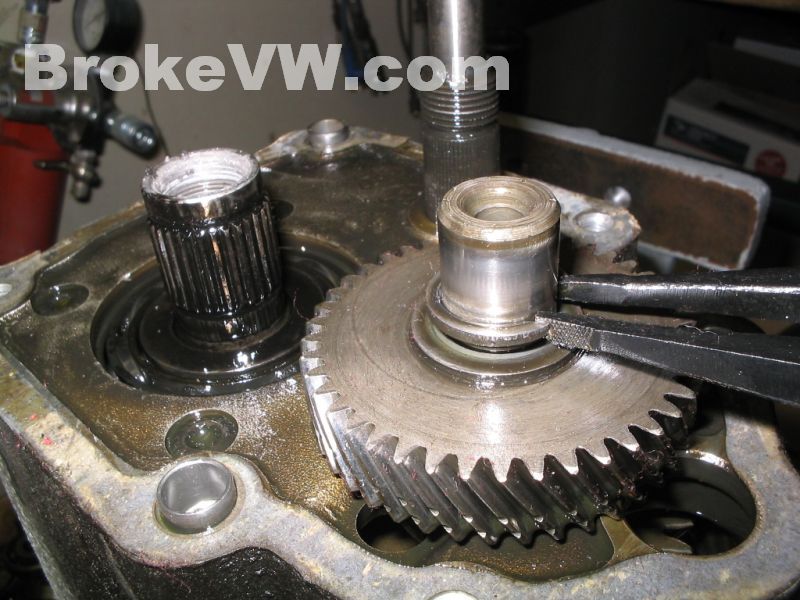
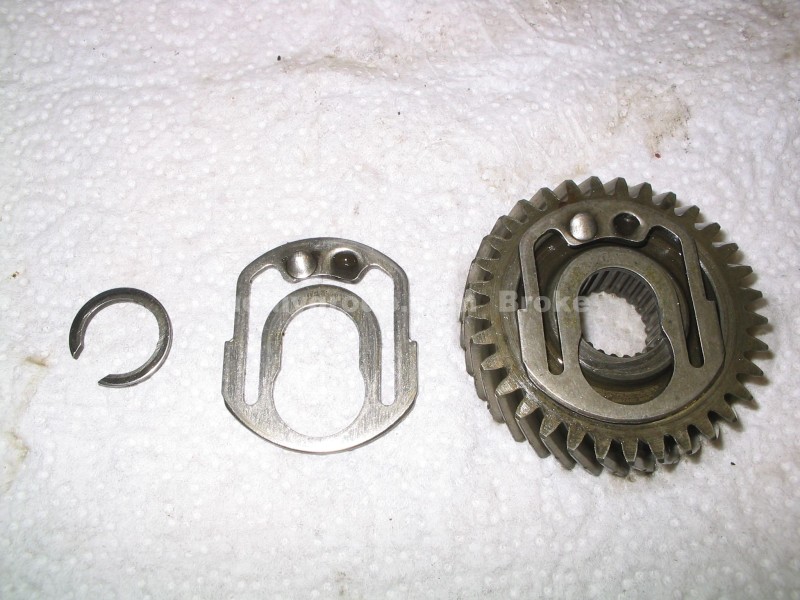
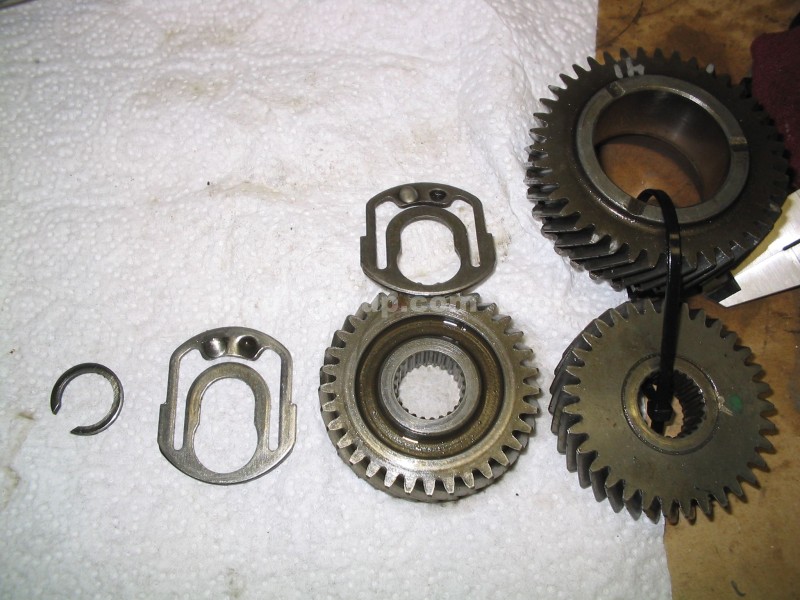
OOK, now one way or the other, you've got the "driving" 5th gear removed, and now
the "driven" 5th gear remains. Use a good set of circlip pliers, and remove the
circlip....
For 16V and 2.0 trans (up to date code
01067), the circlip and washer are replaced by a locking clip. The
driven gear also has a deep groove to allow the locking clip to lock
into place. The pinion shaft groove only allows one style of clip,
either the 8V circlip, or the 16V locking clip. This means your 16V or
2.0 code (prior to 01067) can only use deep grooved gears, but your 8V
(or MK3 codes after 02067) can use deep or shallow groove gears. The
bottom of the page has more pics to explain...
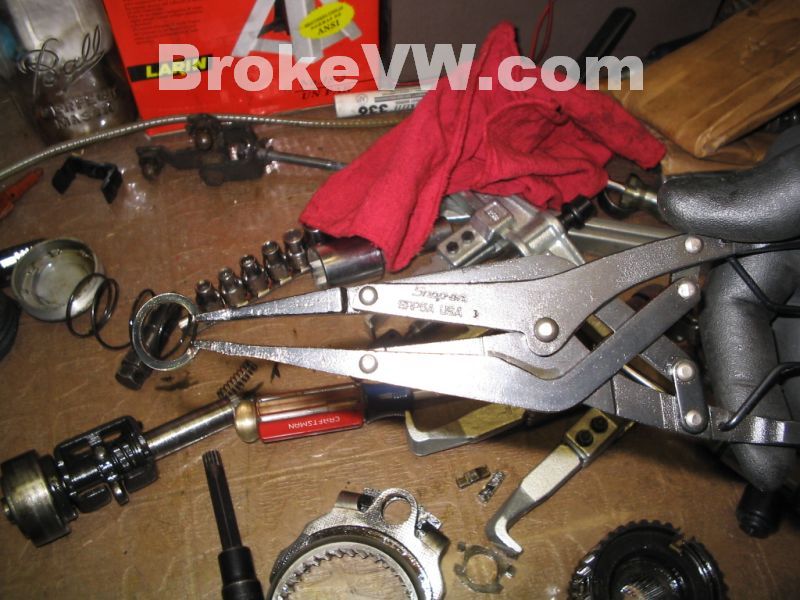
These snap-off pliers do a pretty decent job on all the circlips in the
trans....
If the driven gear doesn't just wobble off with finger force, then use a
puller placed as shown, in the 2 pockets in the case for the puller
hooks...
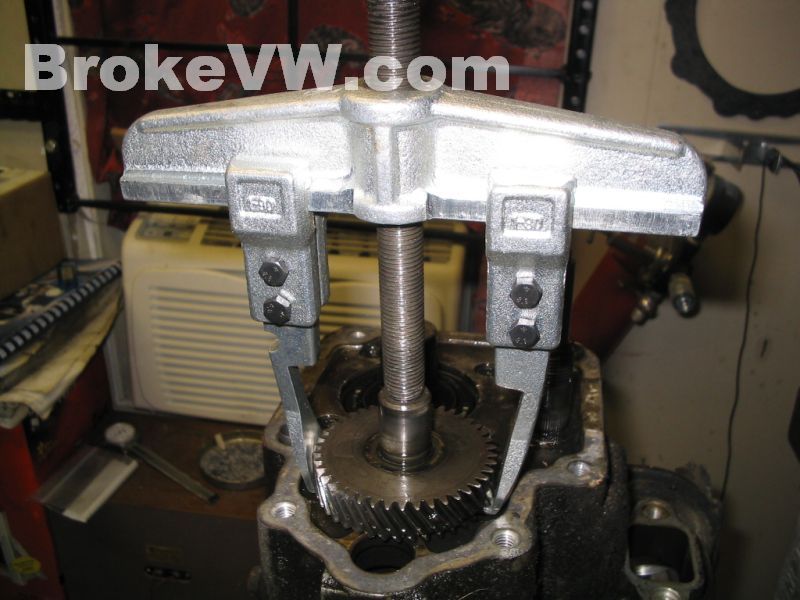
Here is the trans minus 5th gear. You can see the 2 pockets for the
puller hooks for the driven 5th gear on the right in this picture as
well...

Assembly is pretty much the reverse of the removal....put the driven
gear on with a
new circlip, install the driving gear with a
new retaining bolt(111 ft-lbs, yes, tight!), thread the shift fork back on and
lock it with a
new lock plate after adjusting 5th gear.
If you need to re-assemble the 5th gear on the
input shaft, click HERE.
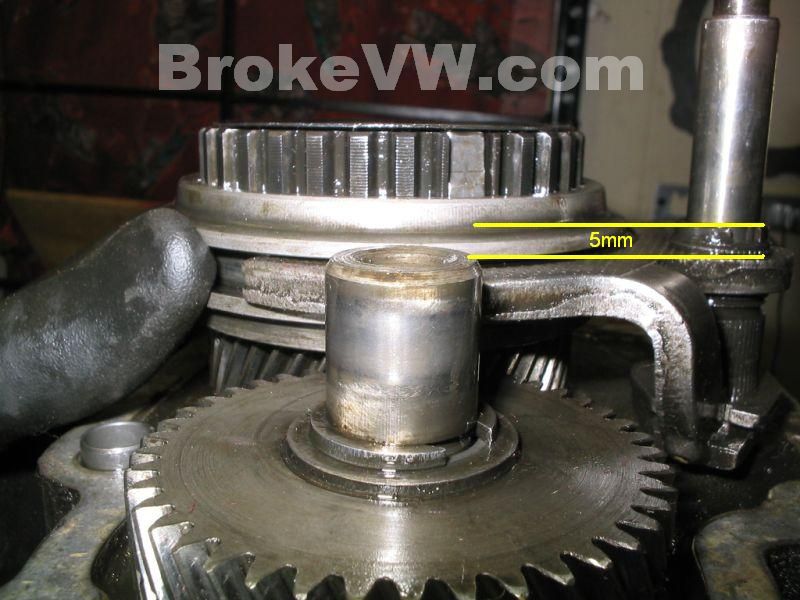
To adjust the 5th gear, turn the threaded tube to move the shift fork in
and out. There should be 5mm space between the top of the fork and the
top of the splined tube. I adjust it so the sliding collar can float on
the shift fork when both in and out of 5th gear. You don't want the fork
to be holding the collar in place and wearing when in or out of gear....
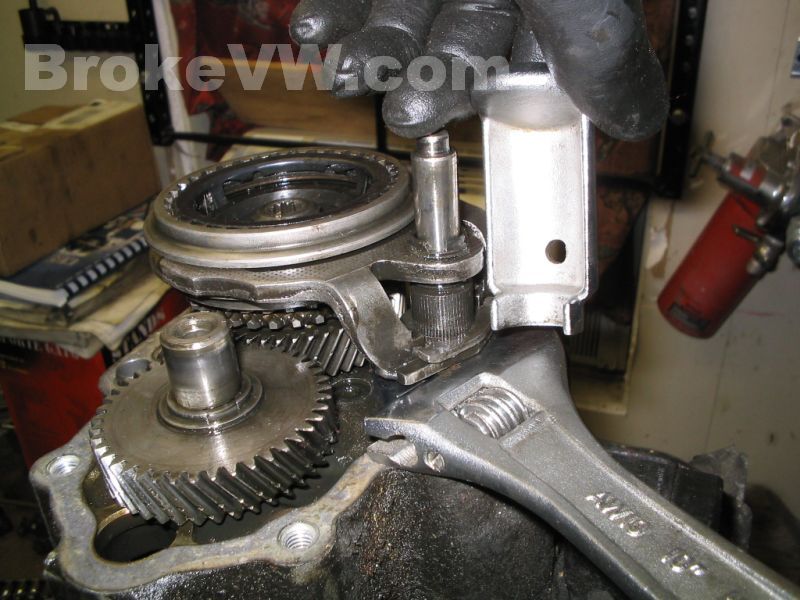
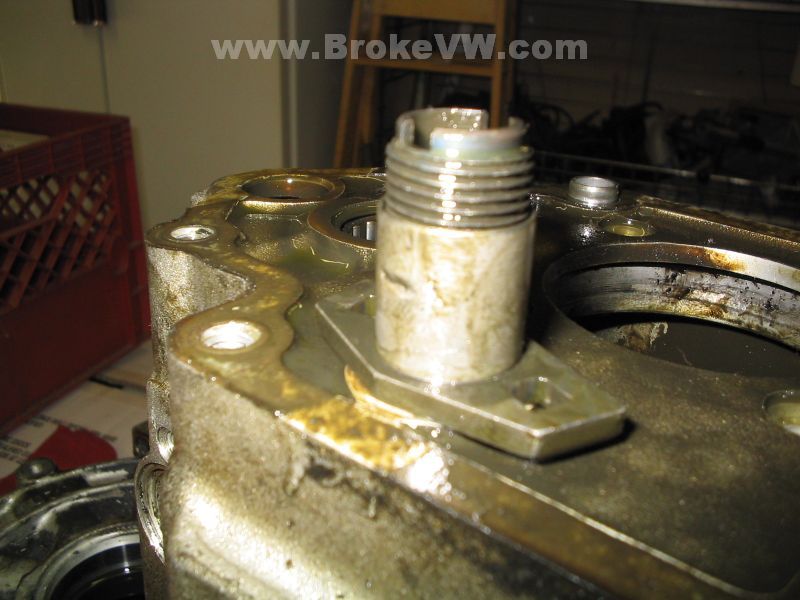
Use something at least 12mm thick like a wrench to support the shift
fork (protect the trans gasket surface during this), and
press the new locking plate down to lock the tube in place. The pic
shows the VW tool but it just needs pressed down onto the splines and
doesn't require the special tool...
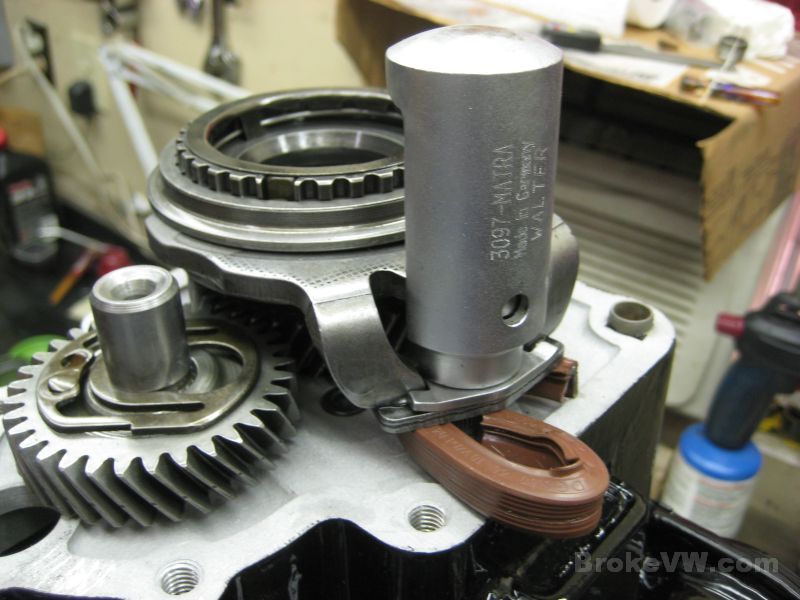
Here is a new pic I took showing a tool I made
from an old flange seal. I cut it and bent it to hook around the selector tube
to support the fork while protecting the gasket surface at the same time...
Install a new 5th cover gasket and bolt the cover
back onto the trans (18 ft-lbs). It might take a bit of tilting and moving to get
the spring and rod into the hole and then the cover over top of the 5th
gear, but it'll go.
Install the selector shaft into the housing, put the spring and cover
back on (37 ft-lbs), bolt in the reverse switch (not very tight at all,
a few ft-lbs tops, spec is 89 in-lb), put the detents back in (15
ft-lbs) and you
should be done .
Circlip Changes
Here is why the 16V codes and MK3 codes up to
June 1st, 1997 will only accept the 0.80 and 0.91 5th gear sets (This
has changed, see the bottom of the page for modifications that need done to use
ANY 5th gear set in a MK3 2.0L or MK2 16V trans!). Those gears are
the ones that use a deep groove in the top face of the gear for the output
shaft, which secures the special locking clip. The locking clip has a tab that
fits into the groove to stop it from sliding off. If you get a gear and machine
a groove into the face for the special clip to lock in, it'll work just fine. I
have heard of some people using the 8V circlip on the 16V shaft anyway, and they
report that there have been no problems, but I can't suggest you try it, in case
it fails... I don't want you to blame me, so use the right parts :)
This pic shows an 8V gear and a 16V gear side
by side, you can see the 8V gear is missing the deep groove....
For 8V shafts, they use the circlip, because
the groove is 16.5mm OD. The 16V gears fit the 8V shafts no problem, as the
circlip can secure the 16V gear just fine. So, why not use a circlip with the 8V
gear in your 16V? Because the circlip is too big to fit the 15.5mm OD groove in
the 16V shafts. If you find a suitable circlip for the 15.5mm groove, the
correct thickness, and hardness, then you'll be able to rig something up. Until
then, you're forced to use the 15.5mm locking clip on the 16V shaft, and that
forces the use of a deep groove gear set.
Another point of possible interest is that the gears for both
the 8V and 16V are 14.1mm "tall", but the 8V washer and circlip combo is 3.75mm
thick, while the 16V special locking plate above is only 2.0mm thick. When I
checked the shafts, the 16V shaft measured 16.1mm and the 8V shaft was 17.9mm
when I measured the splined area including the area for the circlip.
Shift Fork Changes
Old Fork Lock (up to March 6th, 1983 build dates)
Old style 5th hub and non-symmetrical keys used up to Oct 5,
1981
Here are some pics of the old style 5th fork lock tube parts
.
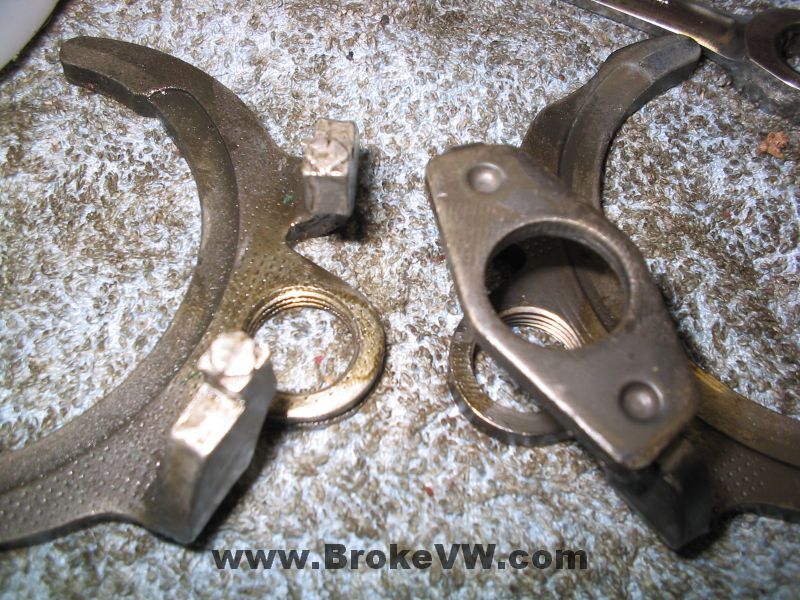
First is a comparison of the old fork and new fork. The old fork can come apart,
the new one is spot welded, and won't split apart as the old fork as done. The
VW procedure is to use the 3059 tool, and just back the fork off. The peened
tube will either come off the shaft, or the fork will pull apart. You can also
try to open the peened tube up, or cut it off, or help the fork press the tube
off, helping with a screwdriver to remove the tube as you turn the 3059 fork
adjustment tool.
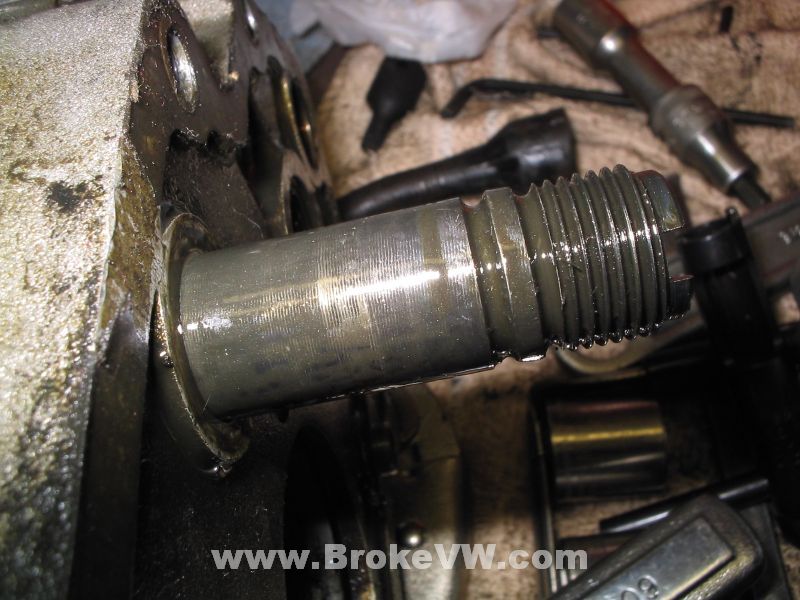
This is a pic of the peened tube still in place, after the
fork had pulled apart. The bottom of the fork and the tube can now be pulled
with a 2 arm puller.
A pic of the bare tube, with the groove in it where the tube
should be peened. This is 19mm below the top of the notched selector tube...
since you can't see the groove when the tube is in place. Peen it with a blunt
tip chisel, and check to make sure the solid selector rod inside still slides,
and when pushed down, springs back up freely (they don't want you to crush the
notched tube).
This is the piece inside that would need changed to swap over
to the new style fork tube with the splines and lock plate as shown in the pics
in the middle of this page...
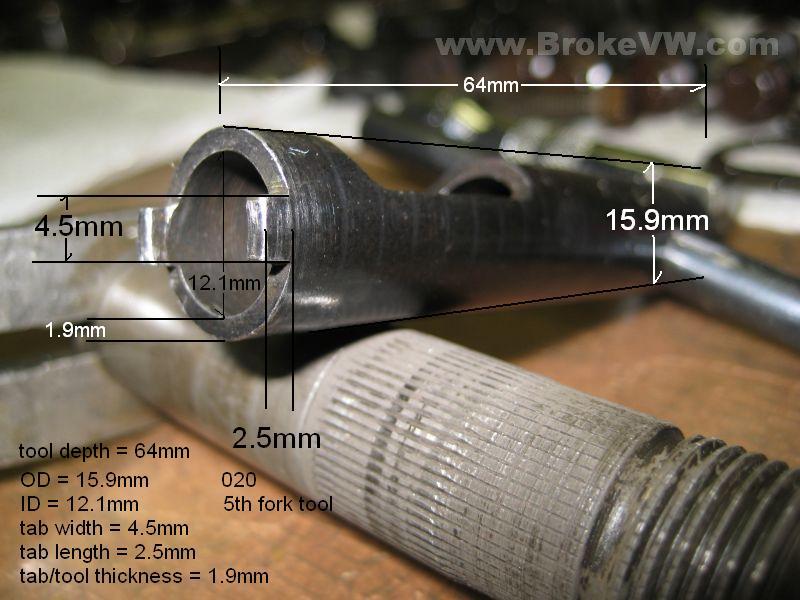
I often get asked for the tool specs for the 5th fork tool, so I've finally
taken a pic and added the measurements in the pic, something I've been meaning
to do for some time, so here it is...
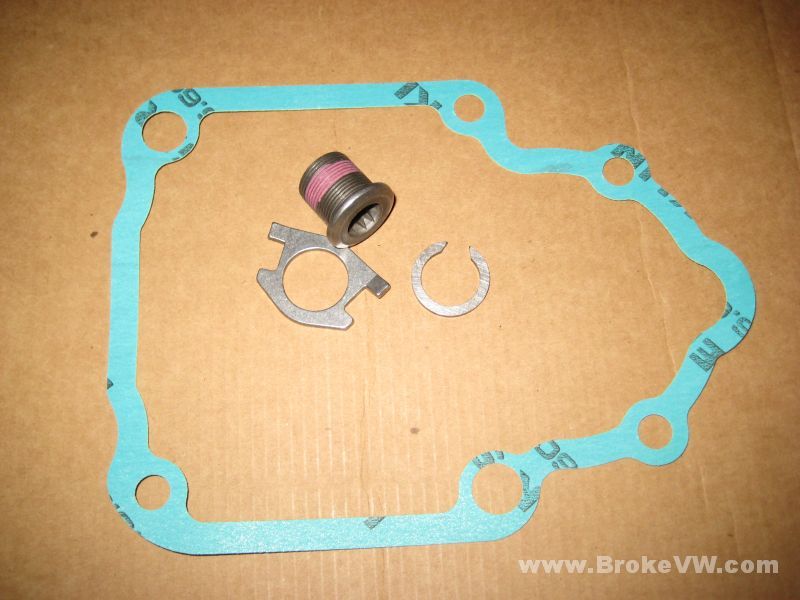
Install Kit
Here is what you'll need to do a 5th swap into an 8V MK2 or later MK3 2.0L
trans. It is the 5th housing gasket, the 5th bolt, 5th circlip, and a 5th fork
lock plate. They are all one time use items per VW, but you can probably get
away with using the lock plate over again as long as it is still tight.... for a
few bucks though, I replace them just to be safe. The kit is only about $30
shipped or so (email for a price as it is subject to change based on the cost of
the parts from VW), so if you need an install kit, feel free to contact me at
brokegti@sbcglobal.net as I usually
keep everything in stock.
How to install a non-grooved 5th gear into a 16V or MK3 trans
Well, I feel silly for it taking this long to figure this out... but I have just
come up with a way to allow the use of any 5th gear to be swapped into a MK3
2.0L (AMC, CHE, DFQ, DGD) or MK2 16V trans (AGB, 2Y).
The modification is free, takes about 10 minutes to do, and works like a stock
VW gear. It is just that simple.
Here is a non-grooved gear and a 16V output shaft, along with the special
locking clip that fits the groove of the shaft. You can see the problem is that
the special clip doesn't have any groove to engage and lock into. This causes
the plate to sit up on the gear and it can slide off...
Here is a pic showing the clip improperly sitting up on top of the gear, nothing
holding the clip from coming back off the shaft again...
Start with the gear on the shaft, minus the clip...
Paint the gear with a black Sharpie or other felt tip marker or something,
roughly where the groove would be...
Fit the special clip and push it on fully. Once on, the clip will spin around
with some force. Twist the clip back and forth, so the tab will dig into the
paint and leave a line. You can also visually line up a center punch with the
center of the locking tab, and mark the gear that way...
When you remove the gear, it will leave a line where you twisted the clip back
and forth. That line is the edge of the locking tab, your center punch mark will
actually be just a little inside the line left from scraping the clip back and
forth...
Here is the only tool you need to get the job done. I used a 21/64 to see if it
would work, and it did. I think a little larger might actually be better...
*edit* - Thanks to Pete for suggesting the use of a stone grinding bit in a
Dremel to start the hole. You might find the dremel stone to do the job where
the drill bit won't... the gear I used for these pics had been ran low on oil.
This means it got hot, it annealed, and the steel softened a little making
drilling possible. With a good gear, you might find it too hard to drill so the
Dremel should do the trick...

Drill a small dimple into the top of the gear. I measured the dimple I made, it
was just shy of 2.0mm or so. Looking at this pic, I can see the bit isn't
cutting into the gear... the gear is HARD, it is tough to drill. When drilling,
the tip cut a dimple fairly easy, but then it stopped digging in like it should
and started squealing as the bit was being burned up. A machinist or
metallurgist I am NOT... so someone with more experience could probably suggest
a better way of doing this, but for my tests, it worked well enough...

There is the modified gear, ready to be installed! So simple, so fast, and it
works! There isn't enough heat generated in drilling to cause any problems with
the gear steel, and since the shaft and gear and locking clip all spin together,
there is really no need for a full groove around the gear. Just one dimple and
the plate will lock into place....
Slide the locking clip on, it won't engage, then twist it around until the tab
lines with the dimple and it will click into place and lock to the gear...
This pic shows the plate JUST lifted off the gear. This is why I think going a
tad bit deeper with the dimple will be better, it'll let the clip sit totally
flat. This clip is more than flat enough to last, I would install this into a
customers trans... I am that confident it would hold just like the stock
arrangement....
Now owners of the MK3 2.0L and MK2 16V trans can enjoy the benefits of the
taller 0.75 and 0.71 gears, without needing a machinist to groove the gear,
without needing to risk the use of a standard circlip, etc... just a few minutes
and a drill is all you need!
Thinking further, I think the next gear I modify will have TWO of those dimples
added, 180 degrees apart from each other, just so the weight removed from one
side will match the other side. I really doubt it would matter, but it isn't
hard to add a 2nd dimple to keep it as balanced as it was before you started.
Click HERE to go back to the Start
Page