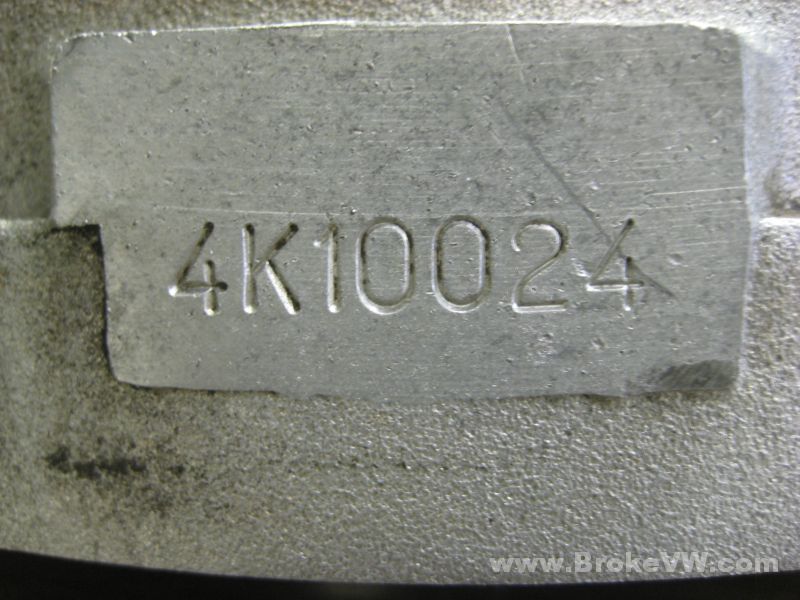
Eric 4K
Arrived 3/27/09 -- Started 5/04/09 -- Done 6/15/09
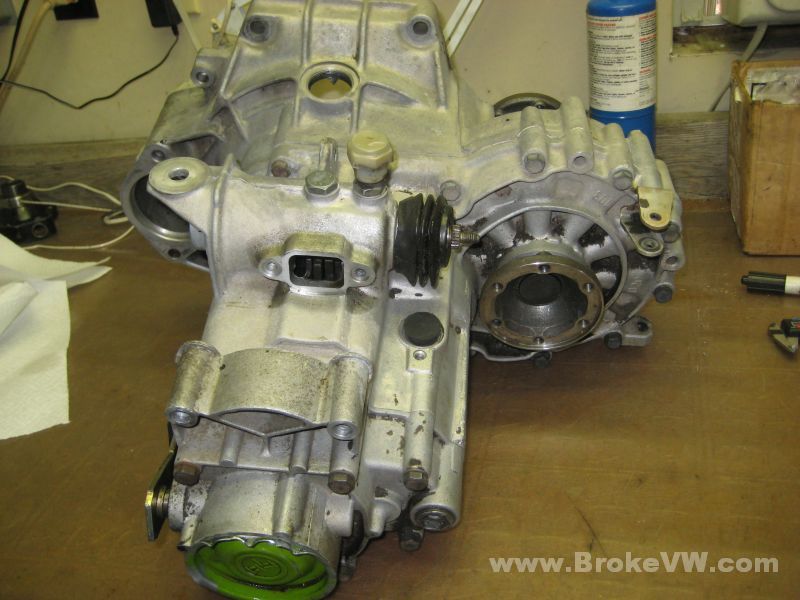
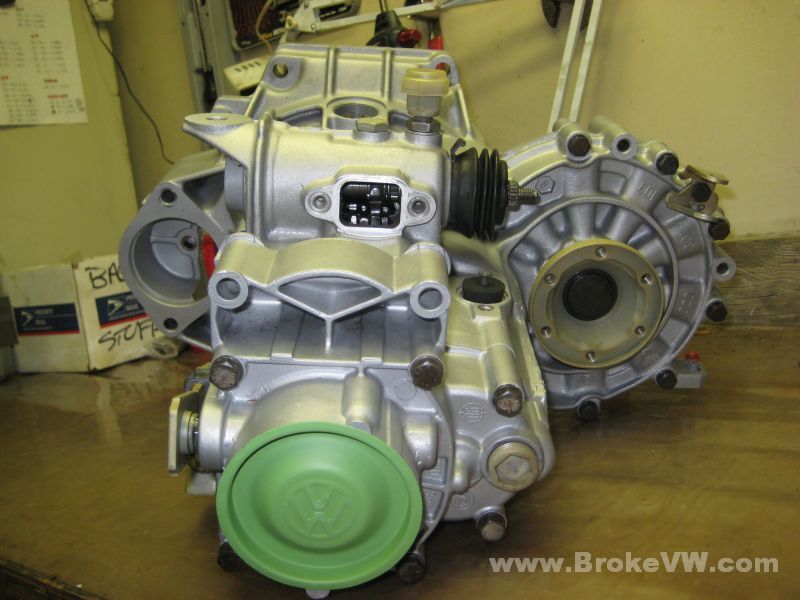
The trans arrived safely, I've taken some pics of it and will post more pics as I progress with the rebuild on this page. I'll email when it is updated.
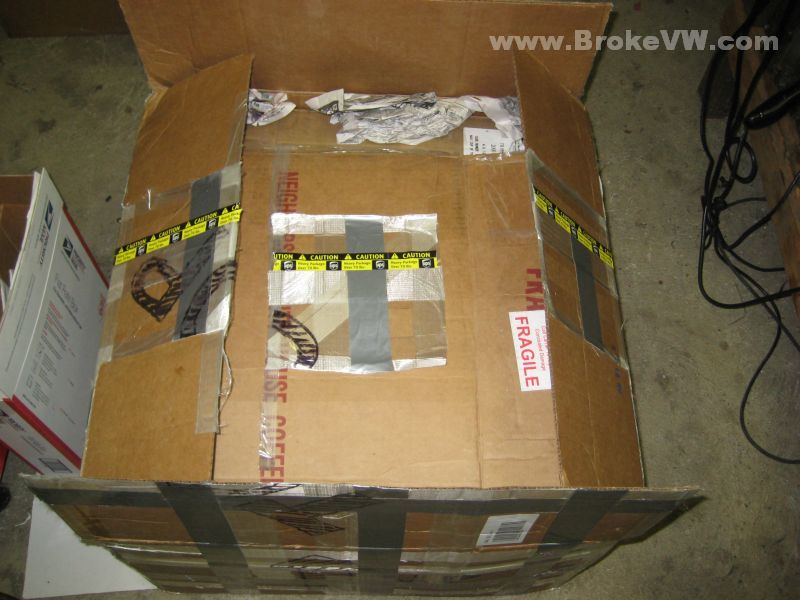
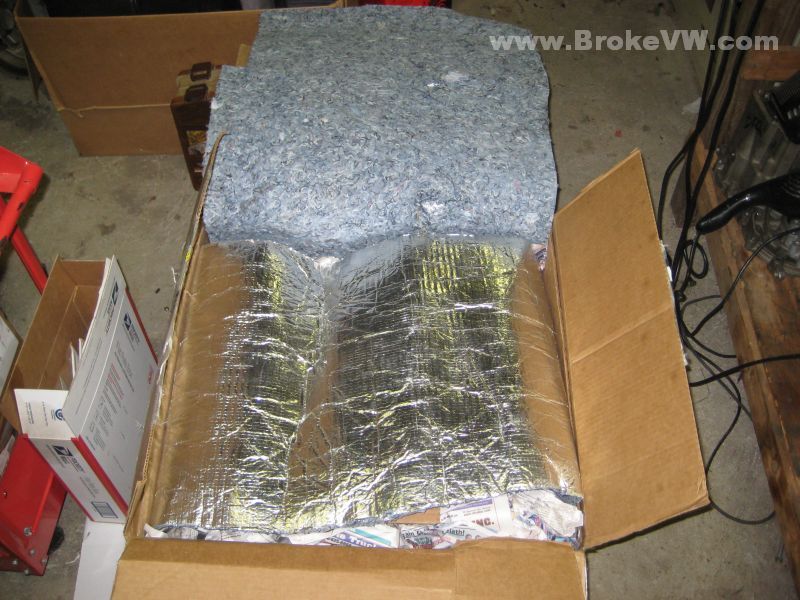
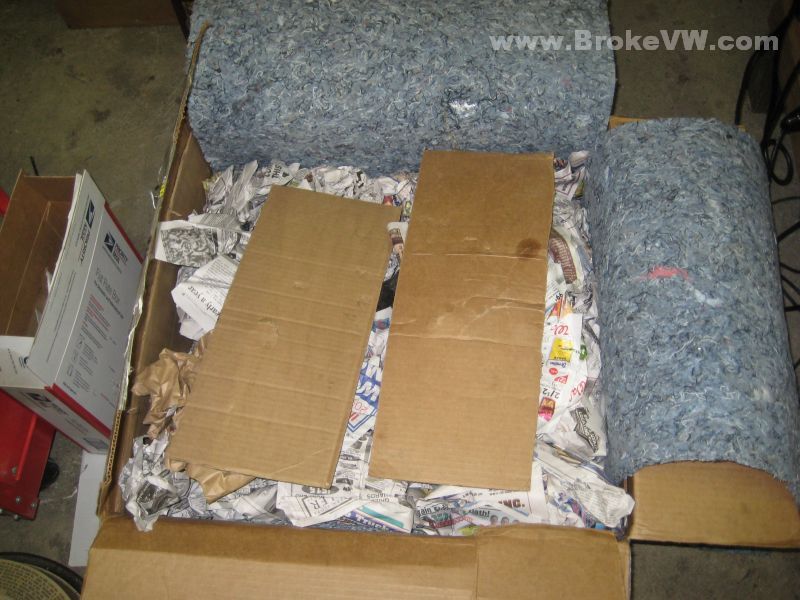
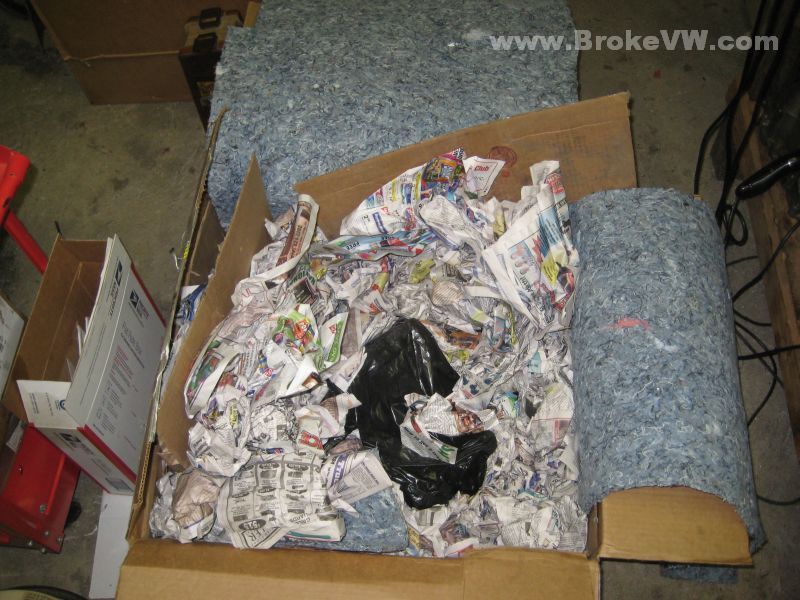
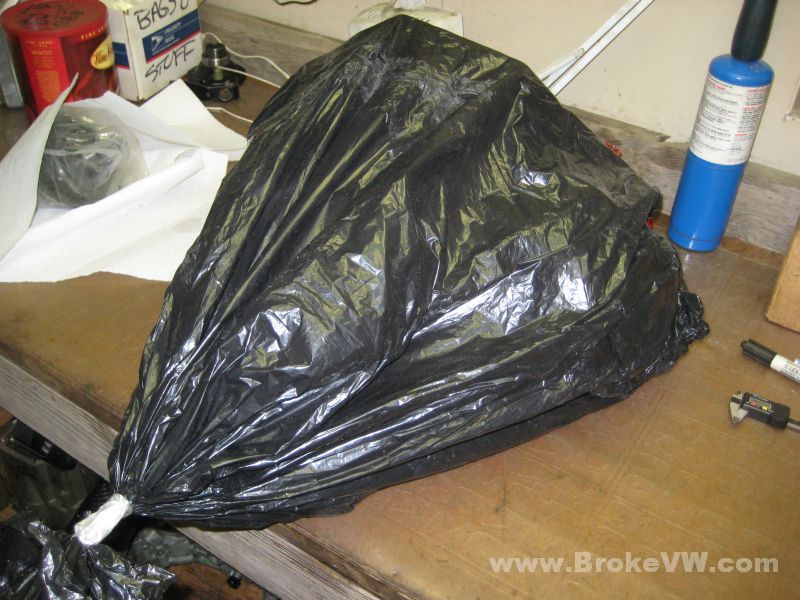
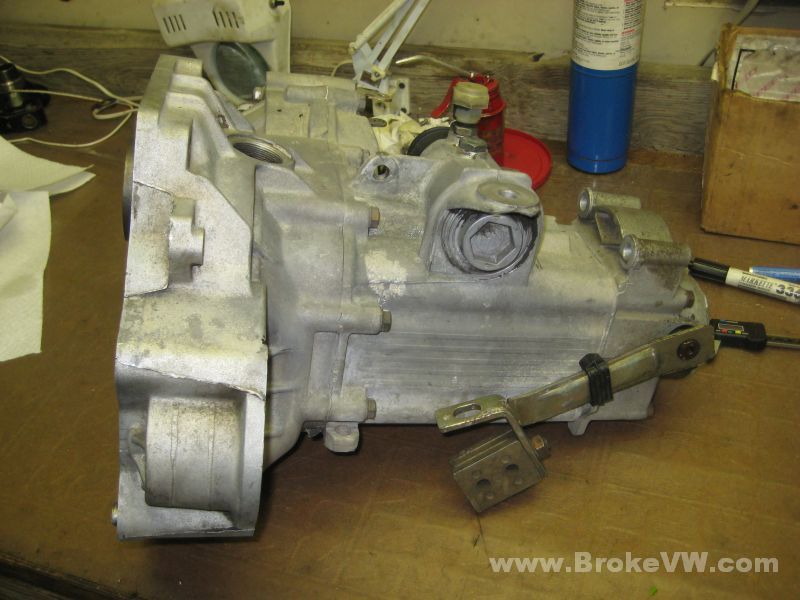
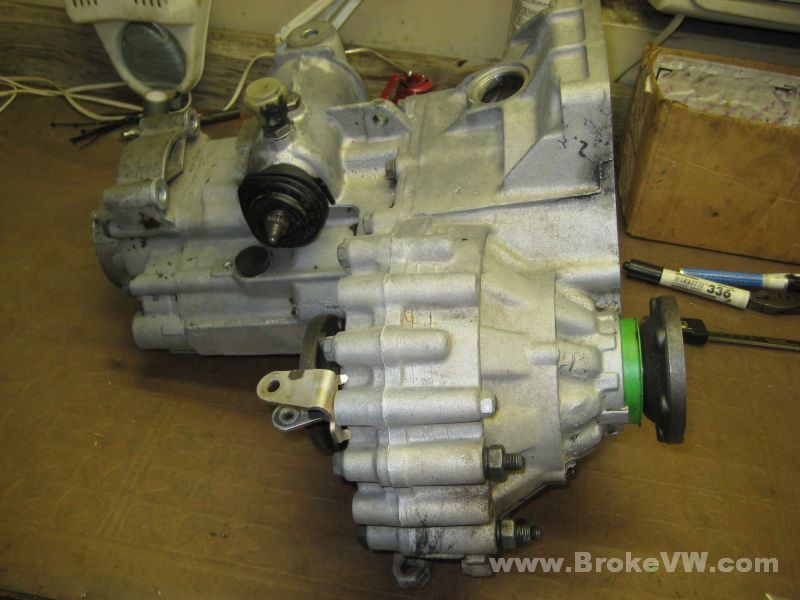
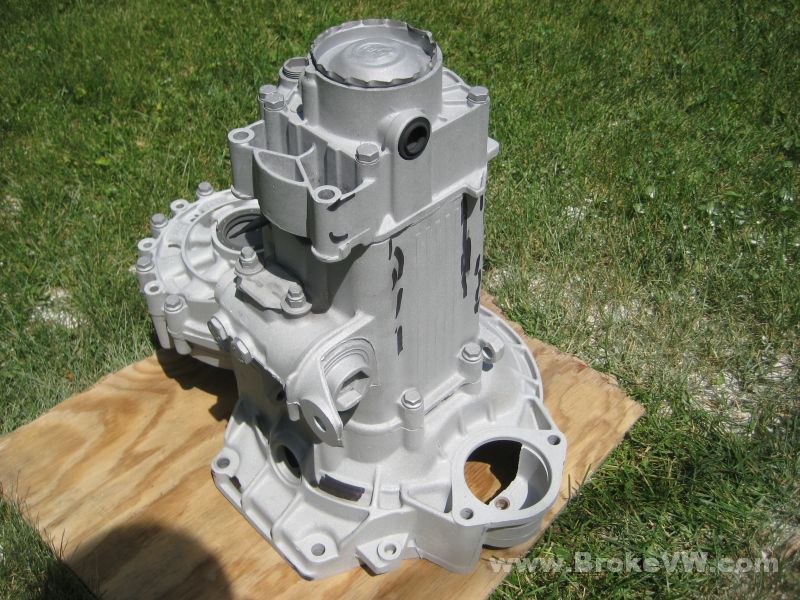
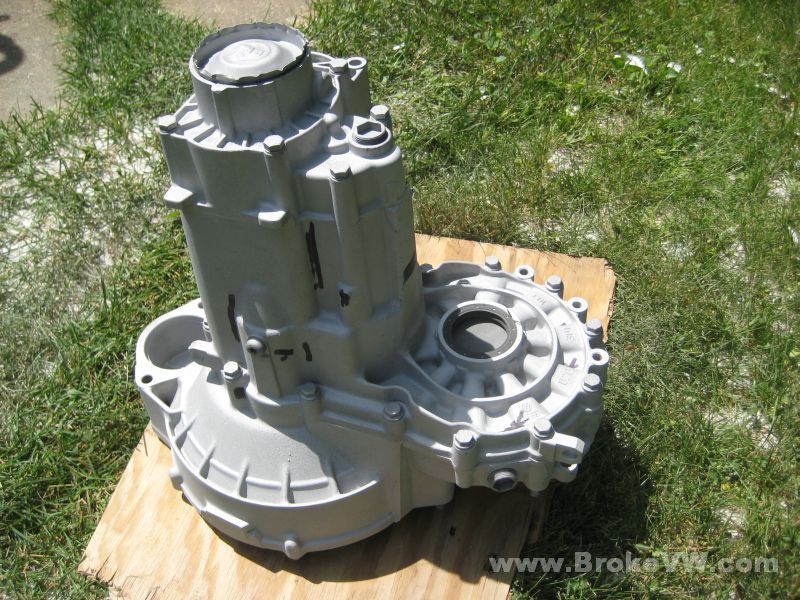
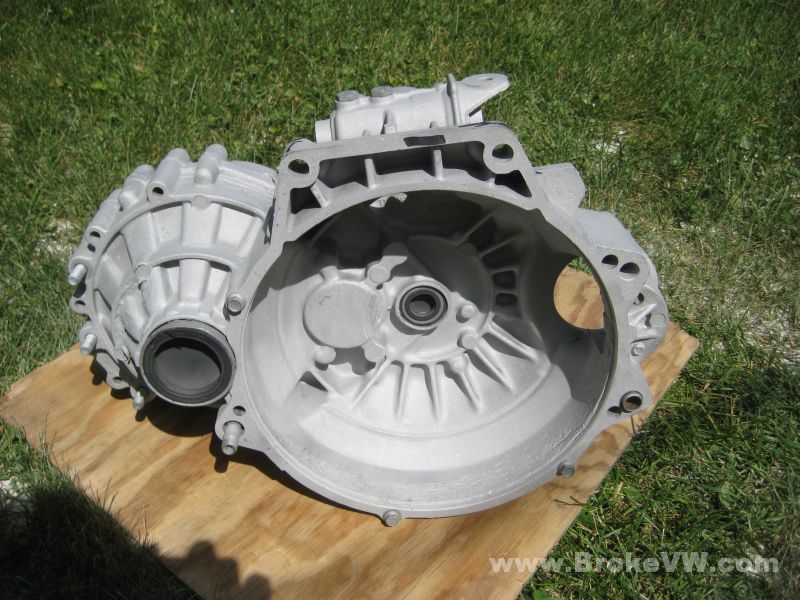
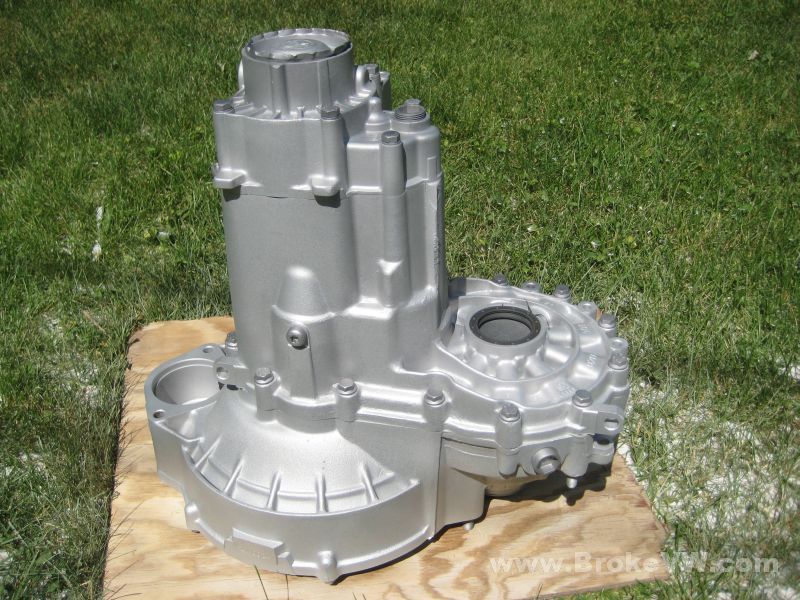
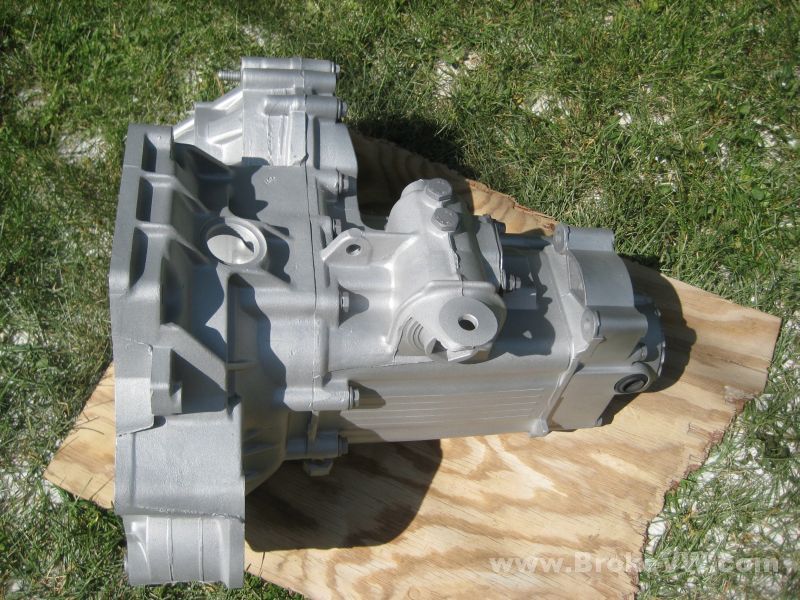
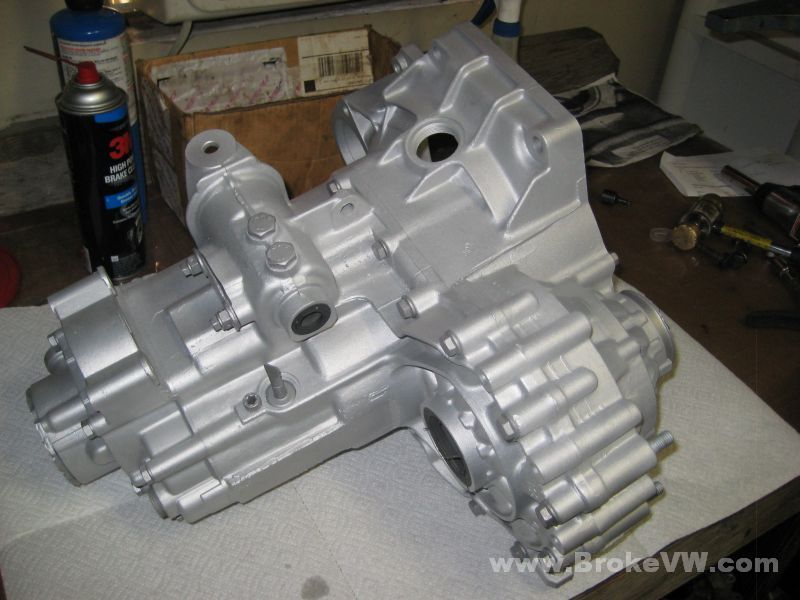
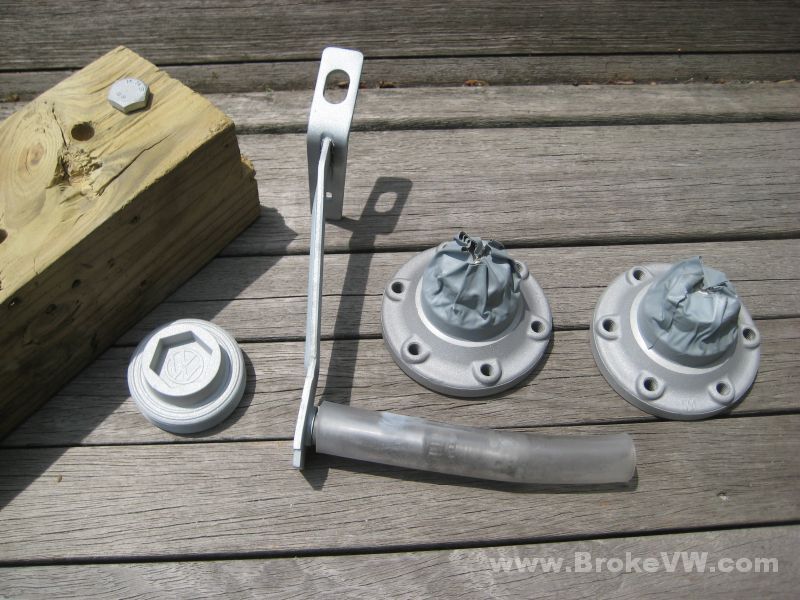
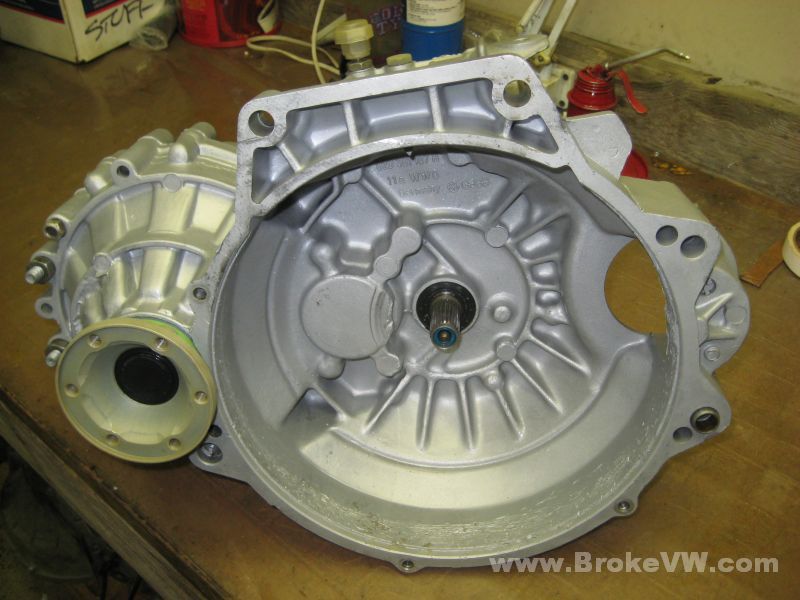
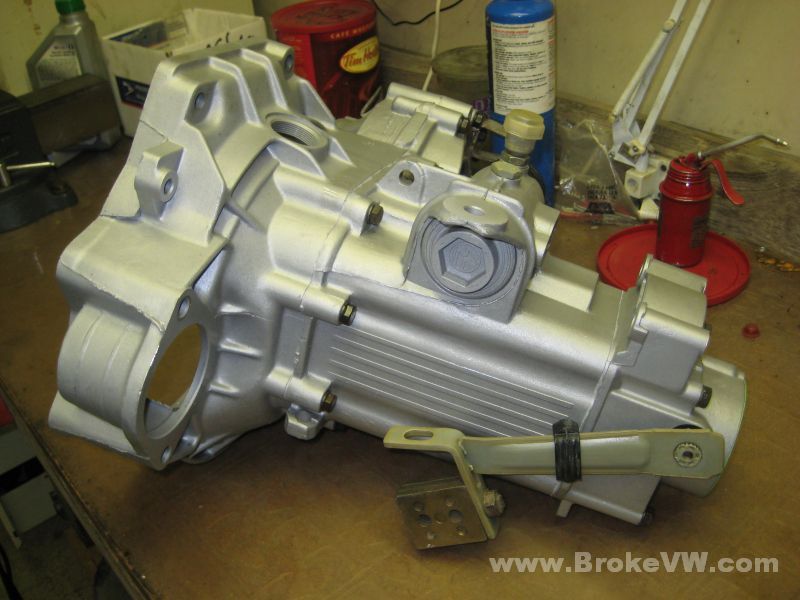
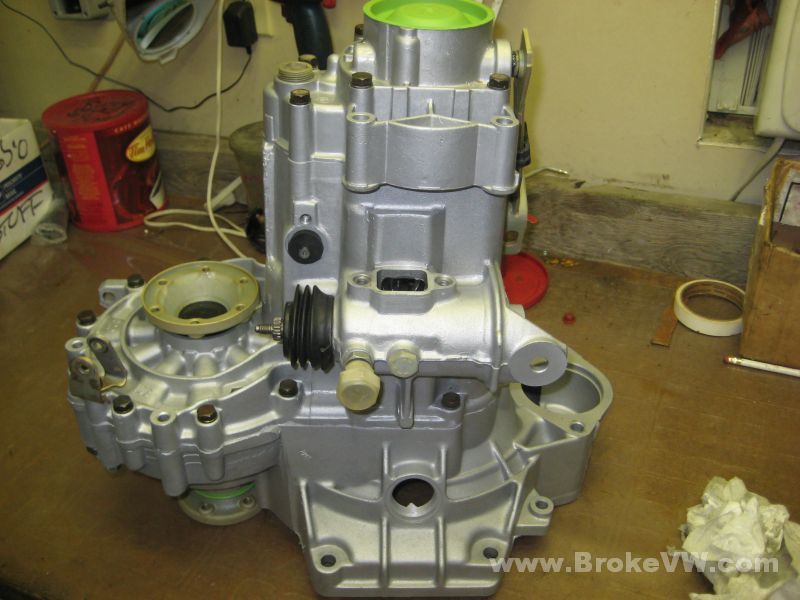
Pics of how it arrived...
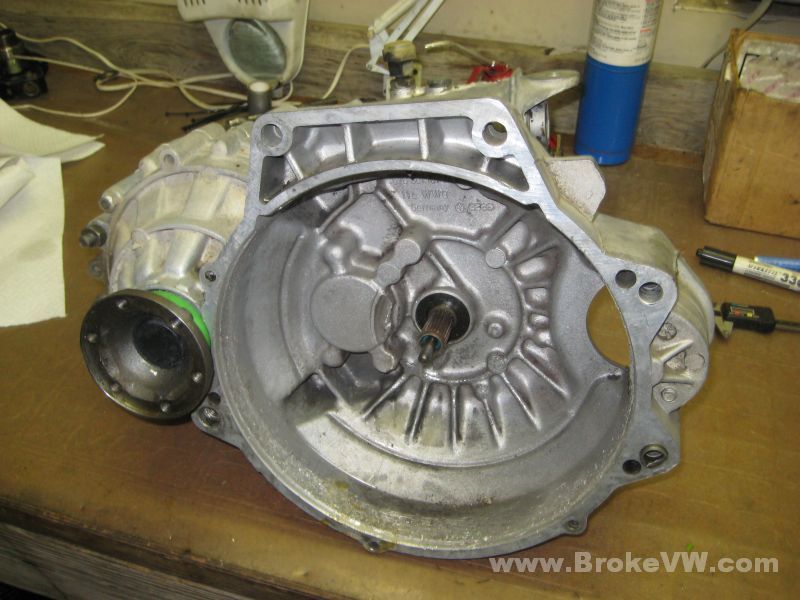
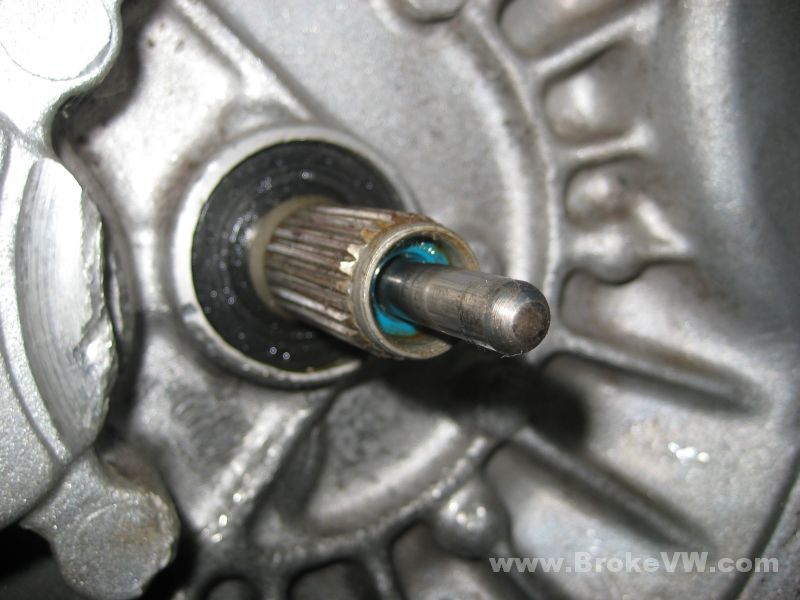
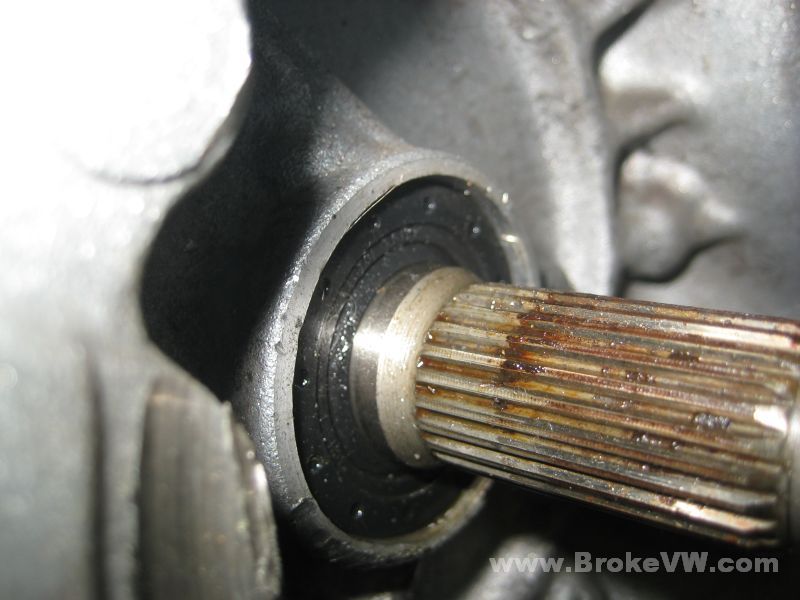
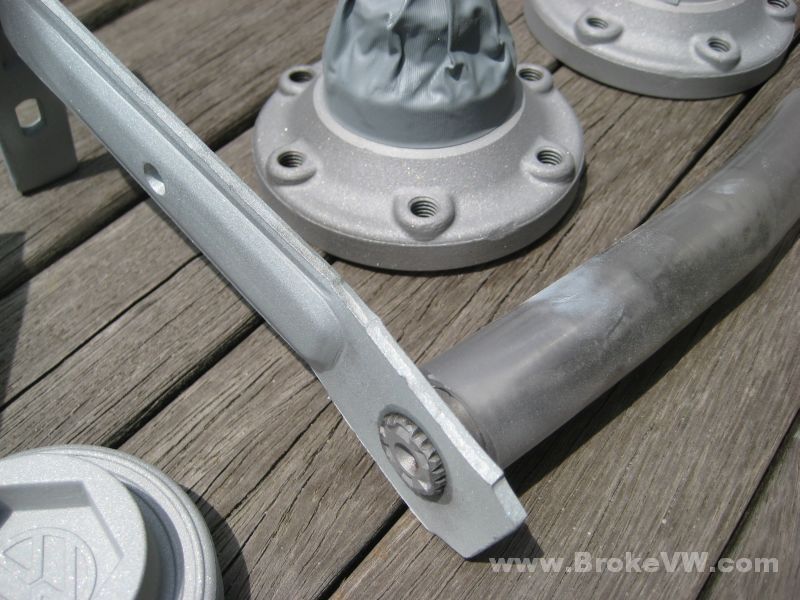
The seals have been driven in too deep, both the input shaft and pushrod seals. The pushrod has some wear on it, it should be replaced at some point before installing it into the car...
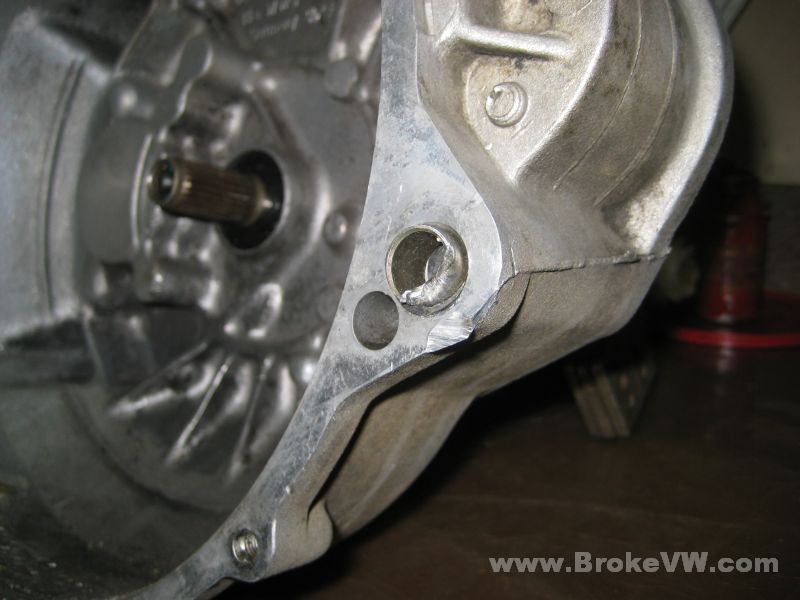
This locating sleeve was damaged at some point, I'm not sure if you were aware of it, it looks fresh, like it might have been done removing it? At any rate, I'll see if I have another sleeve to replace that one with....
I noticed when spinning the trans by hand that there is a nasty scraping noise, it seems to be only when the output shaft spins. TO be honest, it sounds like finely ground metal or sand inside. I get a noise in one small spot during each revolution of the shaft. I'm hoping to get a little work done on your trans ahead of schedule, before the trans that is supposed to be rebuilt before yours actually arrives here. I should have a few days to mess with your trans until the other one arrives, and then I'll have to start work on it.
3/29/09 - 2 hours later
I decided to tear the trans down and have a look... the
trans looks really good inside. I found the horrible noise, it is nothing.
Kind of funny actually... I could hear and feel the noise, I pictured
something like river sand or something. Some of the grit on the outside of
the box and the sand on some of the bolts backed that idea up, but when I
opened the box, I found the source of the noise.... leaves.
Dried leaves and some debris has made it into the box, I think through the open reverse switch hole, because there was a good bit of crap on the selector assembly.
The noise was nothing more than leaves being crunched up inside. Not being a normal source of noise inside a transaxle, I didn't immediately assume that it could be foliage!
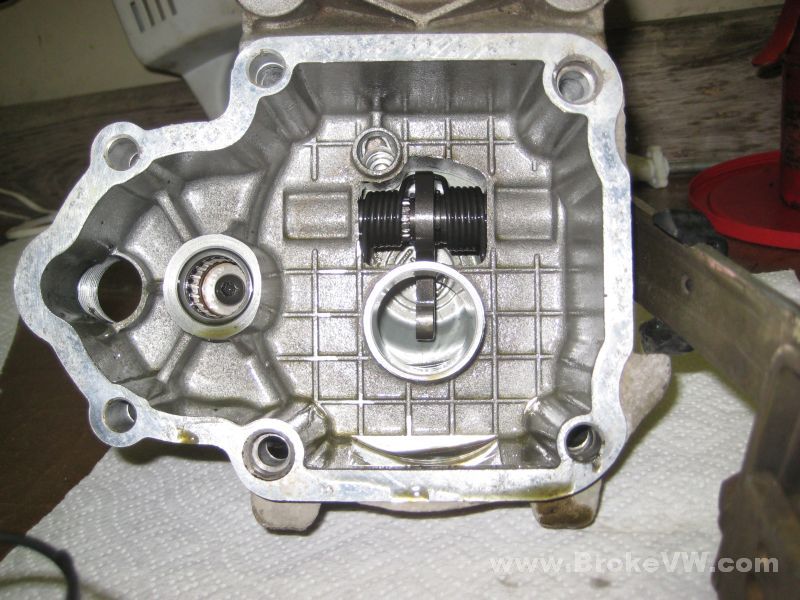
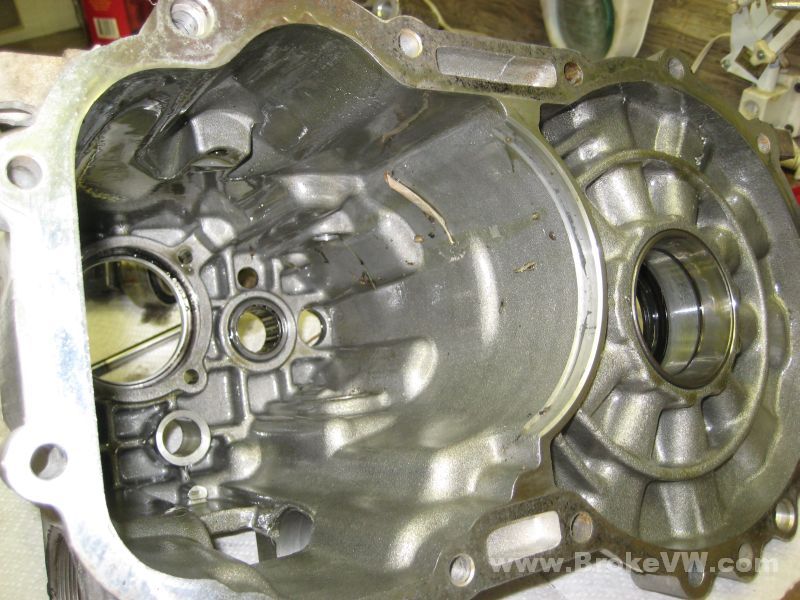
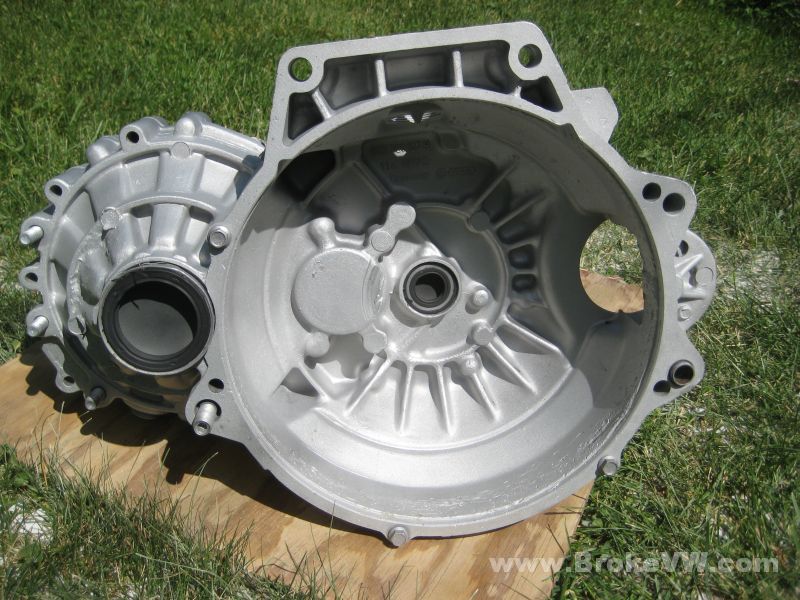
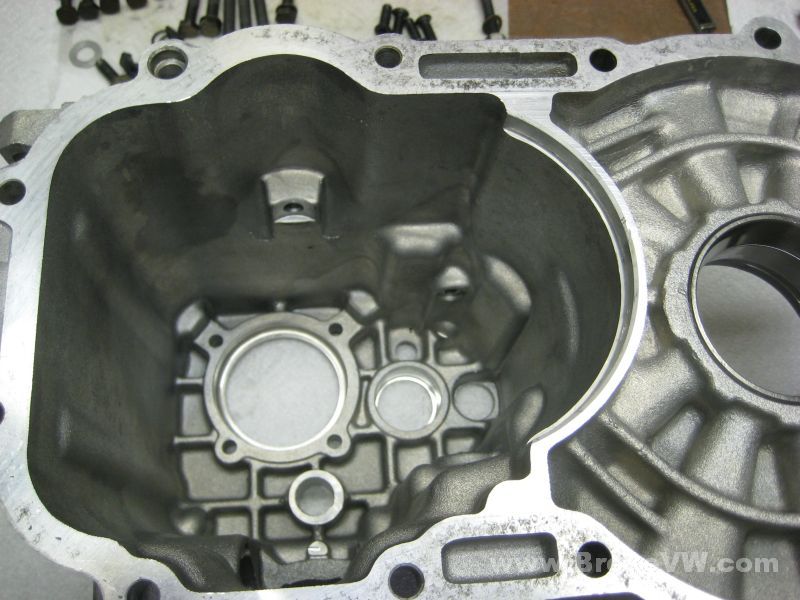
A pic of the inside of the 5th housing cover, it looks really clean. Usually the inside of the trans is covered in a dark film of grime from years of oil stain building up, but this one looks really nice inside. It looks like the trans I open from people who race them, because they are always changing the oil in the trans, it never gets a chance to stain, and it stays nice and silver inside, like this box...
The grit on the selector assembly...
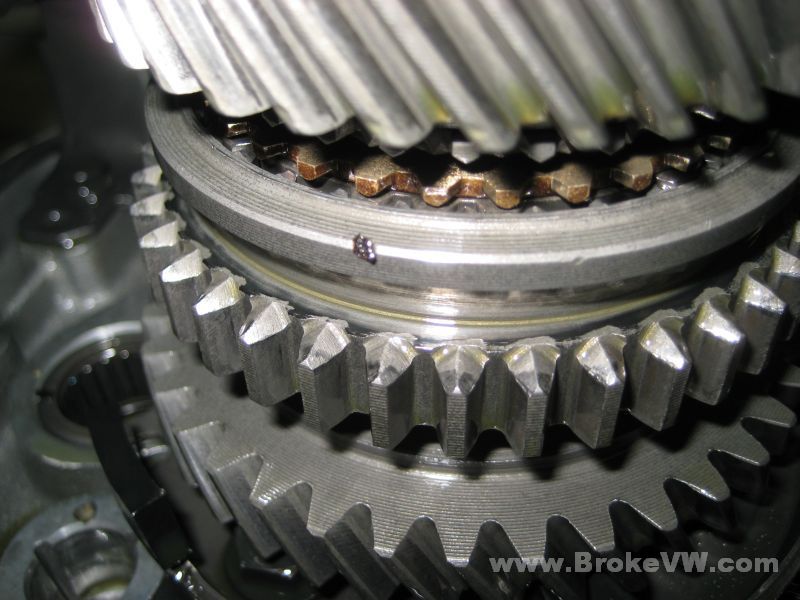
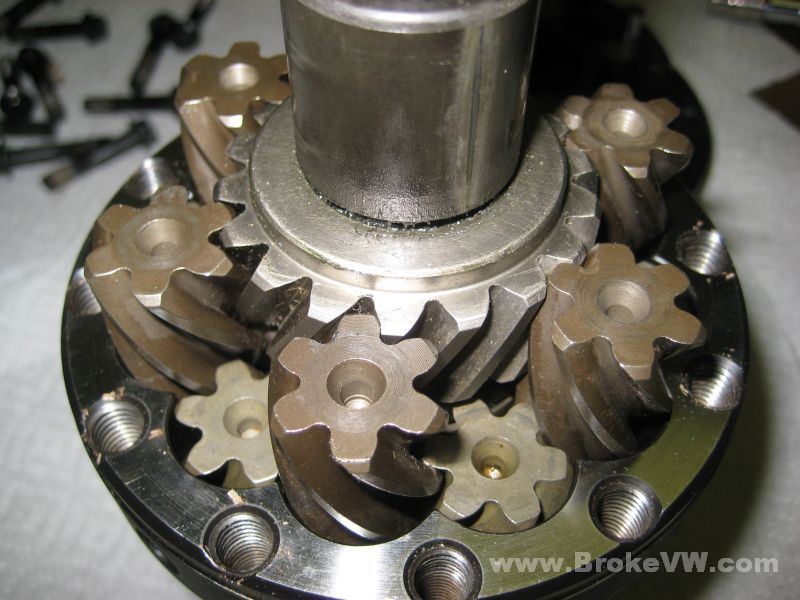
An out of focus pic of the 5th gears...
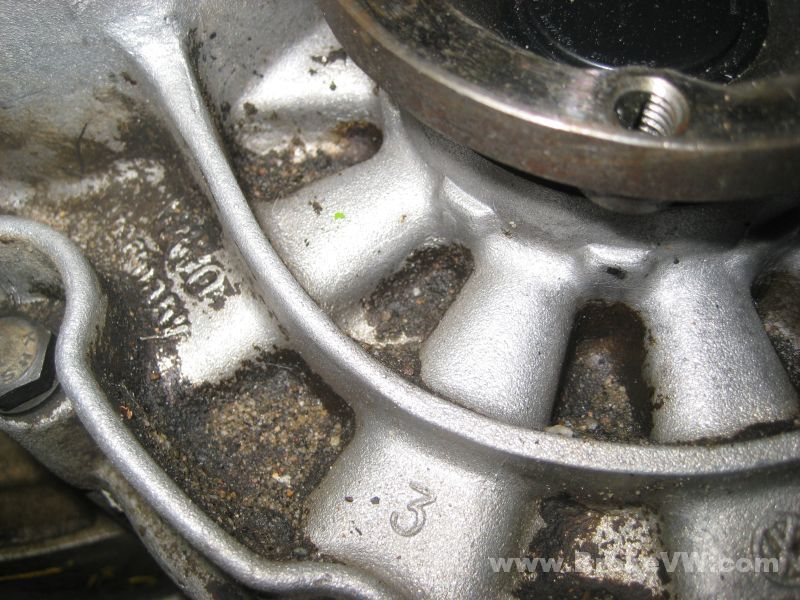
Here is a pic of the gritty grime around the flanges that made me think there might be some more inside the trans...
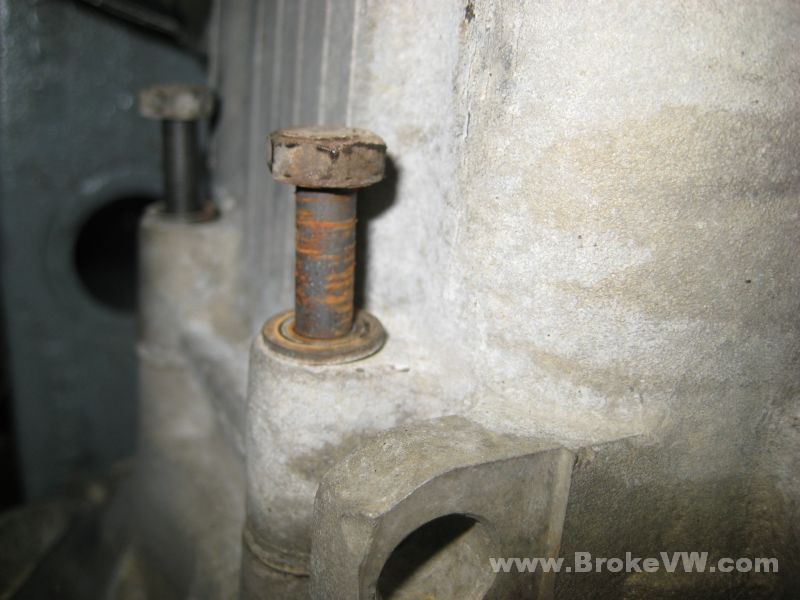
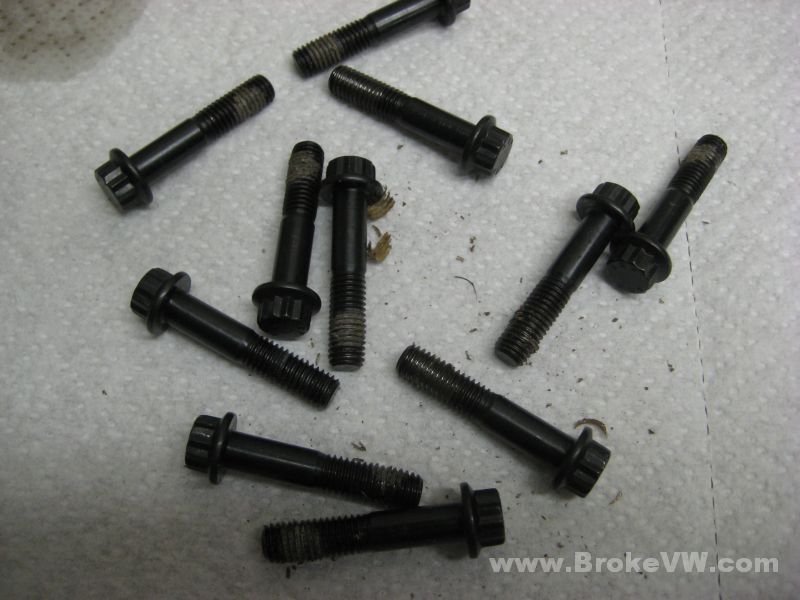
Some of the bolts were dry, some rusted, some oily, and some gritty...
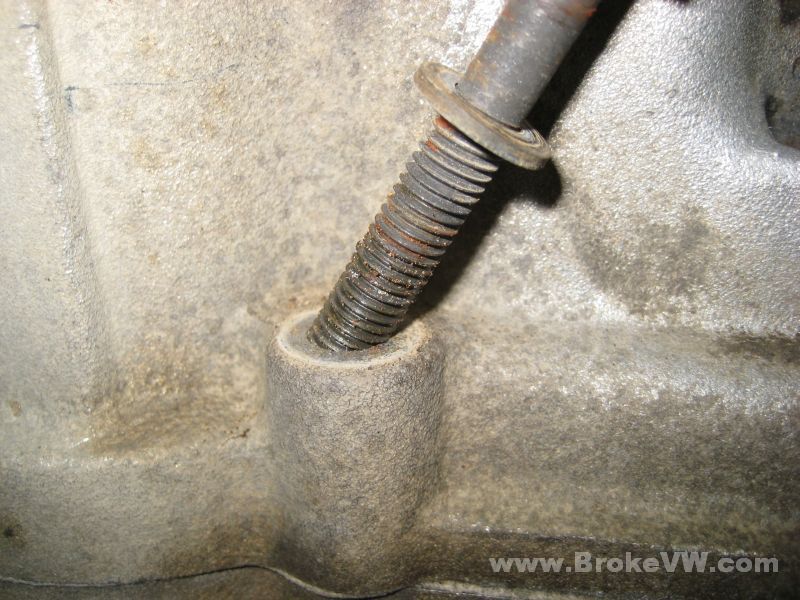

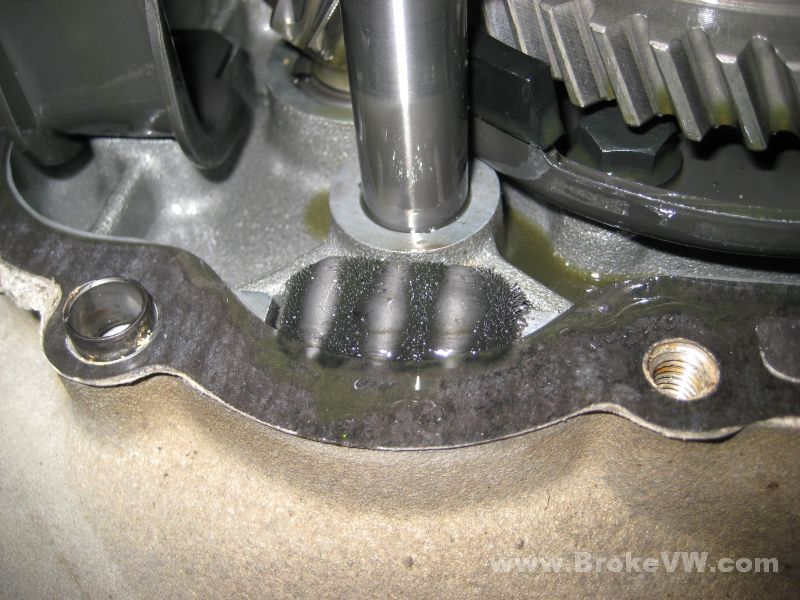
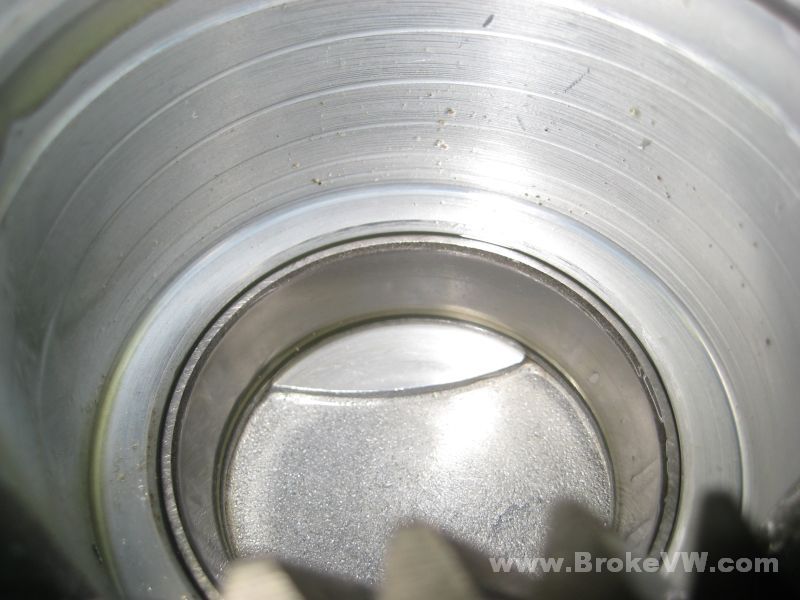
Looking through the drain plug hole, I could see something, I wasn't sure if it was old sealant or what...
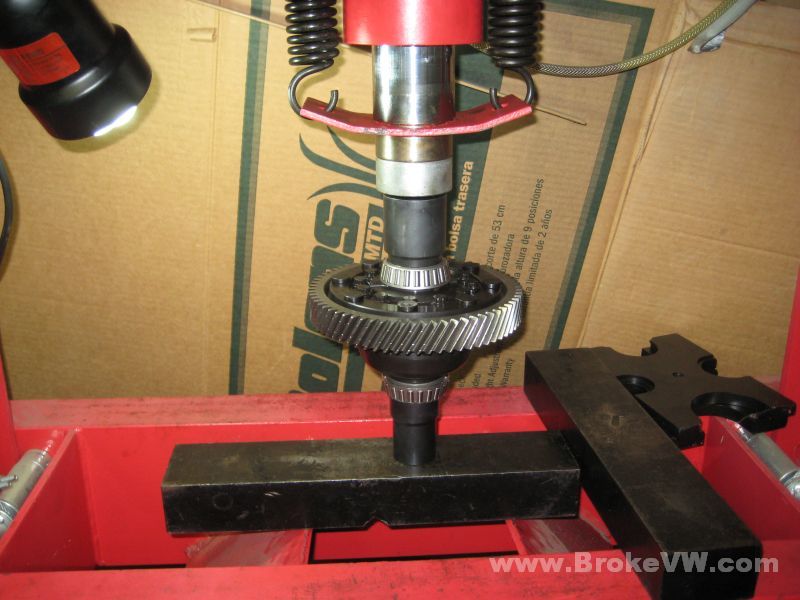
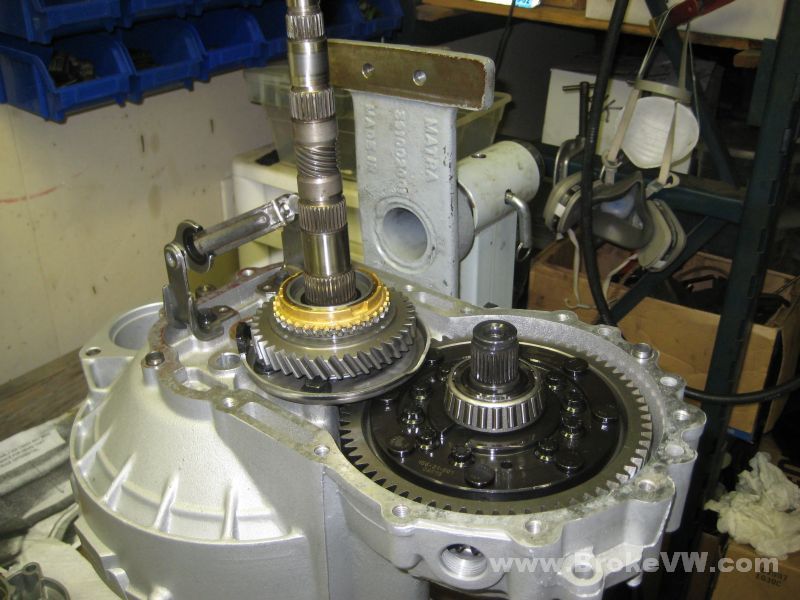
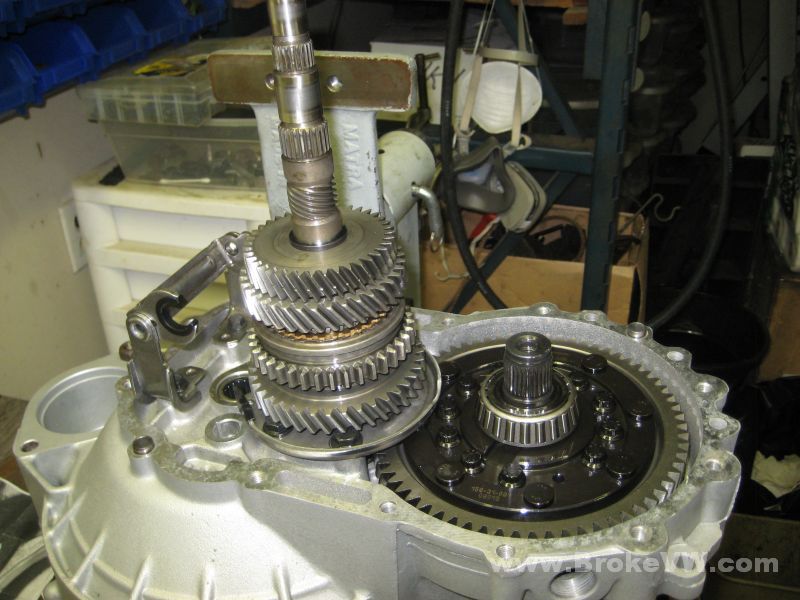
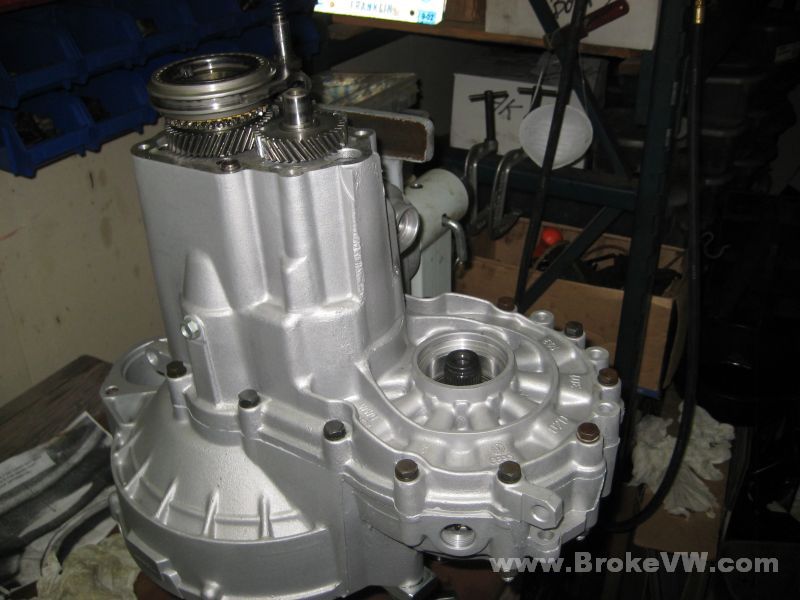
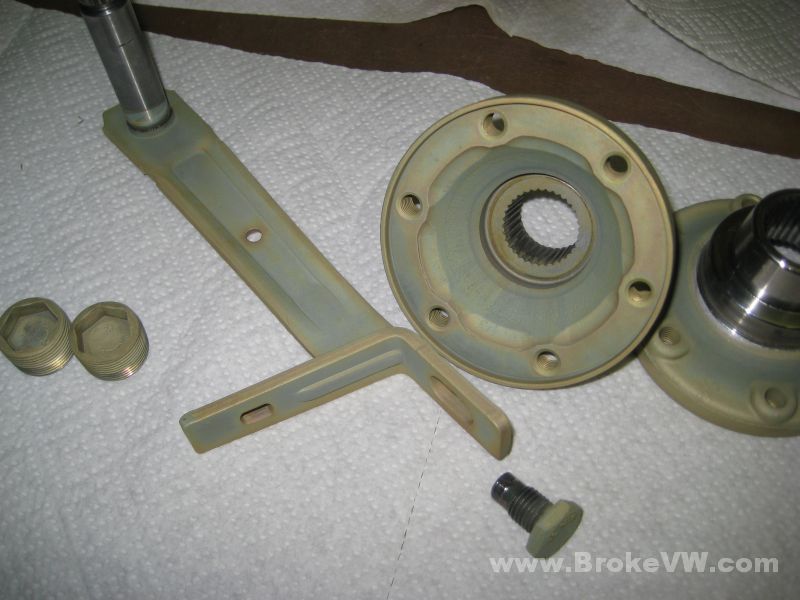
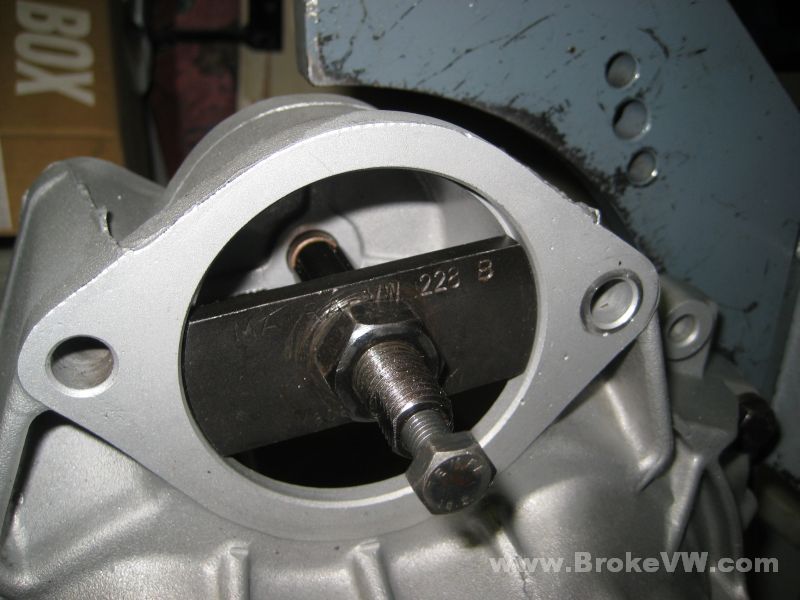
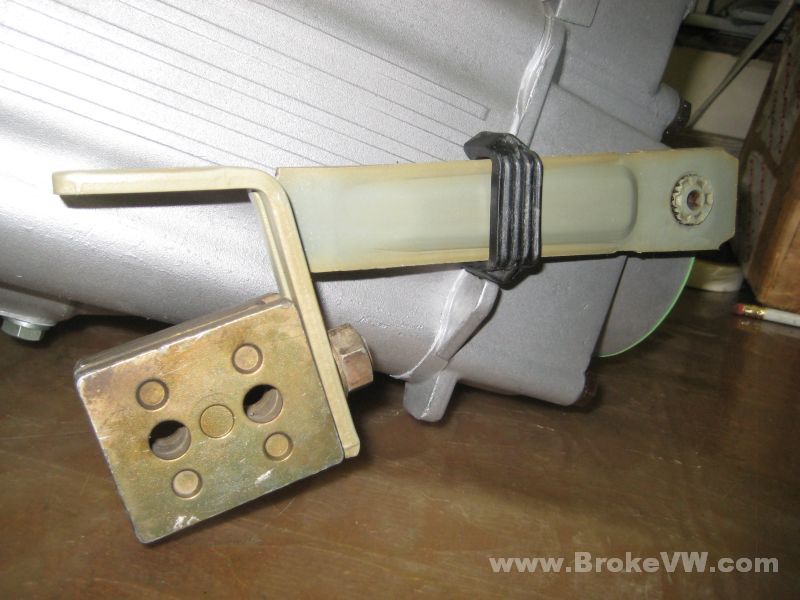
A pic of the support brace installed under the input shaft so the case can be split apart...
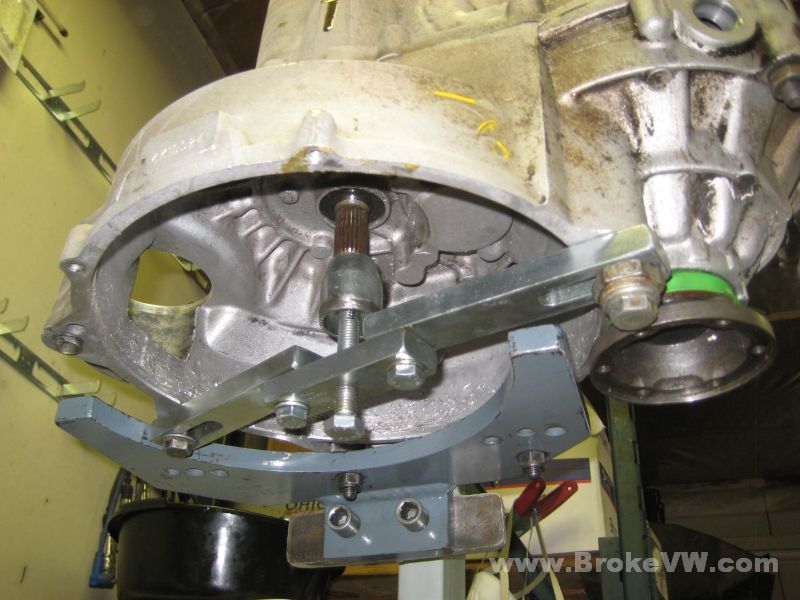
...and the splitting of the case...

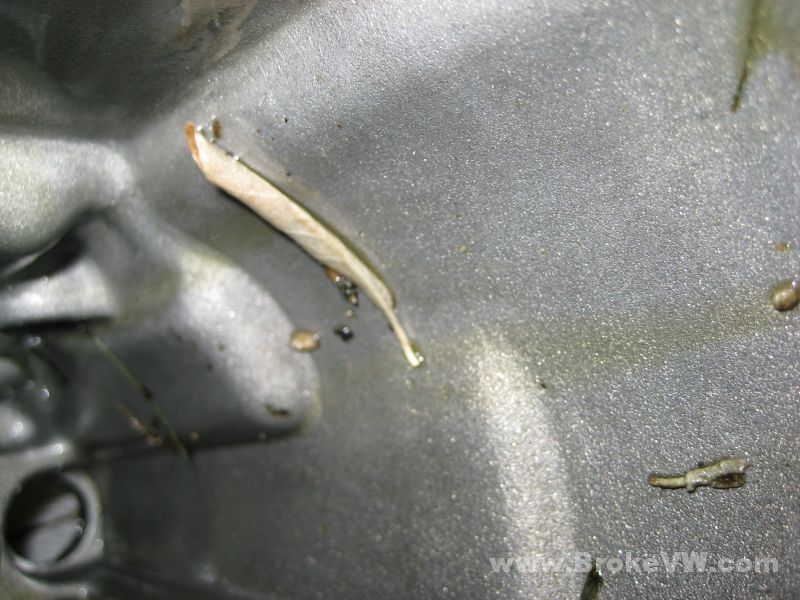
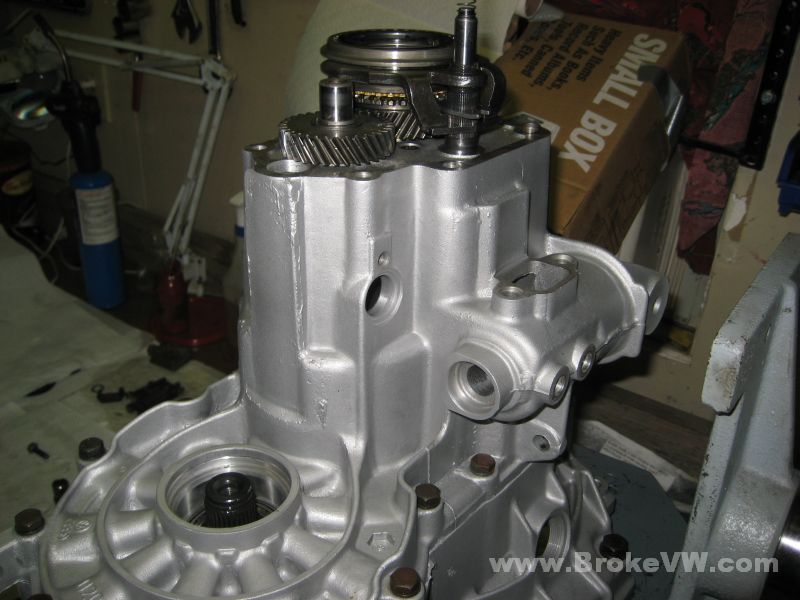
A pic of the inside of the gearbox half of the casing, with an out of focus pic of the rolled up leaf stuck inside...
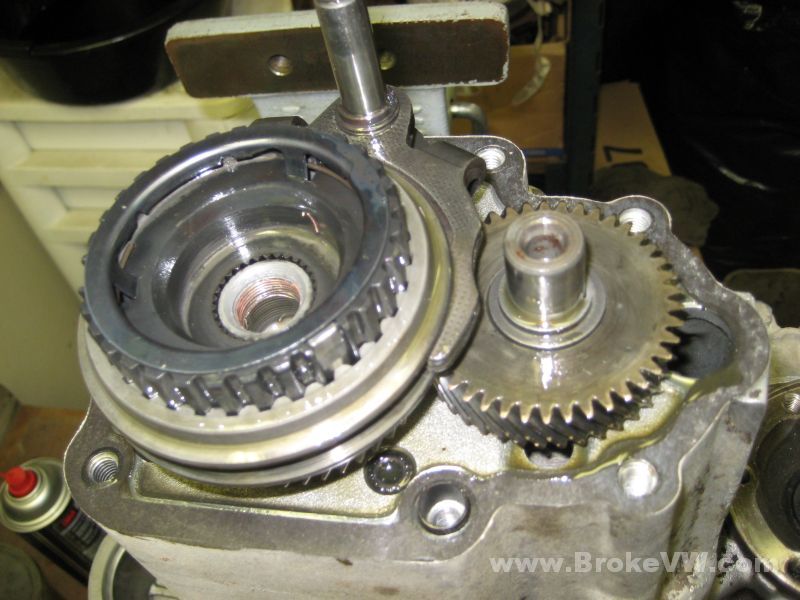
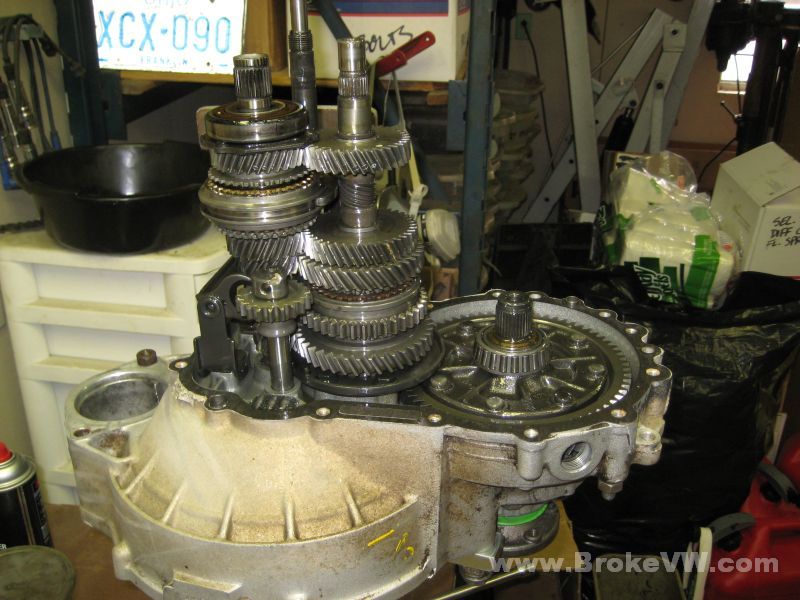
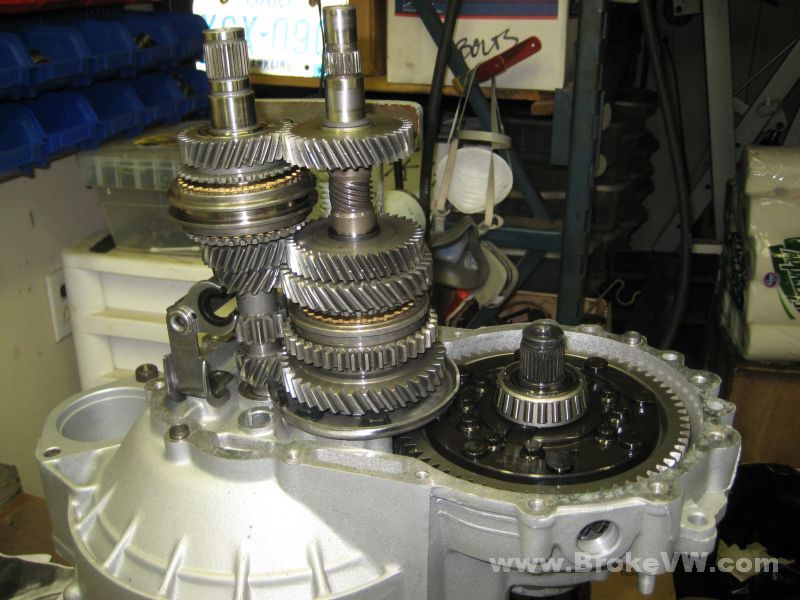
The exposed gear stacks after being split apart....
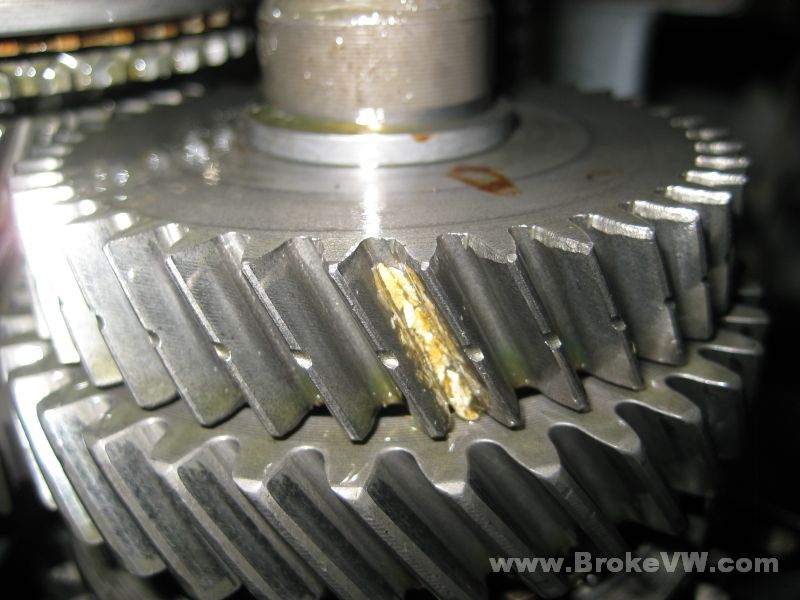
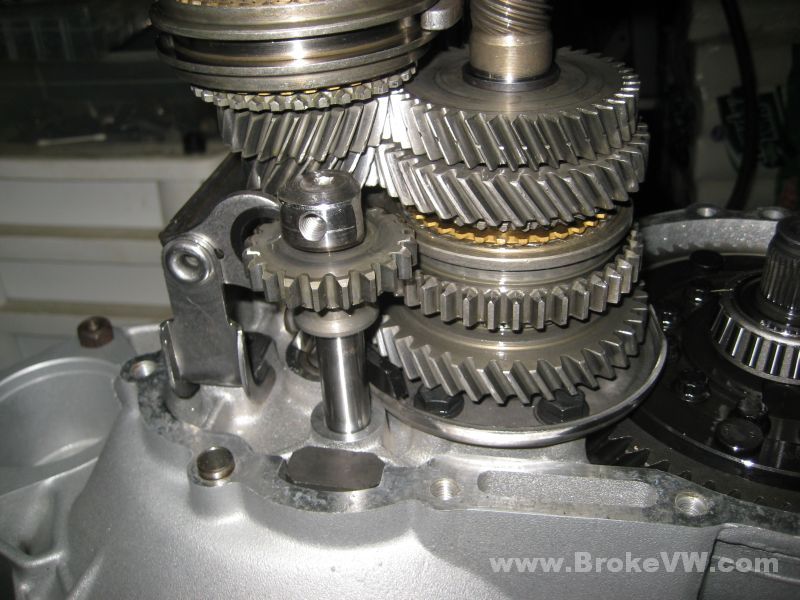
One of the leaves must have been caught between the gears as I was turning it over by hand, here is some in the teeth of 3rd gear...
More leaf and debris on the reverse idler gear, which looks very good, no chipped or broken teeth.
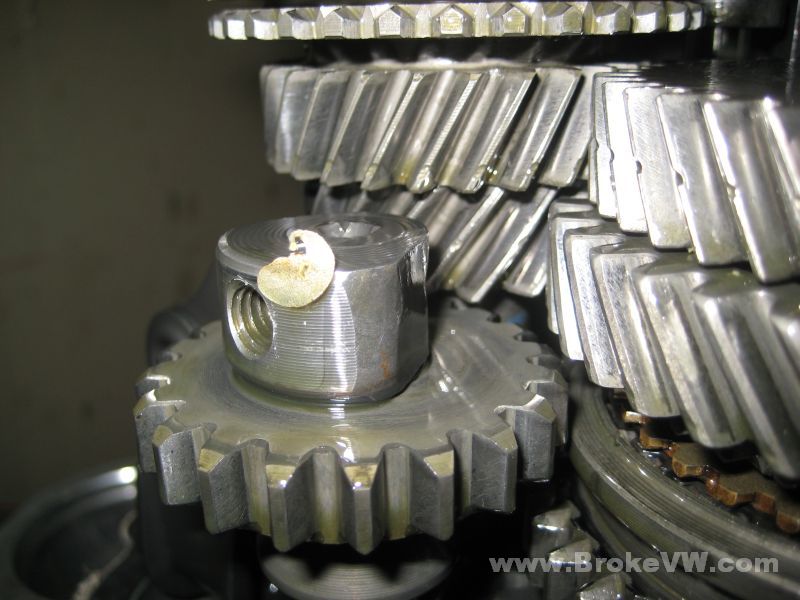
One of the seed pods or something from some plant that was in the trans...

A shot of the magnet, it looks pretty good. It has a smooth even appearance, no chunks of anything found so far, I'll go through the clump and make sure there are no big chunks, but it looks like common wear from the gears and bearings that has been caught...
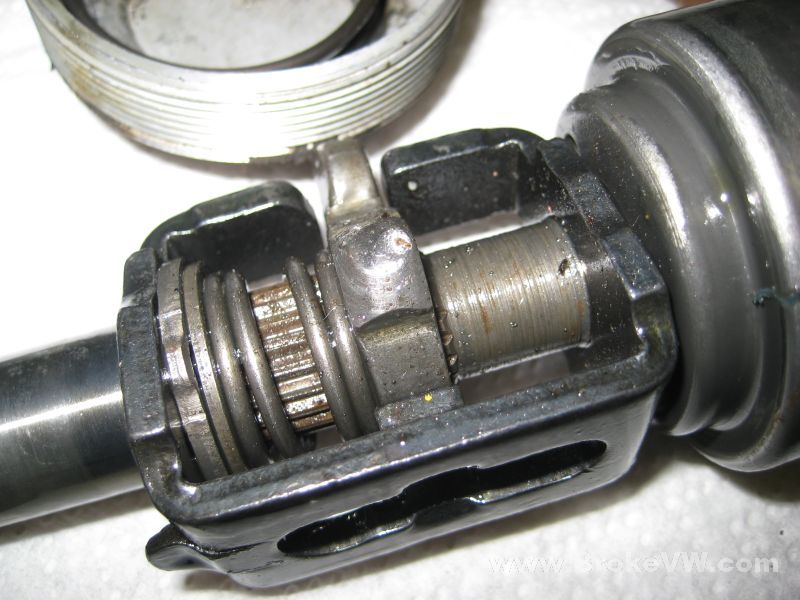
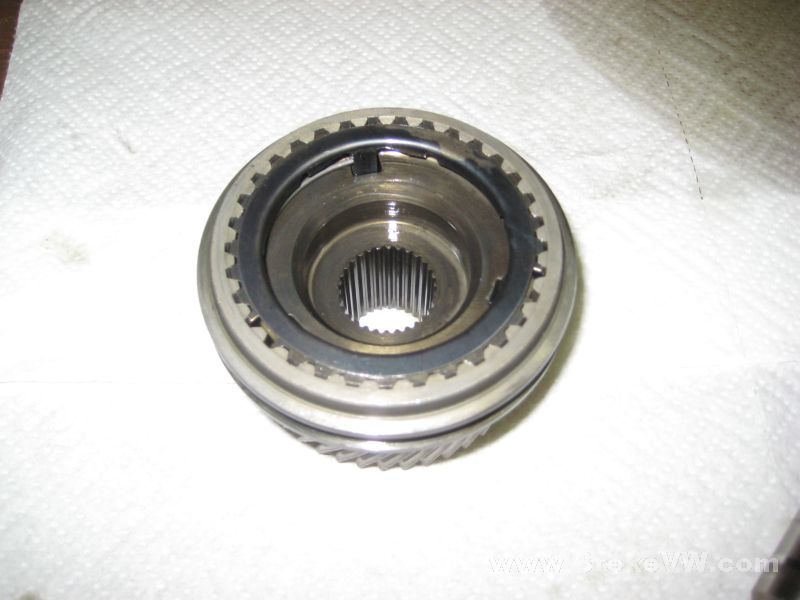
Some more pics of the debris, and a pic of the operating sleeve which makes up part of the reverse gear set. It also looks good, with no chips or broken teeth. Either the trans has low miles on it, or someone took good care of the trans and clutch.

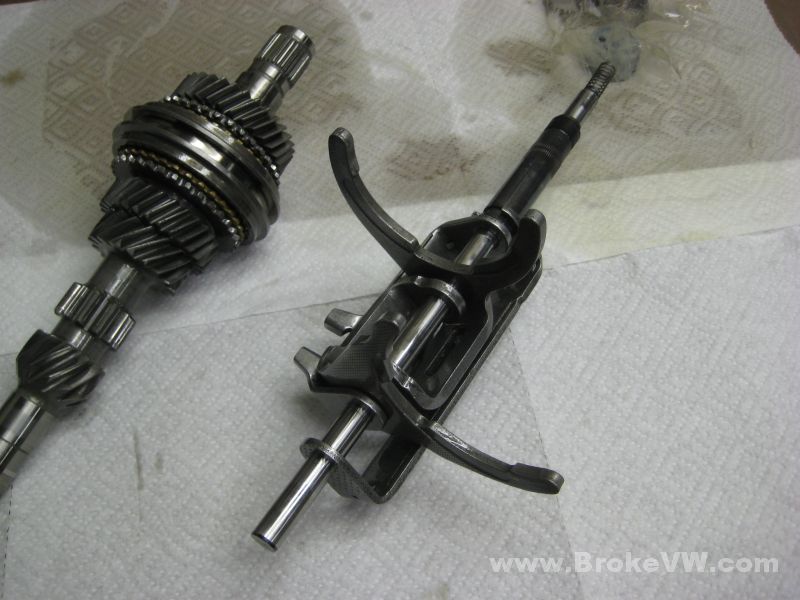
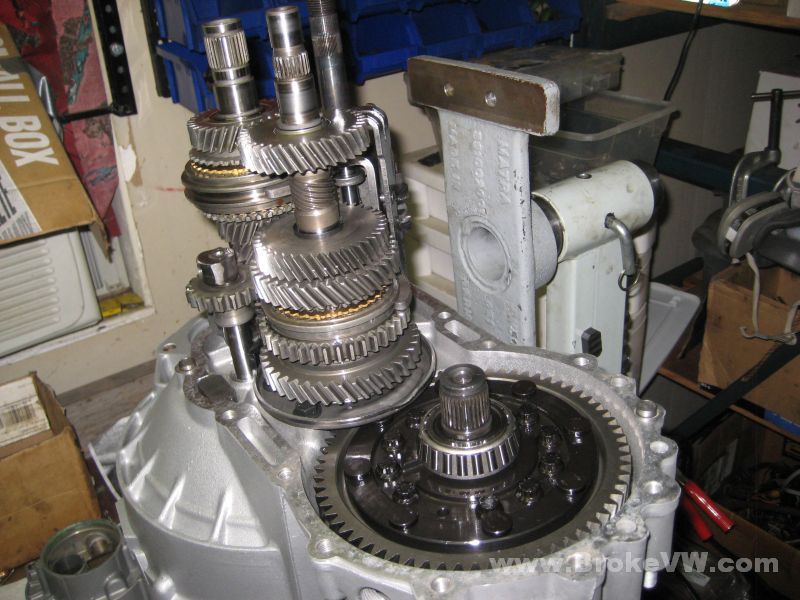
A shot with the shift forks, reverse gear, input shaft, and 4th gear on the output shaft removed...
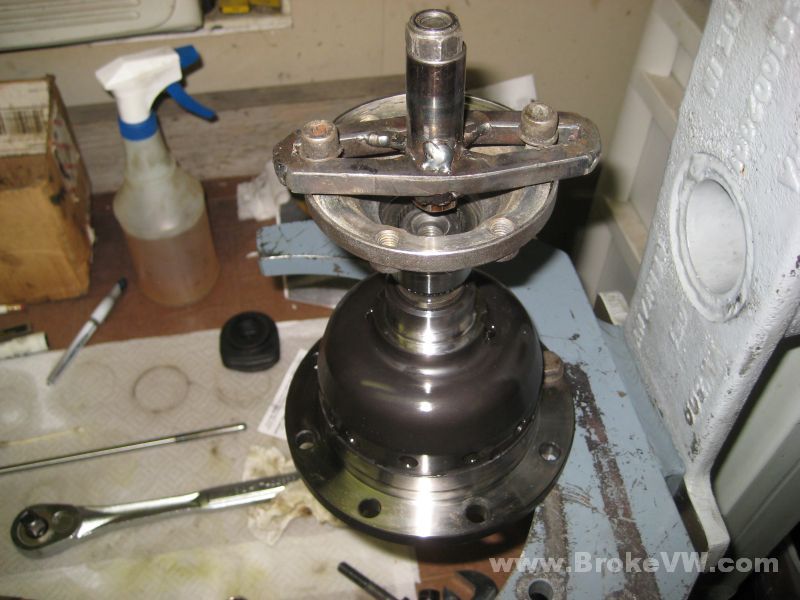
A few seconds with a long puller and the output shaft can be unbolted and removed...
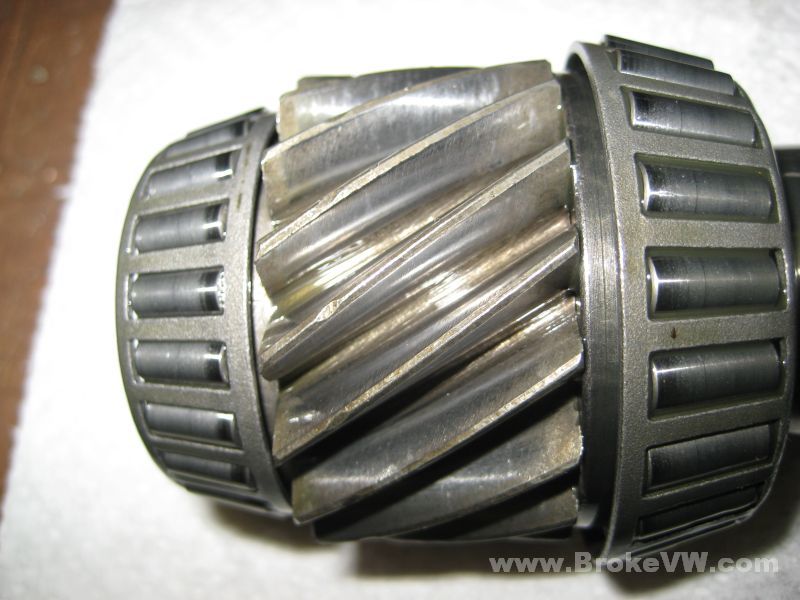
The bearings are worn, but they looks pretty good, which also leads me to believe the trans has low miles on it...

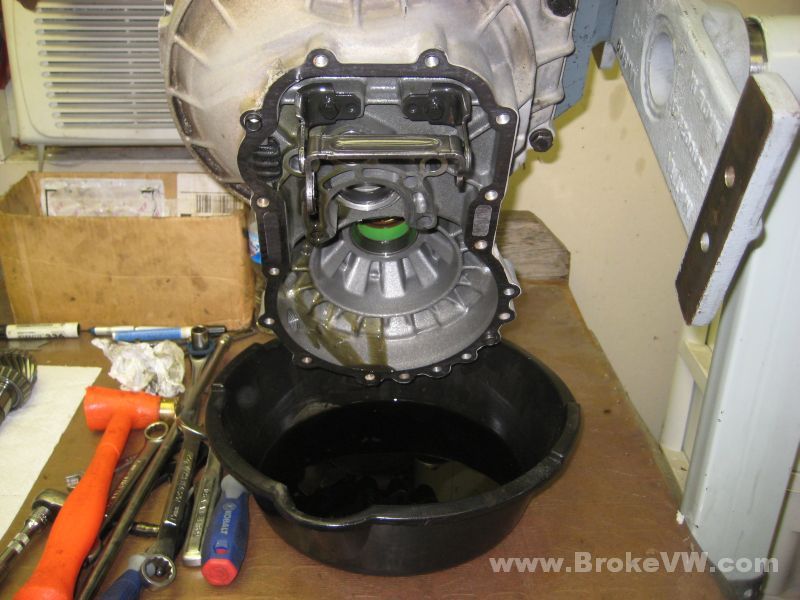
Draining the last bit of oil out of it... you did an outstanding job of draining it before you shipped it. Sometimes it seems people don't even drain them at all, but this one was pretty dry, thanks!
A pic showing the cross shaft that has been working on the large head rivet which secures it. It eventually beats through the head and the shaft slides out, killing the trans in a violent manner...

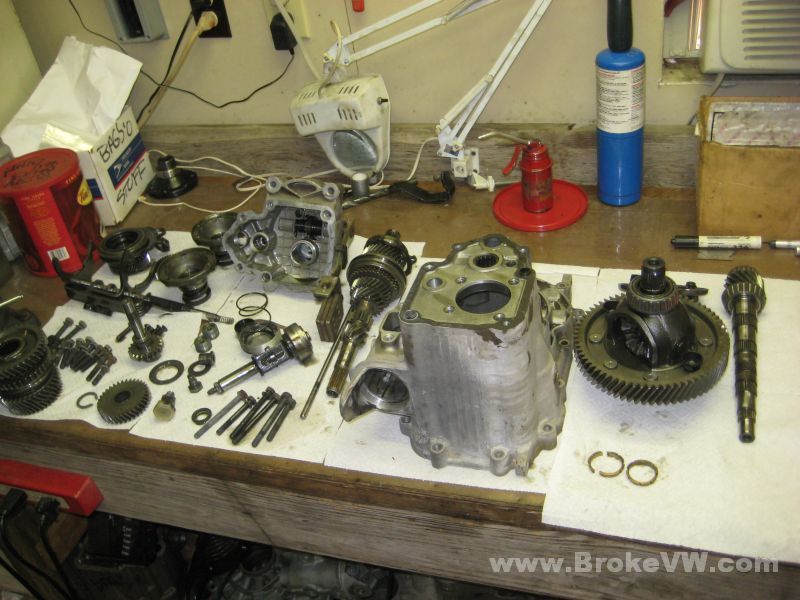
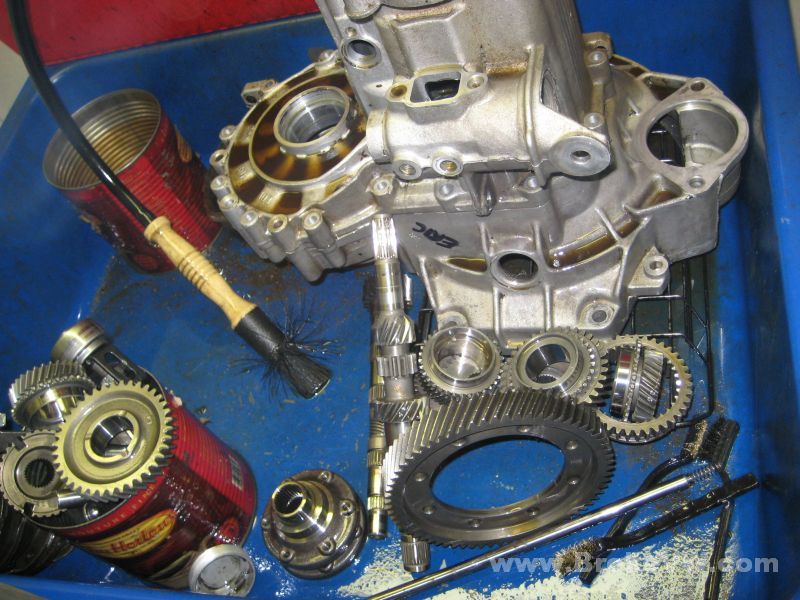
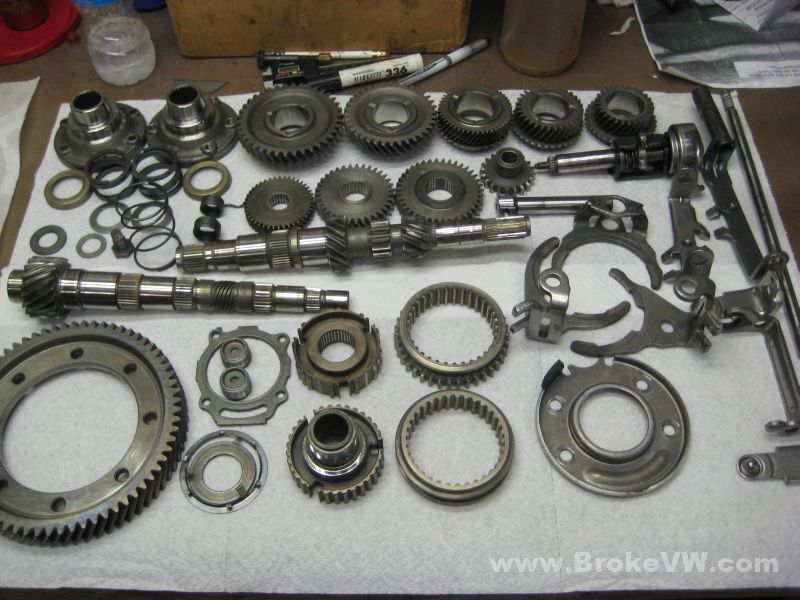
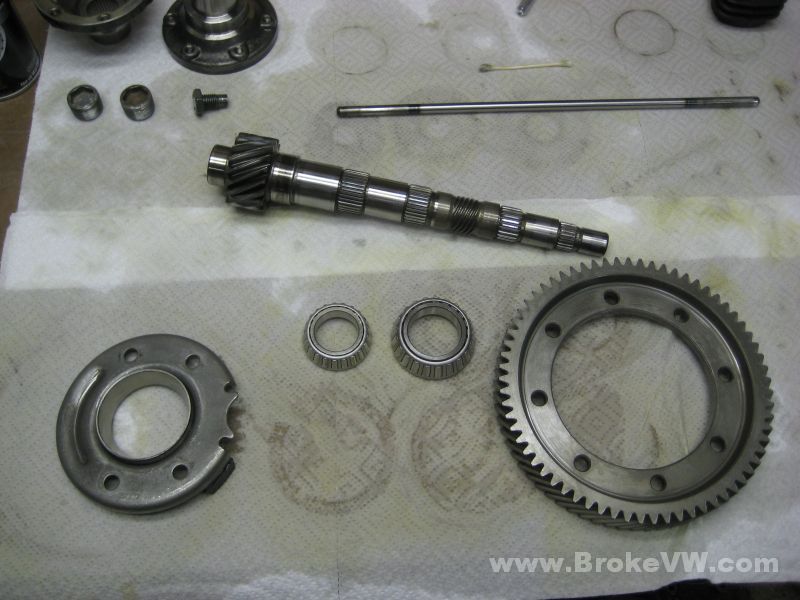
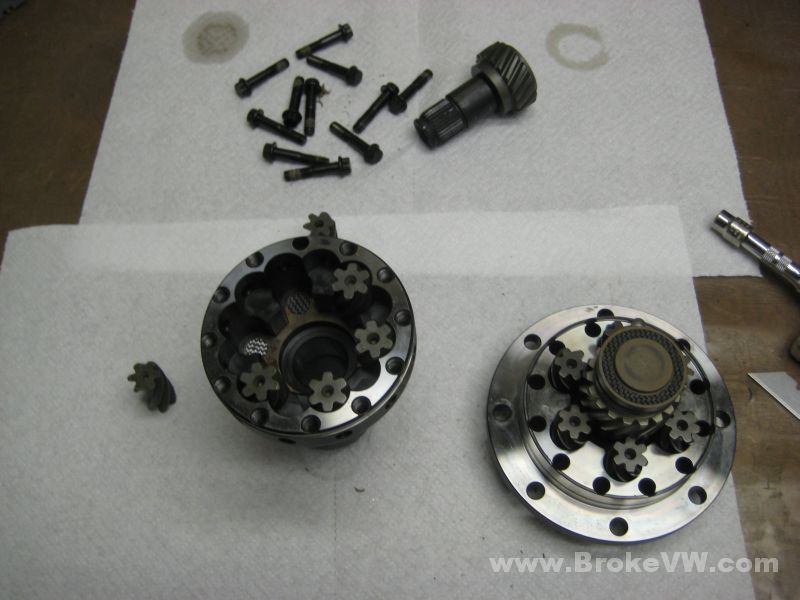
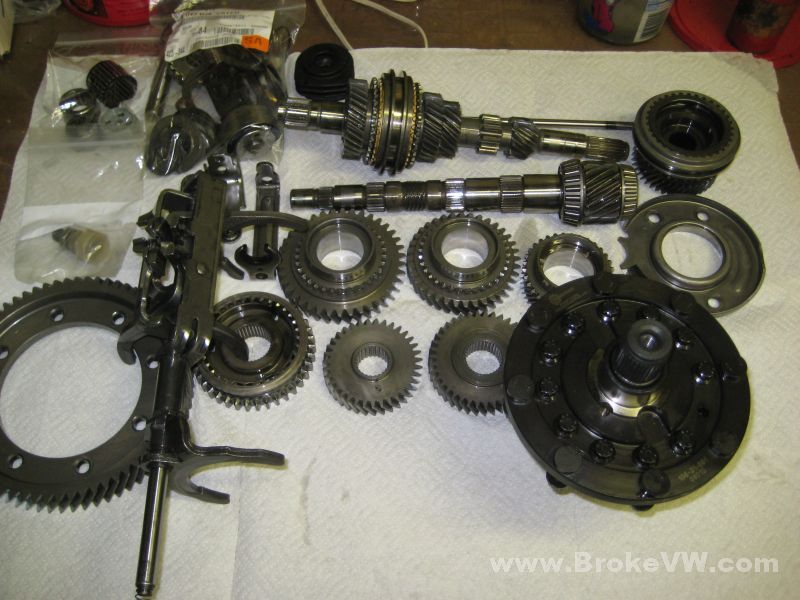
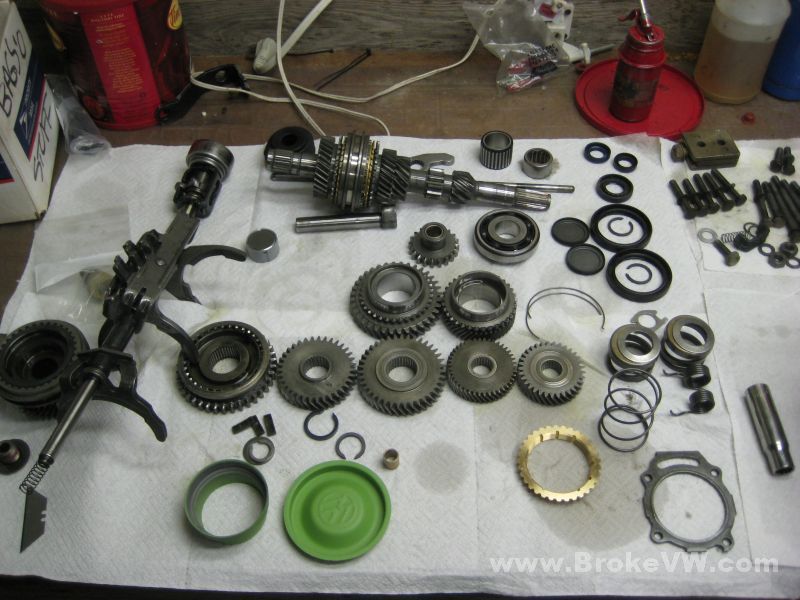
A pic of the guts removed from your trans...
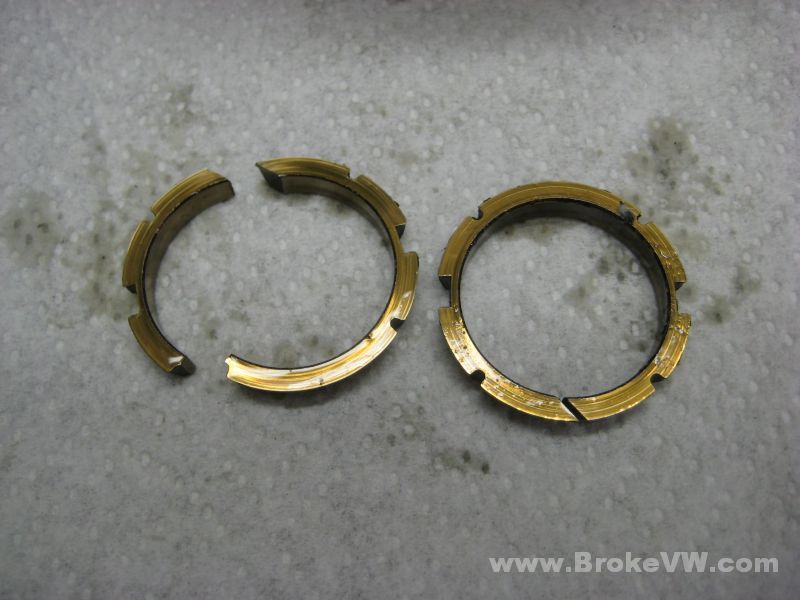
The tapered thrust rings behind the flanges. I originally thought both of yours were intact, but there was a split I didn't spot, and one of your rings have broken. It's not a major deal, when assembled, they parts can't go anywhere, and they still do the job of preloading the shafts. It is very common for them to be broken, they are very fragile. They can break if you drop them... so I can replace the ring, or leave it, and actually, I'll have to look to see if they are even used with the wavetrac LSD.
I'll start stripping the shafts down, see how much I can get cleaned before I have to stop to do work on the other trans when it arrives. Everything has to be cleaned and oil free before it can be cryo treated.
Update 5/04/09
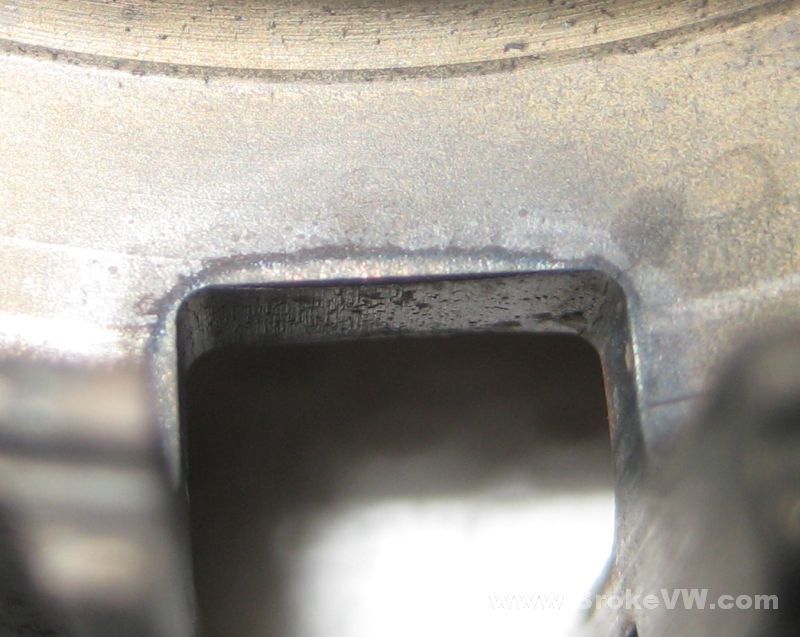
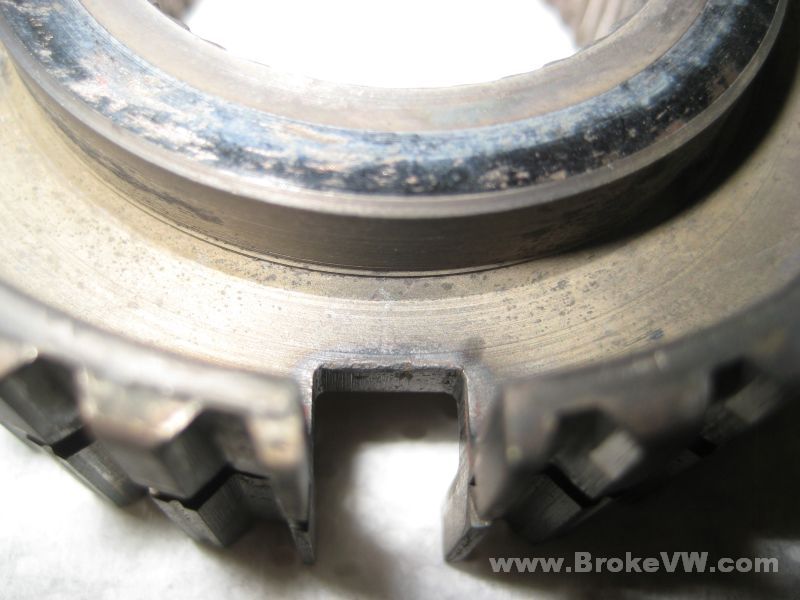
I've started on your trans, I have it in the parts washer now. I've found cracks in your 3rd/4th sync hub, this is common on the older trans when VW used square cuts for the sync keys. The newer hubs are not square, they're rounded to relieve stress in the corners to prevent the cracks... the load is spread around the curved cut, and not concentrated into the corners.
The easiest way to spot them is to clean the part in kerosene, then rinse it in hot water, use an air line to flash the part dry, then let it sit 5 minutes or so, and look for the oily kerosene trapped in the cracks to wick out onto the dry surface. It shows up as an oily line, or in the case of your hub, which isn't badly cracked, just an oily dot, because the crack in your hub is short. Here are a few pics showing the cracks...
Here are the parts in the parts washer, I'm letting the case soak so the gasket is easier to peel and remove. The internal parts have been scrubbed and need rinsed and oiled...
Update 5/06/09
I have some of the internal parts cleaned and oiled now, I'm waiting on the case to drip a little more kerosene off, then I'll rinse it and get it sealed up and get it blasted if the rain ever lets up.
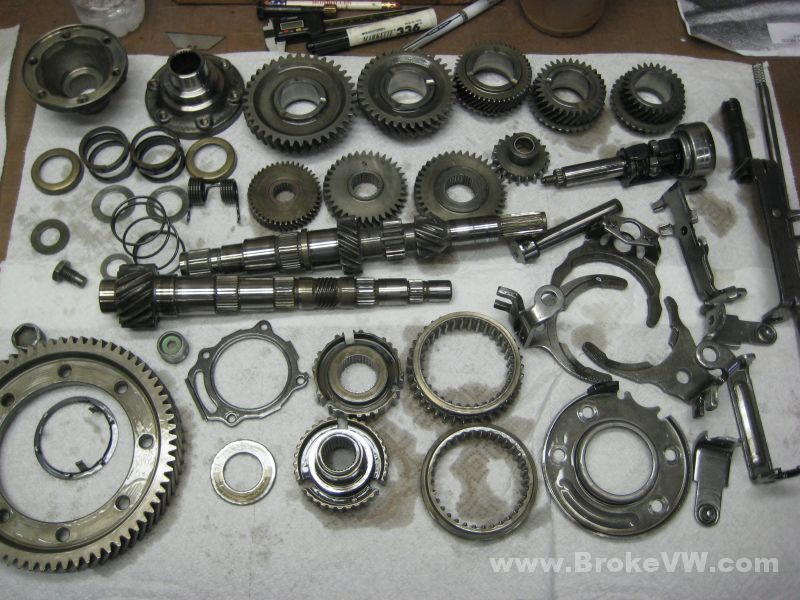
The parts after being washed in kerosene, rinsed in scalding hot water (it heats the part and washes the kero away), then flash dried with compressed air. They are completely grease and oil free, bone dry, and totally unprotected as they are just raw steel...
The same parts now coated fully in oil, this allows them to sit until the trans is ready to be built...
And until the parts are needed, they stay covered to prevent any dust from settling on them. They'll be wiped clean as I pick them up to install them into the trans, but this helps limit any contamination before then.
Update 5/09/09
I've started putting together the sub-assemblies of the trans, then they'll be bagged and put away while the blasting work on the case is being done.
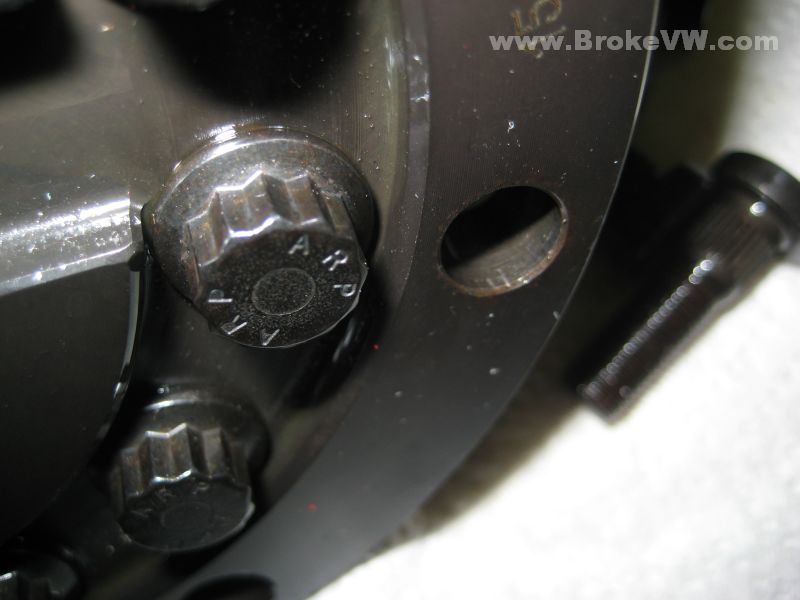
I've ran into another snag possibly on the LSD. The ARP bolt kit doesn't seem quite right to me, but I've not done a ARP bolt kit install into a Wavetrac before, in fact, this is the first ARP kit I've had here, and I want to be sure before I carry on.
The bolts don't press in completely it seems. Maybe they just take a lot more pressure on install, I'm not sure, but I'll ask Autotech and ARP before I continue. If all else fails, I have a VW kit here.
Normally I press in 2 bolts at a time, opposite of each other, and this works just fine. I did that with these bolts, they acted like any other diff and bolt kit, and then stopped. I then switched to pressing directly around the bolts, one at a time, and they still didn't seat fully, so I quit on the bolt kit install. I'll see what Autotech and ARP have to say about it. I oiled the holes and oiled the splines on the bolt prior to install, and I heard the splines cutting in, so they should be secure as far as not spinning, but I don't think it is right, and will ask them about it.
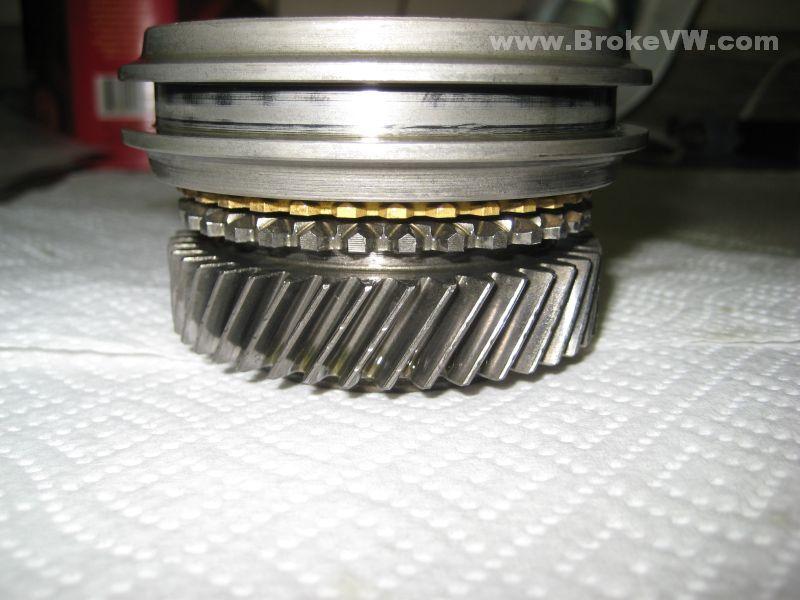
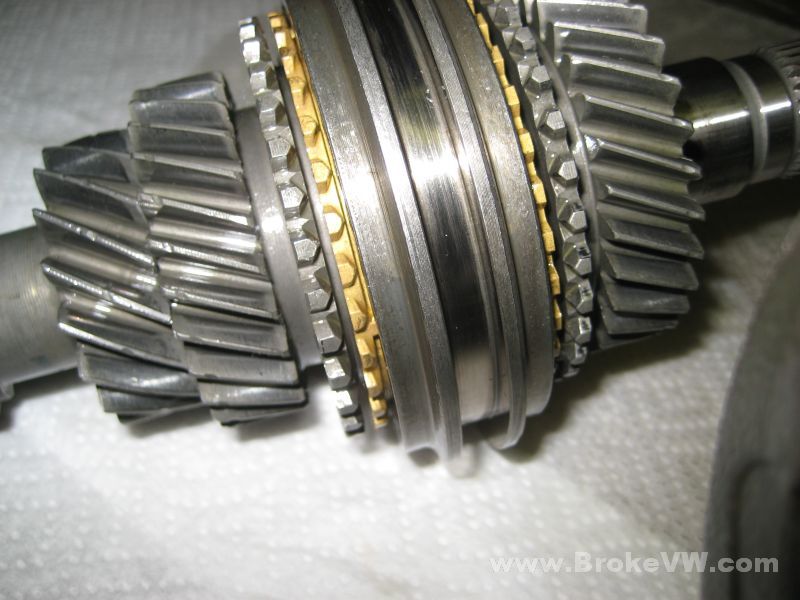
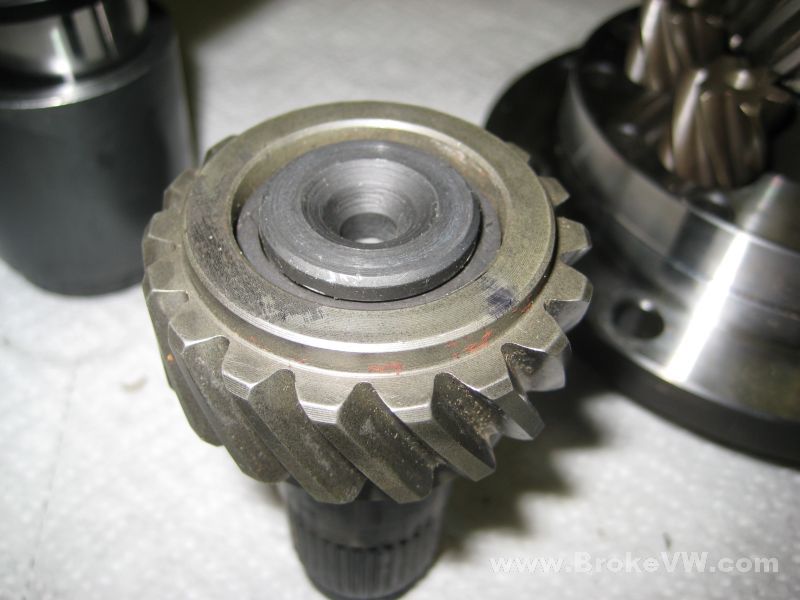
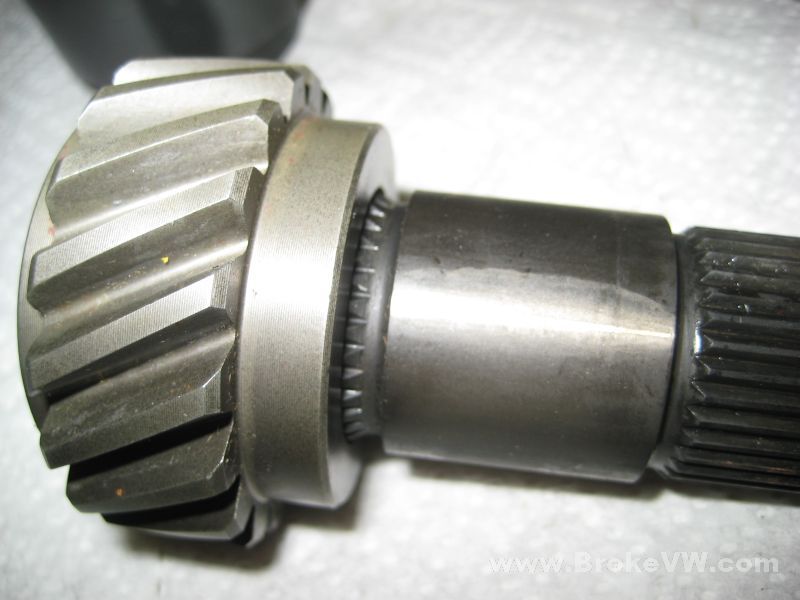
Anyway, I've assembled the 5th gear sync assembly...
Fresh new sync ring, sync keys and sync springs installed on the 0.805 gear I found which looks to be in really good shape, with low mileage. The cross-hatching on the inside of the gear (which is the outer race for the needle bearing) was still visible and looked like it just came from the factory, unfortunately I didn't get a pic of it. Come to think of it, I forgot to get a pic of the updated 3rd hub assembly... it is just another stock hub and sleeve, but it is from a newer trans. I take a lot less pics during the actual build, sometimes it is because parts need heated and I don't have the time, usually it is because I get into the mindset of rebuilding the parts and forget to take pics until I'm done... at any rate, I forgot a few pics, sorry!
The completed input shaft, new needles bearings, updated hub that I forgot the pic of, new sync keys, springs, and bras rings, new circlip holding it together, and the pushrod bushing and seal have been installed. The pushrod seal is deeper than usual... I installed it to the normal depth, had a look, and it wasn't quite flat (they're very easy to get crooked because of the small diameter), so I tapped it flat, and by the time I had chased it around level, it is inserted deeper than normal, but it shouldn't be a problem. They just want it installed below flush on the input shaft, and not driven down on top of the pushrod bushing.

The shift forks assembled for later...
The bearing race has been pressed into the bearing plate, the tapers are cleaned and ready to be heated and installed, and the ring gear needs pressed onto the LSD...
The completed assemblies and parts then get bagged up, the gear sets, the forks, the input shaft, 5th gears, the small bearings and parts, selector, etc...
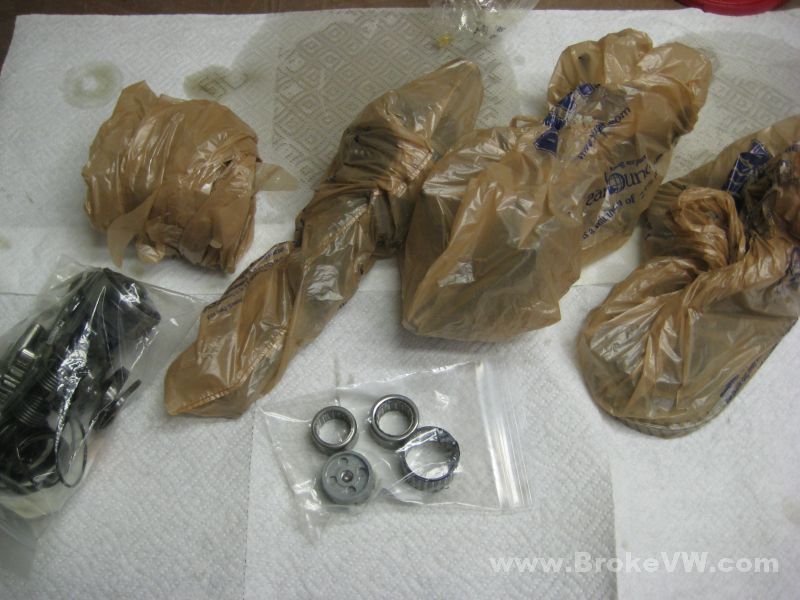
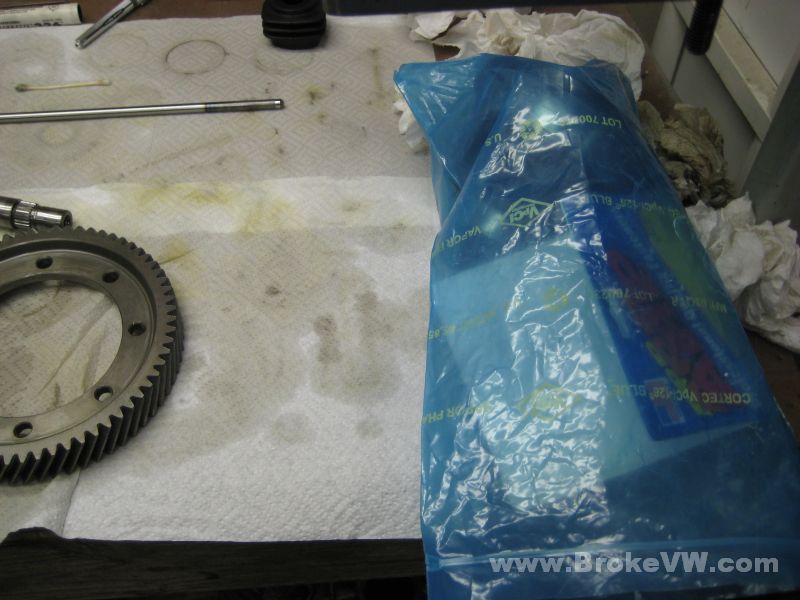
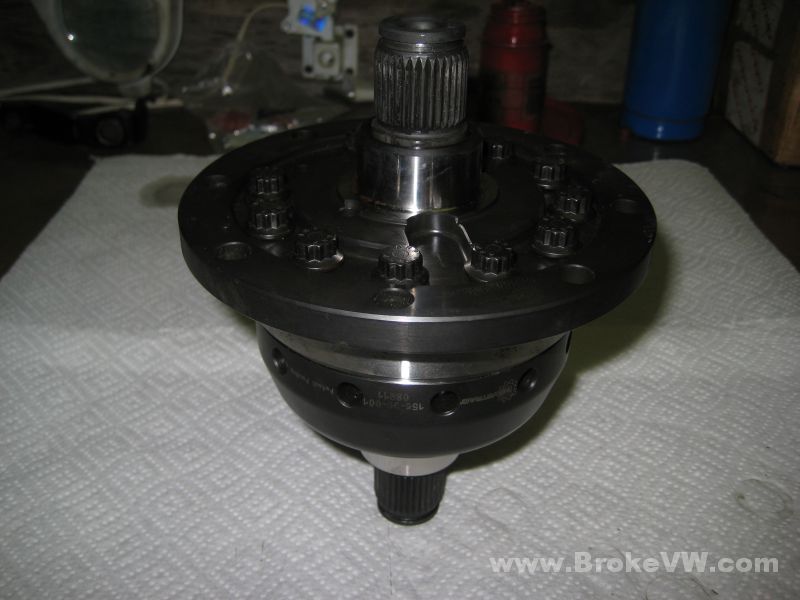
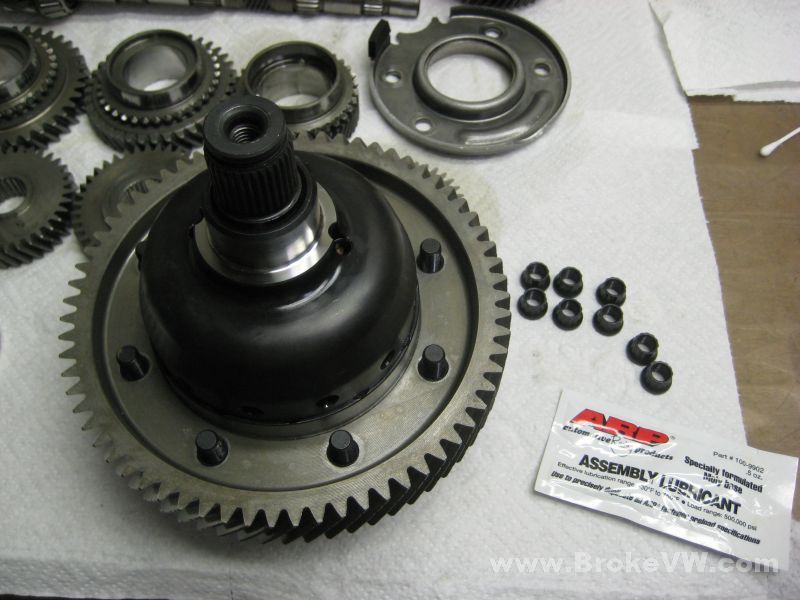
The LSD and ARP bolt kit in the blue bag ready to be assembled...
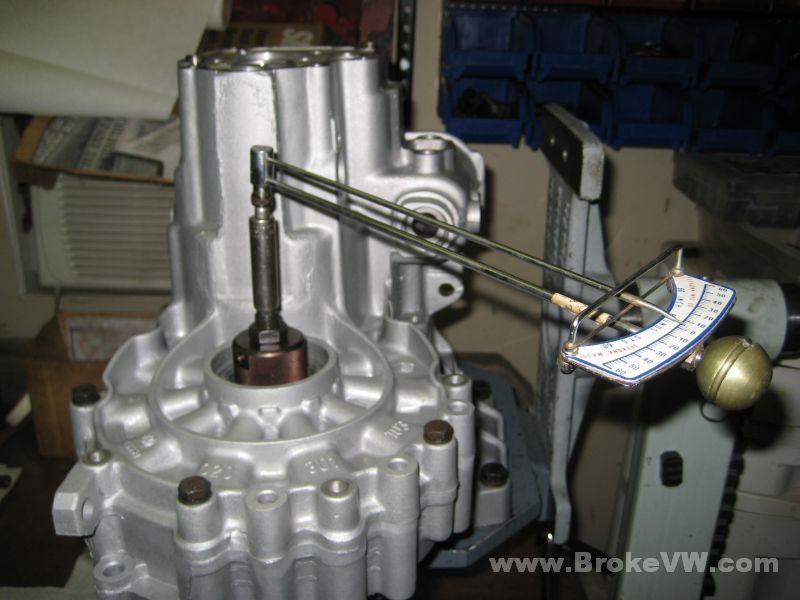
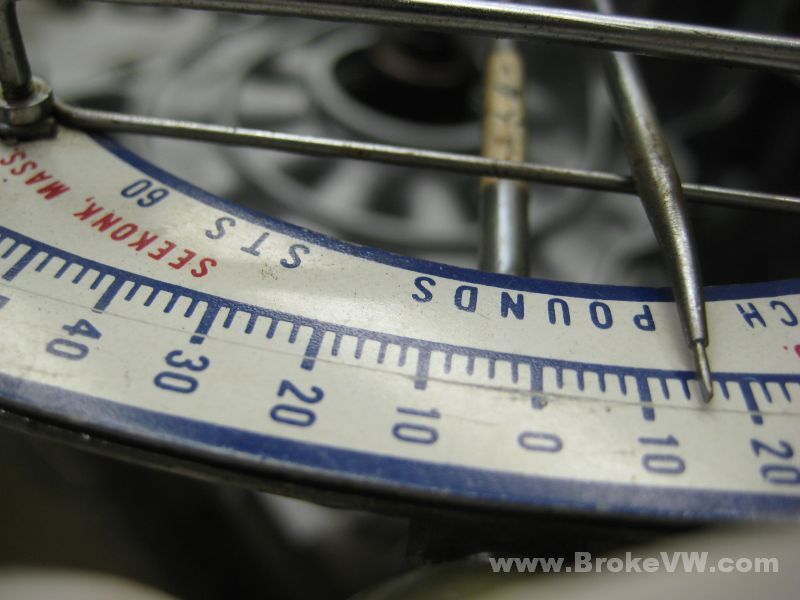
Before I built the diff, I wanted to check the point at which it "breaks" and acts like an open diff, and I was curious if it would do so with the internal preload of the wave plates... and it does. The old loose version you sent broke at 20-23 foot pounds I think, this one breaks at about 41 ft-lbs or so, which doesn't surprise me, when I got it back from Autotech, the slop was totally gone, so I expected a higher preload.
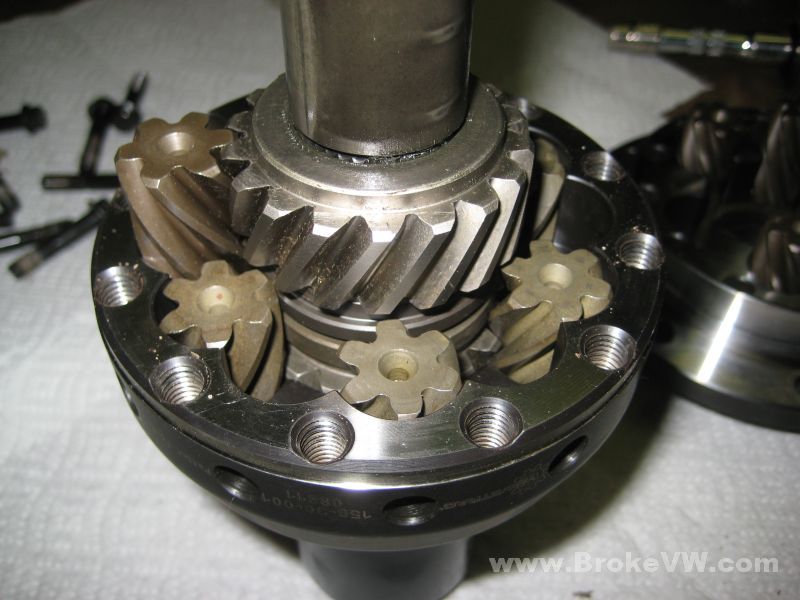
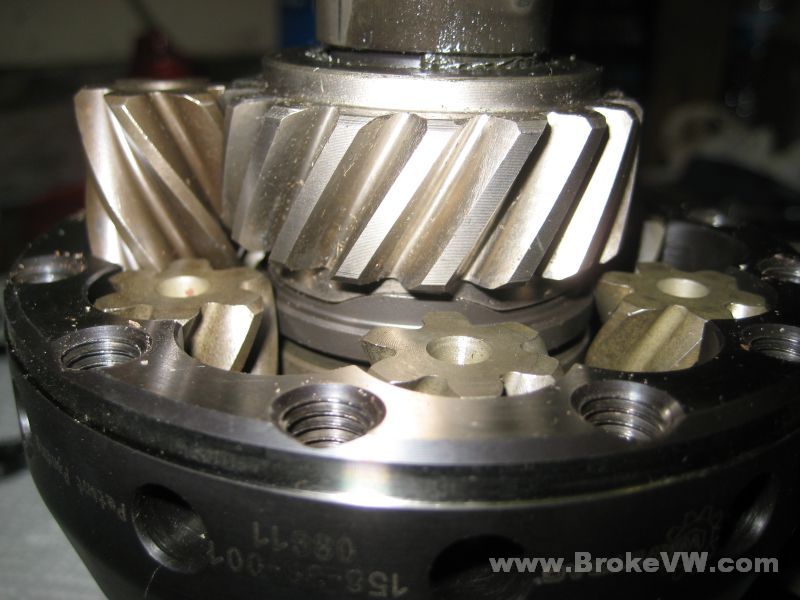
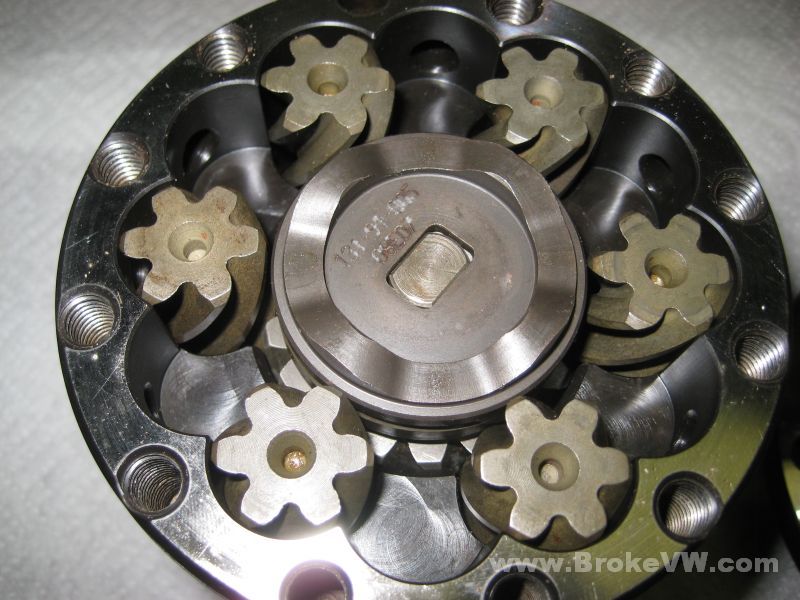
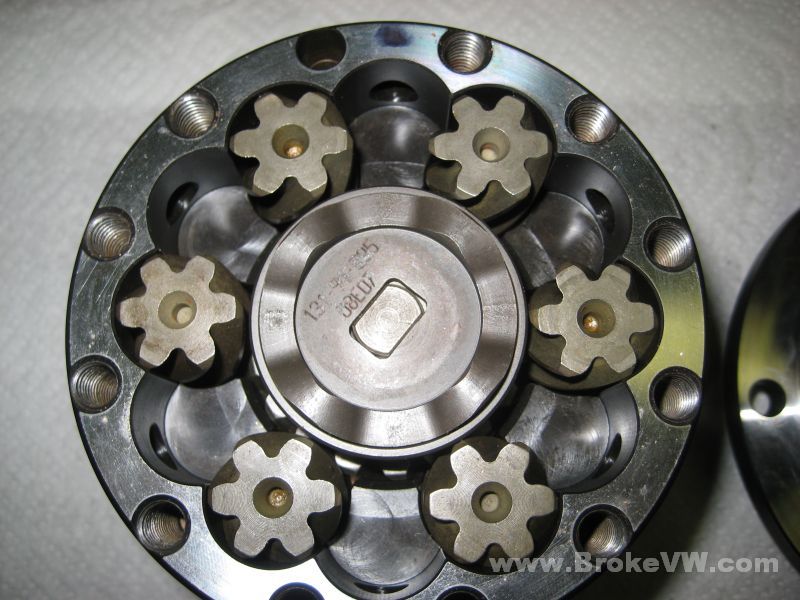
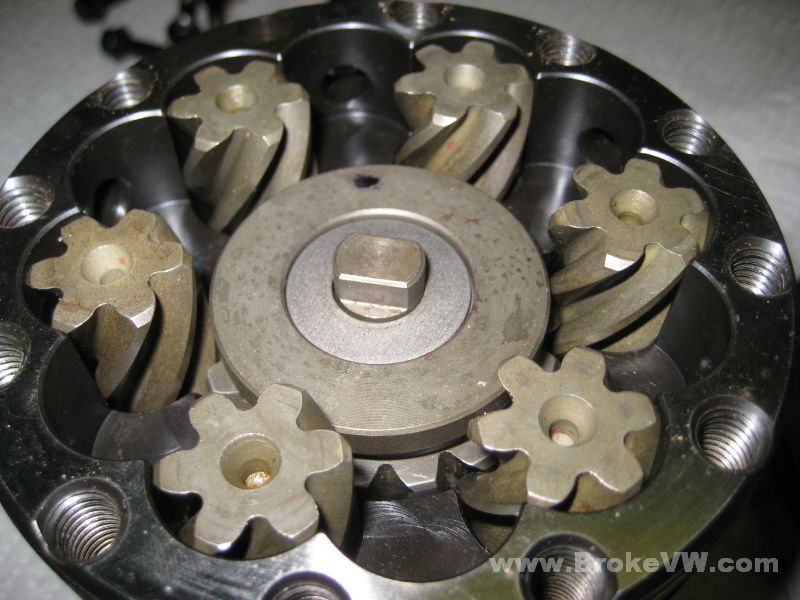
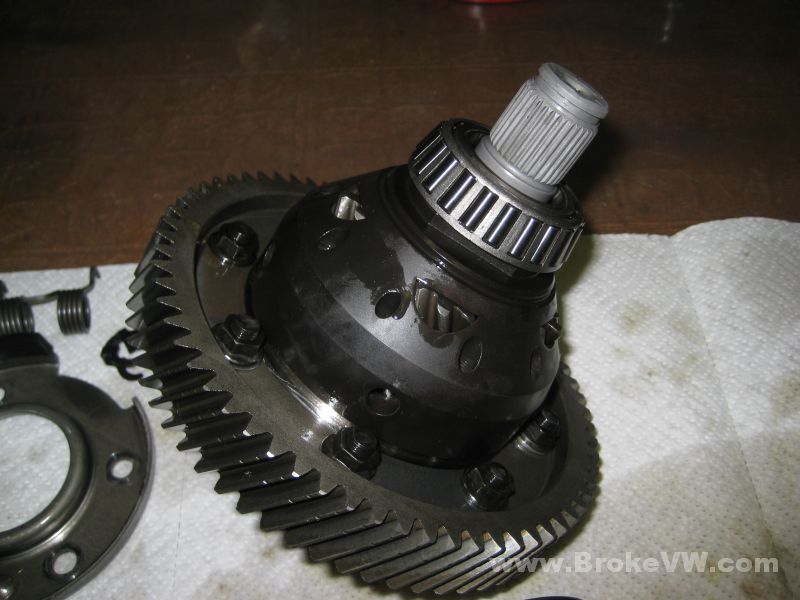
Here are some pics of the inside of the wavetrac in case you ever need to open it and need pics to get it back together properly, although these were taken prior to the slop being removed from the shafts...
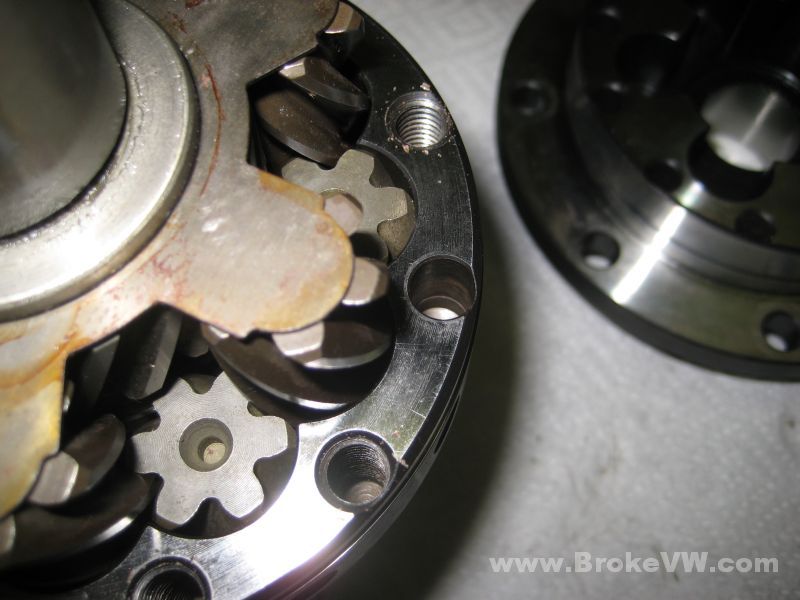


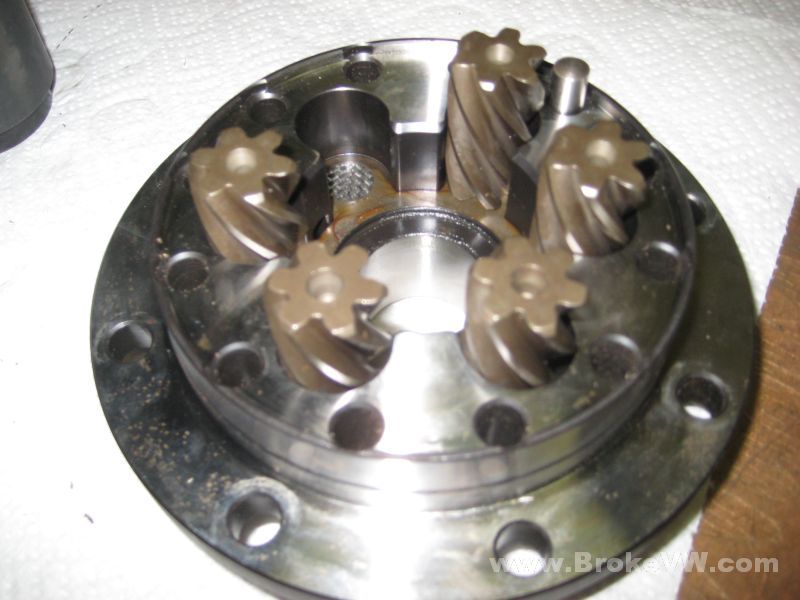
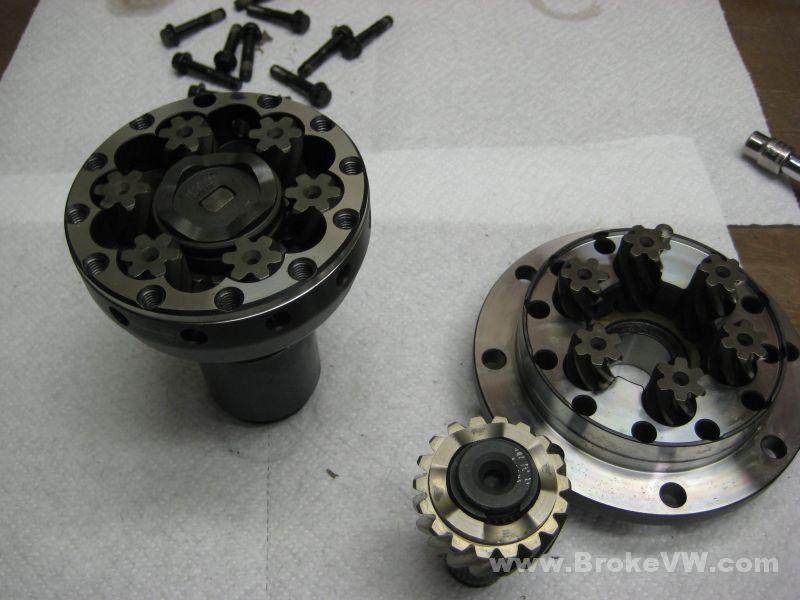


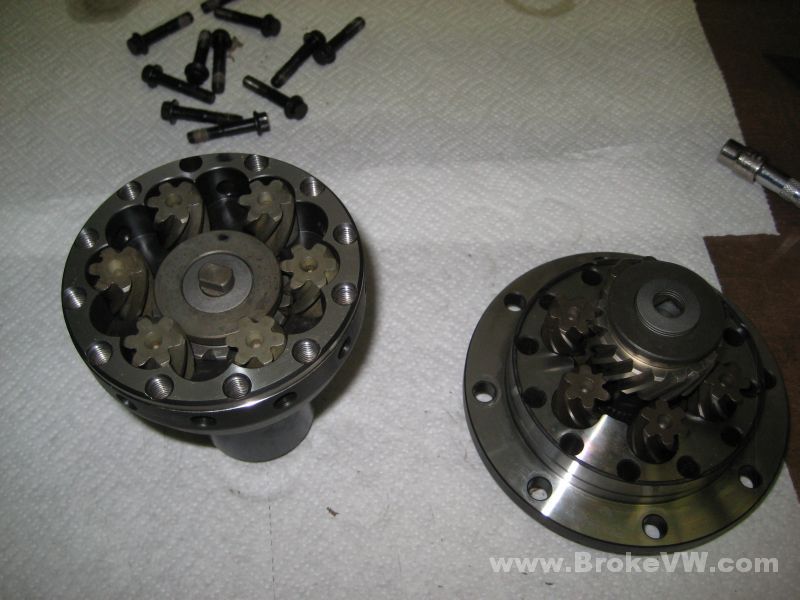


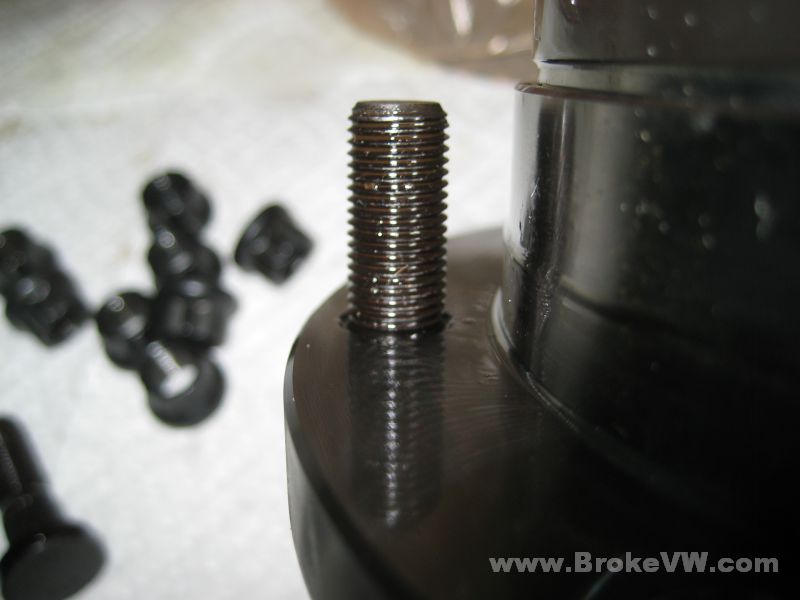
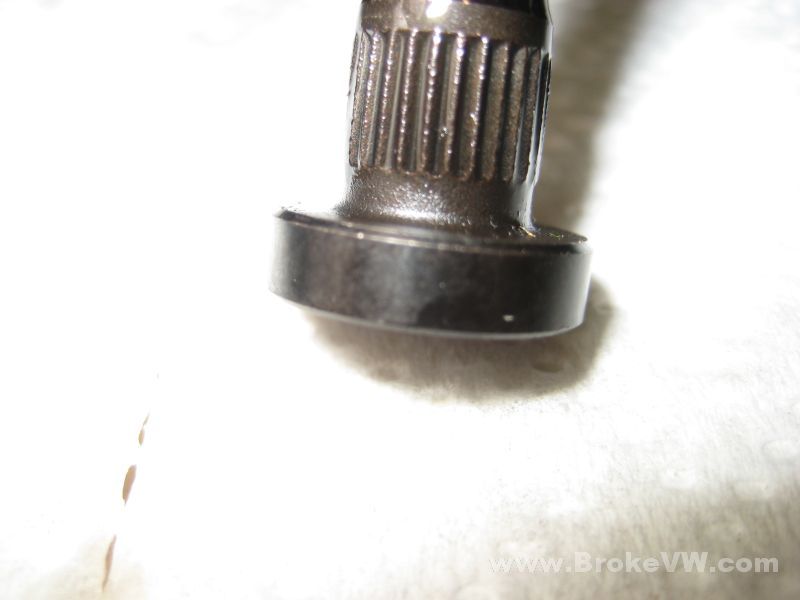
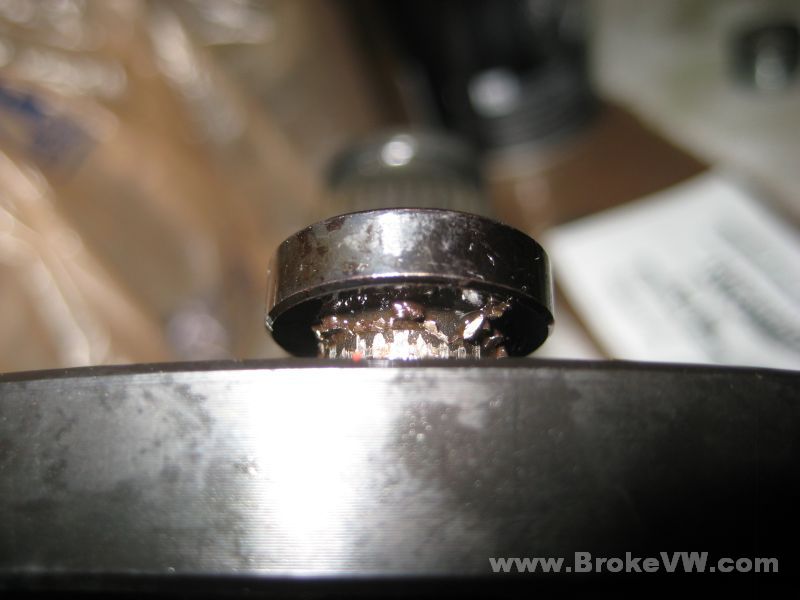
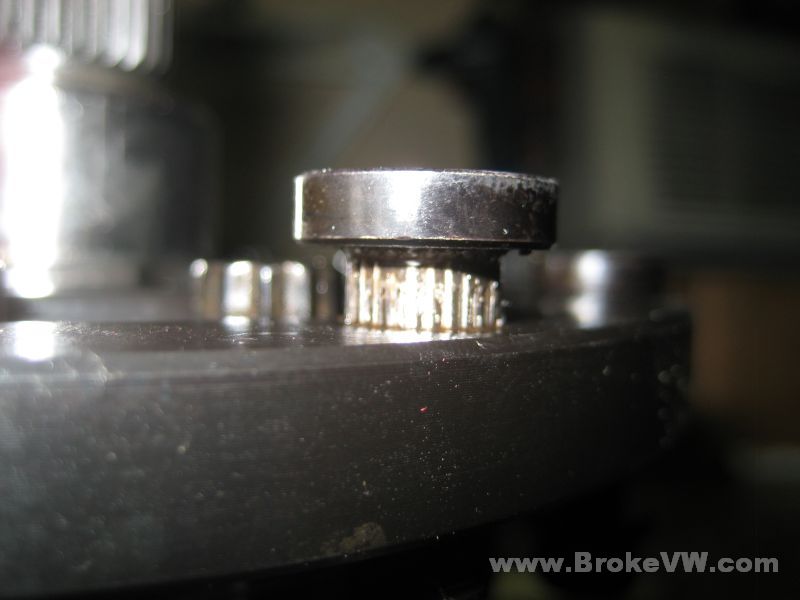
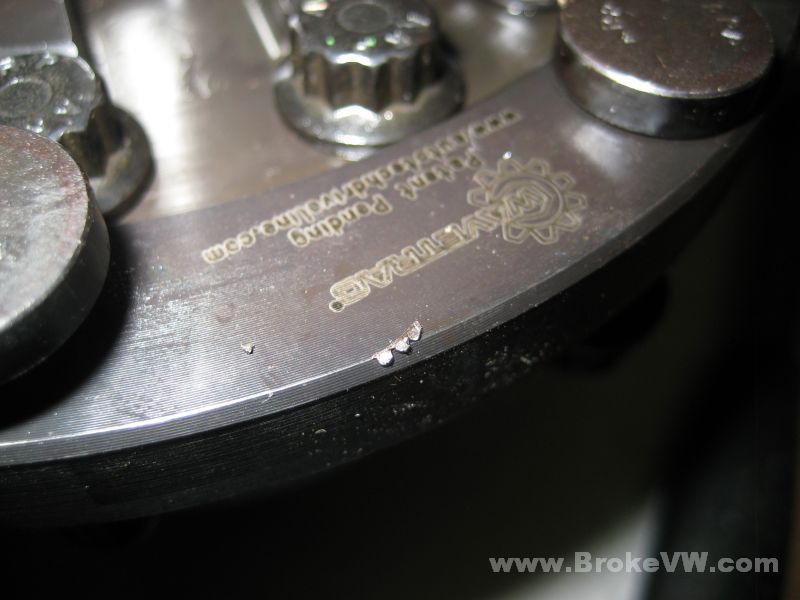
Here is a pic of the bolt installed. There looks to be enough bolt to do the trick for securing the ring gear, and I heard the splines digging in, so the bolt shouldn't spin, but I want to be sure, because it doesn't feel right to me... there is just too much gap under the heads, and I'm hoping the problem won't be hard to fix, or take too long.
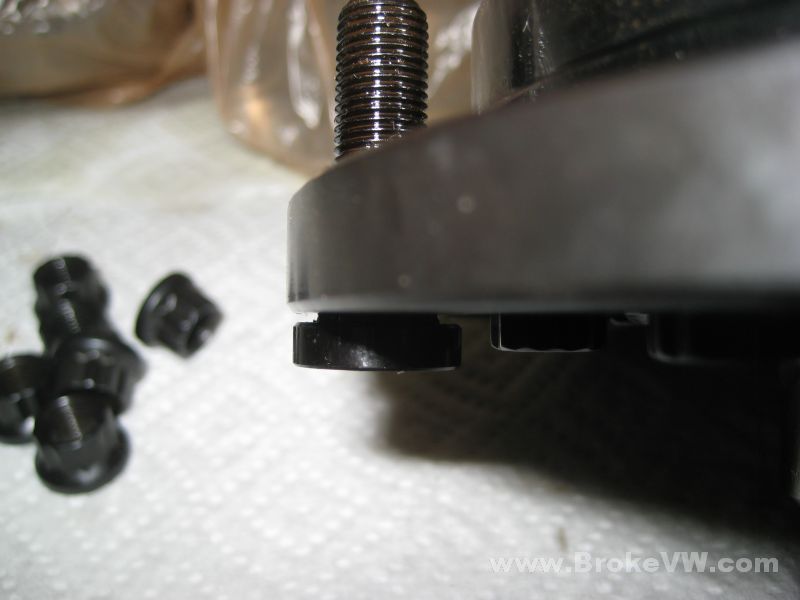

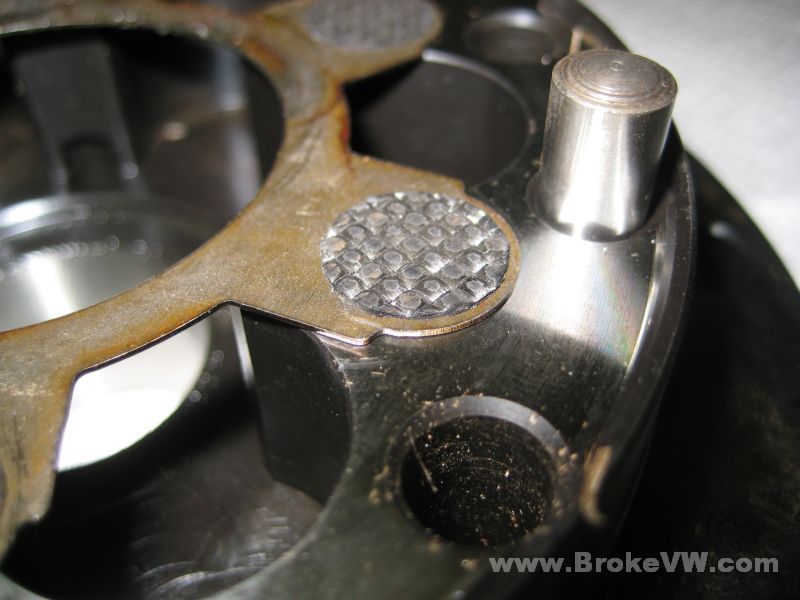
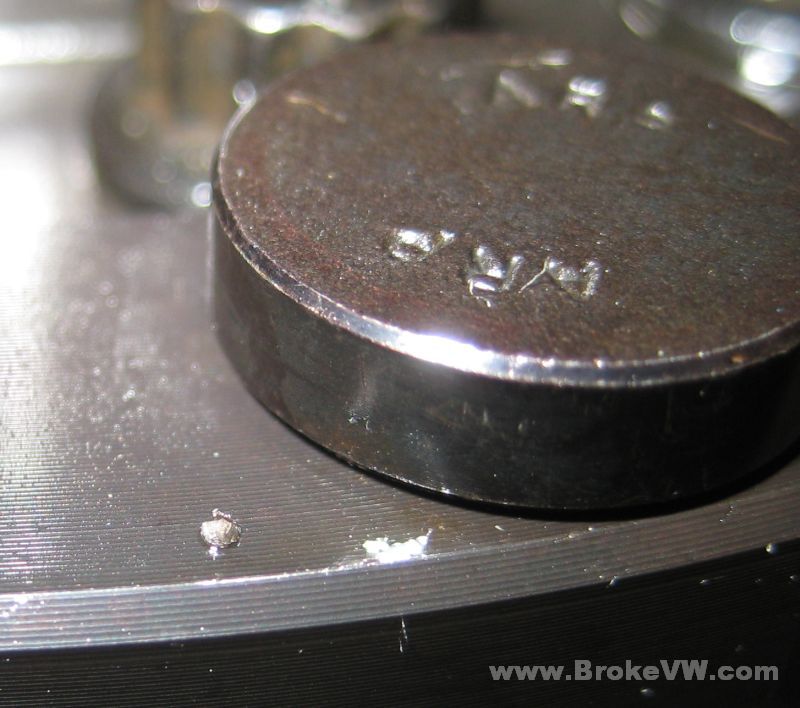
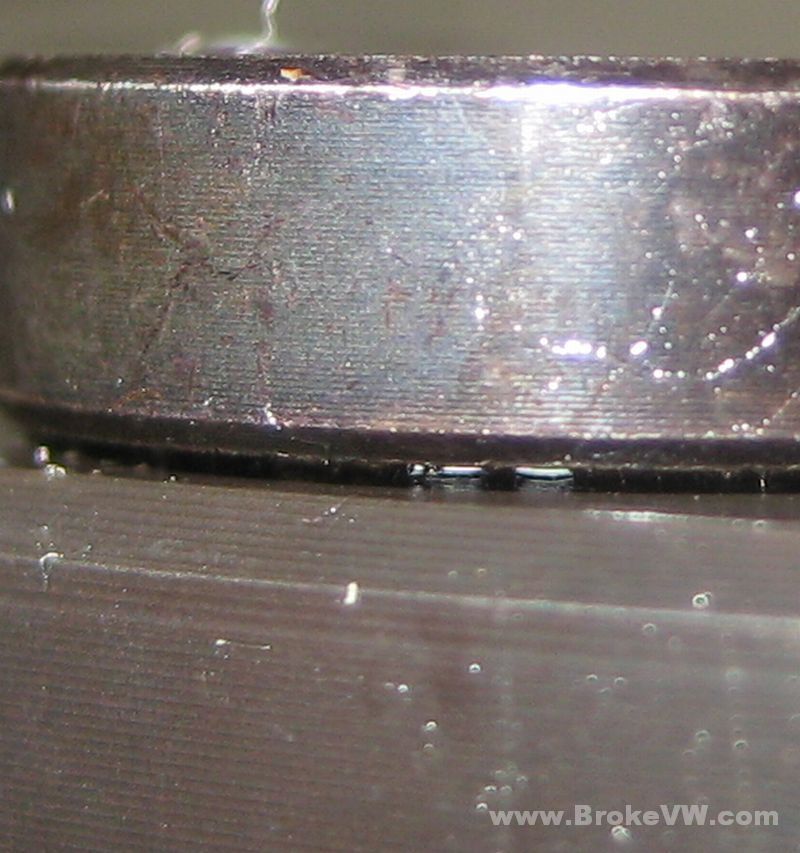
And it was this following pic where it all clicked in what is happening here.... I reduce these pics before uploading them, and when looking at the full size version, I saw why the bolts failed to go in fully. The pic after this one is a zoomed version...
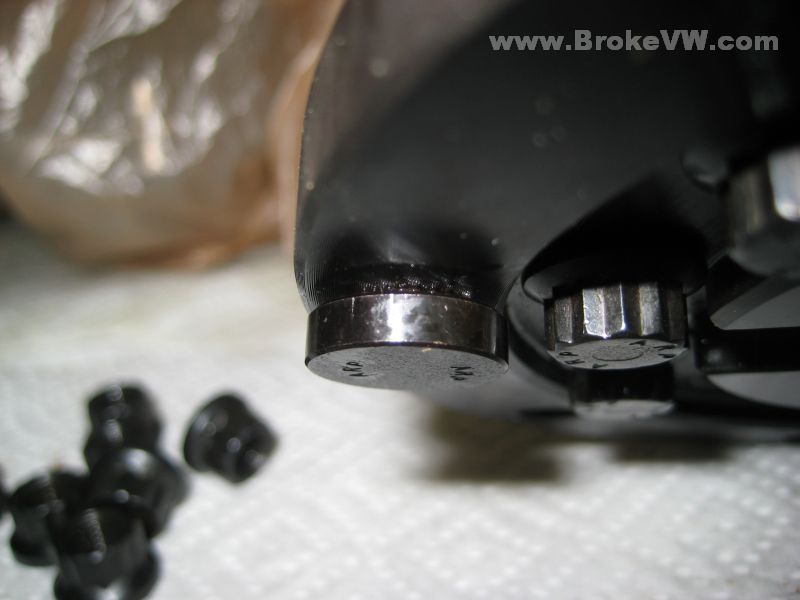
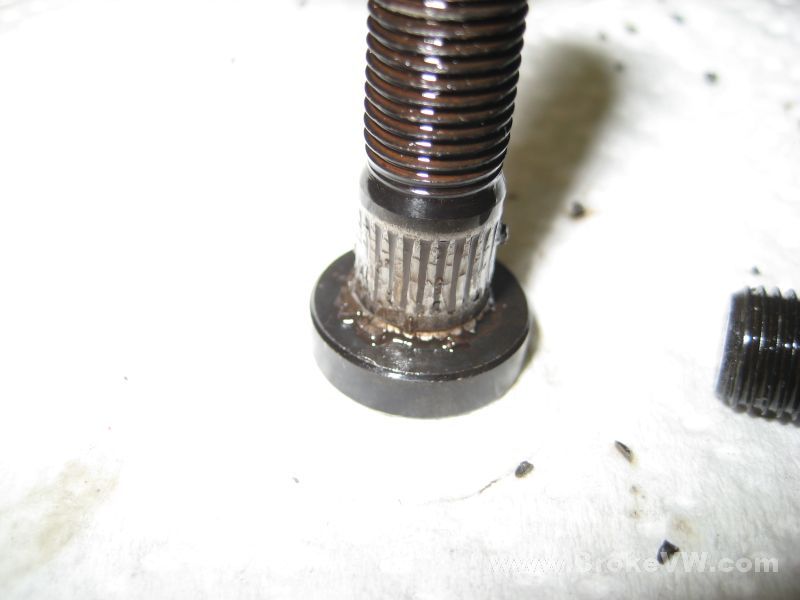
That's metal under there... it can only be splines... the splines are being shaved off, scraped off on install, and they're collecting under the head, preventing proper install, creating gobs of small steel contamination VERY close to a sealed up LSD, and that LSD is going to be installed into a rebuilt trans with all new bearings and parts.... yikes. I go to great lengths to ensure no contamination of parts, I work as clean as I can, and I do this to make sure the rebuilds work and work as long as possible... and things like this don't help.
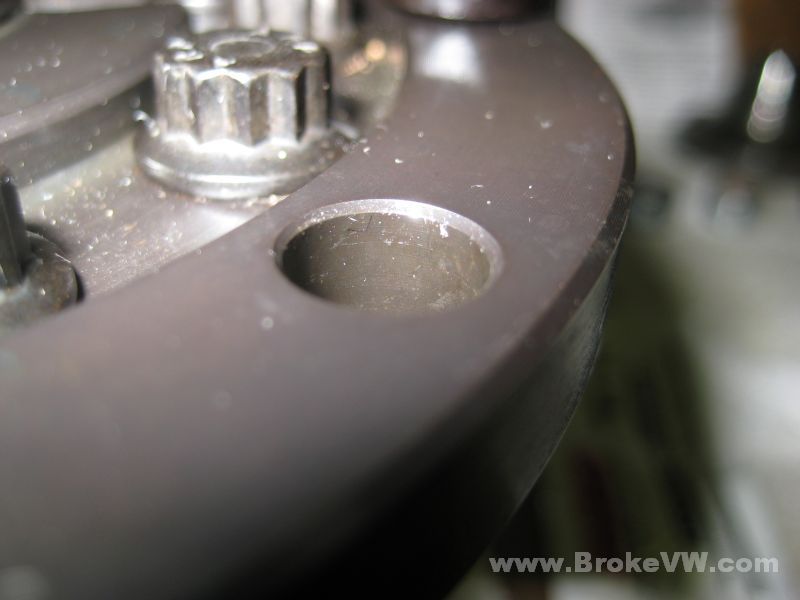
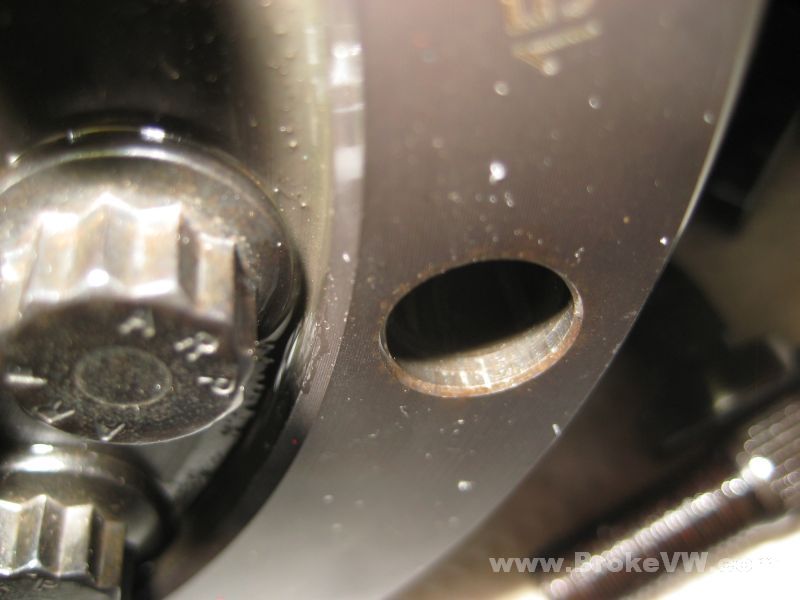
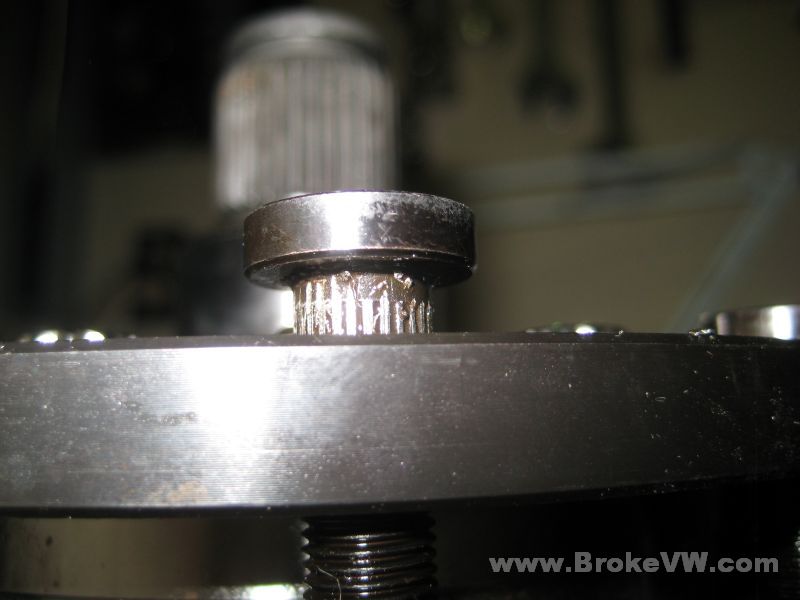
Here is a pic of the hole... which is what I originally had feared might be the problem... the bolts come with instructions about the holes needs a chamfer for the radius under the bolt heads... and it looks like there is proper chamfer, the bolts are ARP used in the LSD to hold the halves together, so I would assume Autotech made the holes to fit the bolts profile, and I think they did, it's just the splines of the bolts screwing everything up. I don't know if the LSD body is too hard, and not letting the splines cut in, or if the splines are too big and causing the problem... that's for those high-salary engineers at ARP ad Autotech to sort out... I'm just the monkey who puts the parts together :)
I've heated the new bearings and installed them to the output shaft, they've been oiled and the shaft has been bagged up like the other parts...
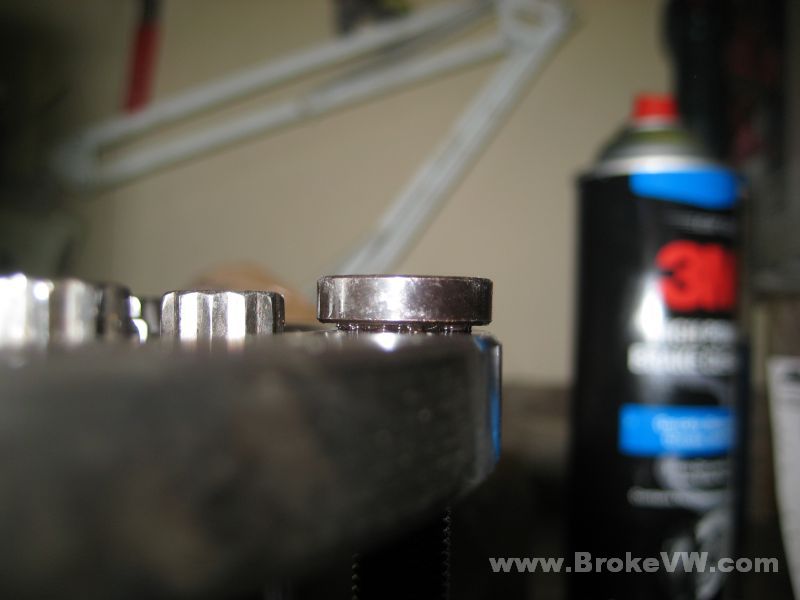
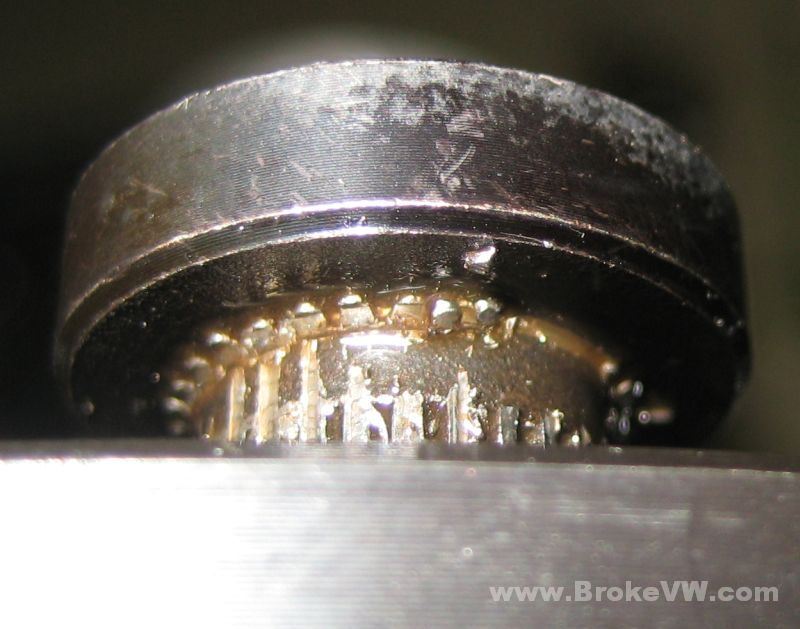
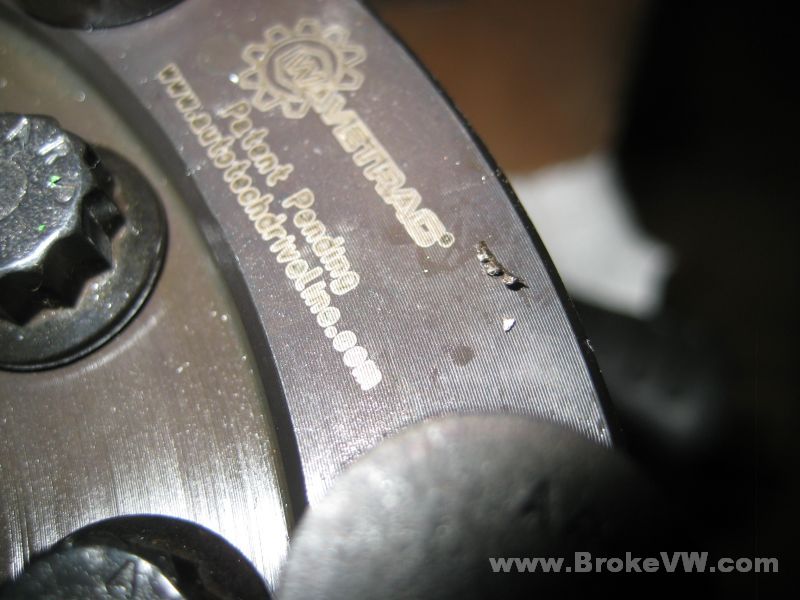
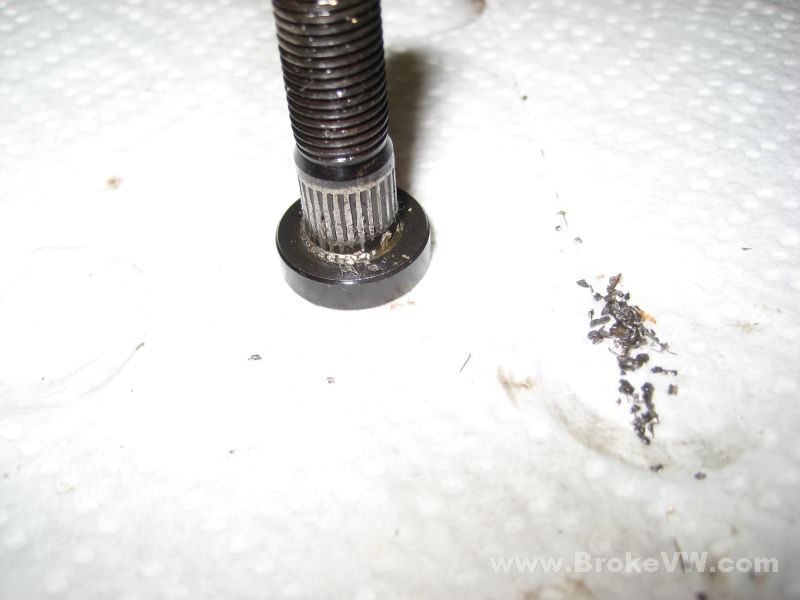
I went and pressed the bolts out partially to get a look at what was going on... if I was right, they need to come out enough to be cleaned and then pressed in again, if I'm wrong, I'll need to buy an ARP bolt kit... as it turns out, I'm right, they're gobs of garbage under the bolt heads now on the 2 I pressed in, and they need carefully cleaned, as this LSD has small holes in it for lube and so on that I don't want those pieces getting into...

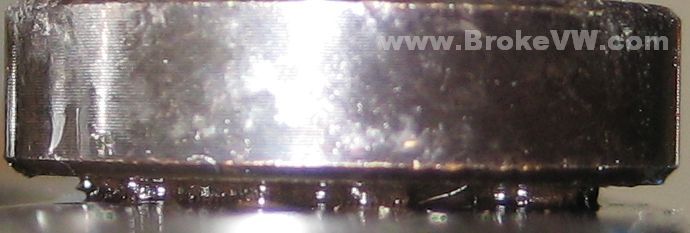
Look right around the head of the XZN style bolt there... those small pieces of stuff.... that's steel from the splines of these bolts... that all will need carefully checked to make sure none of them get into the LSD and they're all removed prior to install... and that is a PITA...
You can see the garbage is wet with oil from the install. I'm curious if a VW kit would do the same thing in the LSD, but I have one kit left, and at $120, I don't want to use the bolts to test anything. I'll let you know what they say about the bolts and LSD, and what they do about it, and then you can decide if you want me to carry on using the ARP bolts or if you want to try something else like a VW kit.
Well, I'll bag the LSD and parts up for now, carry on with the case, get it rinsed and blasted and rinsed out again and ready to be built, then I hope something is solved with the bolt kit, the next part of the build is setting the bearing preload for it, and I can't do anything else until that is done unfortunately.
Update 5/19/09
Here are pics I took before shipping the LSD back to Autotech.
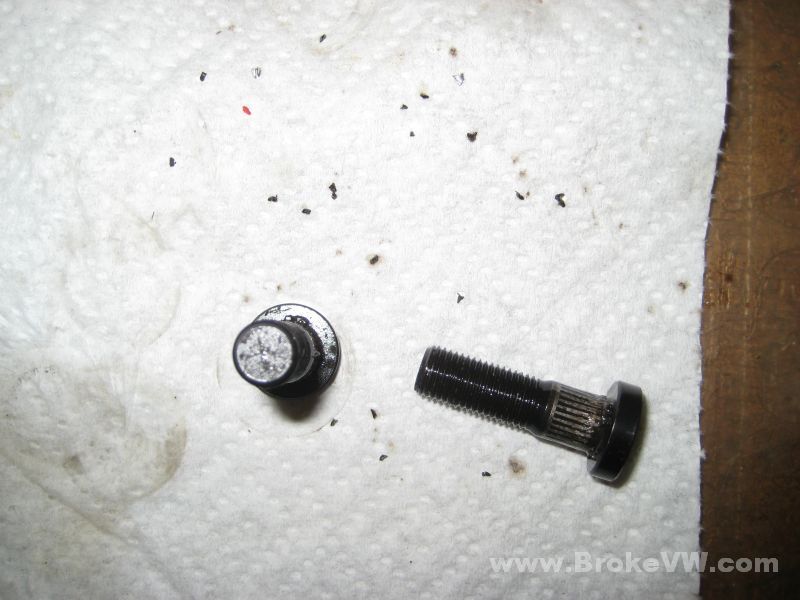
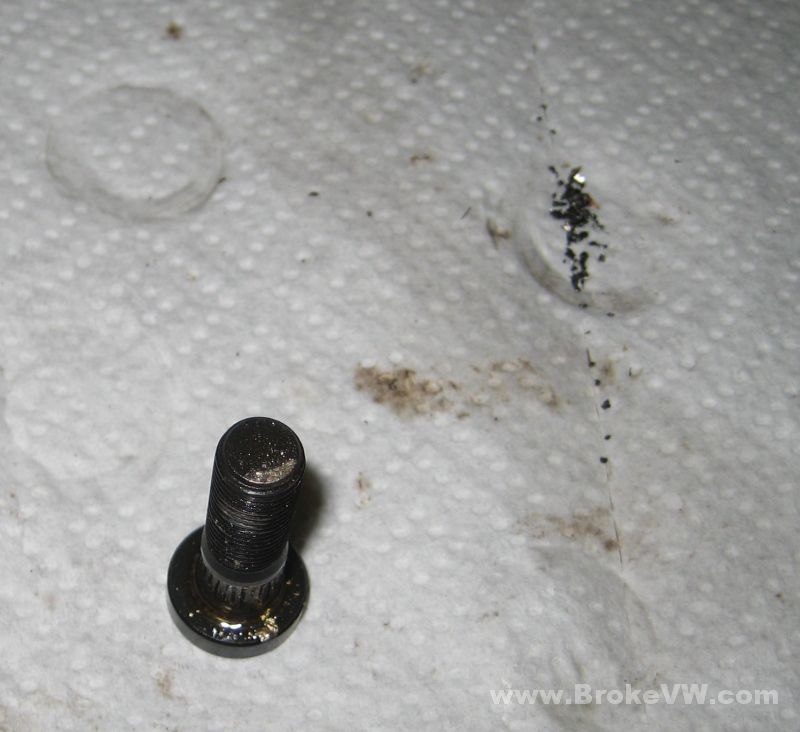
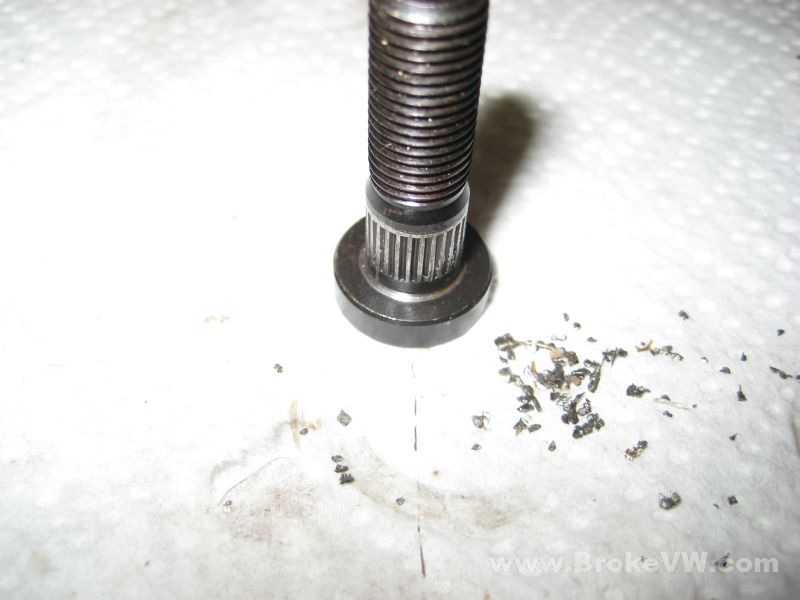
The bolts pressed back out of the LSD, the small black specks in the picture are the splines. Just one of those specks could cause a bearing roller to start skidding instead of rolling, and it would be death for that bearing in short order. When that bearing fails, it will take the rest of the bearing in the trans out as well. I have more than one dead trans here that failed catastrophically because of a failed bearing that allowed a roller to escape.
Just one speck has the ability to destroy the entire trans.
Update 5/20/09
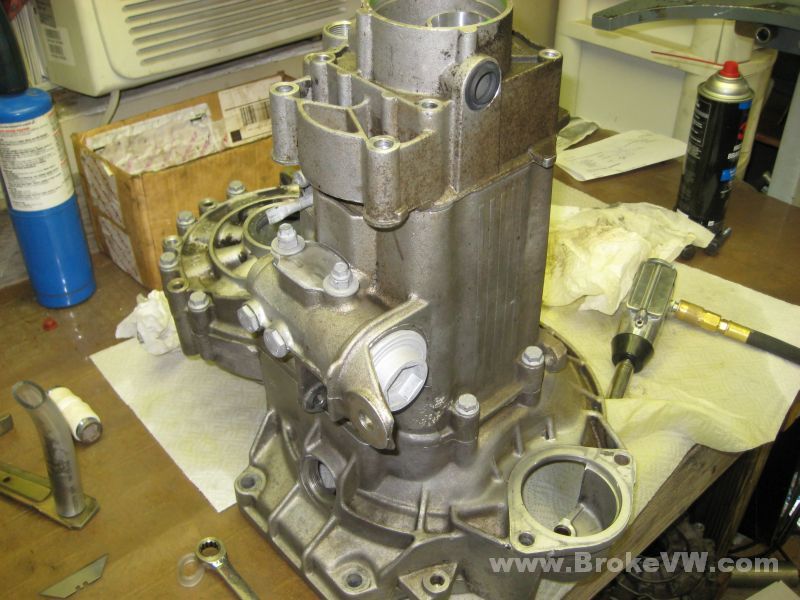
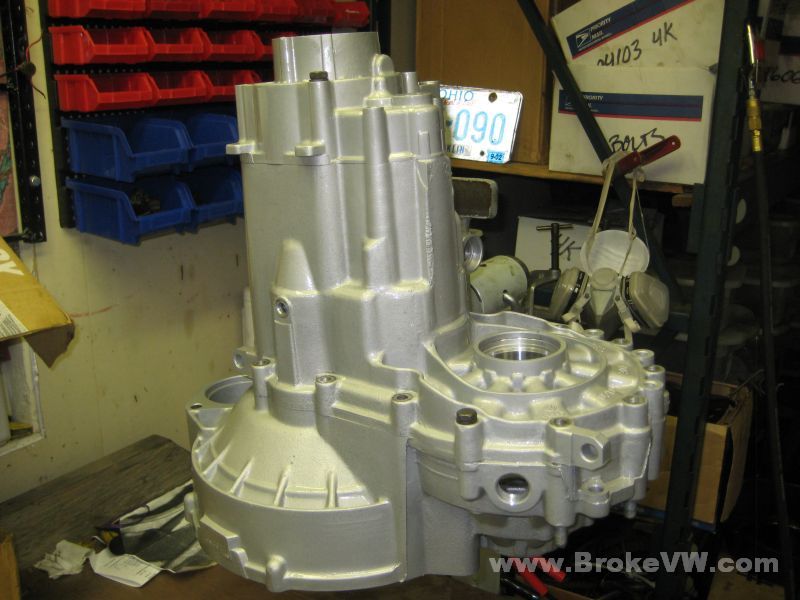
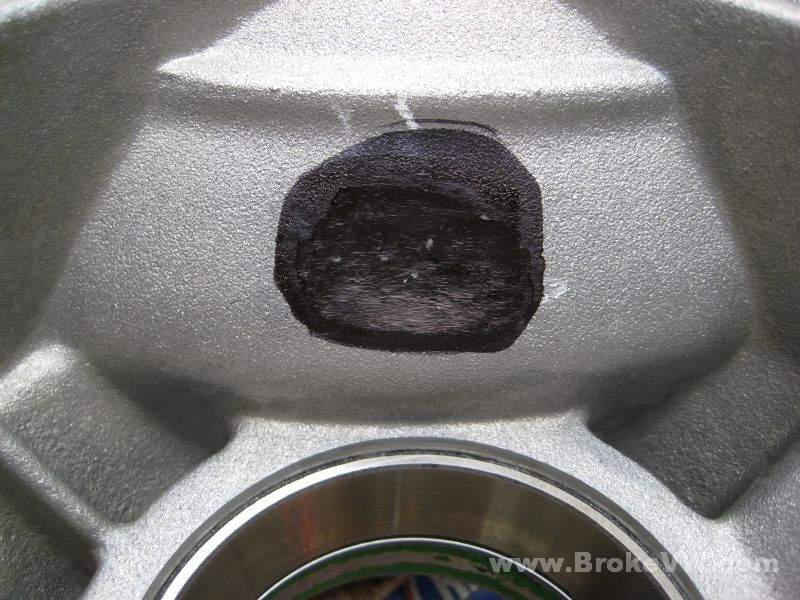
I had started to bolt the case pieces together to get them blasted and found some damage to the 5th housing.
The case gets bolted together, the internal bolt holes are plugged with spare bolts, the case holes are sealed with rubber discs held in place with old seals, and any place that sand can get in is sealed off. This helps LIMIT the amount of sand in the trans. Sand WILL get in. Sand gets EVERYWHERE. I'm just trying to prevent spending gobs of time rinsing the case out to get all the sand out. Sealing it up like this keeps most of it out, what does get in is easily rinsed out before being built.
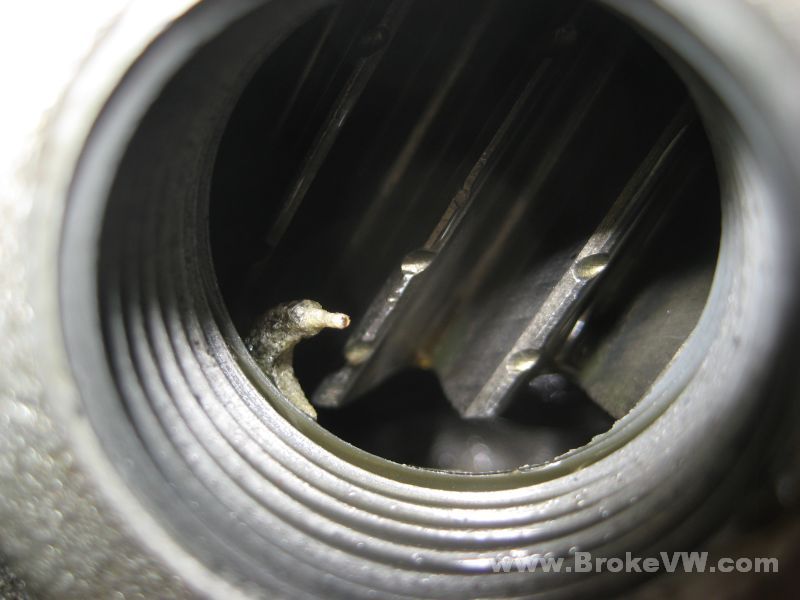
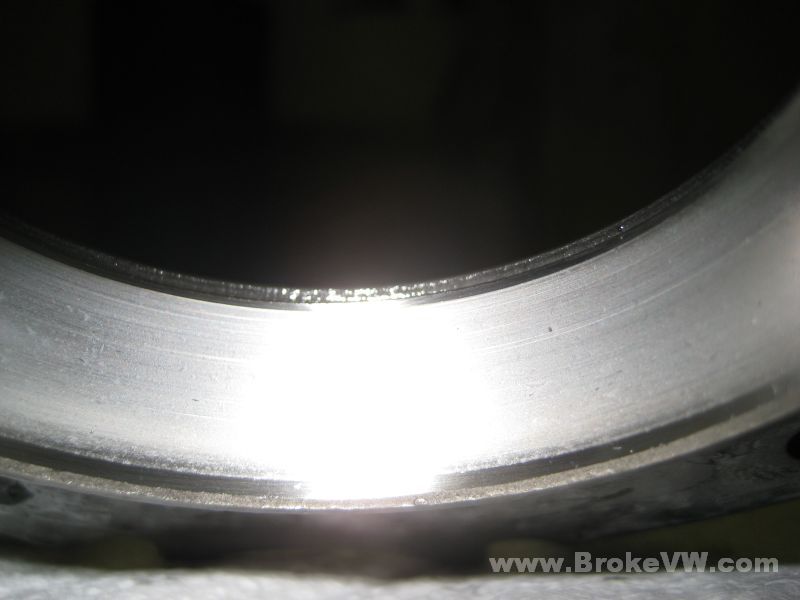
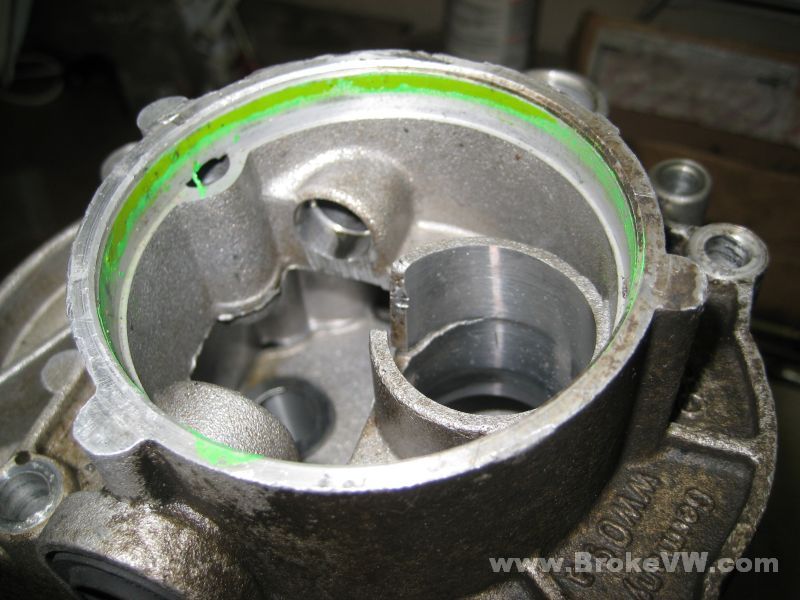
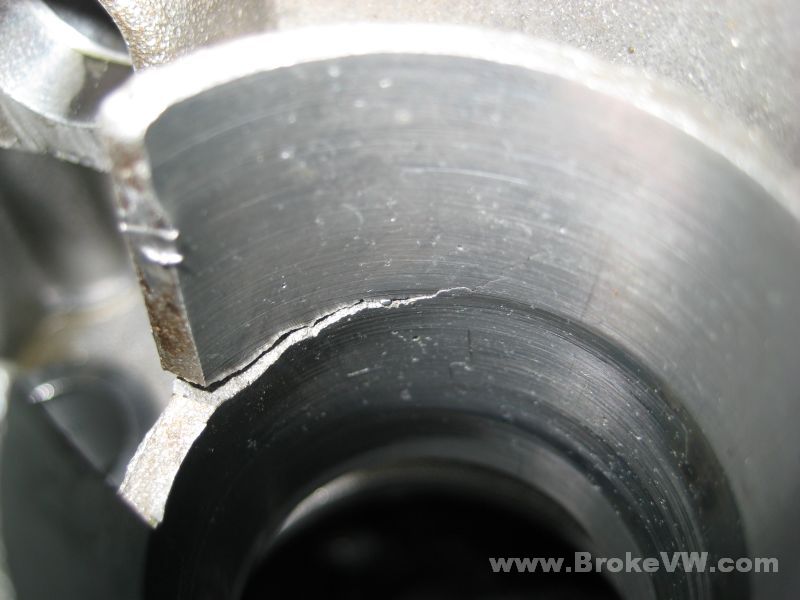
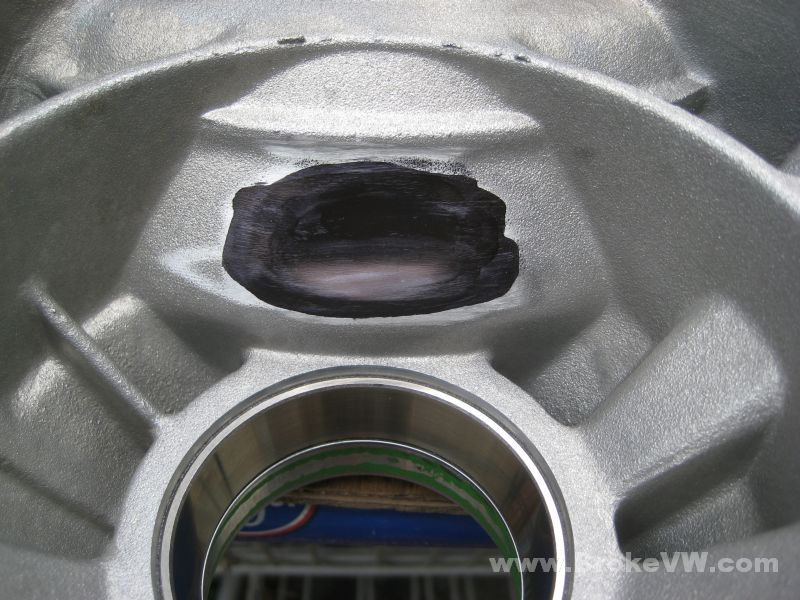
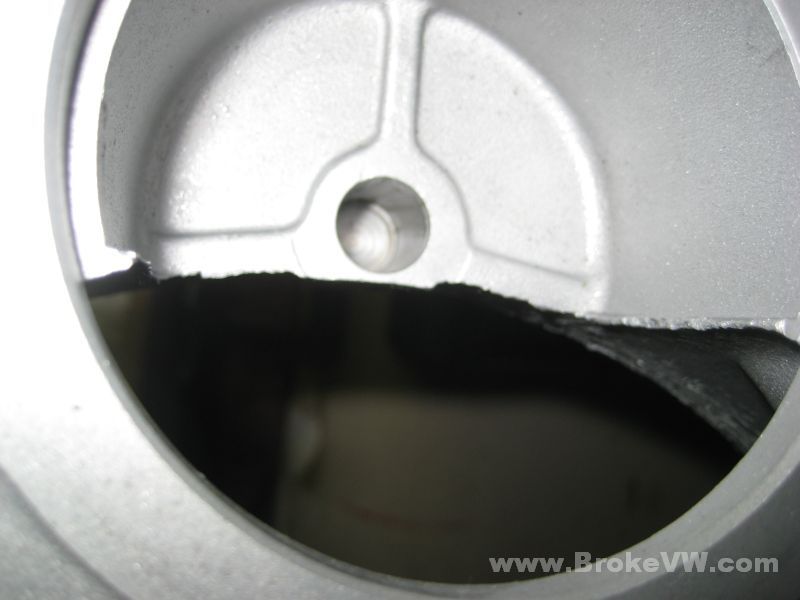
I went ahead and started sealing the case and bolting it up when I got to the 5th housing, and found the crack in the TO bearing bore..
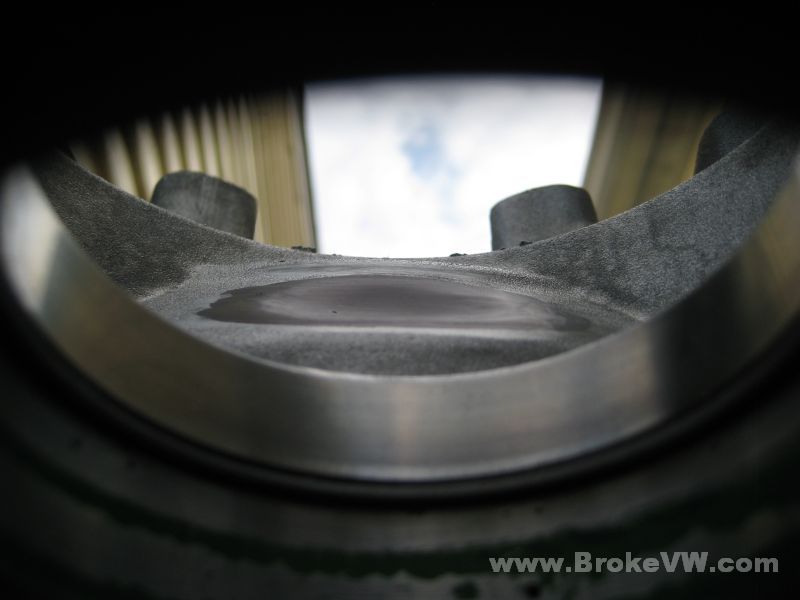
The crack runs around the wear line which is how I think I missed it in the parts washer earlier, but there was no missing it now as I was about ready to seal it up to blast it. If you look down the bore from inside, looking towards the green end cap, you can't see a thing. When you look down into the trans, that's when you can see the damage.
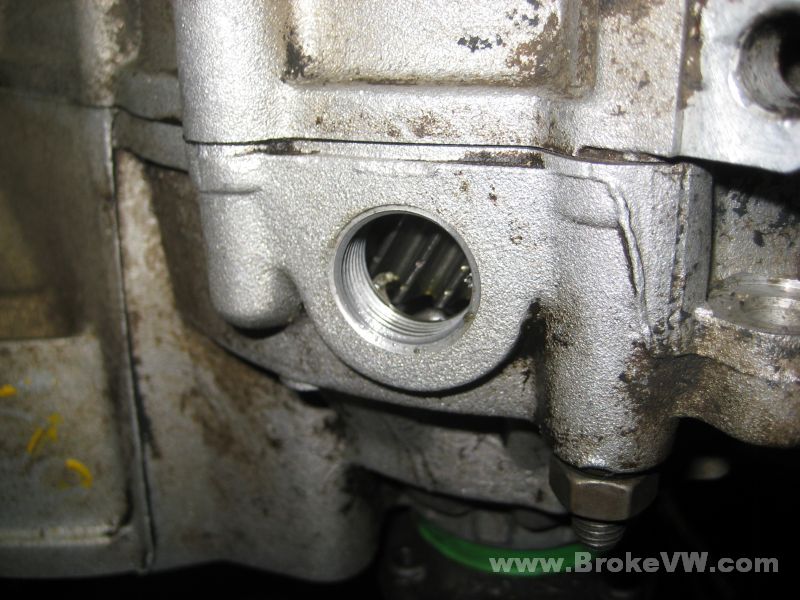
I'll have a look for another 5th housing, unless you have one in good shape from a spare trans you want to send... it'll save you $50 for a good used replacement if you have one. They're getting harder to find... lots of them are scrapped when the car is wrecked as the mounting tab on top for the support arm breaks off, and several are scrapped if the TO bearing fails and starts to spin in the bore, it causes grooves to form in the aluminum, and they're junk then.
If I have one, I'll try to update the trans with a new style 5th housing. Your housing is the old style, with the 17mm oil filler hole in the low spot. The new style housings raise the filler hole up 7mm, and this means you no longer need to add 0.5L of fluid into the speedo hole... when it is level with the side filler hole, it is done if a new 5th housing is used. I'll try to find a new style housing if I can if you don't have a spare.
Update 6/04/09
Still waiting on the LSD to return from Autotech, but I do have some pictures of the case being blasted.
Here is a pic of the trans after it has been sand blasted once. I then look it over, marking any spots that need more attention with a black marker. That makes it easier to see while wearing the blasting hood, and once the black is gone, the stain under it probably is as well, so it works fairly well. I still miss some spot, always, and I find it during the rebuild, so don't be surprised to find some spot with dirt on it, or a little nook that was missed in blasting. It is amazing how many little places there are for stuff to get into on these things!
I recently changed brands of glass bead. The usual supplier informed my that the mfg. of the glass bead I used went out of business. They had no bead. I drove around for a few days to several places looking, I finally found some, it was supposed to be #80 bead like what I usually use. One of the mfg.'s are lying to me, because this stuff is a finer glass bead, and it doesn't cut as well. It does leave a nicer and smoother finish though, so while it costs a bit more in bead media, (both in consumption and actual price per lb.), the results I think are superior to the other trans I have done. I will be buying more of this bead media, I like the finish a lot.
Let me know what you think of it...
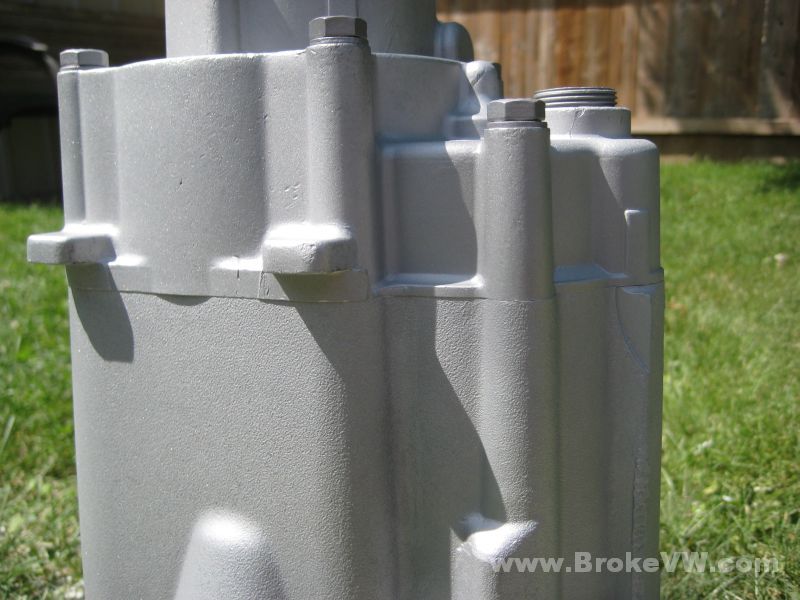
Here is a close pic of the 5th housing compared to the gearbox half of the casing. There is some texture difference, they were cast at different times, so they don't match exactly, but they're pretty close...
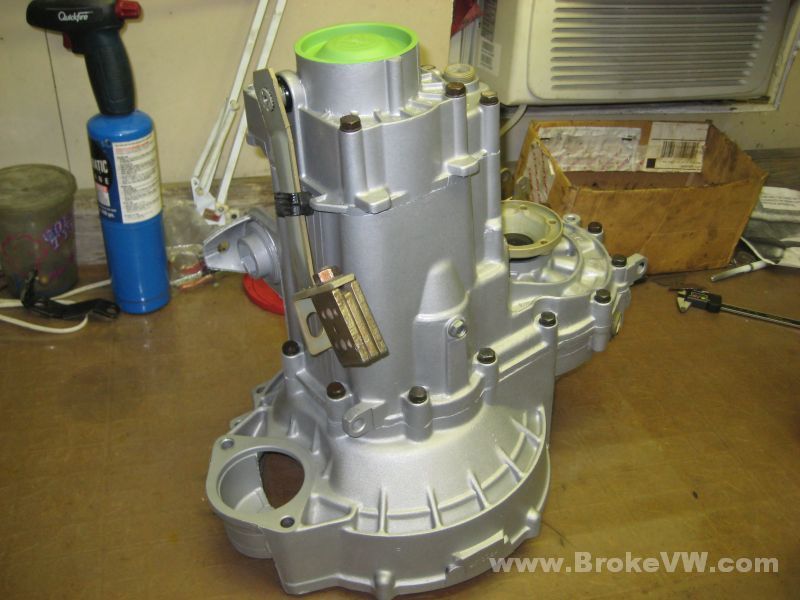
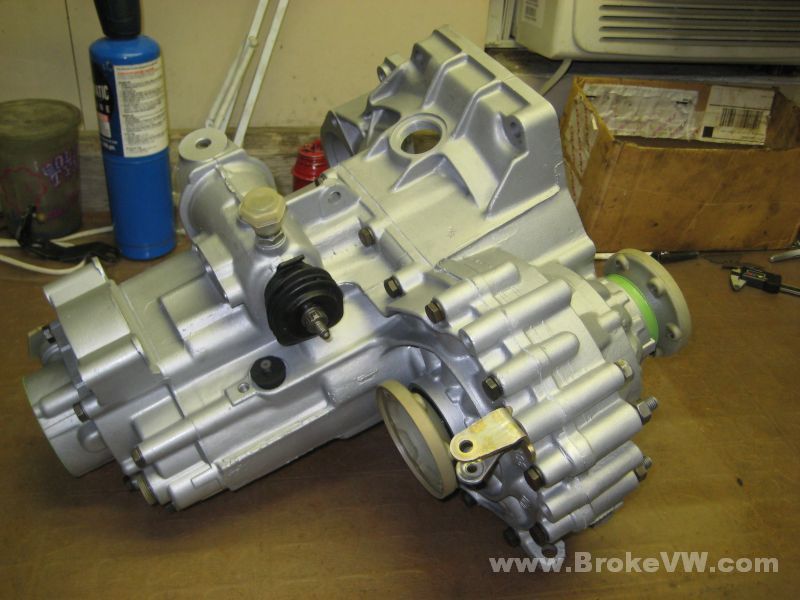
Some pics of it indoors with flash... I like the look of it, and it feels nicer I think....
I'll work on getting it split apart and rinsed and dried out, and then I can have it ready for the LSD to arrive. Looking at the pic above, that 5th housing looks like it matches the case now.... at any rate, it looks better :)
Update 6/08/09
Well.... I think there is still a problem with the bolt kit or the LSD. Last I heard ARP was sending Autotech an undersized set of bolts, and Autotech pressed them in... but this still looks like there is some debris.
Your parts laid out, ready to get started, but I wanted to give that LSD a good close look...
While looking, I noticed a couple bolts didn't sit flush. Maybe they didn't press them in fully, but while looking through the lighted magnifier, I saw something catching the light, and fished it out with a razor blade. It is a piece of steel, it is shown there by itself to the left of the bolt head... not the flat looking white spot, but the chunk of garbage there a little further to the left...
Here is a pic showing one of the bolts not sitting flush... it is easy to see when you compare it to the next pic, which looks OK...
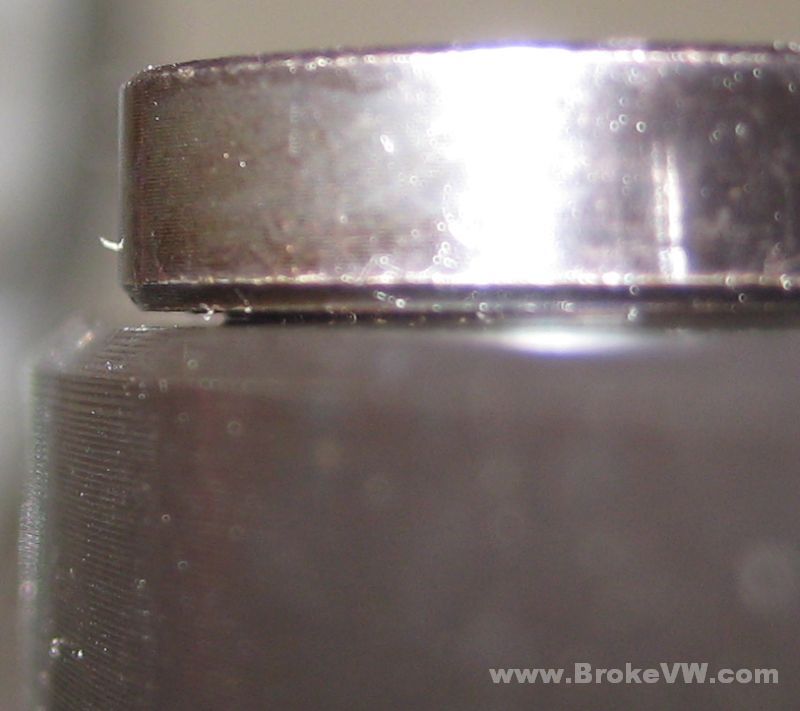
In this pic, you can see the chamfer on the bottom of the bolt is sitting flat on the housing compared to the pic above....

This looks like more garbage under this bolt catching the light of the camera flash...
I went ahead and tried to press the 2 bolts in not sitting flush, and they wouldn't go. When they wouldn't go in any further, I tapped one of them out a little bit. That little silhouette visible under the head there on the right is a piece of steel spline....
A shot looking up under the head reveals the splines doing the same thing. Maybe not as bad, but it's still debris...
Here is a pic of a rather large chunk, it looks to be 3 splines shaved off together...
The one bolt I tapped out a little had garbage under the head, and to be honest, it tapped out rather easily. I think I'll tap it out fully, and have a look inside the bore of the LSD, see if the splines cut in at all.
Update 6/11/09
Some more pics of the rebuild work...
The trans case now wet with WD-40, it makes it look a little different, but the reason for it is that it keeps the trans clean through the build. Grease and oil on my gloves will stain the raw aluminum case, making it look nasty when it is done. To keep it clean, I spray the case with WD40, and keep it wet as it dries out. This allows me to touch the case, any oil or grease will be held in suspension, not staining the case. To clean it, I just wipe the mark away with a towel wet with fresh WD-40, and it makes cleaning it up a snap after it is built. Carrying the trans from the rotisserie to the press will put the fingerprints on it.

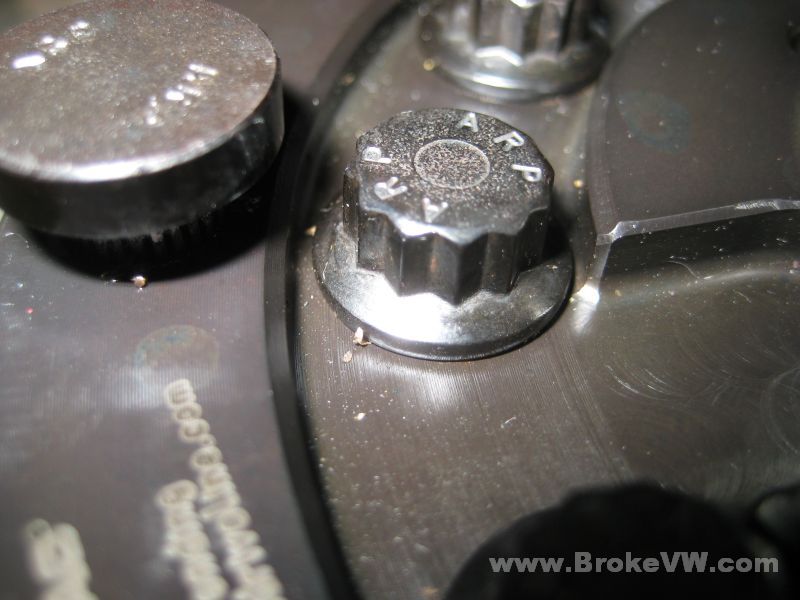
Here are a couple pics of the bolts I removed after Autotech returned the LSD to me. I removed any specks I found, you can see the pile of them beside the bolt...
In this pic, you can see the splines have built up around the shank of the bolt under the head. Some of these won't be an issue, they'll stay trapped in the chamfer under the head in the housing, but some might not. With them out of the way, I don't have to worry about it...
Here is a pic of the bolt after I picked the splines out with a razor. Some were still connected, or stuck so bad I couldn't pick them off, but the majority of them came off, and if they won't come off after picking at them, they won't get into the rest of the trans.
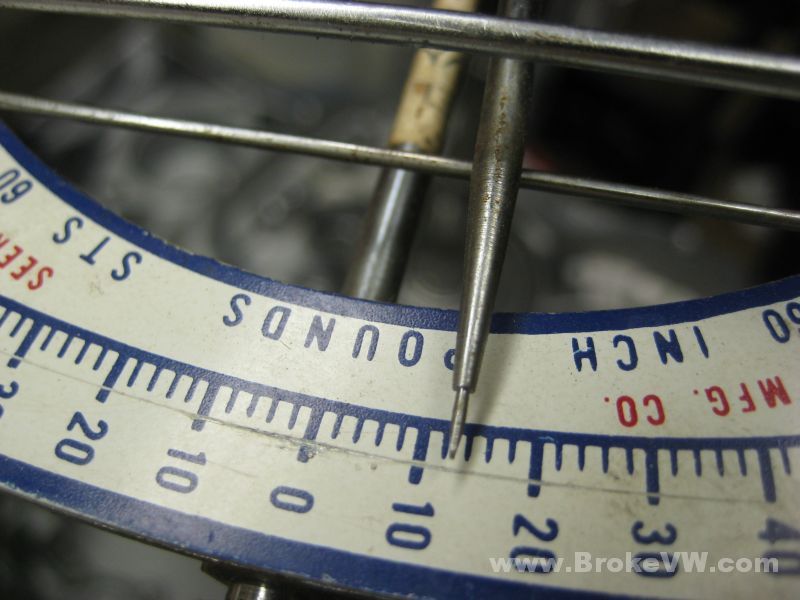
Here is a pic showing the output shaft bearing preload being checked by measuring the turning torque. The original shim was used, and it brought the bearing back into spec. It is at the upper end of the acceptable range, but it still falls into spec. ..
VW spec calls for new bearings to have 4.4-13.3 in-lbs. of turning torque, the pic shows a touch over 12 in-lbs, but it measures out to about 12 even when spinning it without trying to snap a pic...
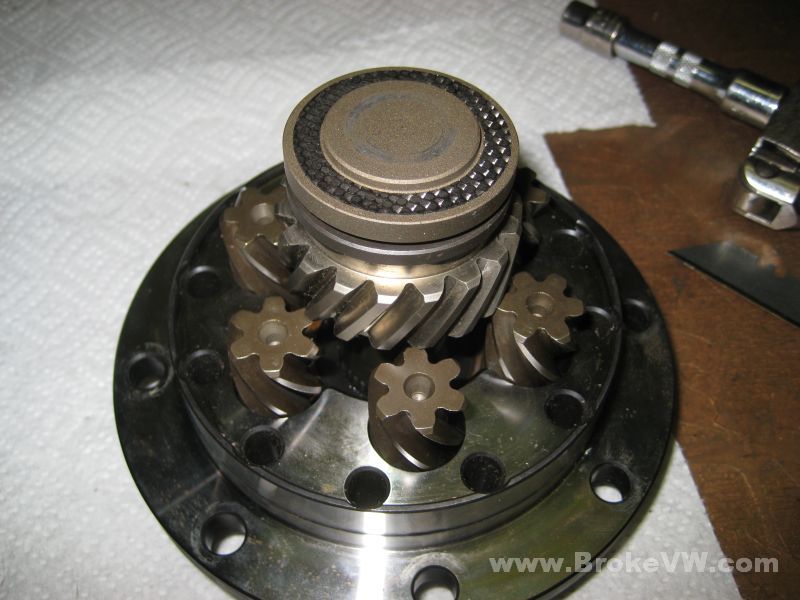
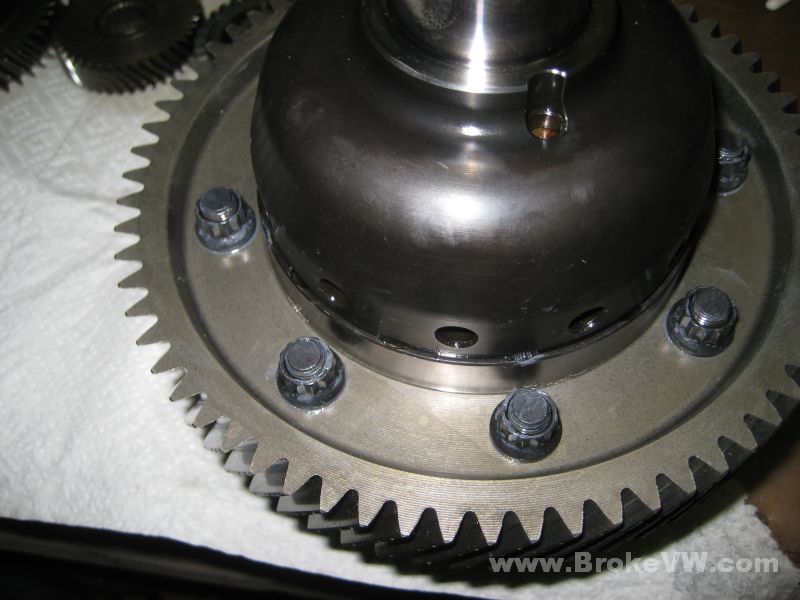
The ring gear heated and pressed onto the LSD... so far, so good...
Adding a little assembly goop to the face of the nuts, and a little inside so the treads all get fully coated from start to finish...
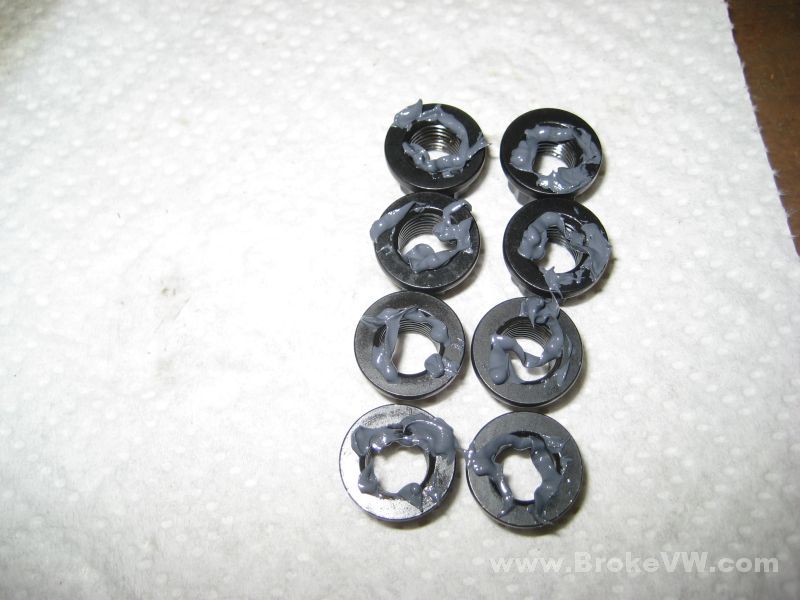
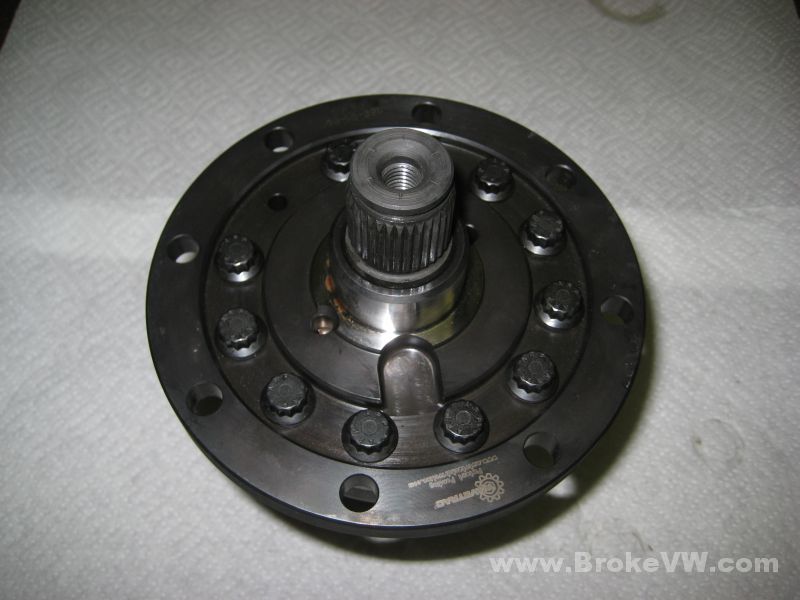
Installed, and I backed a few off to check the lube got into all the threads and on the face of the nut. They are all torqued evenly to 40 ft-lbs as per ARP instructions (normally the bolts install to 52 ft-lbs)
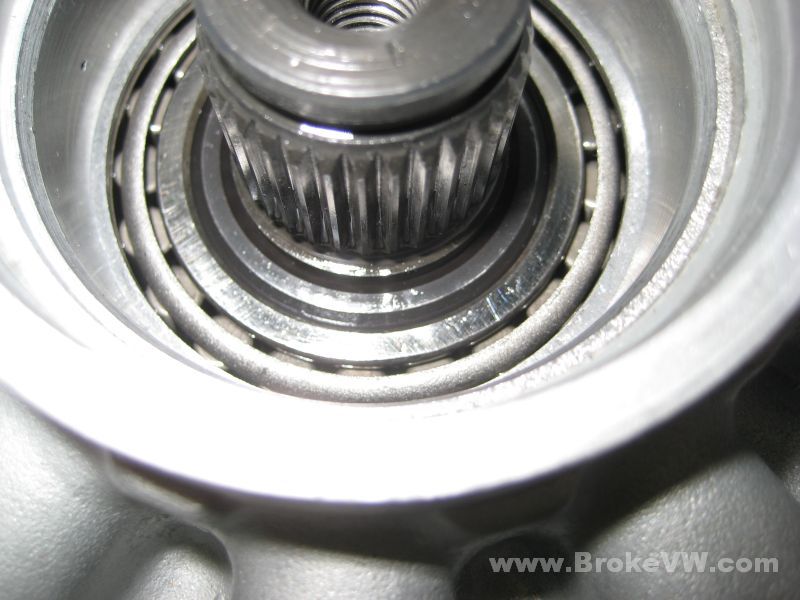
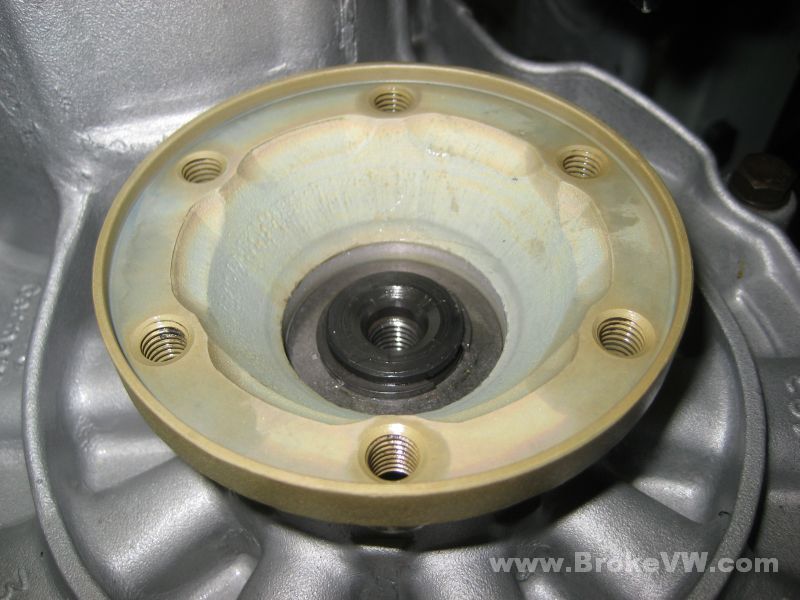
New bearings pressed into the bellhousing. There is a standard 1mm shim behind the diff carrier bearing race, and the new output shaft bearing and original shim is installed, and the new output shaft roller bearing is also pressed in, those are all cryogenically treated as well. All the bearings in your trans are cryo-treated, save for the plastic gear needles and the TO bearing...
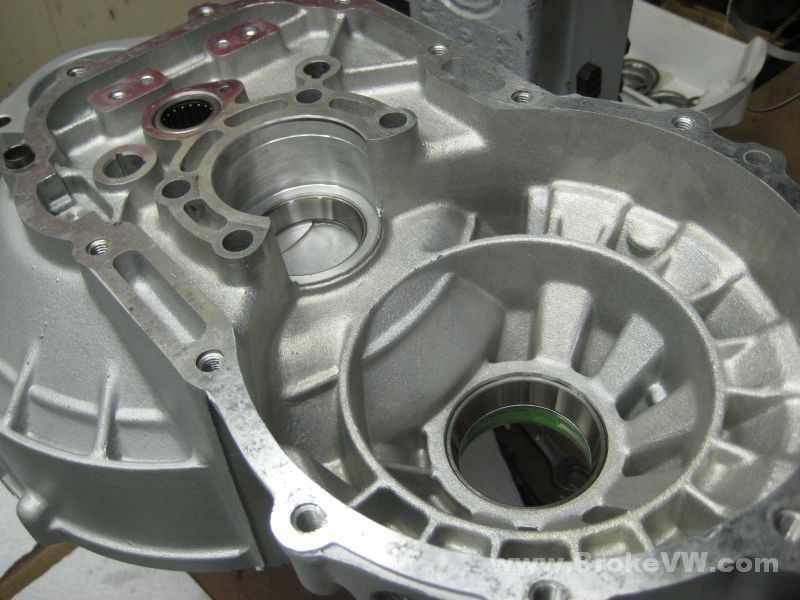
The 50-ton shop press (I call it Big Red) makes short work of pressing the bearings on, but when heated to the proper 100C/212F temps, they drop right on usually. On this install, one dropped on without any force beyond gravity, the other needed pressed on, but it was very smooth, and there were no issues...
And after a few steps of no problems, we have reached the next hurdle in this build. I've learned something... next time I do an LSD install into an older 020 trans, I think I will charge more money on the labor :)
Autotech never mentioned this, but the LSD doesn't fit the older 020 trans. You have an older 020 trans. Hooray!
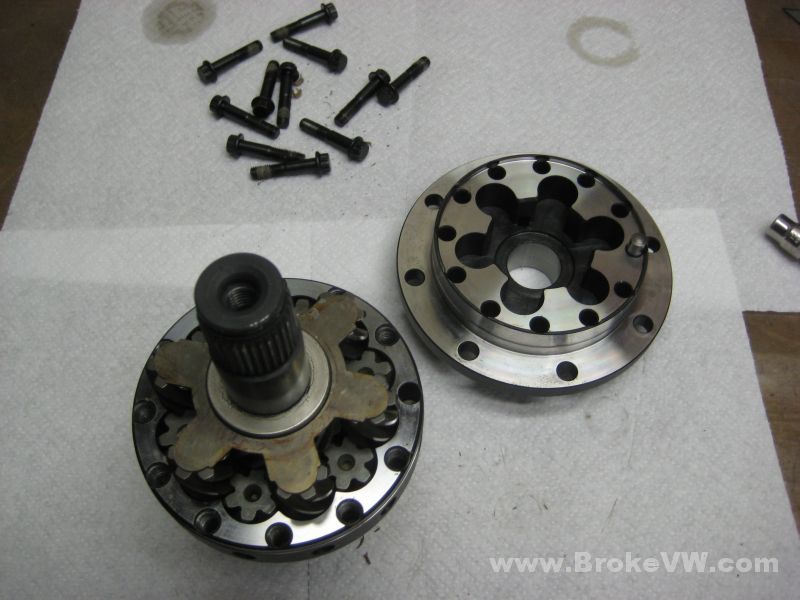
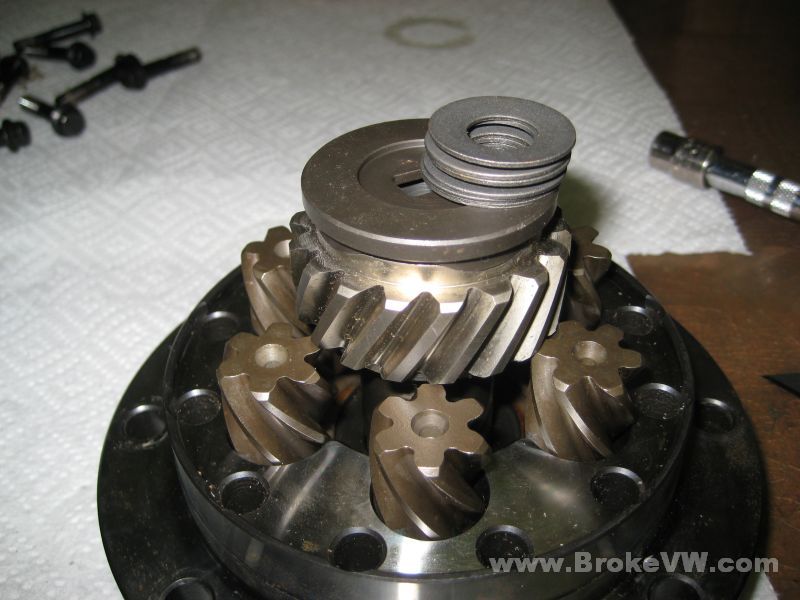
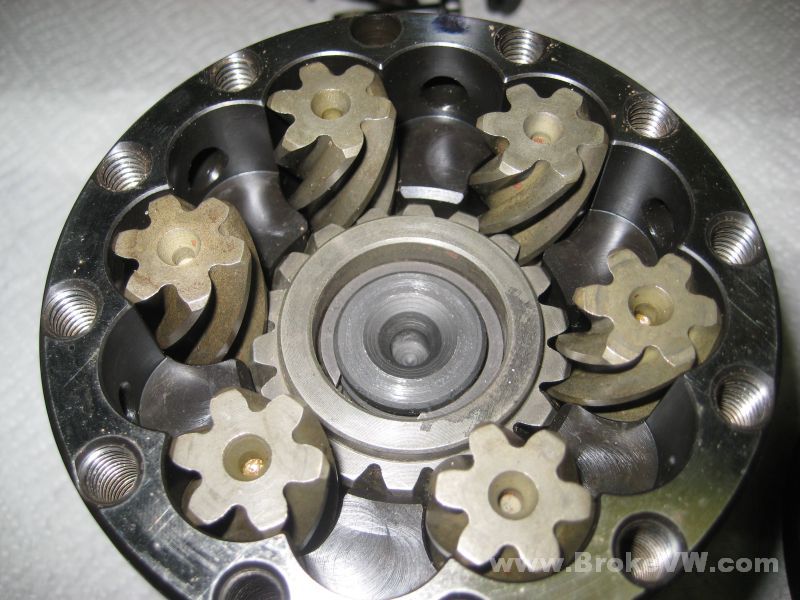
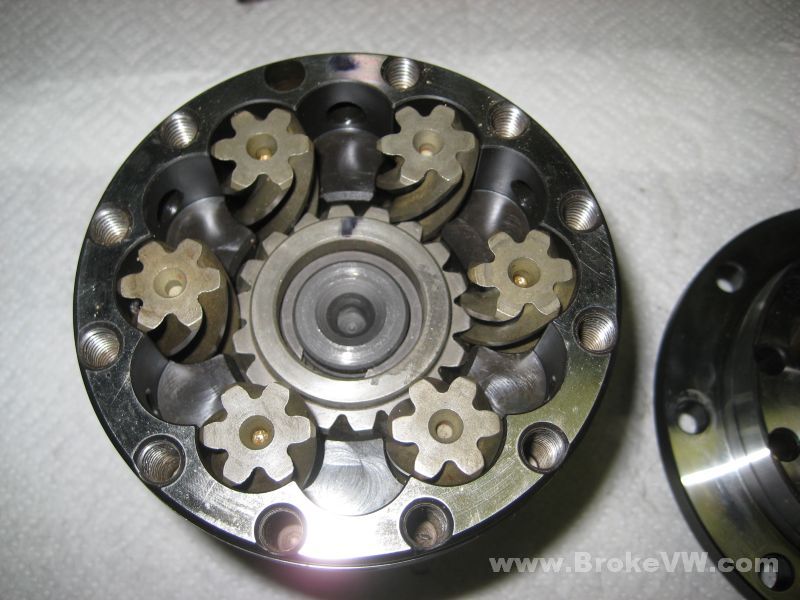
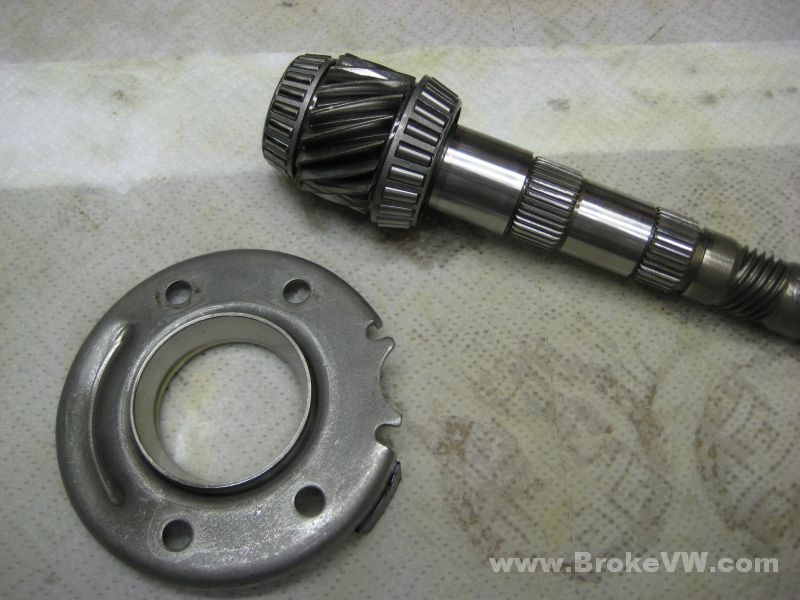
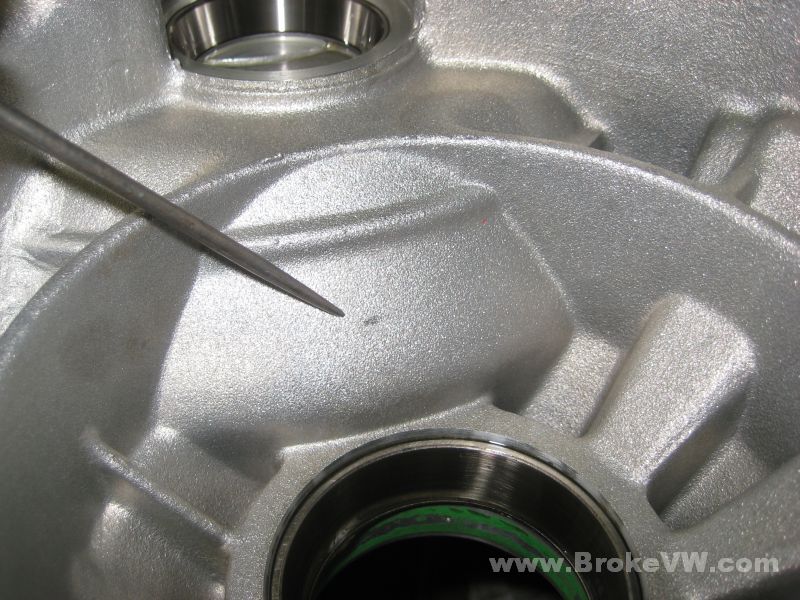
Right... on the Torsen LSDs, which is what the Peloquin, Quaife, and this Wavetrac is... there are side gears inside that can contact the casing on the early 020 cases. The older LSDs had the tops of the side gears partially exposed in half-moon cuts on the LSD housing. Here are a couple pics showing a Peloquin LSD, and the side gears exposed in the LSD partially poking through the housing...
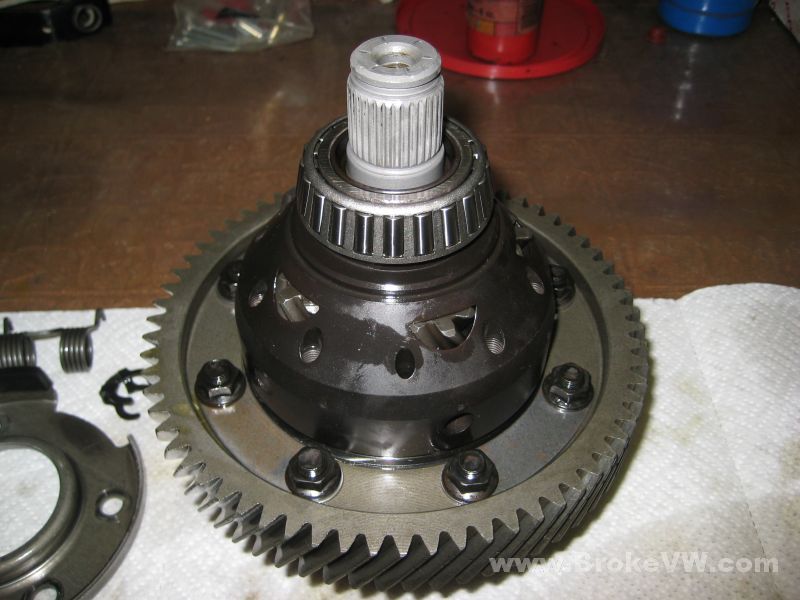
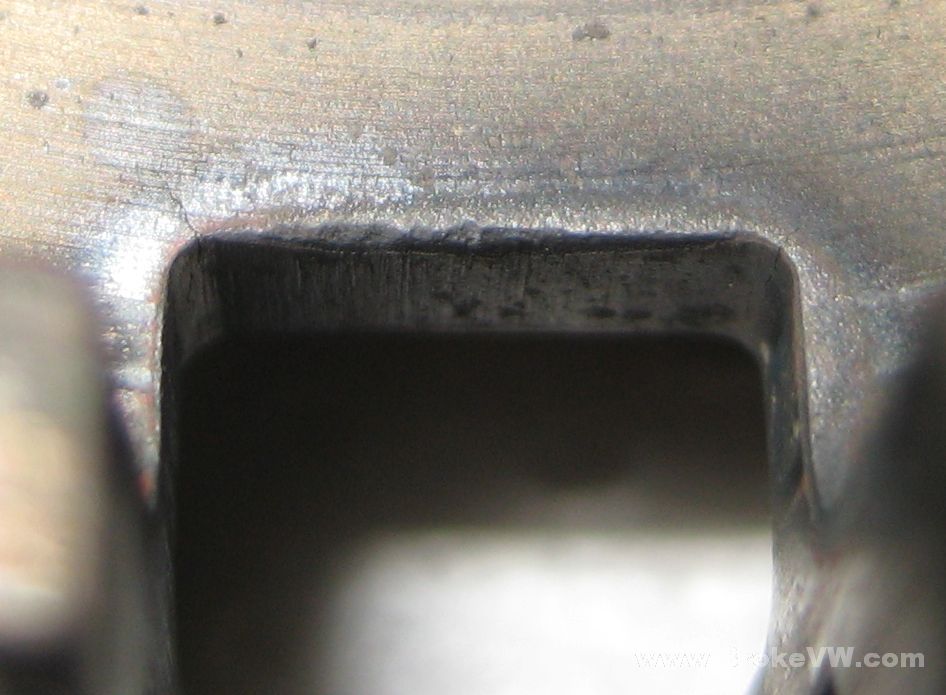
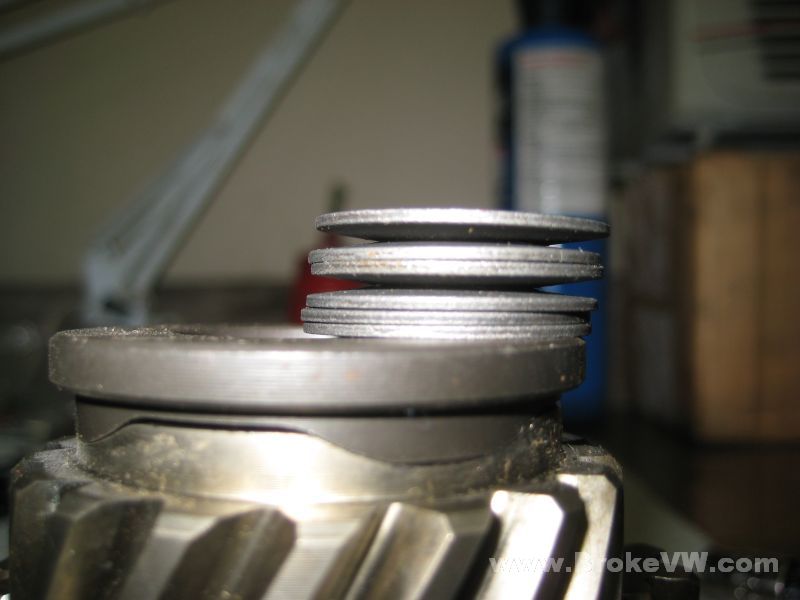
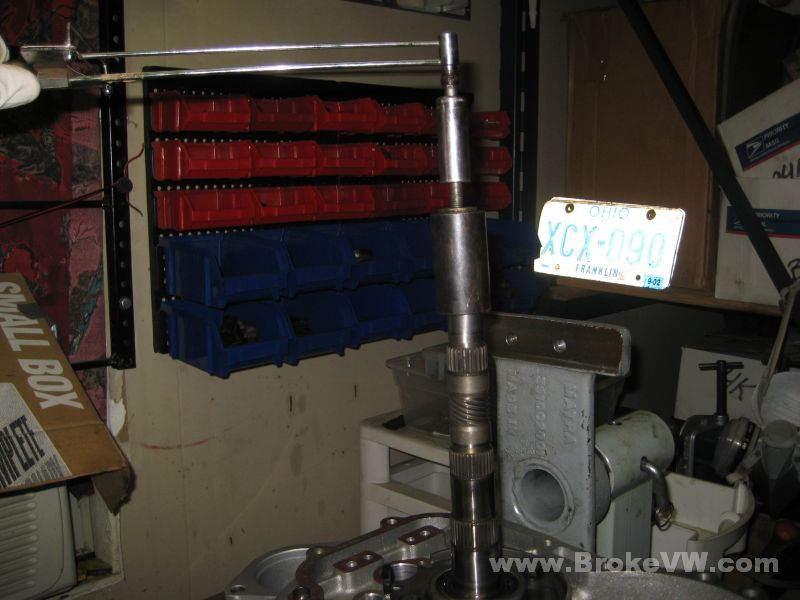
Here is a pic of your Wavetrac.... the side gears are in there, but covered up. Notice that little line running above the pointer in the pic?
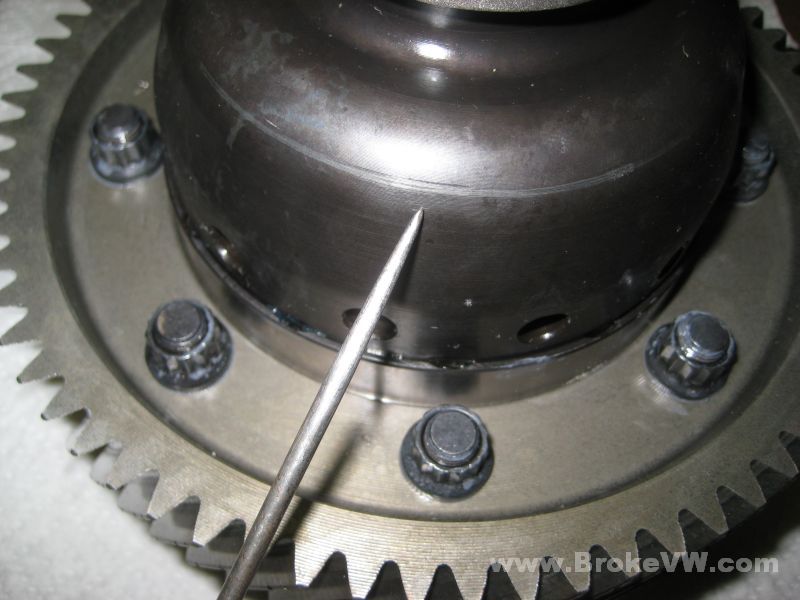
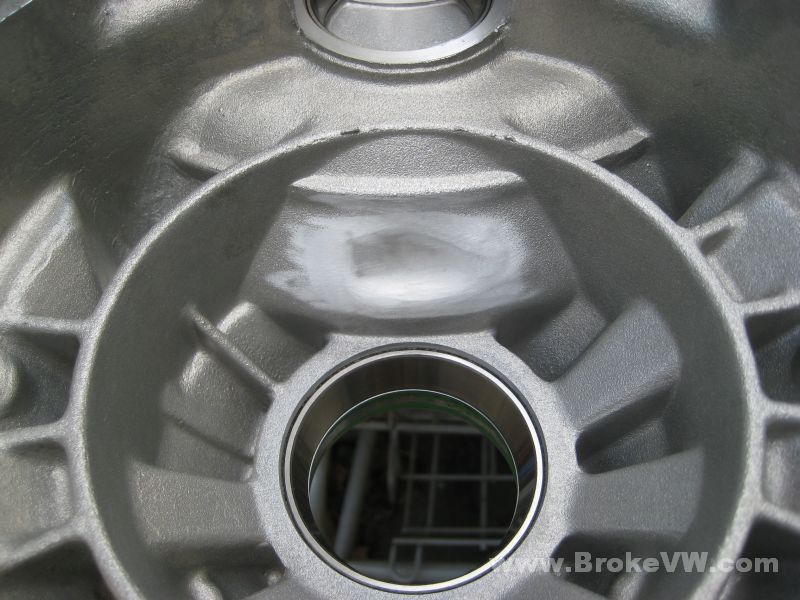
That line created this mark in the case... because the LSD won't fit into the case. It contacts the housing, and I need to grind the housing out, which really, really sucks. It means I have to pull those bearings out for the output shaft and the input shaft, and then grind on the case, sending powdered aluminum everywhere. This means I have to bag all those parts and get them boxed up, then I can start grinding. The diff needs to come out of the bag, and put back into the case and spun to see if it will clear. If not, more grinding after I bag the diff up again.
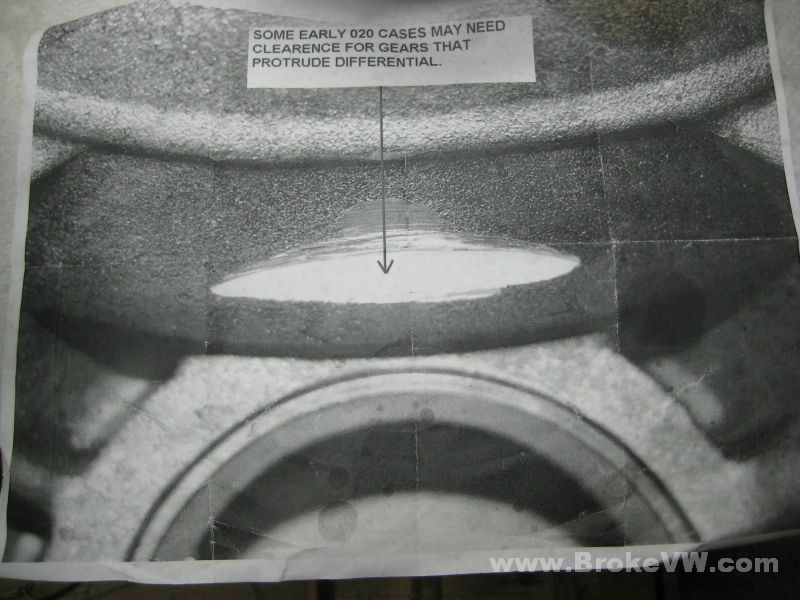
Here is a pic of the instruction sheet that is shipped with the Peloquin LSD units. Had I known this Wavetrac would also need fit like this, I would have not pressed in the shaft bearings into the bellhousing, and I would have made plans to grind the case out (perhaps during those couple weeks the LSD wasn't here!), instead of having all the parts out and bearings installed, I would have known to leave them covered until the grinding was done.
Also, notice how clean that cut looks. I do not have the equipment to do that. I had to grind my last rebuild to fit the Peloquin pictured above, but it looks rough. It looks like someone attacked it with a rotary grinder, because I did. The cut below was done with the bellhousing securely mounted into a milling machine, and the material was cleanly and evenly removed.
My concern is that the case isn't thick, and while grinding to clear the Peloquin, I was nervous about going through it. If I make a hole, it will need welded up, and that will be bad. The Wavetrac has even more material there it would seem, because the gears are fully covered, making the cut needed in the case even deeper I think. I'm going to have to build a tool to measure the thickness of the case in that spot, so I know where to stop.
Tomorrow, I will contact Autotech. I'll let you know what they have to say.
Update 6/12/09
I've spent the day grinding the case. It took me a long time because I wanted to take just a little off at a time, I was afraid of grinding through the case.
Here is a pic showing the grinding started....
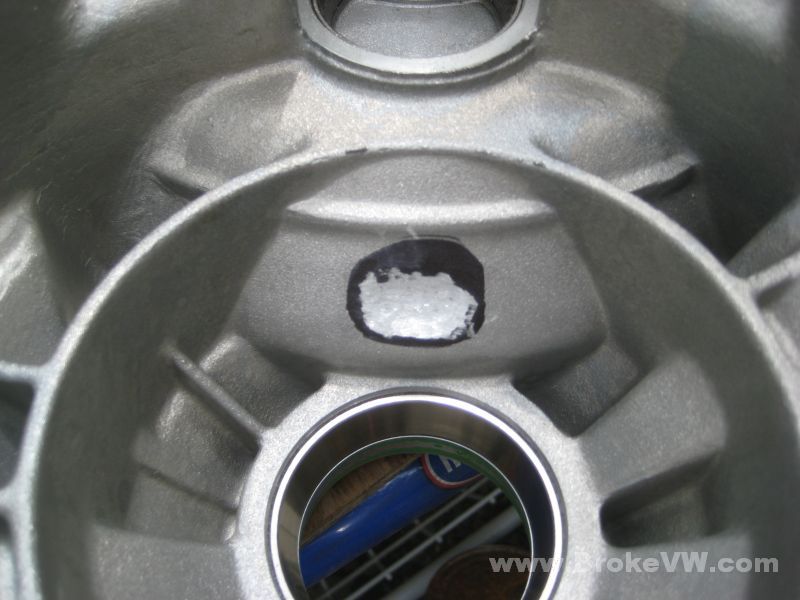
After removing some material, I would blow the case out with an air line, wipe the bearing race clean, and paint the area black with a magic marker...
...the diff would then be sat inside the case, and spun around, leaving shiny spots where it was contacting...
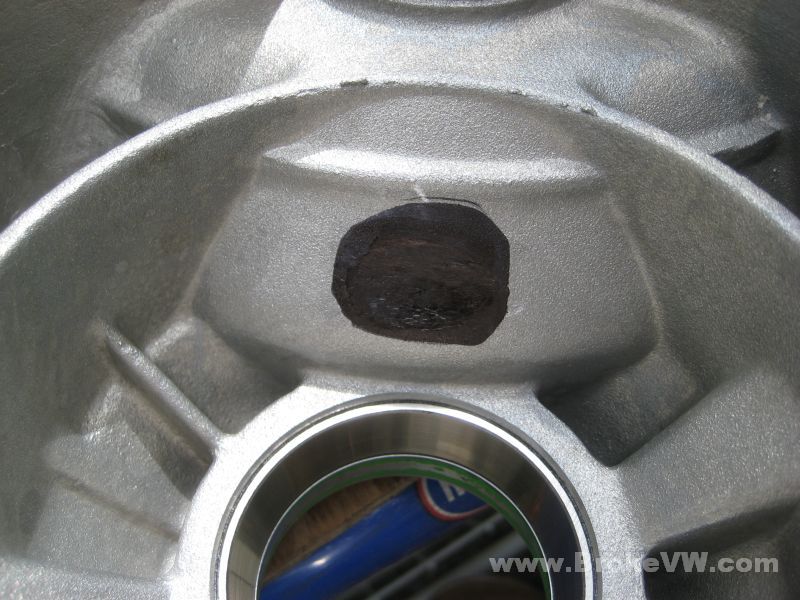
The diff would be lifted out, put away (the grinding was done outside, thankfully I had decent weather), and I would grind the marks again. I would then blow the dust away, wipe the bearing, go get the LSD, stick it in the trans, spin it, lift it, and repeat. I did that all day, I had the diff in and out probably 30 times or more.
Eventually, I got it to the point where it no longer contacted the case. I then went over it a few more times, this time with a fine tool, I used an 80 grit flap wheel on a rotary tool to smooth the area out and to remove a little more material. I painted it up a final time, and checked the diff for contact one more, and when it cleared again, I sanded the paint away, removing a little more material in the process.
Here are a few pics showing the amount of material removed. It is a good little amount, and it is JUST enough...

All the black magic marker has been sanded away, the case thoroughly rinsed and I can now get started on adjusting the diff bearing preload...

With the grinding taken care of, the diff bearing preload can be done. After checking the play with a dial indicator and selecting the shims, I checked the turning torque...
Spec is 11-31 inch pounds, your bearings measured out to a little over 16 in-lbs, so they're in spec...
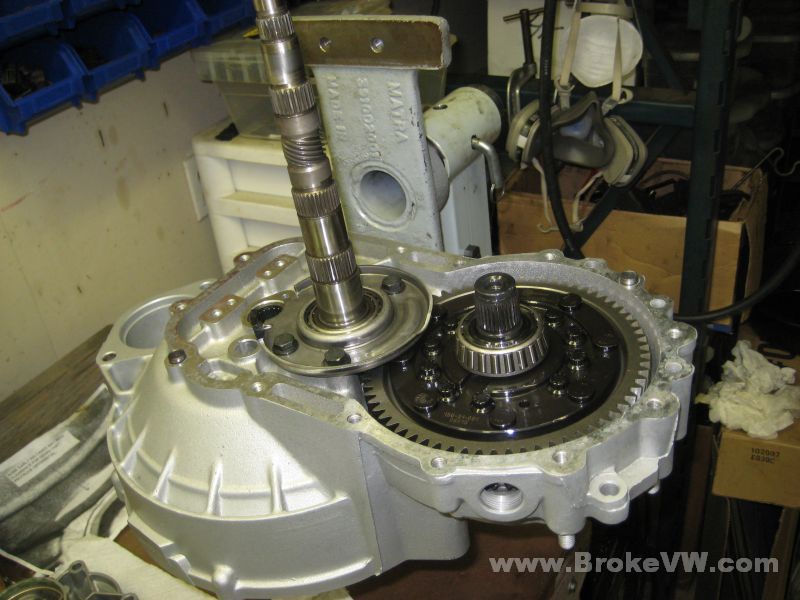
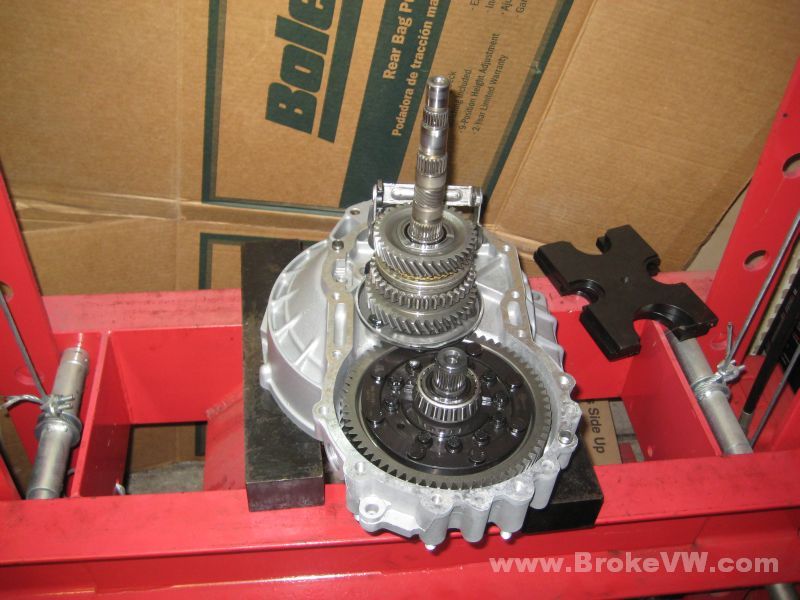
With the preloads all done, the actual build can finally start, about 2 weeks later than I wanted, but it is time to start putting everything back together now. The LSD is installed, then the output shaft gets bolted in...
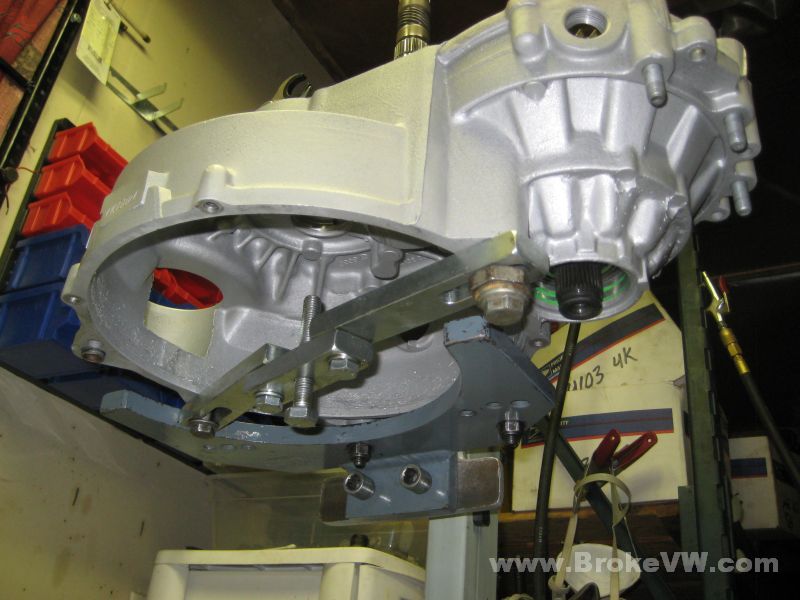
A support bar is installed under the trans for pressing operations later on. I shouldn't actually install that thing yet, it isn't light at all, and it just adds to the weight that I have to carry from the bench to the shop press, but I have no clue what I'm doing out there :)
The thrust washer, 1st gear, and the 1st sync ring gets installed, along with the reverse relay bracket supports...
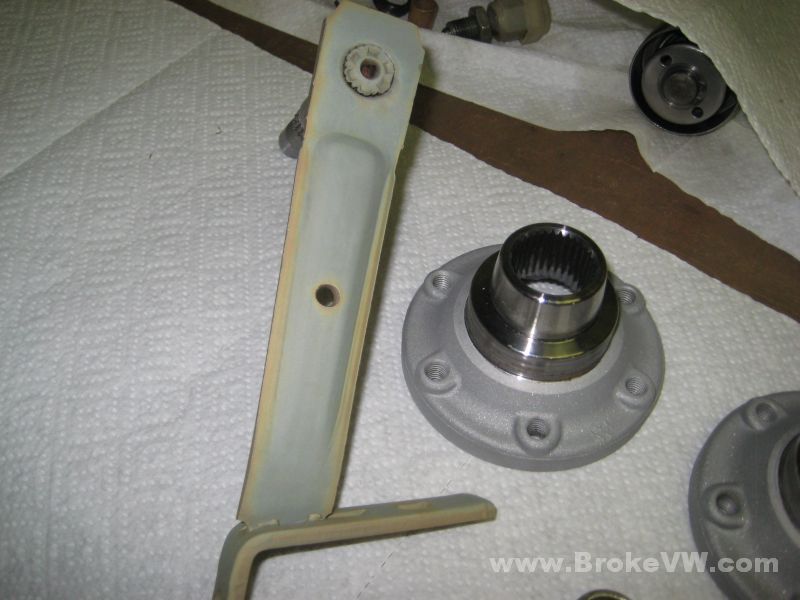
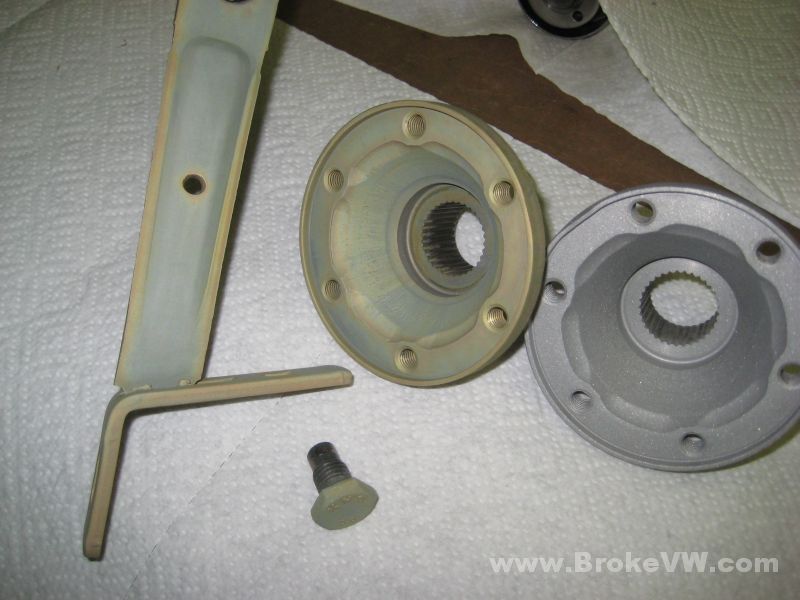
The parts left to install, not counting the flanges which I still need to blast and plate, along with the release arm, drain plugs, and the 27mm selector cover...
After letting the parts heat up in the stove to 210F, I brought out the 1st/2nd sync hub, and pressed it onto the output shaft (hardly pressing it really, it dropped on pretty easily once heated). The sync springs and keys get installed into the hub, then the operating sleeve is slid into place holding the keys in. 2nd gear needle bearing race is then heated (I just warm it up with a propane torch, it is small and warms very easily) and dropped onto the shaft, and allowed to cool. The race sometimes are loose on the shaft, you can drop them in place without heating them, but if you go ahead and heat them up, then let it cool in place, the part will actually shrink a small bit, and get tight on the shaft once again, the way it is supposed to be. Anyway, the needle bearing and 2nd gear gets installed once the race has cooled...
A hot 3rd gear gets installed onto the output shaft and is allowed to cool down, then the adjusting circlip is installed. They call for the largest circlip you can fit to be used for 3rd gear, and they offer them in 0.1mm increments up to 3.0mm, but most trans use the 3.0mm without any problems. Your trans was no different, it accepted the 3.0mm circlip for 3rd...
4th is installed at the same time the input shaft is dropped into place. The 4th gear didn't need heated to be installed, but I found it to be loose, so I warmed it in hopes that it would shrink tight when it cooled, and it did a little, but there is some axial play on the shaft. There are no adjusting circlips for 4th, but as the gear wears, it gets loose and has some movement up and down (as positioned in the pics), and there is not much I can do for that. I will have a look to see if I have a small shim washer that can be used under the 4th circlip and on top of the gear to eat up some slop, but I might not have anything to fit it.
A little dab of RTV silicone will keep the magnet from rattling around. They can't go anywhere once the case is installed, but the RTV stops it from moving at all...

Reverse gear and the magnet installed...
Shift forks installed...
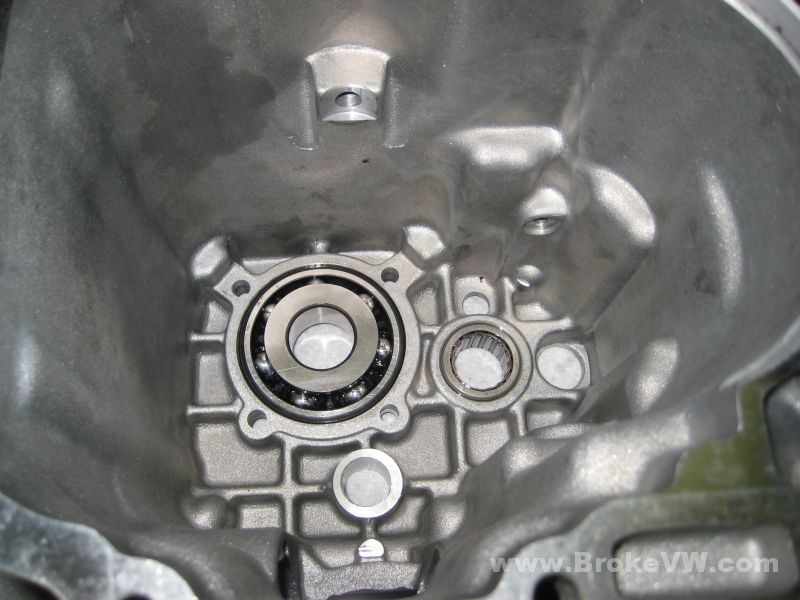
The input shaft large ball bearing and the output shaft roller bearing needs installed...
...and a few minutes later, 2 new cryogenically treated German bearings are installed!
That's it for tonight, everything gets covered up as usual while I'm not working on it...

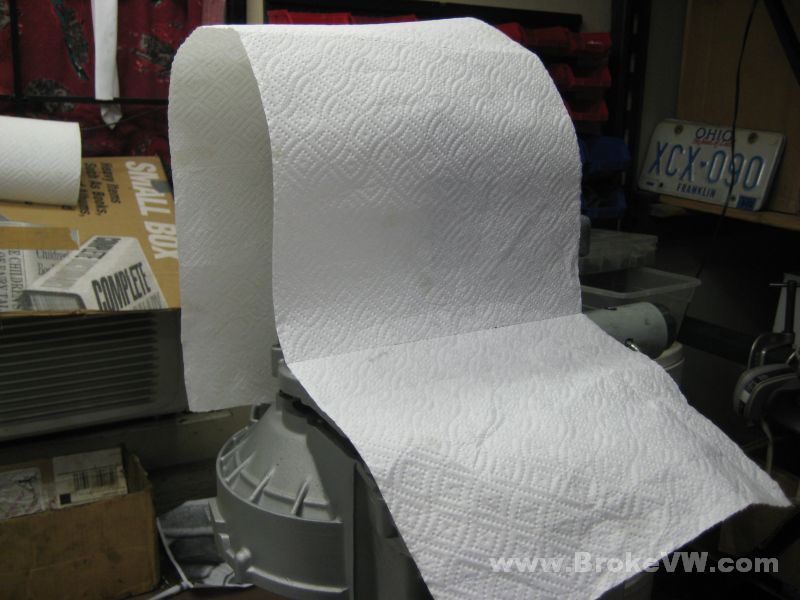
The case is just sitting up there, tomorrow I'll list it off, clean the gasket surfaces with brake cleaner, and apply some VW trans sealant paste, and press the case together. Everything will get bolted up and then the 5th gears, selector, flanges, 5th housing, etc. will need installed.
Update 6/15/09
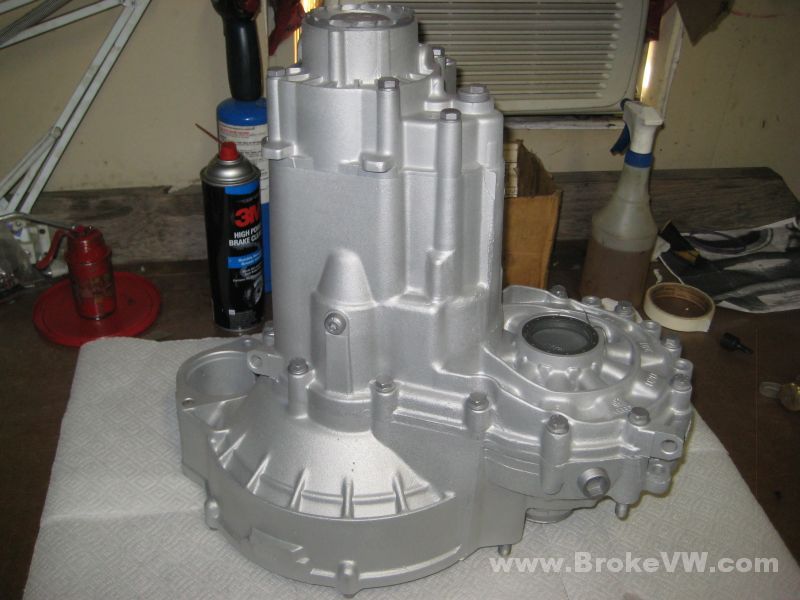
This weekend I managed to get the blasting and plating done that I needed to, and I was able to get the trans built.
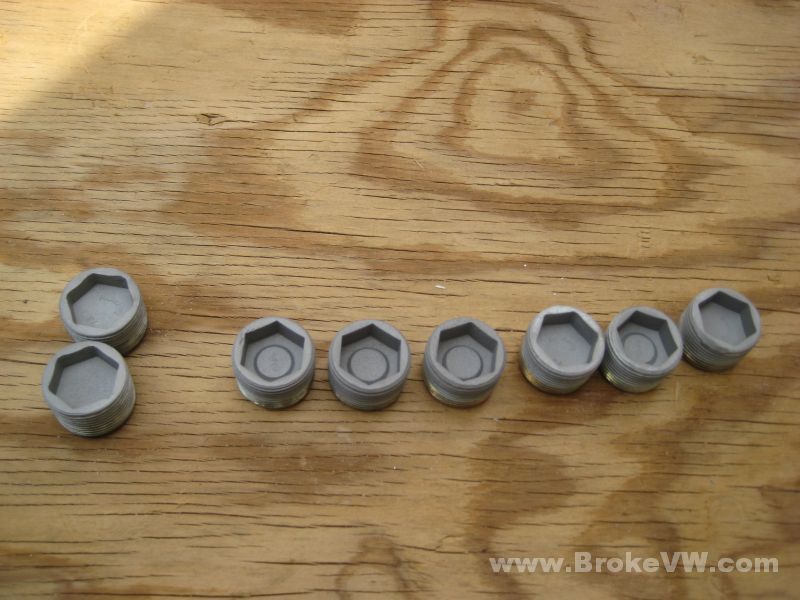
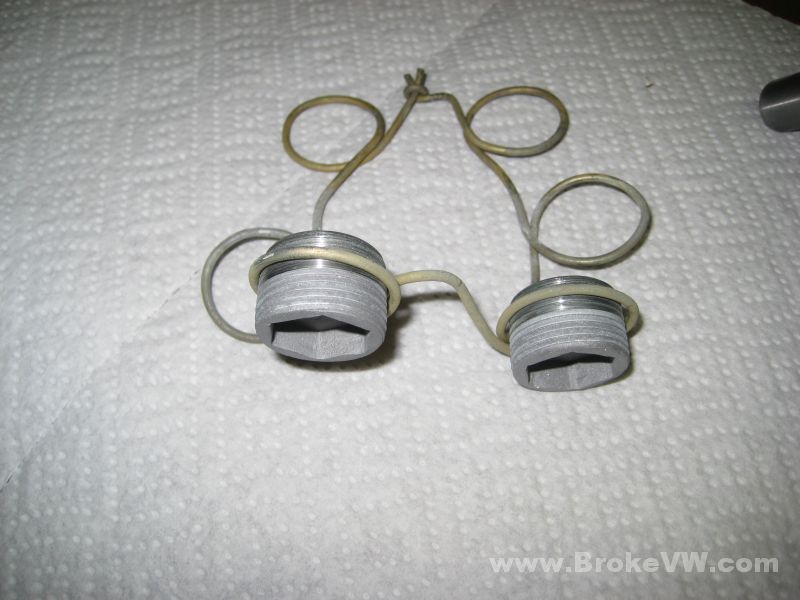
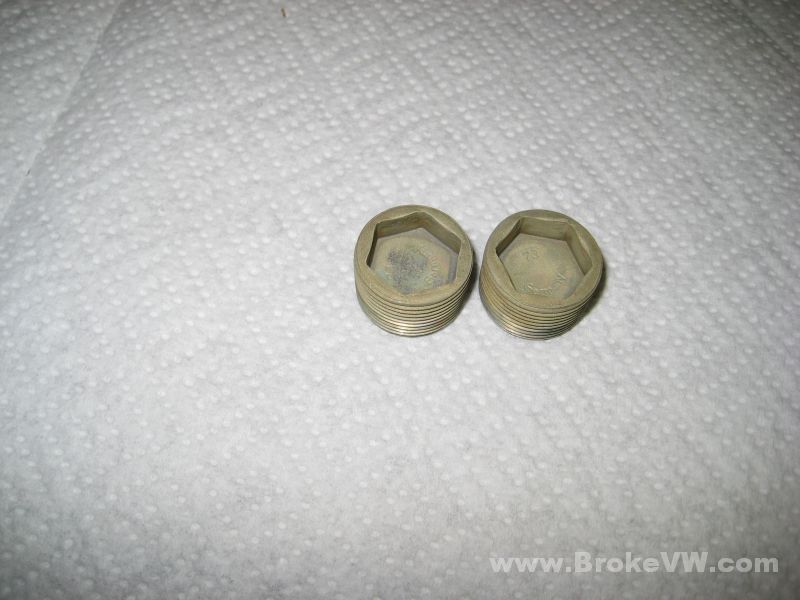
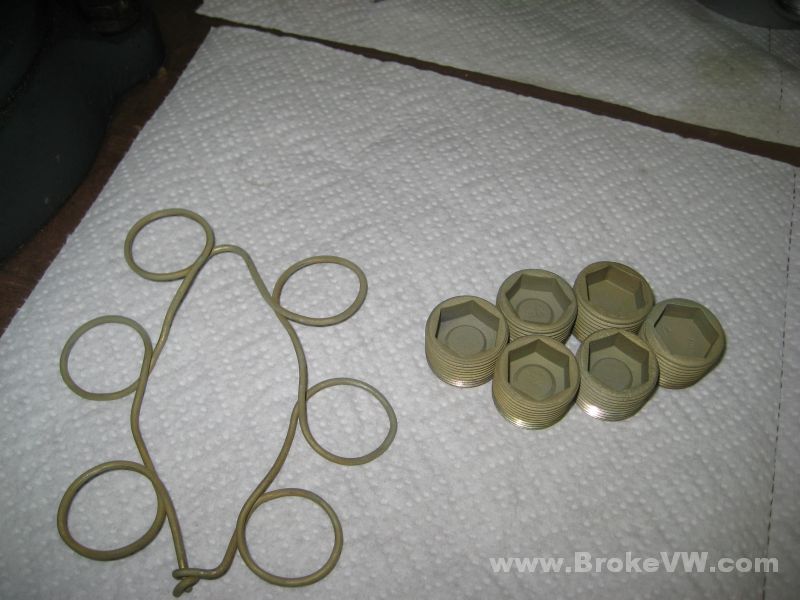
Here are your drain plugs on the left, and a half dozen others I decided to plate at the same time since I had everything out. These are raw steel, they've just been sand blasted...
Freshly blasted parts...
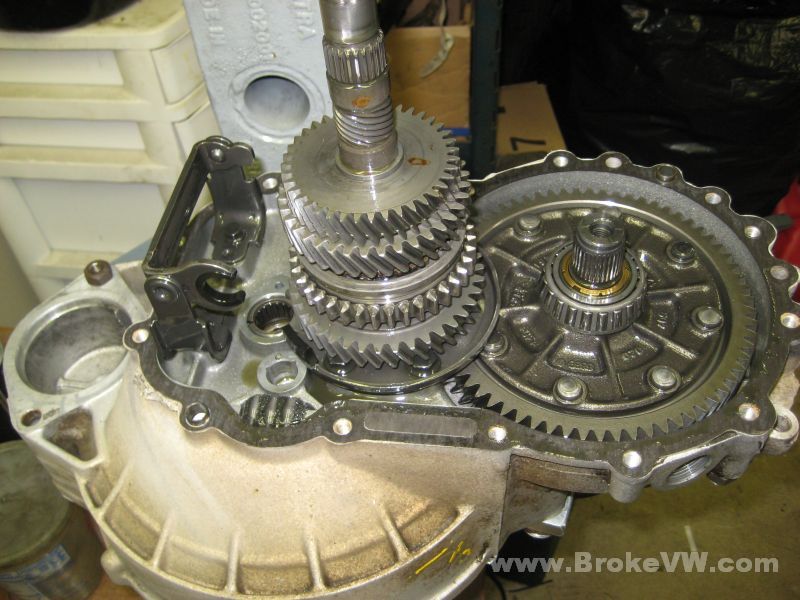
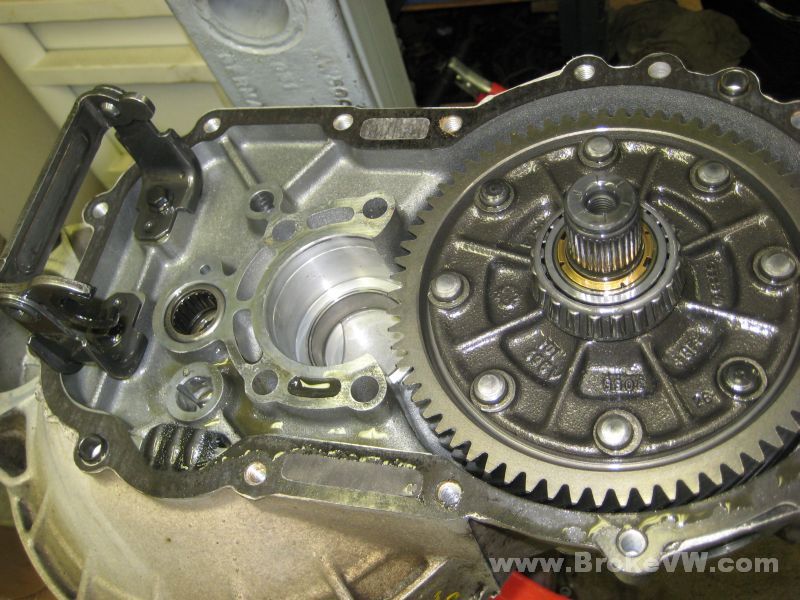
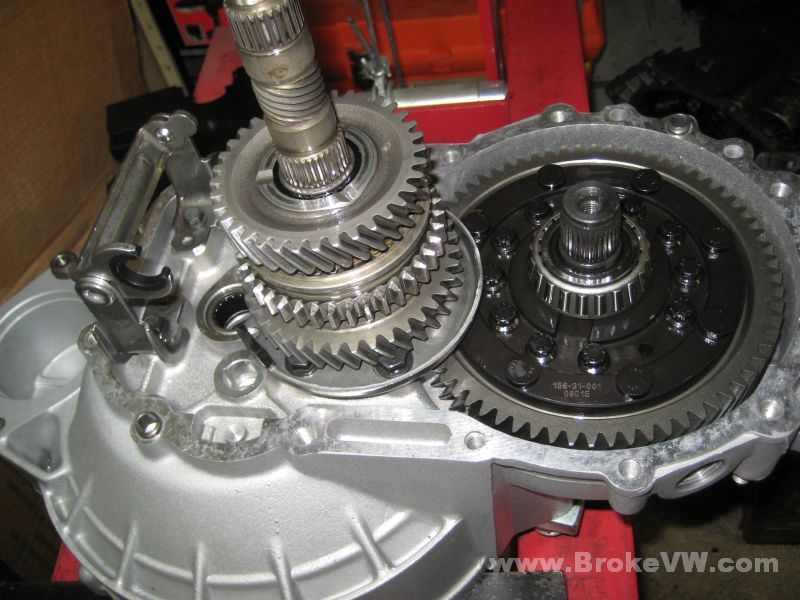
I've got the case bolted up and the 5th gears installed...
Here are some pics of the parts as they were plated...
Just because... the half-dozen drain plugs after being zinc plated and then yellow chromate dipped, like your parts. The zinc is a sacrificial coating, it will oxidize before the steel under it does. It stops the steel from rusting for a longer time than paint. The yellow chromate is to add an extra layer of protection to the zinc layer, it resists some acids I believe... and it mimics the yellow cadmium coating the factory parts got...sort of...
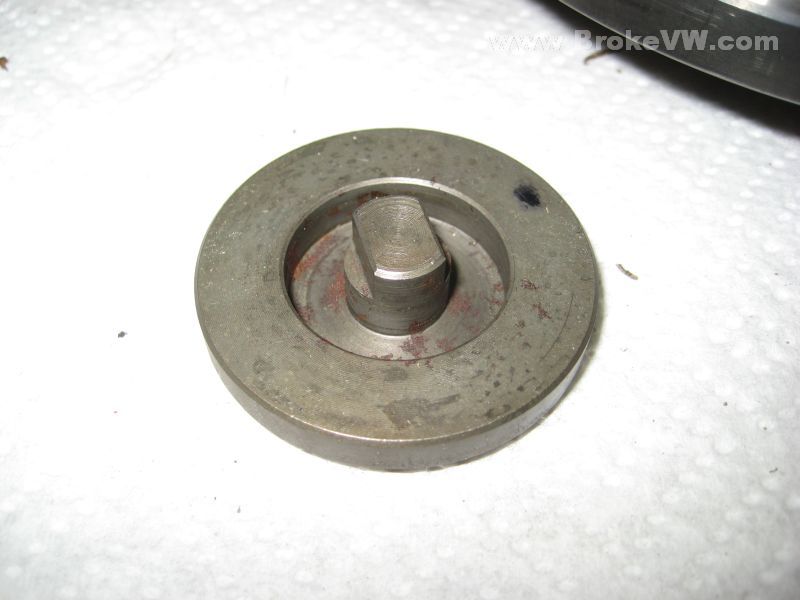
Here is a shot of the LSD, there is no provision for the tapered bronze rings in the Wavetrac, thus the tapered rings, the springs, and the spring caps were not installed, it was just the flange, the concave washer, and the circlip....
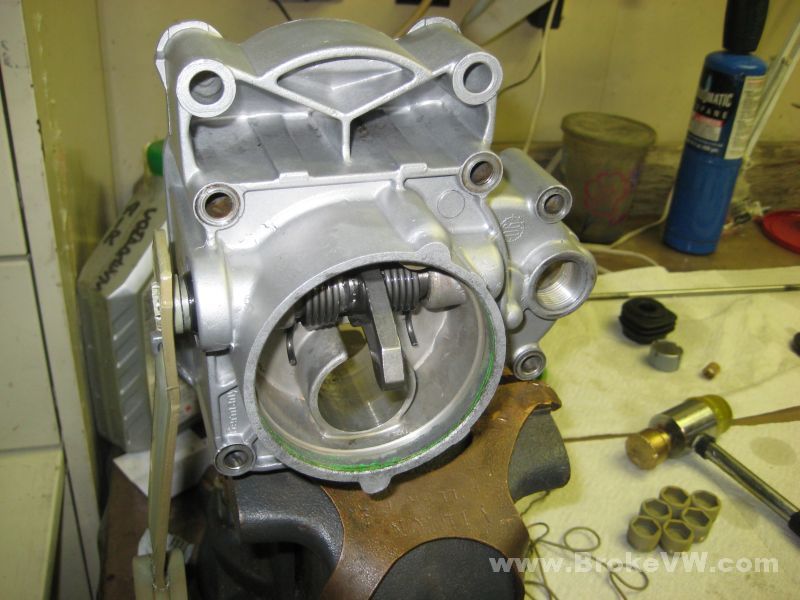
Installing the new actuation finger into the 5th housing...
The new selector seal and the shift boot installed with the selector and detent bolts. The flange center seal is also pressed into the flange...

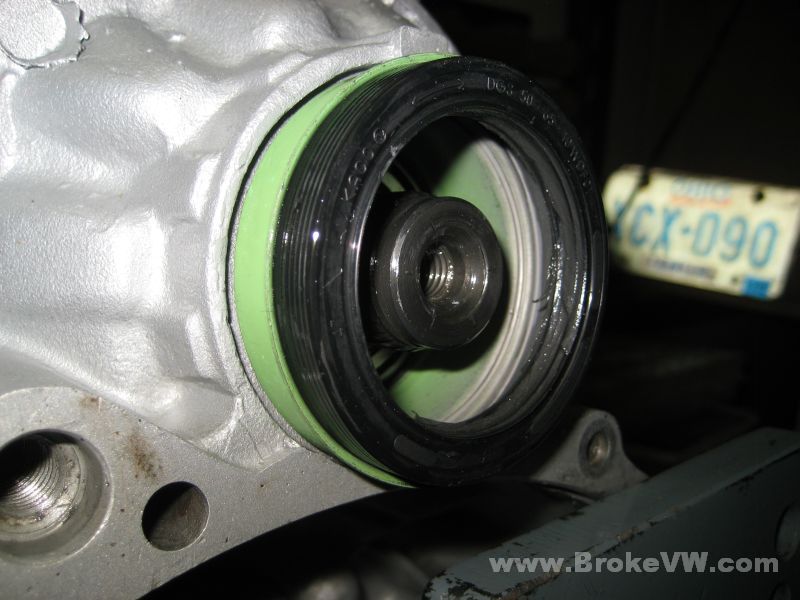
Installing the passenger side seal... the green sleeve is pressed in, then the flange seal is started in....
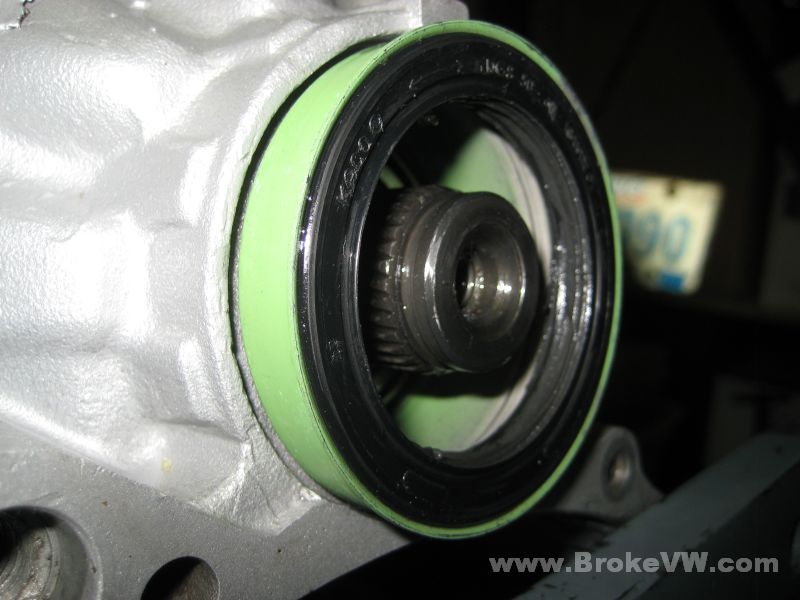
...and is driven in flush with the edge of the sleeve...
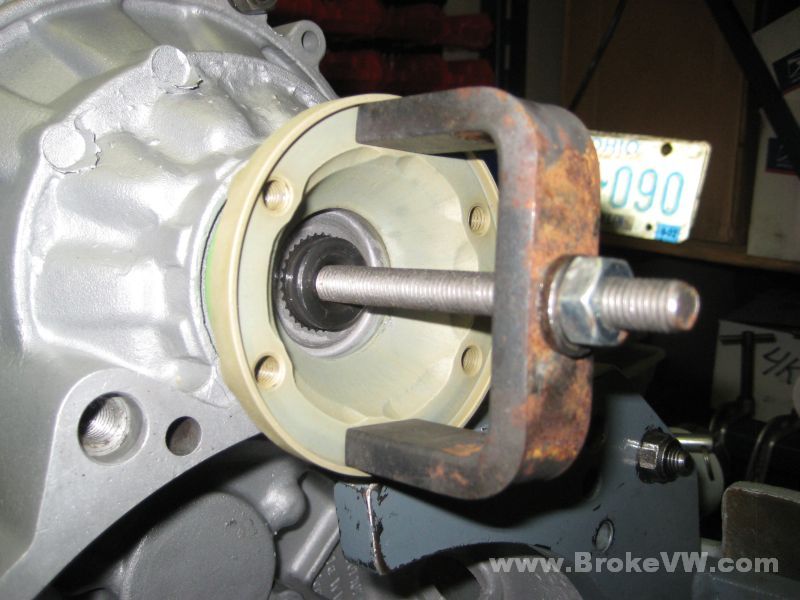
Installing the flange...
A new VW end cap pressed into place with the plated drain plug. You can make the drain plugs last longer by covering it in grease. It'll keep it new, and just wipe it clean before using it, and it'll have fresh clean threads...

Last step... changing the starter bushing. The new bushing is held in one hand between my thumb and middle finger, so it forms a cup with my thumb as the bottom. It is filled full with oil, then I press into the oil with my middle finger. The hydraulic action will force the oil through the bushing, and it will sweat the oil out in little droplets, impregnating the bronze with the oil. Bronze and brass are self-lubricating metals, which is why they are used, but forcing oil through them will help with those lubricating properties.
The old bushing and the new bushing, both out of focus...

Pulling the old bushing out with the special VW tool...
The hole is cleaned out with a q-tip and brake cleaner so it is nice and spotless...
This tools drives the new bushing in, and fits inside it perfectly to prevent the bushing from wanting to distort under the pressing forces when installing it.

That's it, all done. I need to snug up the linkage bracket, and bag it up and get it boxed and taken into the UPS store to get a shipping quote on it for you.
Here you can see the original cadmium coating used by VW on the weight... and the "copy cad" coating I use here. Cadmium plating is very toxic, so a lot of mfg.'s no longer use it, it has been replaced by the olive drab green bolts and brackets found on newer cars, that is a green chromate coating, which is what I use here. It is less dangerous to use. I can use green or yellow chromate, because I do the 020, I choose the yellow to match the other parts on the car. The original cadmium plating is better. It is better looking, it is much longer lasting, and it is just a superior method, but I can't do that here in my little garage :)
Let me know what you'd like to do with the parts removed from your trans... there is the 5th gear set and the stock diff, I can pack them in the box with the trans, or I can ship them USPS for $15 or so (it should go flat rate I think), or I can just stick them in the parts bin here if you don't need them.
Thanks!
Brian