How to get to the TO bearing
Update - I've added more pics and some text to this page to make the instructions a little more clear hopefully. The trans used in the new pics is a complete trans, rather than the shell in the older pics.
Here are some pics you can use to inspect the TO bearing, or to inspect the actuation finger in your 020 trans.
If the cable is OK, the pedal cluster is OK, and the pedal dropped to the floor, and the clutch isn't disengaging, one of the first things to check is the actuation finger that pushes on the Throw-Out Bearing.
A quick test to find a problem inside the trans is to try to lift the arm on the trans higher than horizontal, or when it points to 9:00 on a clock face. You shouldn't be able to lift the arm past 9:00 by hand. If you can raise it up until it reaches 10:00 by hand, you have a problem and should start with the finger check.
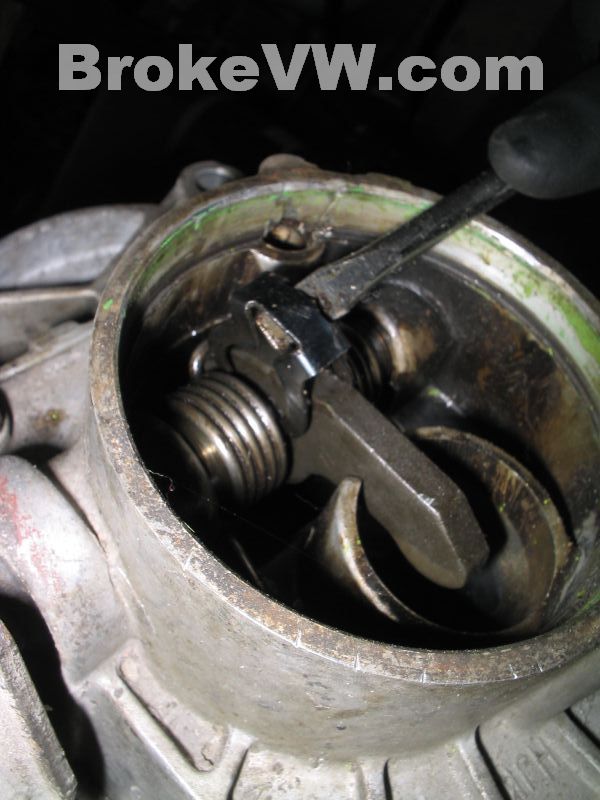
Start by prying the green end cap off. It is a one time use part. The green "paint" is actually the sealant, and once scraped up from being installed shouldn't be used again or you risk leaks. They simply press into the end of the trans.
Use a flat blade screwdriver to catch the lip to start it. You can also just stab through the thing and pry it out, but I'll show this method...
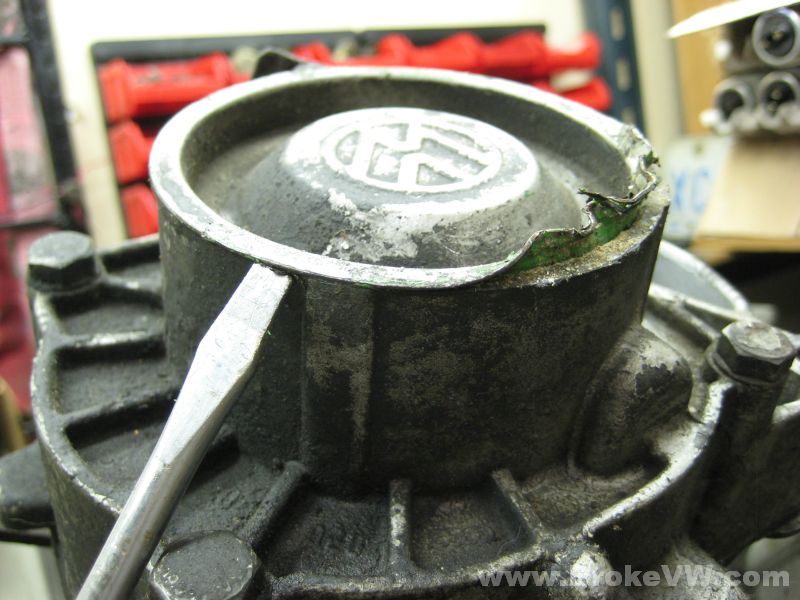
Once you have enough of it peeled up it'll lose grip and will lift out...
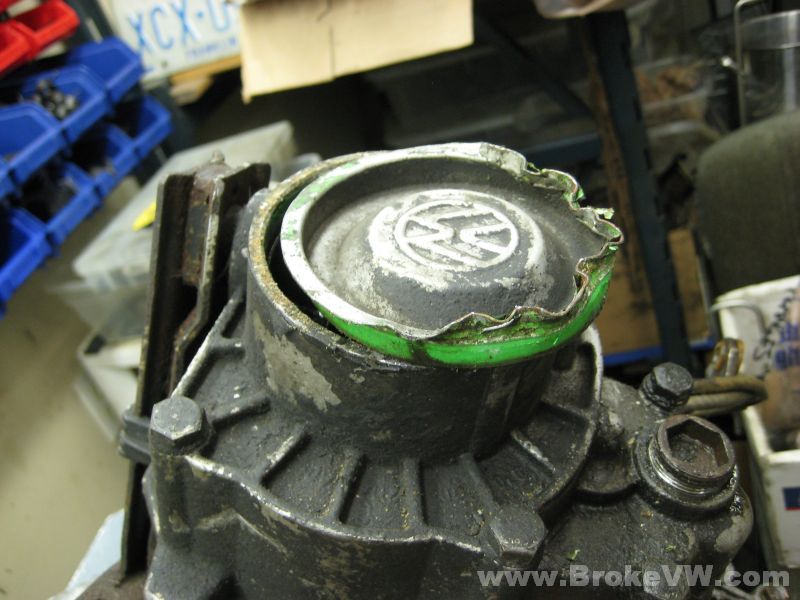
This trans has seen better days. Any gunk in the trans from a damaged gear or bearing will collect in the 5th housing as shown laying in front of the TO bearing in this pic...
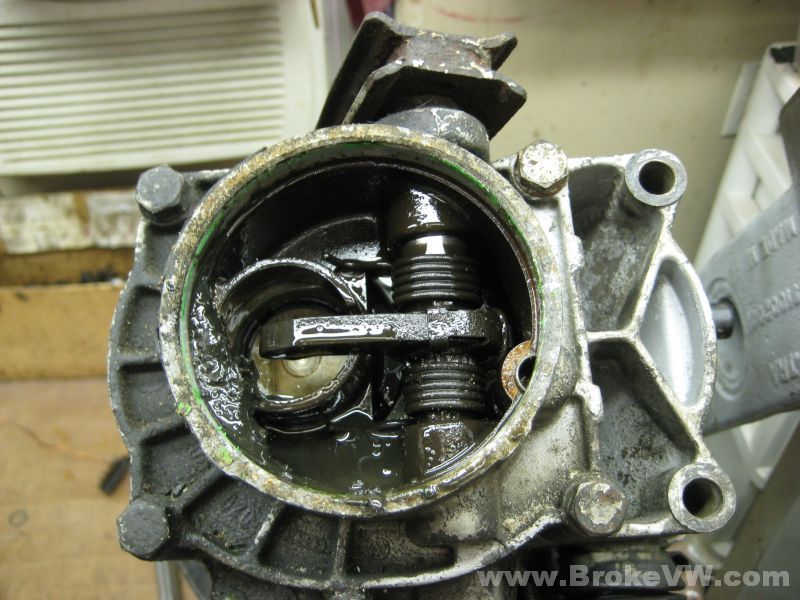
This seems to be plastic bearing, the black plastic cage of a gear needle bearing, or the thrust piece inside the diff, also black plastic...
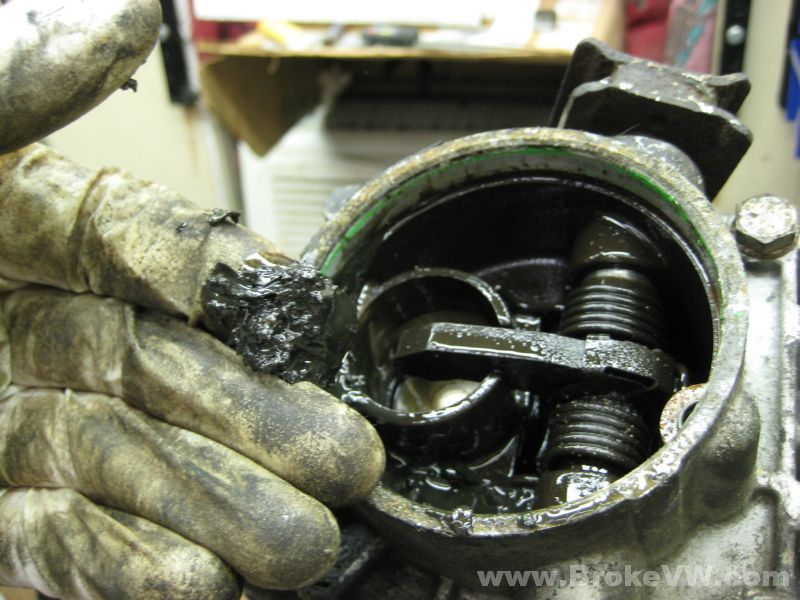
You can get to the TO bearing only (no access to the finger) by removing the six 13mm bolts that hold the 5th end cover to the trans, but that may require the use of a new gasket and won't allow the actuation finger to be checked. To access the finger, the green end cap needs removed.
The next step is popping the black plastic clip from the release arm on the outside of the trans case, where the cable attaches to...
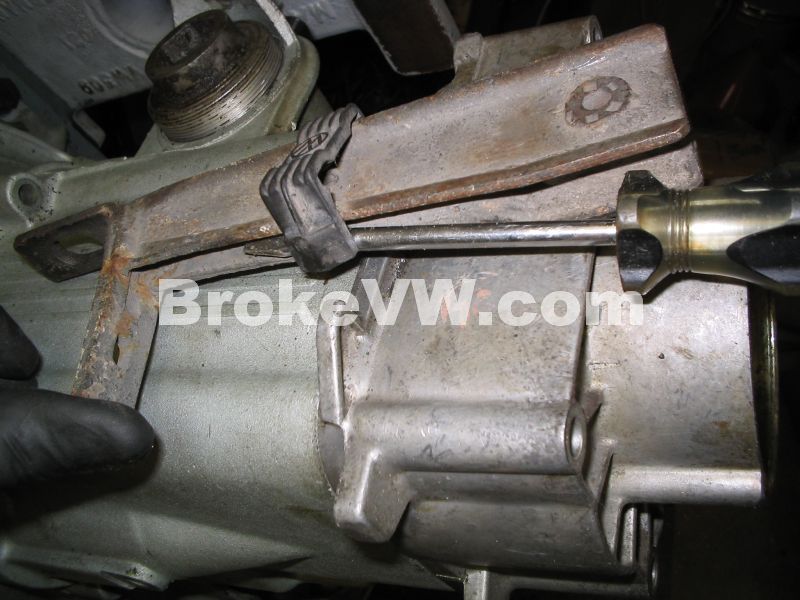
This should allow the arm to drop straight down, but sometimes the arm can still get caught on the trans case (the TO bearing would normally be seen under the finger in the hole shown) (the next 3 pics are older, showing the empty shell casing)...
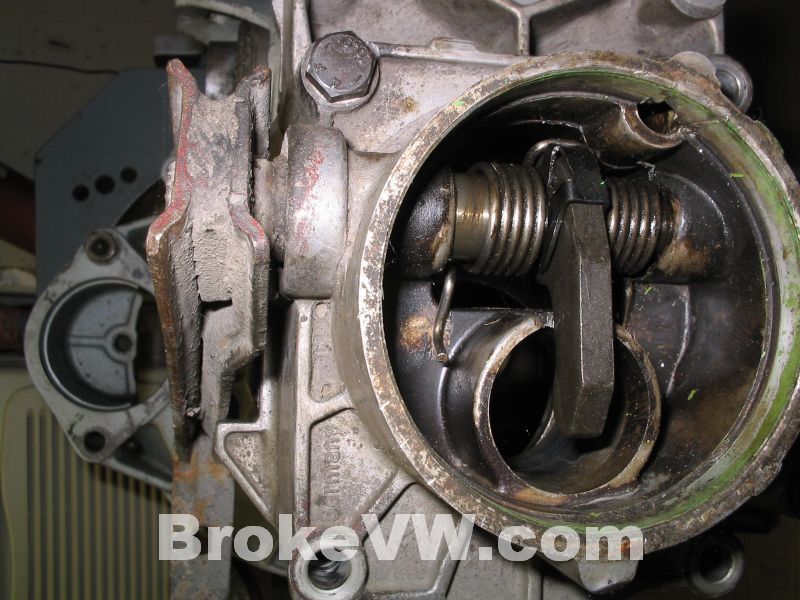
Just pull the arm out a litte on the trans, towards the front of the car....
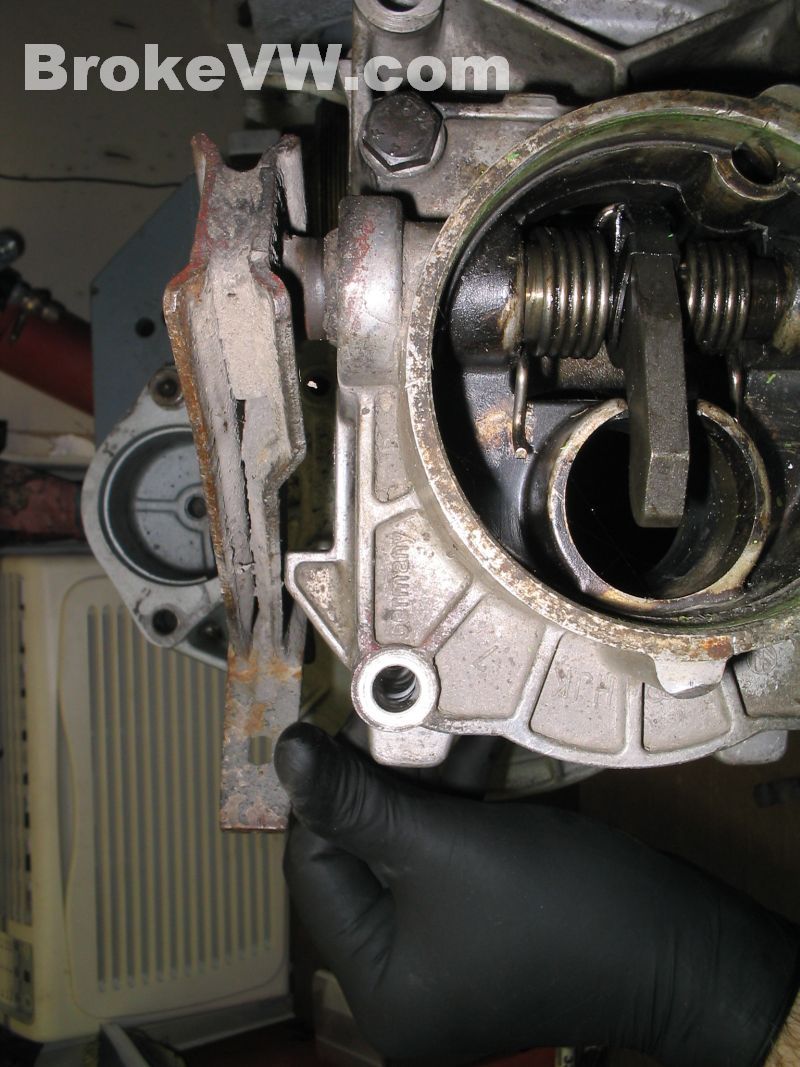
...and the arm should be able to clear that catch on the trans case, and swing and point straight down....
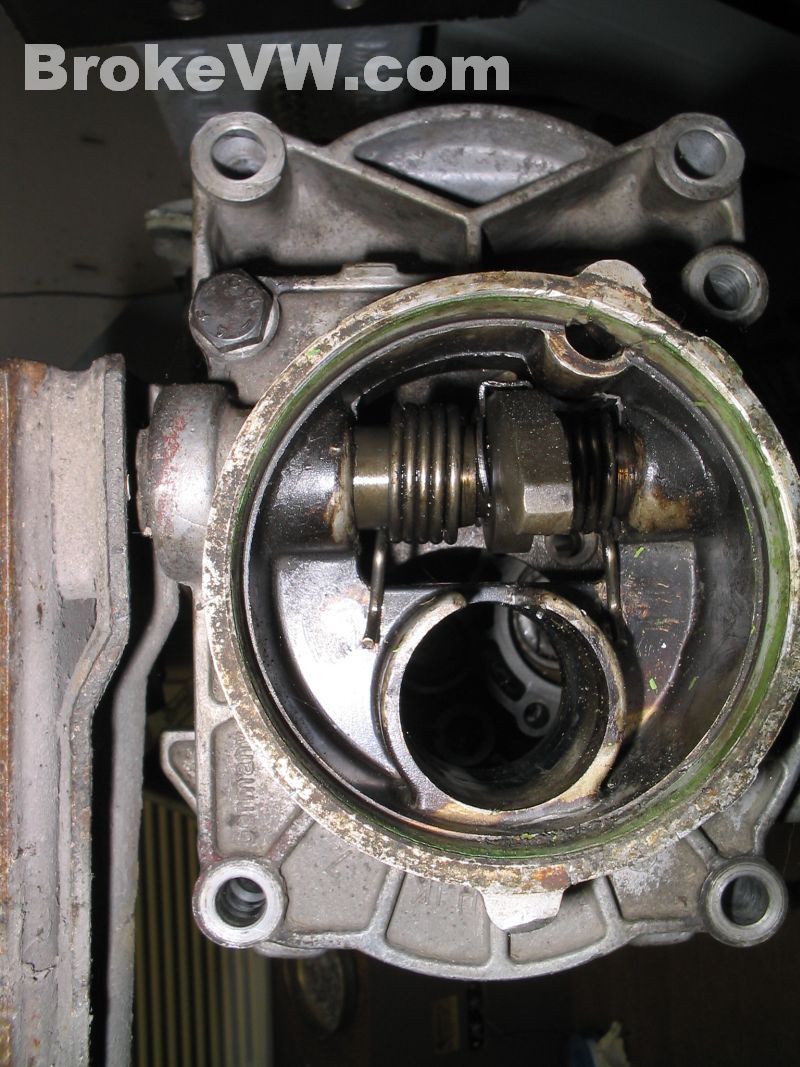
Right, with the clip removed and the arm swung down making the actuation finger point out of the way, you can now remove the TO bearing. You can slide the pushrod up into the input shaft from the clutch end, then use a screwdriver, wood dowel rod, or anything else like that to push the pushrod further into the input shaft until it hits the bearing and lifts it out for you.
If you don't have the trans removed from the car, you'll need to reach in with a magnet and work it out of the bore from the 5th end.
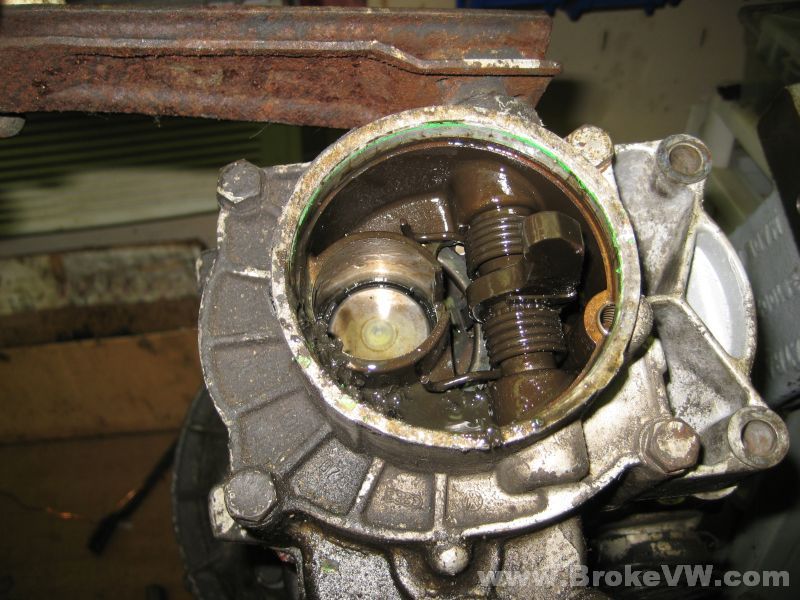
The pushrod used to shove the bearing out of the 5th housing...
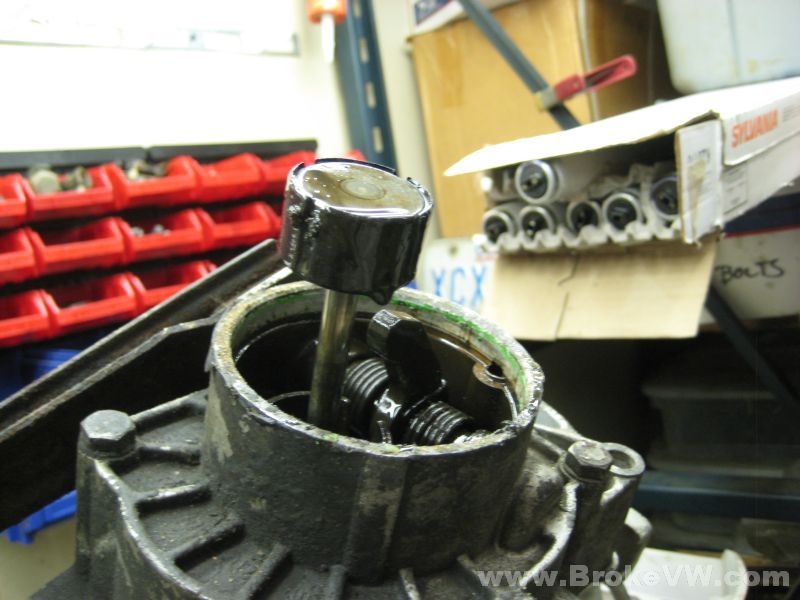
You can then reach in with a magnet and grab the TO bearing, and slide it out to inspect it for gritty feeling, noise, etc while spinning it.
This shows the bearing removed... you can see the large XZN bolt used to hold 5th gear to the input shaft...
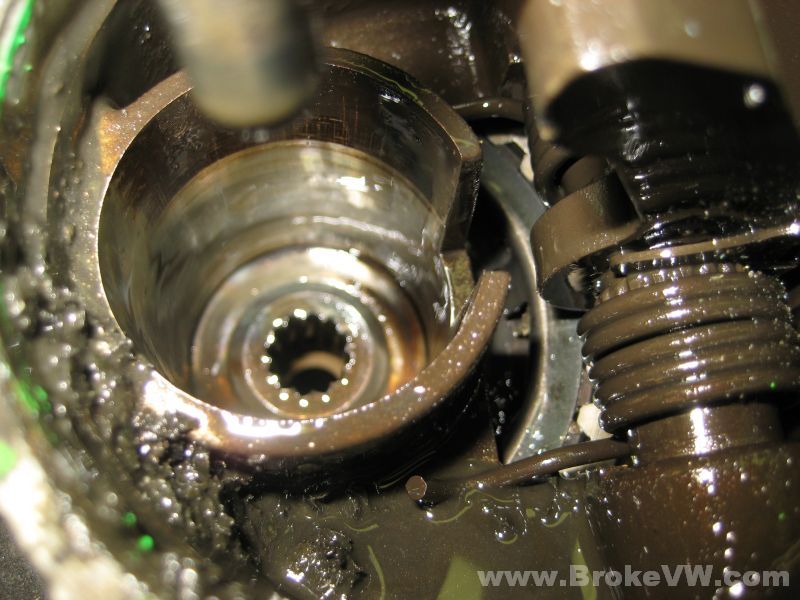
Removing the actuation finger
If you need to remove the actuation finger to inspect or replace it, use the following pictures...
Pry the clip off of the actuation finger as shown. Put the black plastic stopper back onto the arm so it holds itself up to expose the clip, pry the clip off, remove the black plastic stopper, then let the arm drop straight down to remove spring tension...
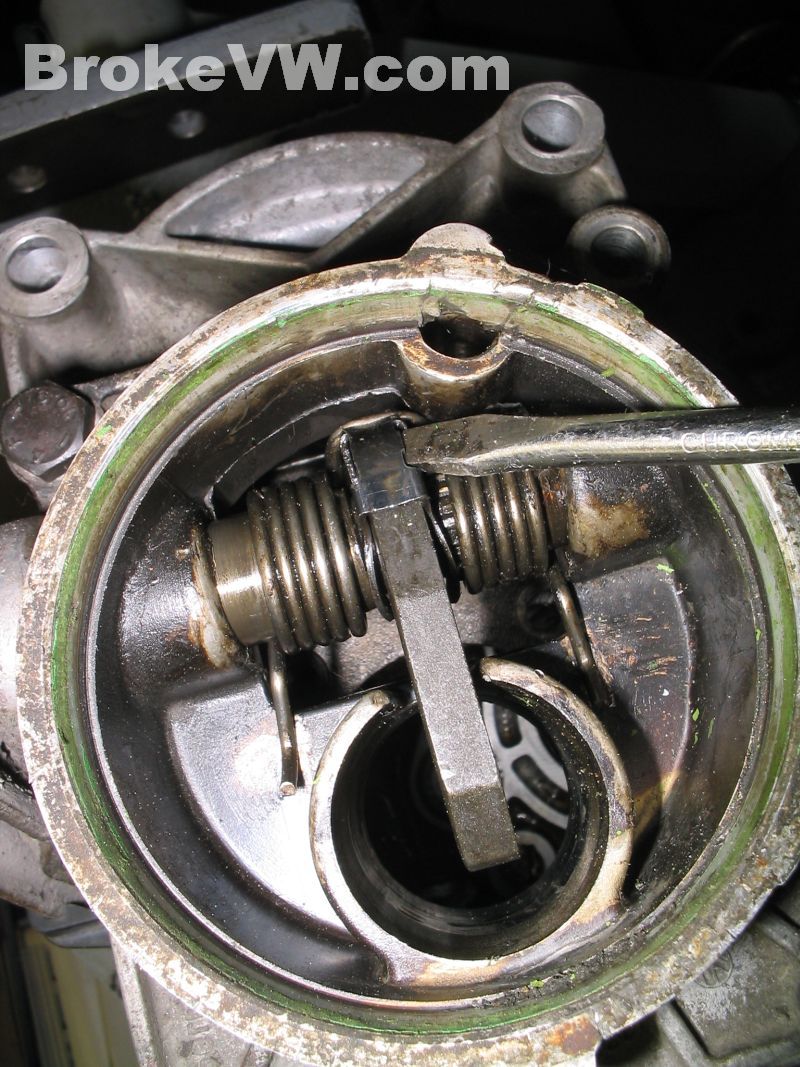
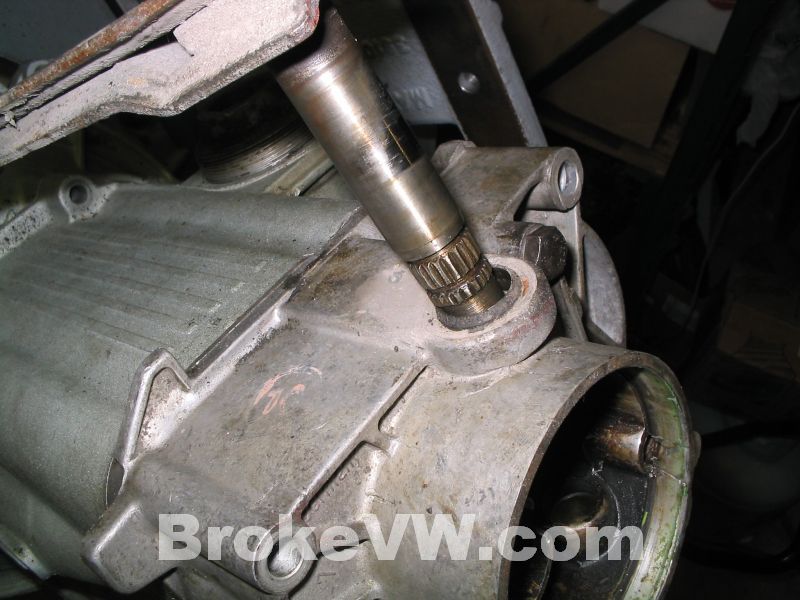
Once the clip is removed, the shaft can now be pulled from the trans. Grab the release arm, and pull it and the splined shaft out of the trans, leaving the actuation finger and the spring behind to stay in the case...
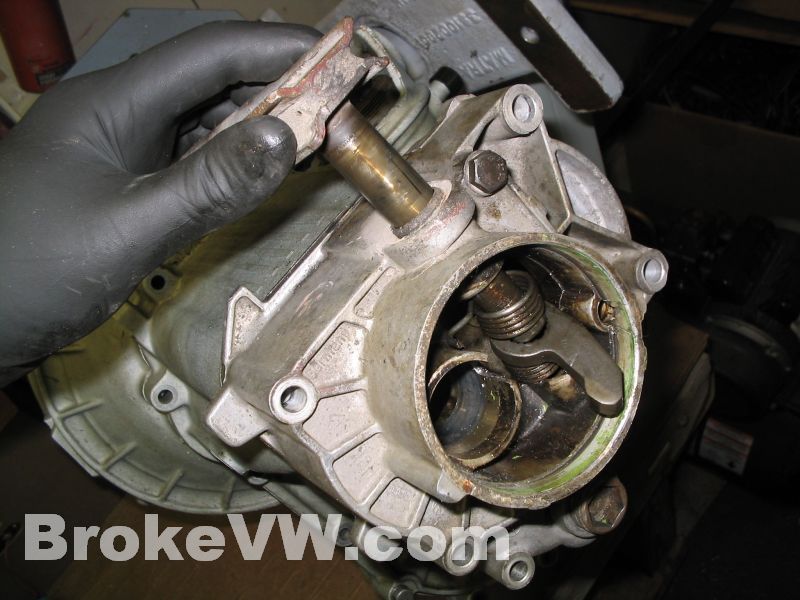
Once you get the shaft out, pull the finger and spring out, and inspect the finger. You'll see it has 2 large notches on the finger, and the shaft has one large spline. You can only get the parts back in the trans one way, even though the finger will fit one of 2 ways onto the shaft....
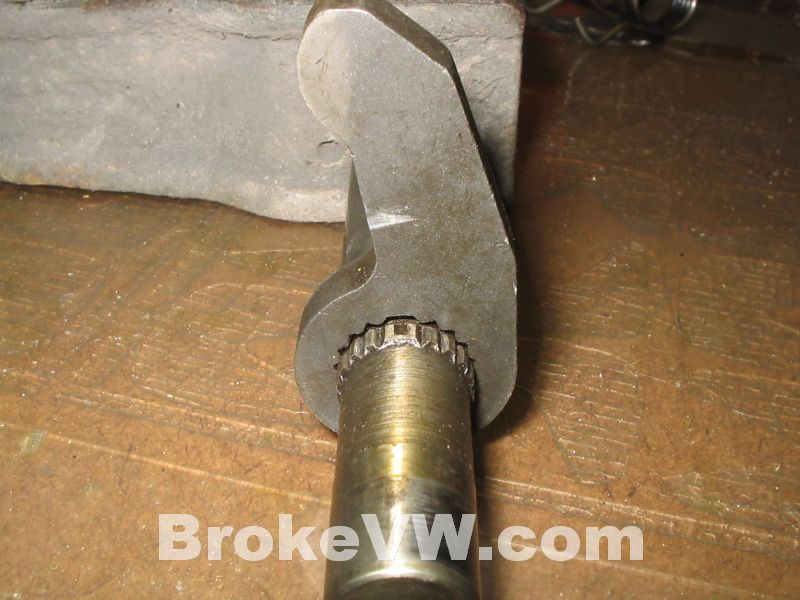
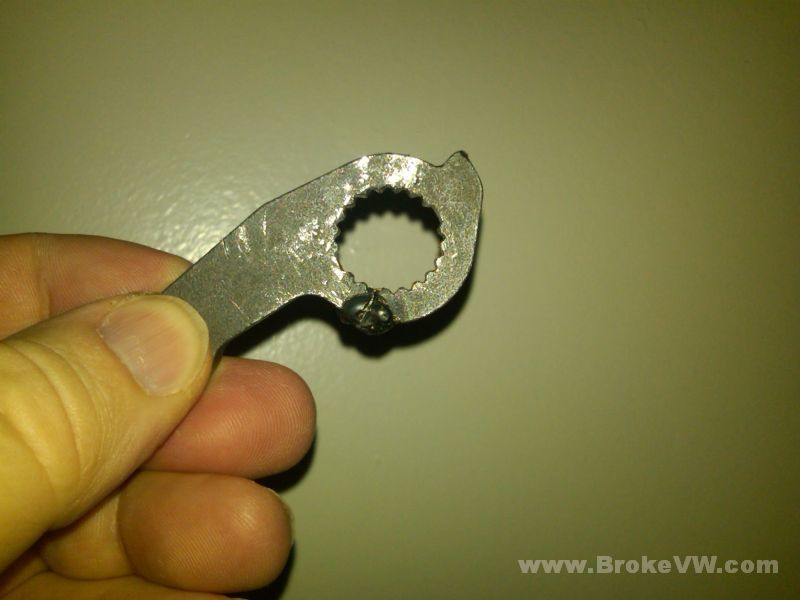
Inspect the finger in the area shown, and look for cracks or splits between the splines that would allow the finger to open and expand on the splined shaft, and allow the finger to slip on those splines.
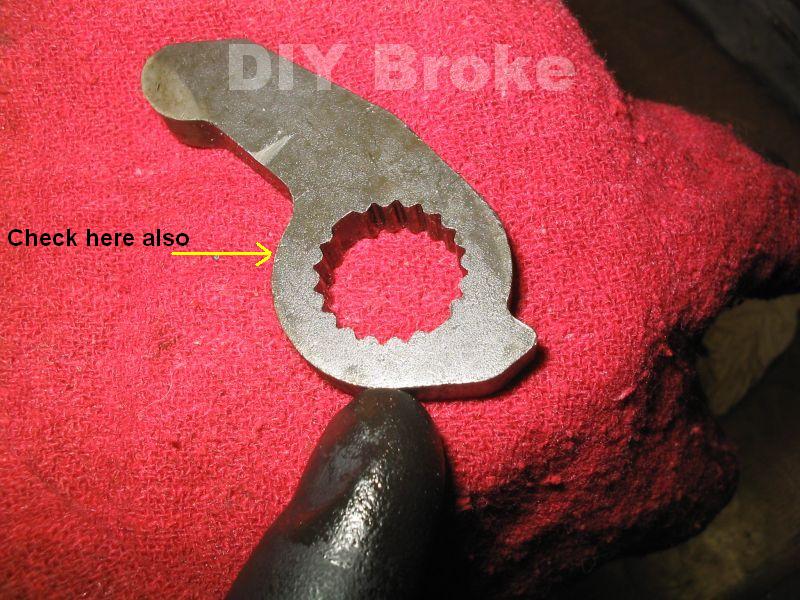
Here is a pic sent to me showing a broken finger and a repair attempt. It was reported that the fix lasted about 6 months before failing again. Thanks to Casey for the pic...
When installing the new finger, and sliding the shaft back into the trans,take care inserting the splines of the shaft through the seal to protect the seal from the sharp edges of the splines where they are machined into the shaft...
You'll need a new green end cap, during removal, the sealing surface of the cap is usually damaged, and most of the time, the cap is bent anyway on removal.
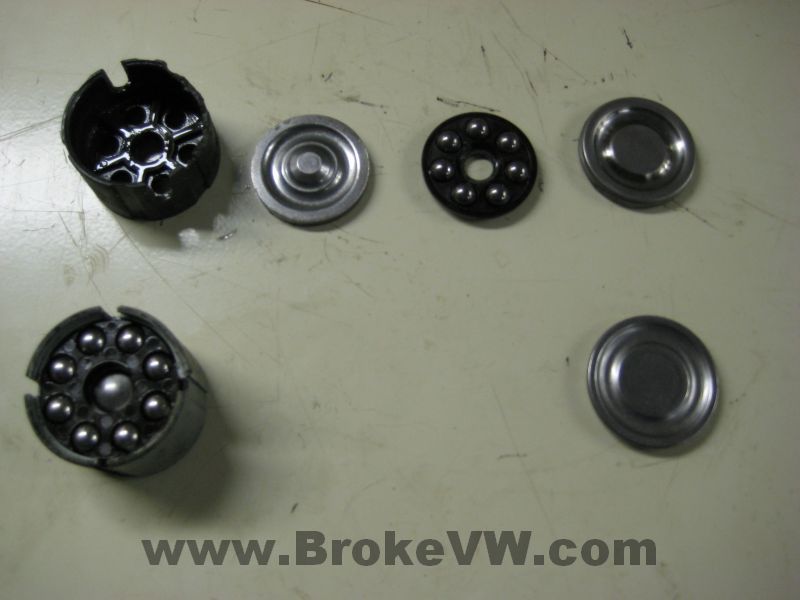
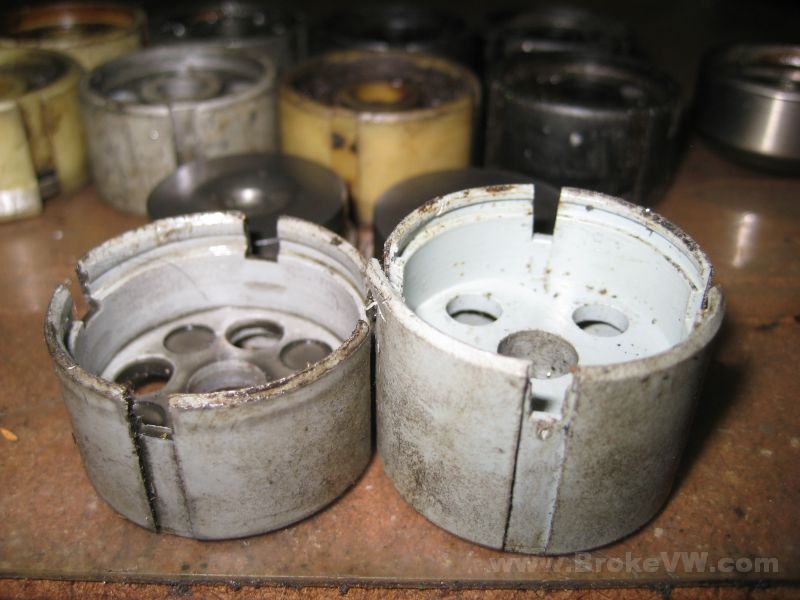
Pic of a TO bearing opened up... some have 7 bearings, some have 8, and I'm sure some have 6... if your bearing has fallen apart inside the trans, pull the pieces out, and count the holes in the plastic bearing cage to find out how many bearings are still in the trans.
They seem to all be just 4 pieces... the main plastic body, a metal race with a cup for the pushrod, the plastic bearing cage and ball bearings, and then the metal race/back cover piece that snaps into the main plastic body.
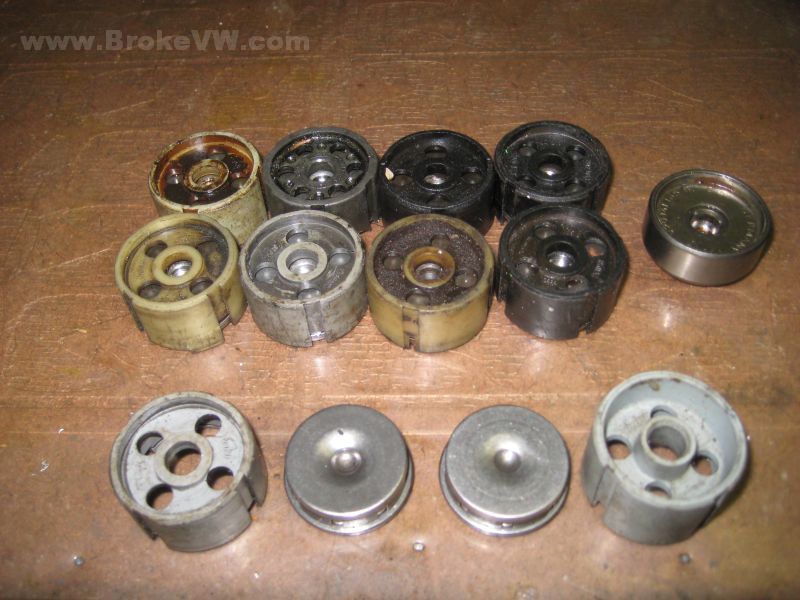
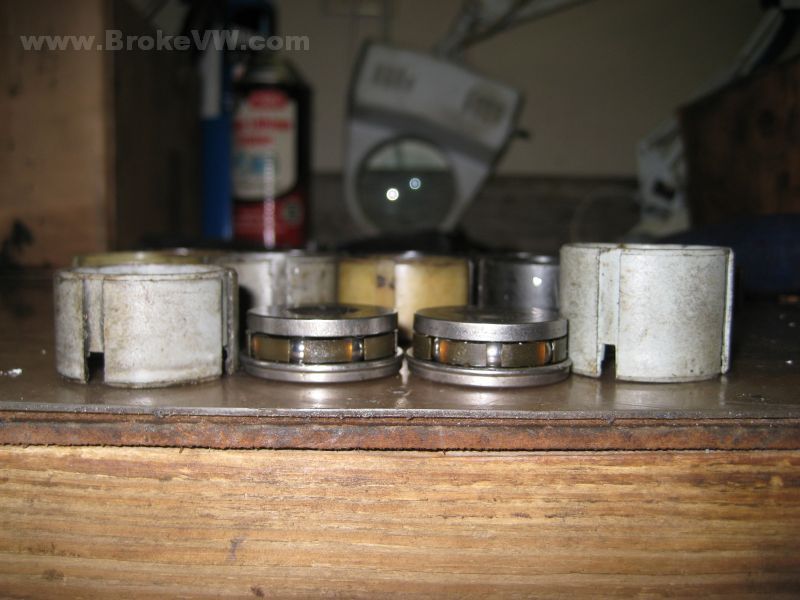
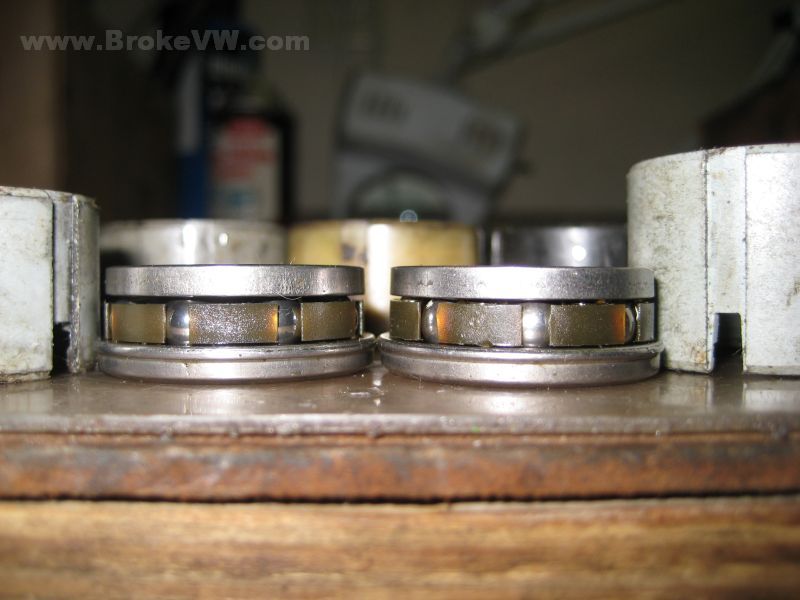
More pics of the TO bearing. These show the various bearings I had around the shop removed from 5 speed 020 trans. The tall one is about 24mm and the shorter ones are about 19mm, and the bearing inside is the same, at about 11mm tall.
Click HERE to go to the Start Page