Austin -AGS
The 'real' build page
Arrived 06/02/11 - Done 05/18/12
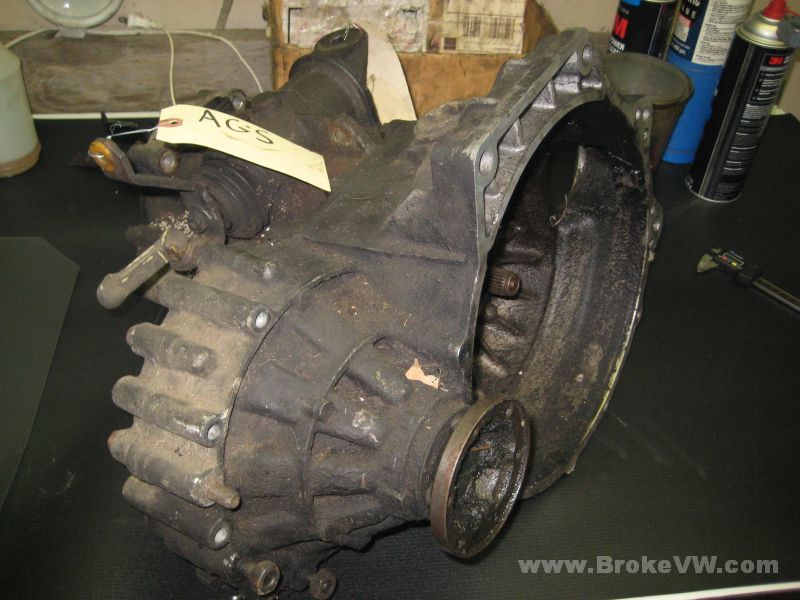
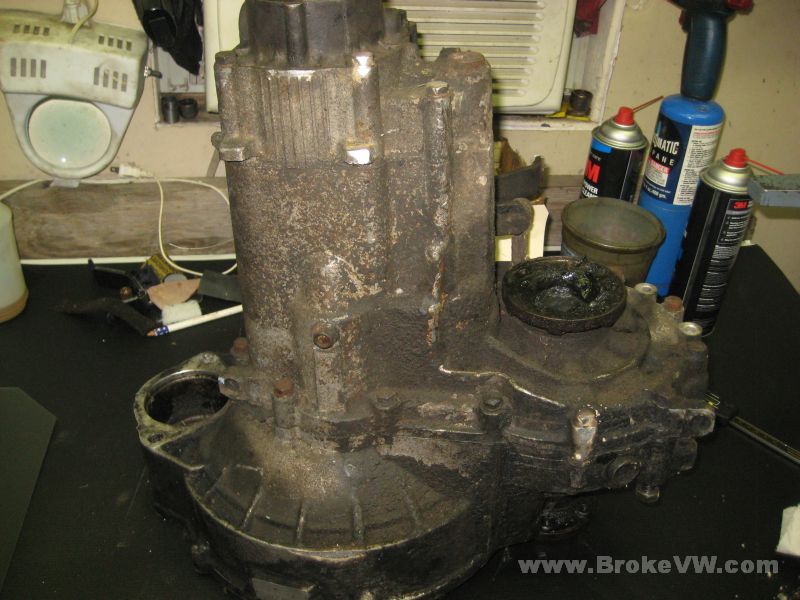
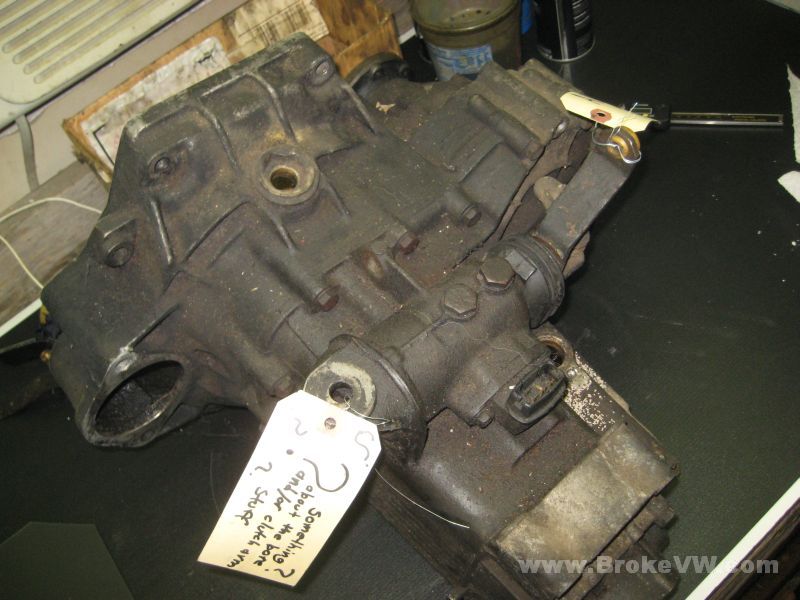
Before:
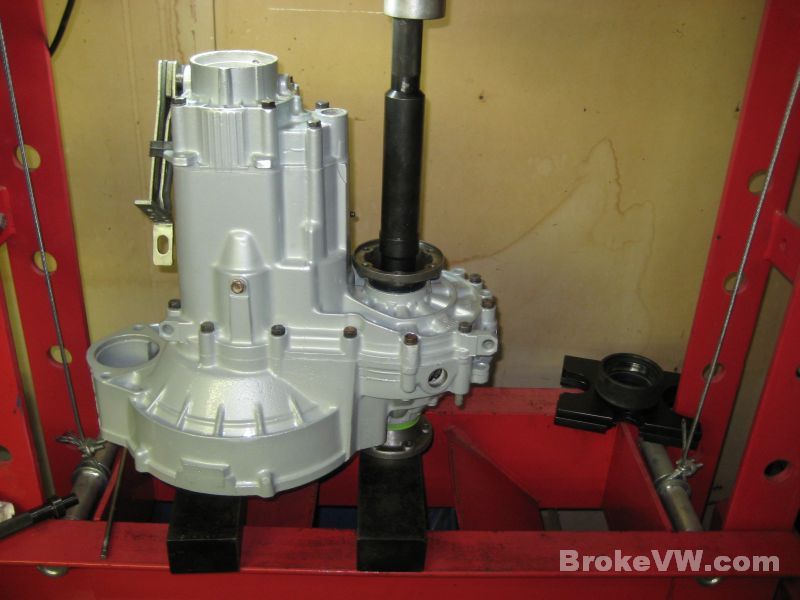
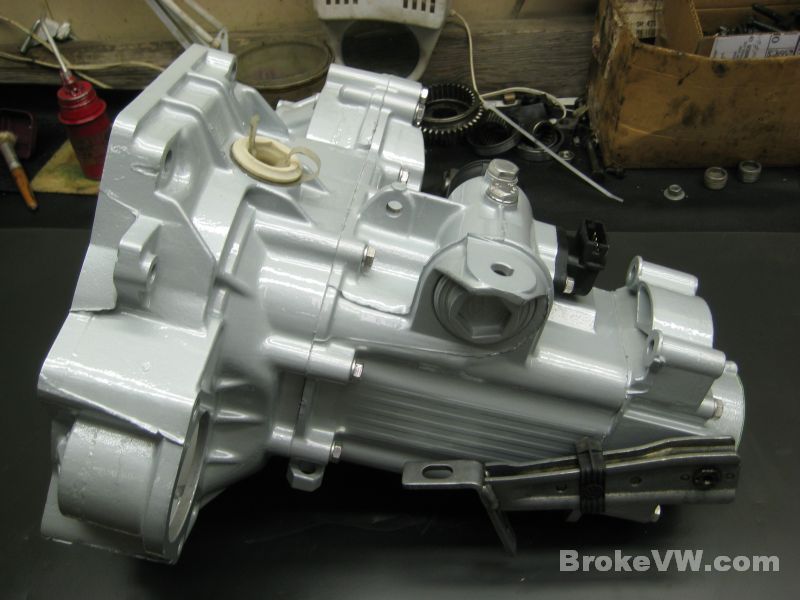
After:


The trans has been slid around on the floor quite a bit, but I haven't spotted any damage to the bore or clutch arm area as the tag mentioned...
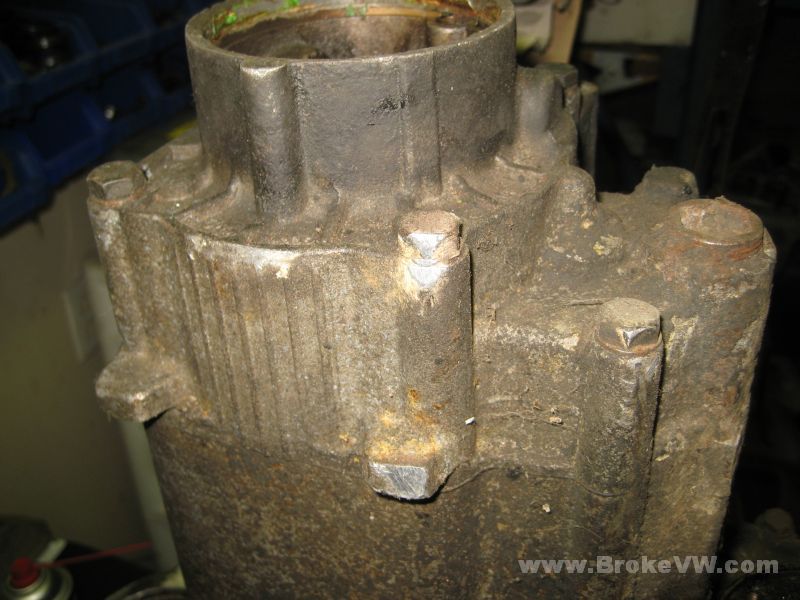
The trans is quite filthy, and covered in grime...
The gears are black, it could be from a lack of oil or just very old oil, or both. The small 5th gear is a little loose on the splines...
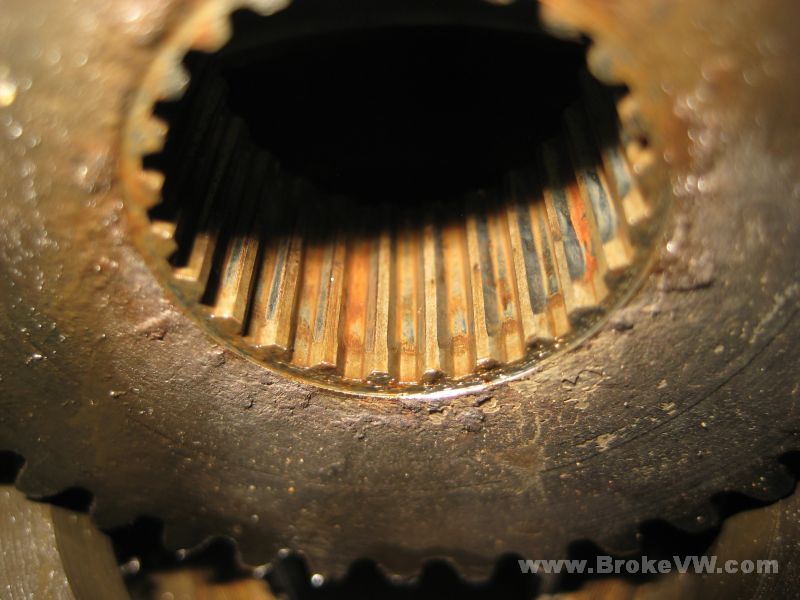
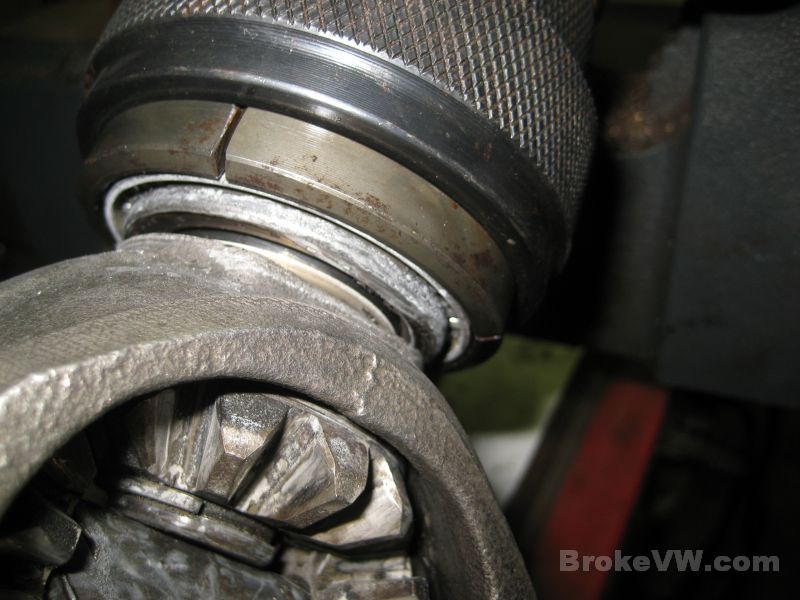
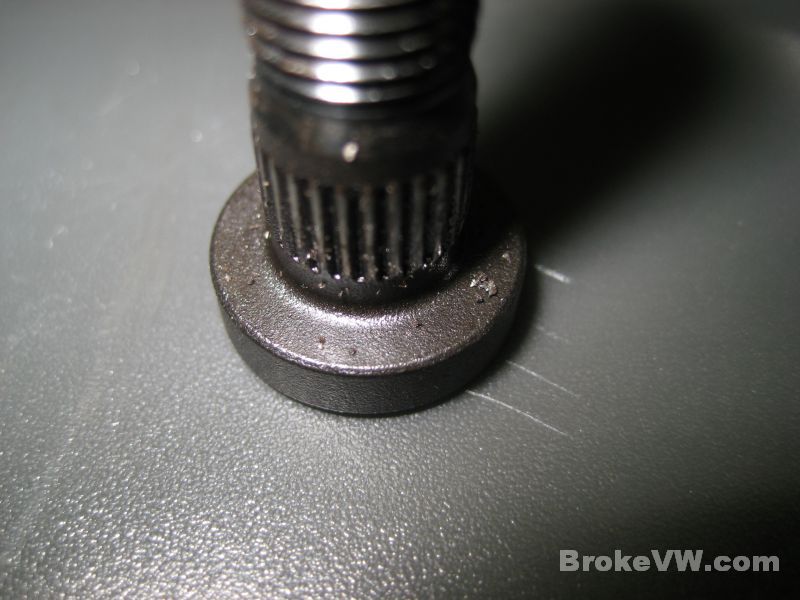
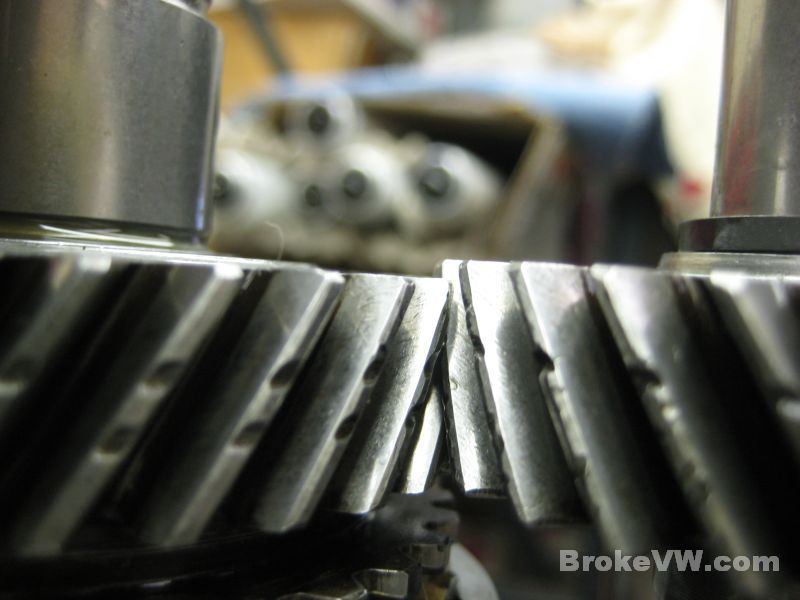
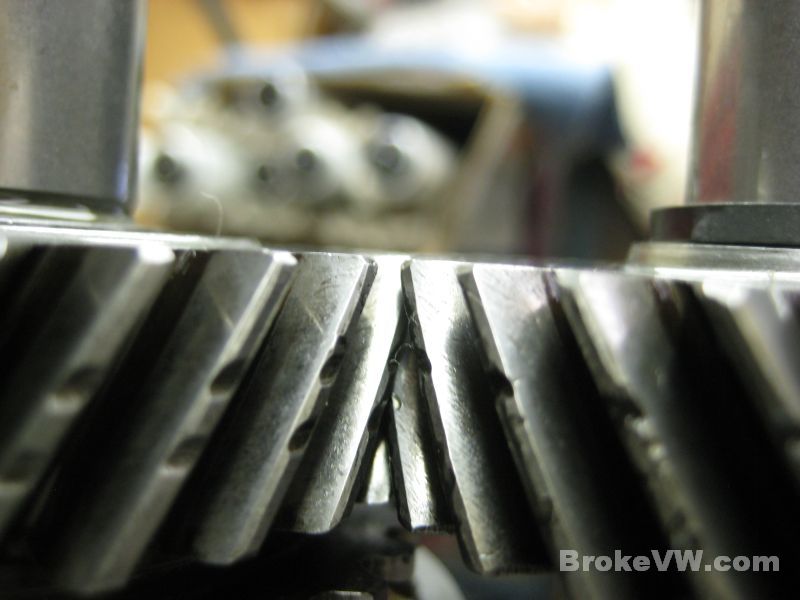
With 5th removed, the splines can be inspected, and they are in better shape than I had expected to see. They are still squared and sharp, but the splines in the actual gear are starting to show signs of wear....
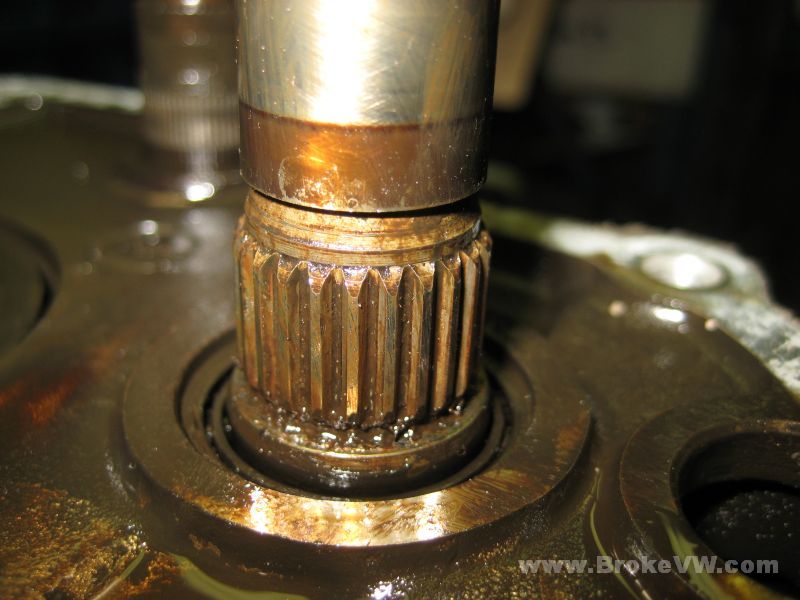
You can see on the right side of the splines in this pic the wear area, where the spline actually looks a little thinner. That is from the forces the gear is exposed to beating on those splines, making a little more room each time, which allows it to continue to get worse. I think with these splines, they can still be used, but I will likely bond the gear in place with loctite compound for splines and bushings....
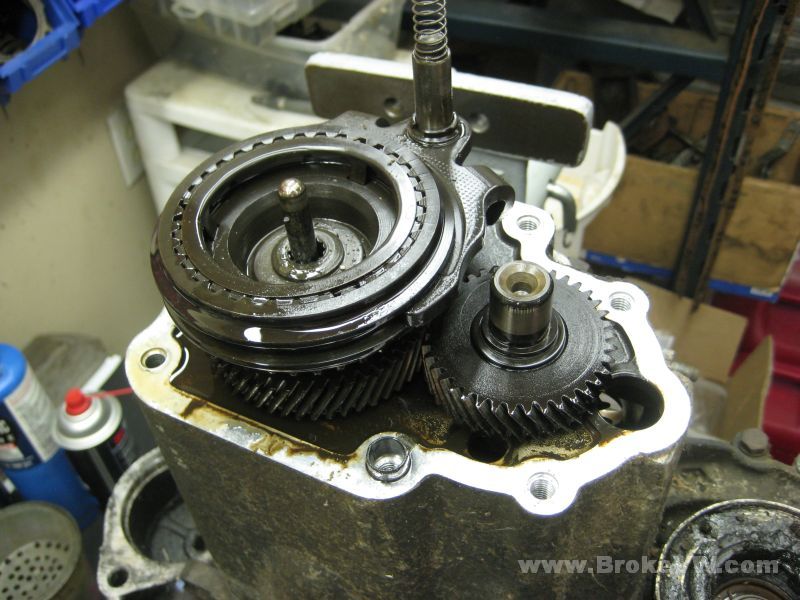
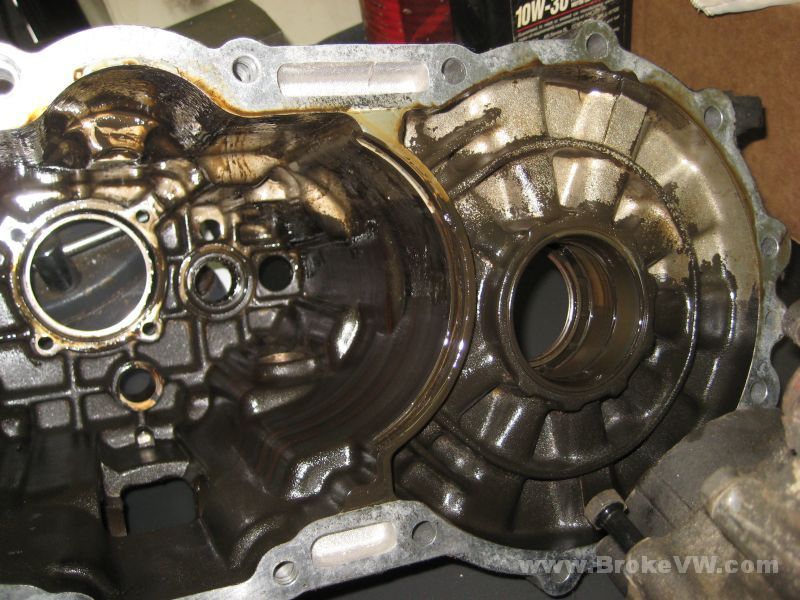
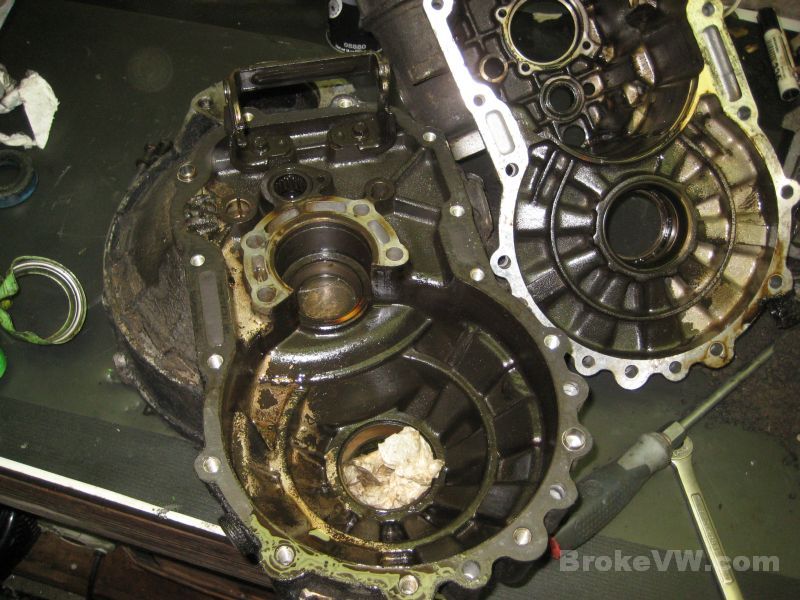
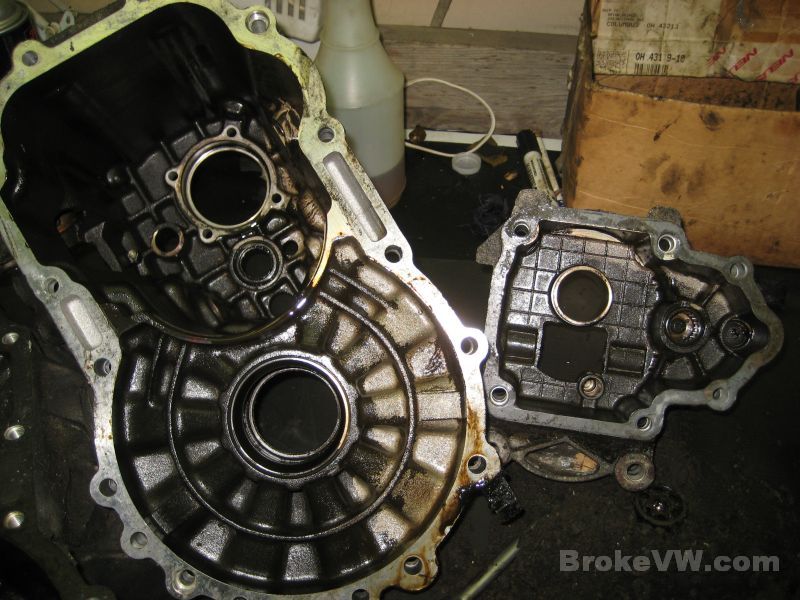
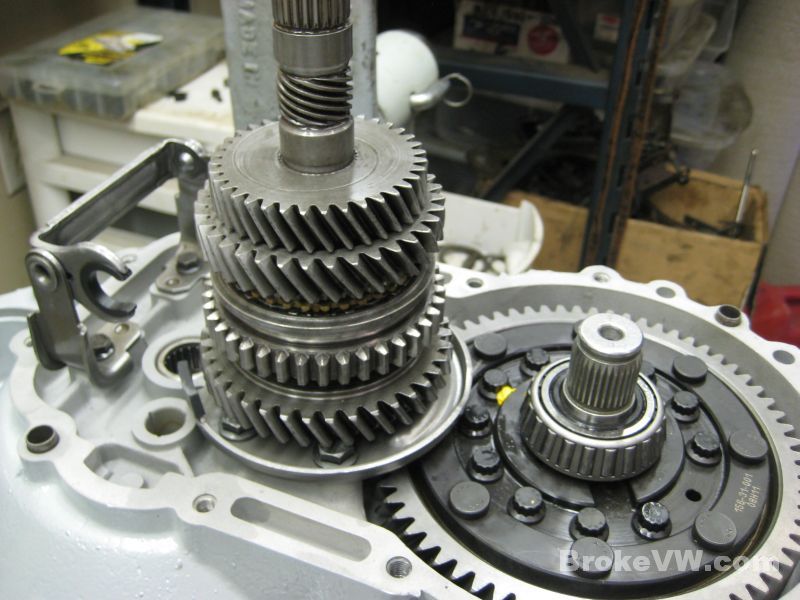
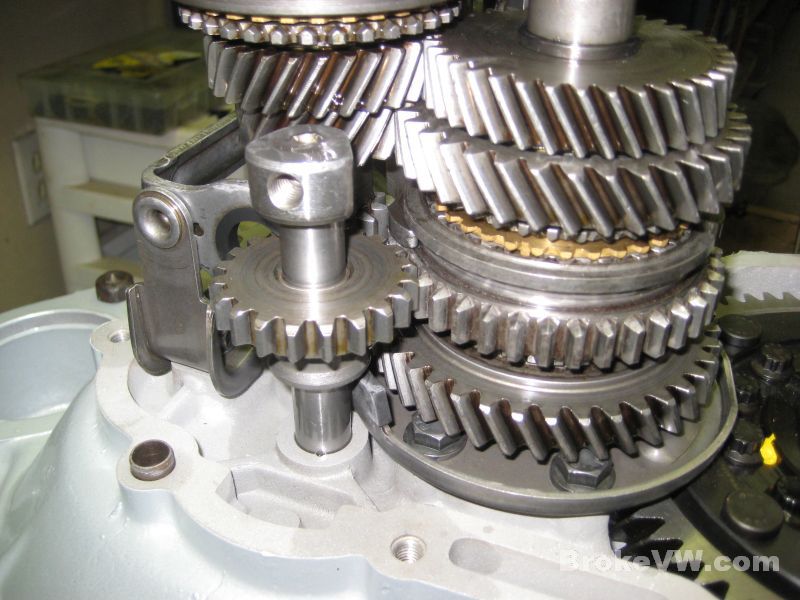
The trans torn down, it is black inside from the oil stain...
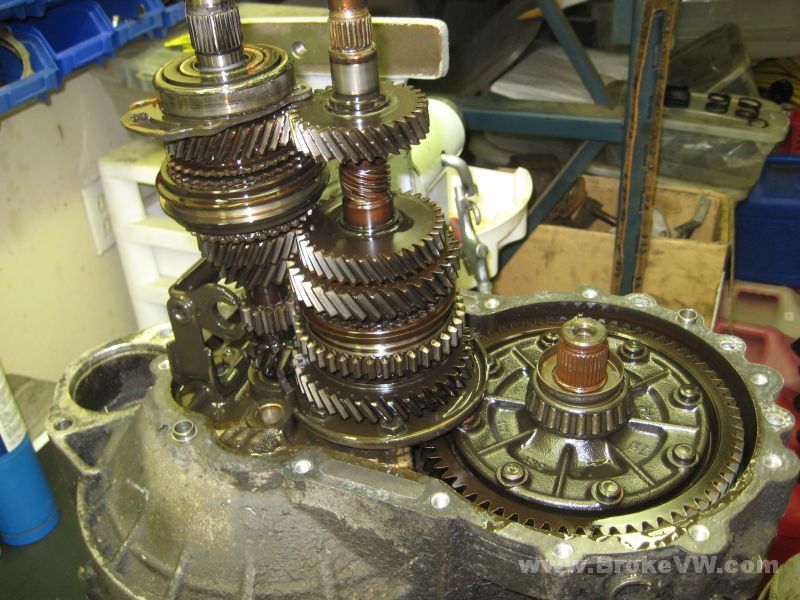
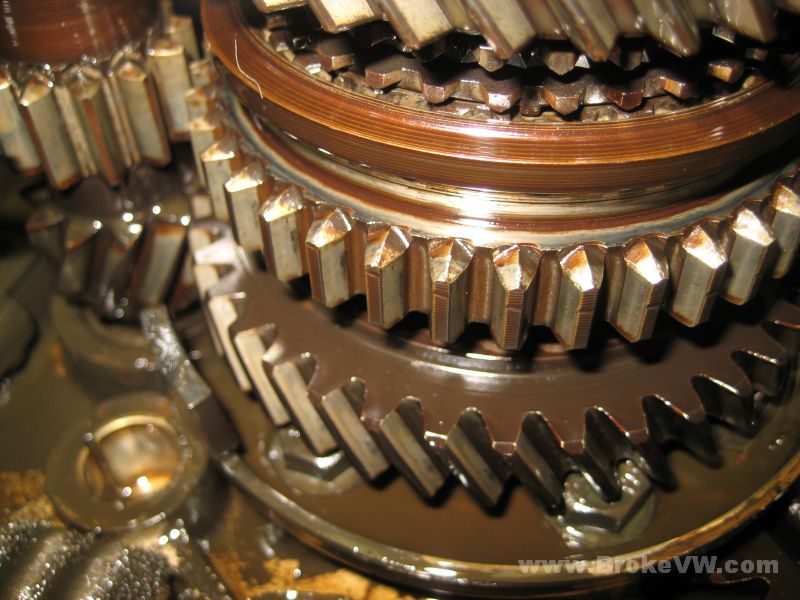
Reverse gear looks fine. Someone was careful not to select it while moving and the clutch must have been maintained properly, because the teeth for reverse on the hub look good. The camera batts died before I got a pic of the small idler teeth, but they are in good shape as well...
The case is stained and it had some water in it when I cracked it open, which explains the rust coloring in some places on the steel parts...
Update 10/15/11
Everything from this point on was done after you thought you
weren't getting a trans :)
The Wavetrac has been purchased and has been sitting here since your wife
decided to get the trans built for you anyway.... very cool! I am also going to
donate the media blasting and powder coating of the case for the build so in the
end you should have a pretty nice little trans.
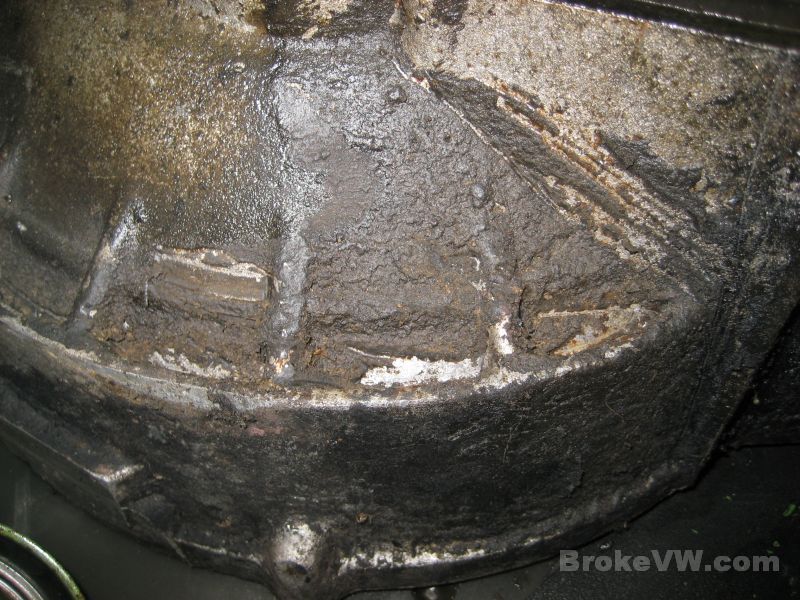
This trans was filthy! It was covered in years and years of grime, it or the engine was leaking, keeping it wet, and dust and dirt would stick and cake onto the casing, so it was very grimy outside, and inside it was pretty badly stained from old oil having sat in it.
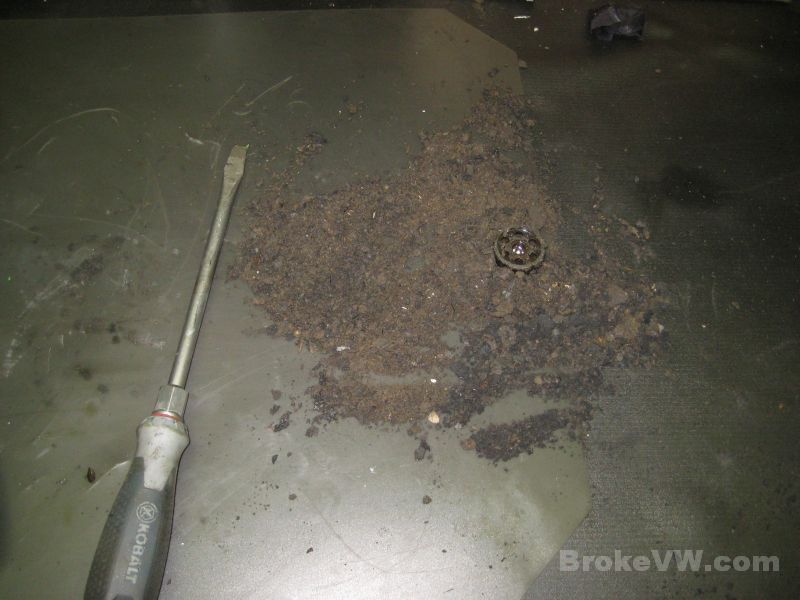
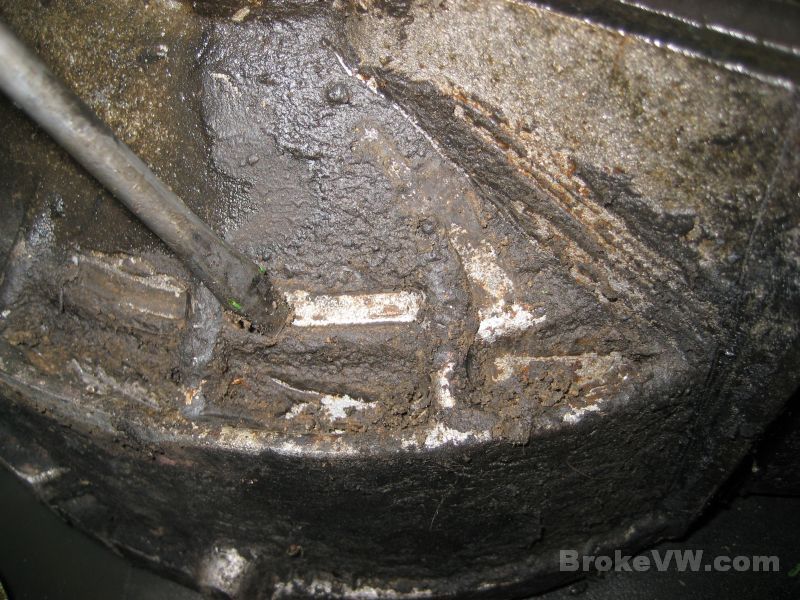
This is some of the pile of build-up I scraped from the casing with a screwdriver before putting it into my parts washer. The pile was enough to bury a release bearing!
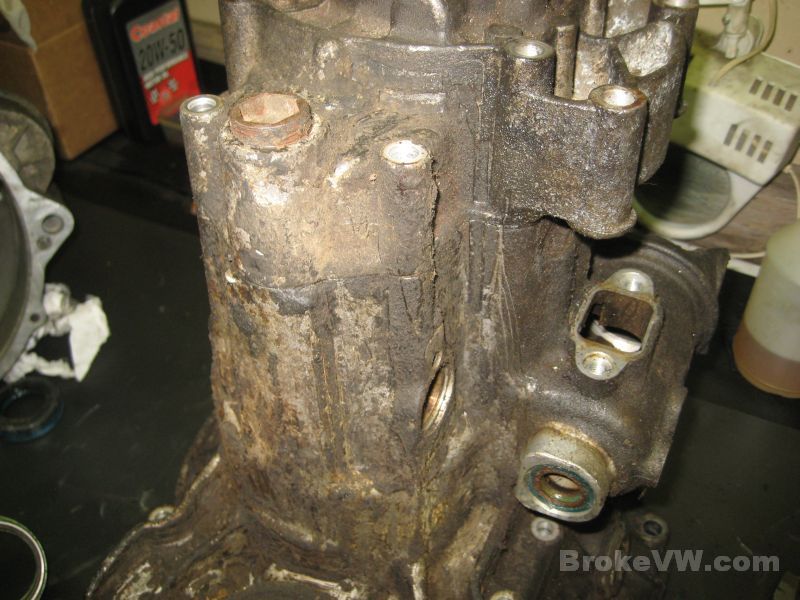
A couple pics AFTER scraping it down a bit, but it is still very funky nasty.... but it won't be for long....
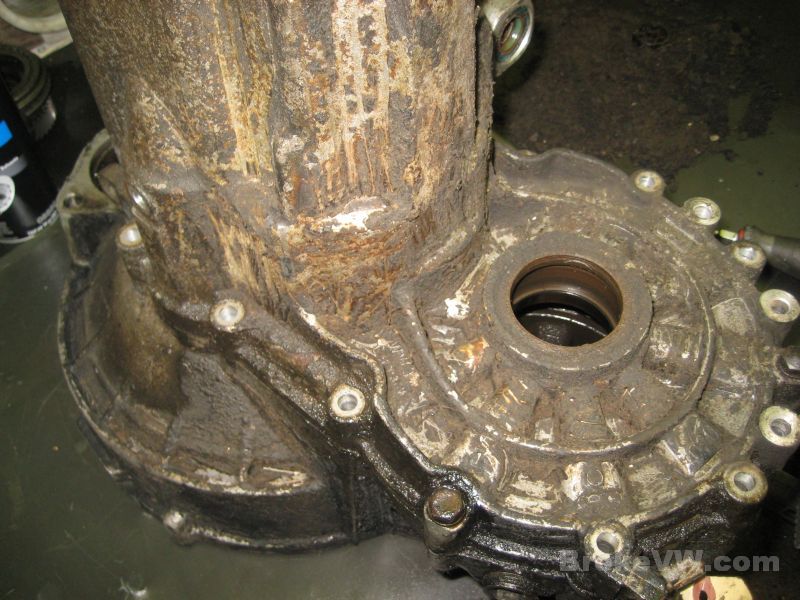
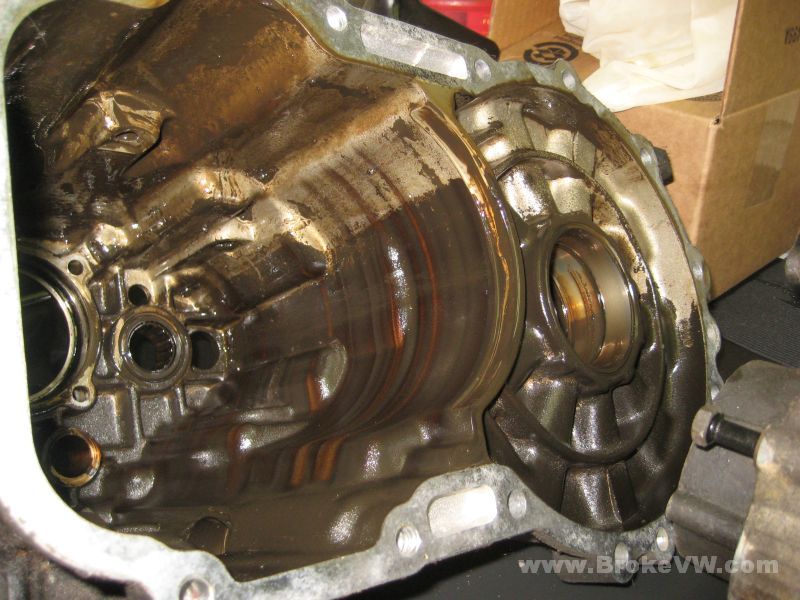
The stained inside of the casing will need cleaned up...
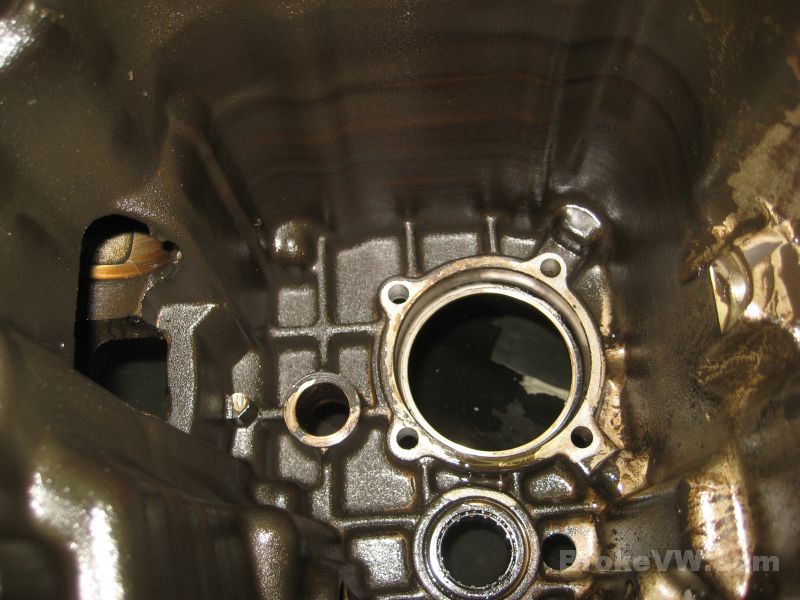
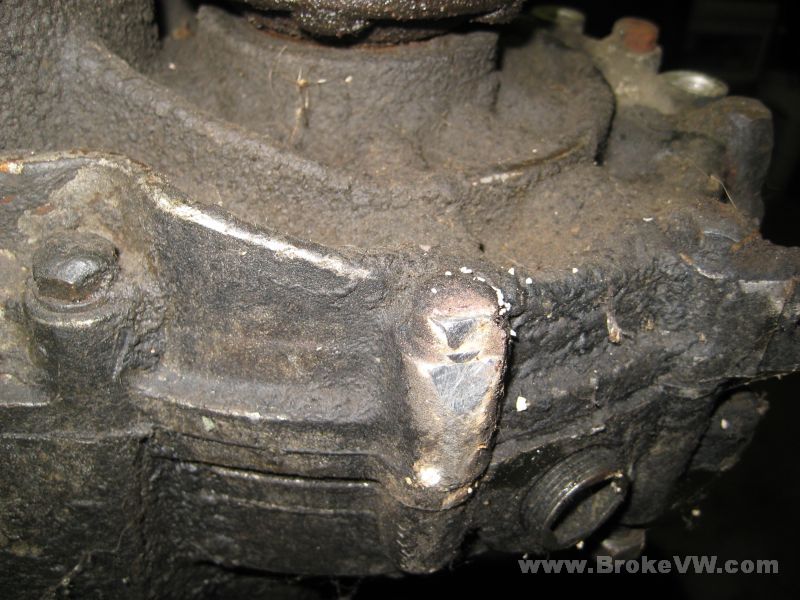
This isn't actually too bad here, it isn't very deep but it shows the grime needing scraped away, and the nice clean aluminum under it. The only good thing about a leak is that it keeps all the metal around it protected for as long as it is covered and wet. The trans will look very nice where it was covered in grime, and it'll look corroded and oxidized where the aluminum was exposed to water and oxygen... but it'll get taken care of....
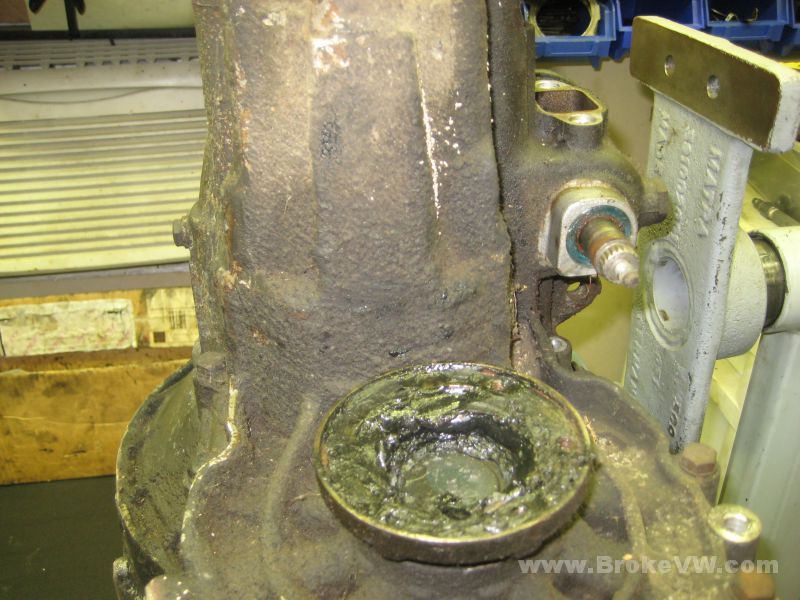
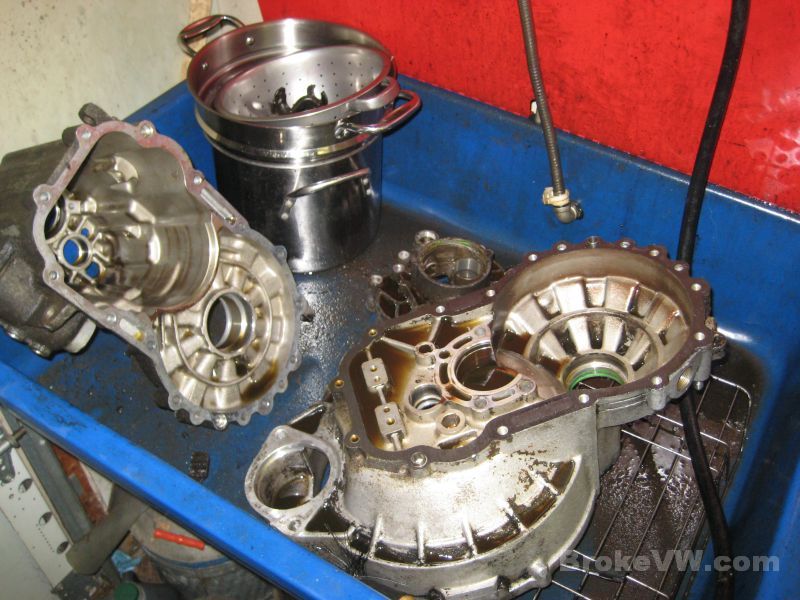
Into the parts washer to start removing some of the grime from the casing, and to see how bad the stain will be to remove from the inside...
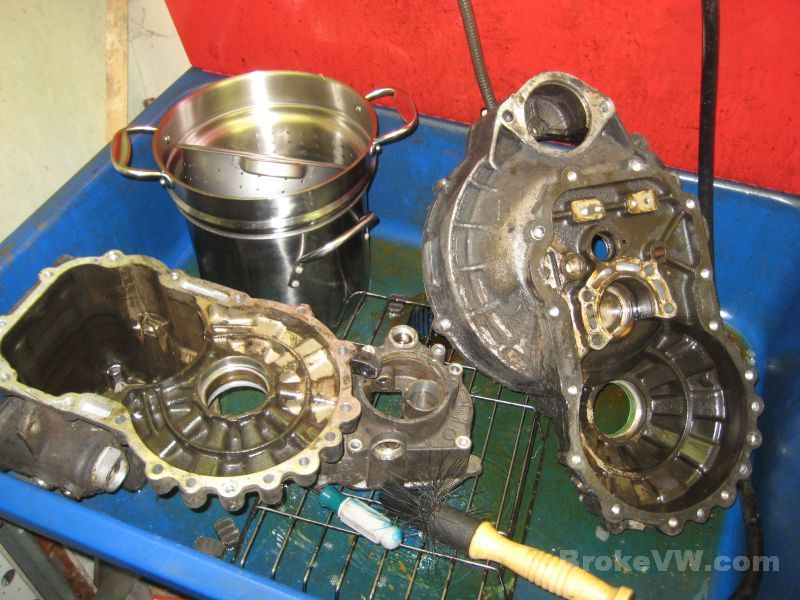
After a little soaking and scrubbing, it is showing signs of improvement, but it is bad enough that I won't spend too much time on it. The casing will end up being sand blasted and it'll look like new, then it'll be powder coated, probably silver or gray to match the color of the bare aluminum....
Some grimy parts removed from the casing....
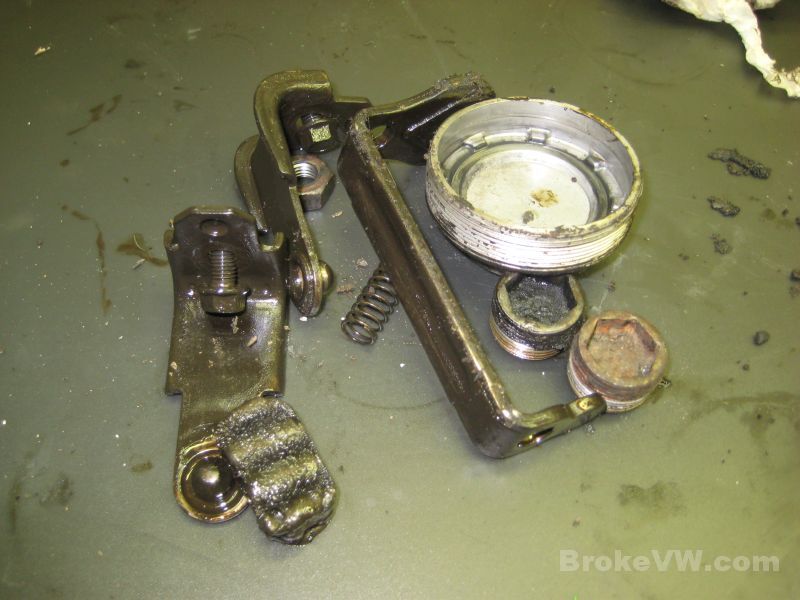
Removing the output shaft taper bearings. The whit powdery coating on the parts you see is from the vibratory cleaner, that will be removed in the ultrasonic cleaner and then the parts will be rinsed, dried, and oiled for later...
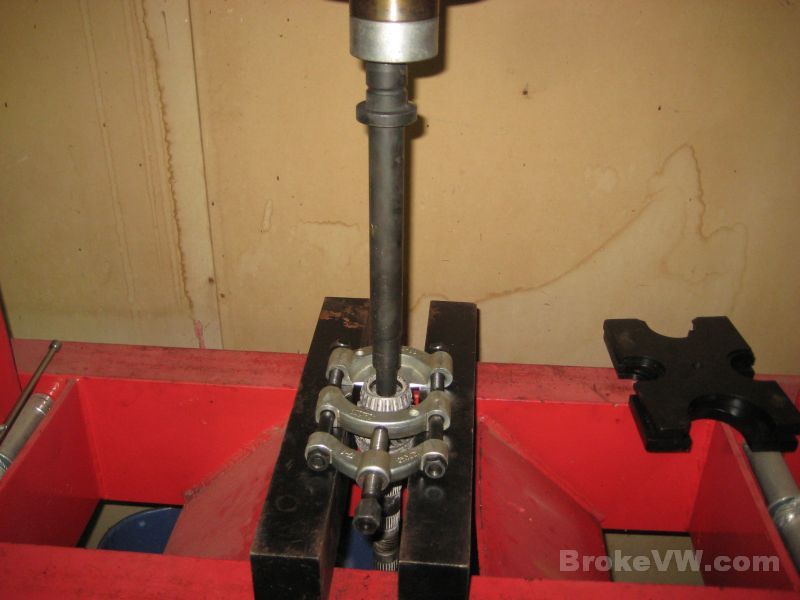
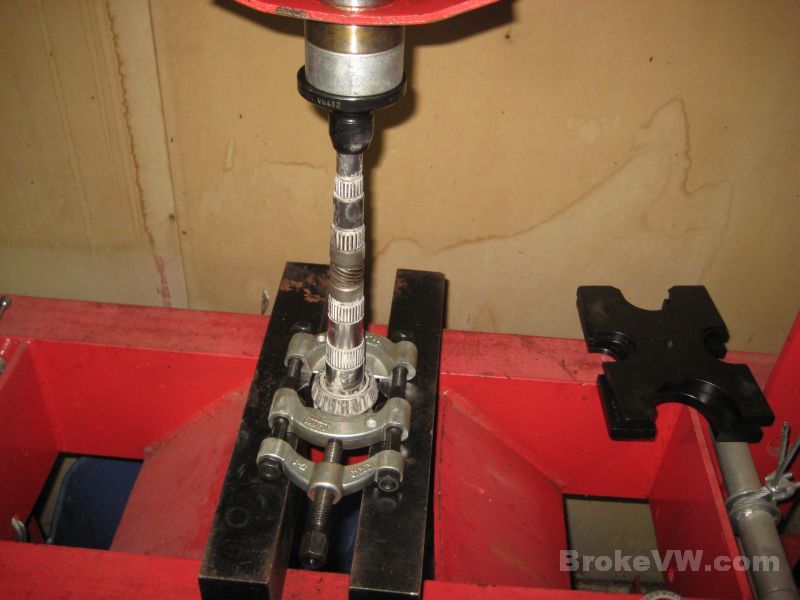
Using the VAG1582 puller on the diff bearings, it pulls them by grabbing every roller to spread the force and not damage the bearing during removal...
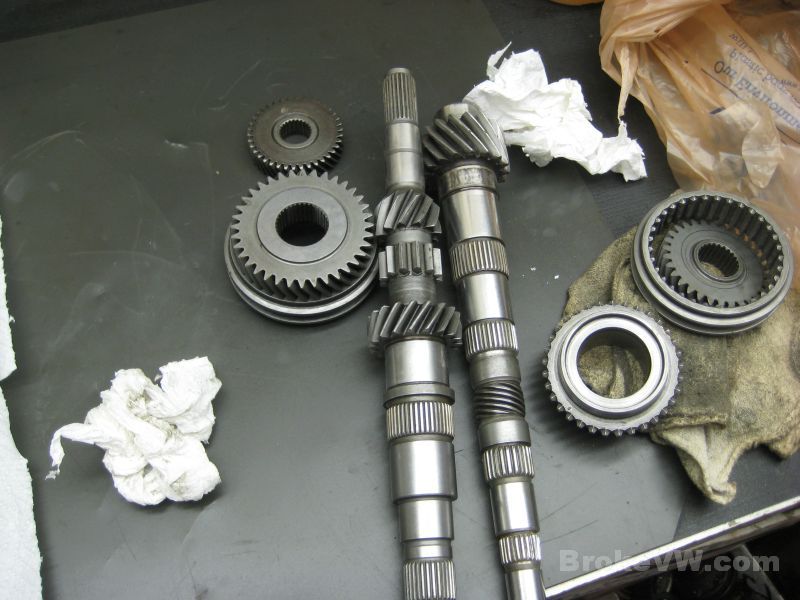
Some clean and dry parts needing oiled...
Some parts that need to go through the ultrasonic cleaner but that have already been through the vibratory cleaner...
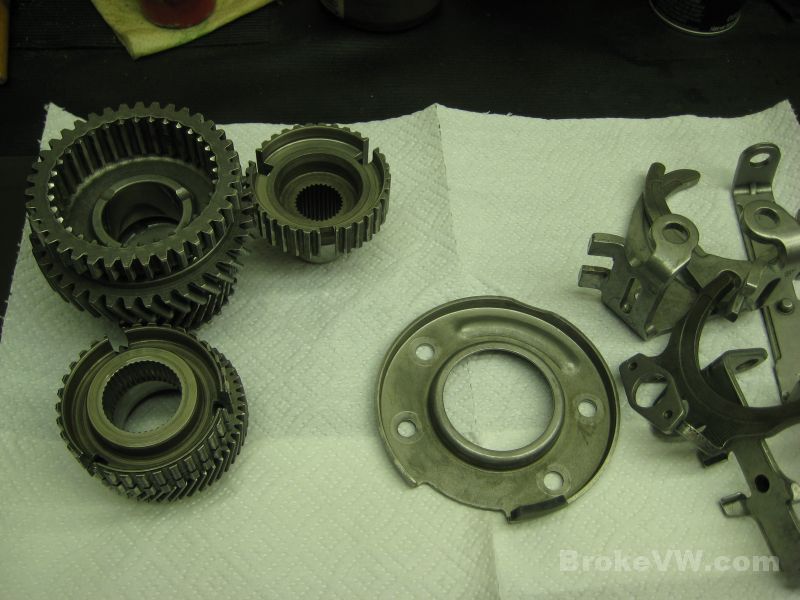
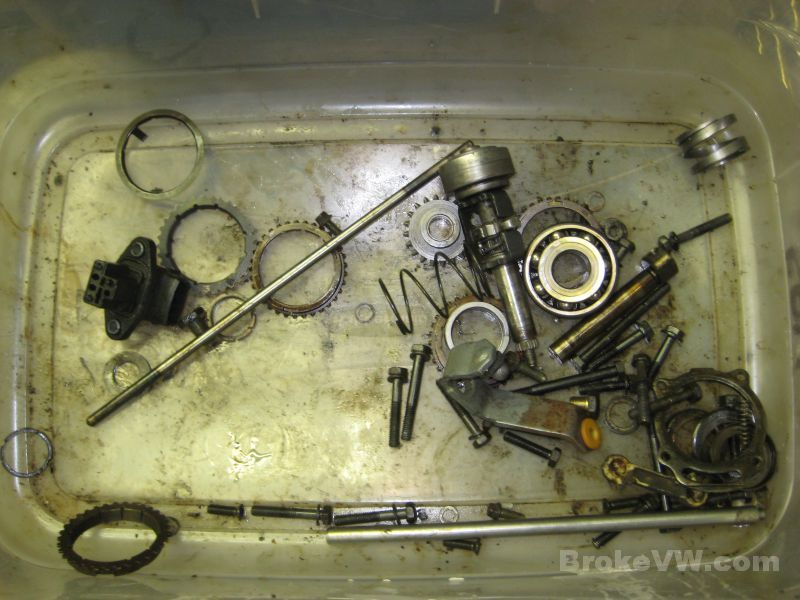
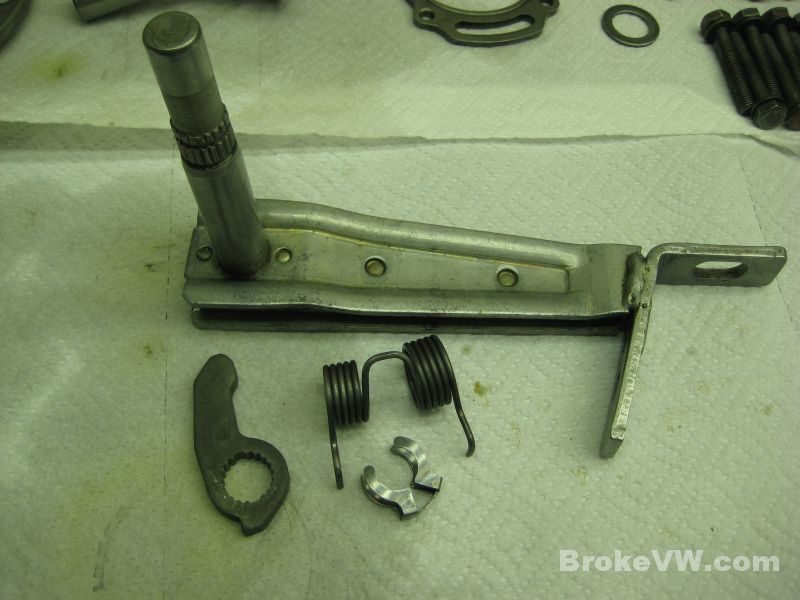
Misc. small parts from the trans, some will be used, some like the sync rings will be replaced....
I've put the trans on the bench for now, I will try to get it blasted before the weather gets cold here, but I have another trans coming in this week that is scheduled for work, so your trans will get put to the side until I have more free time to work on it.
Update 10/18/11
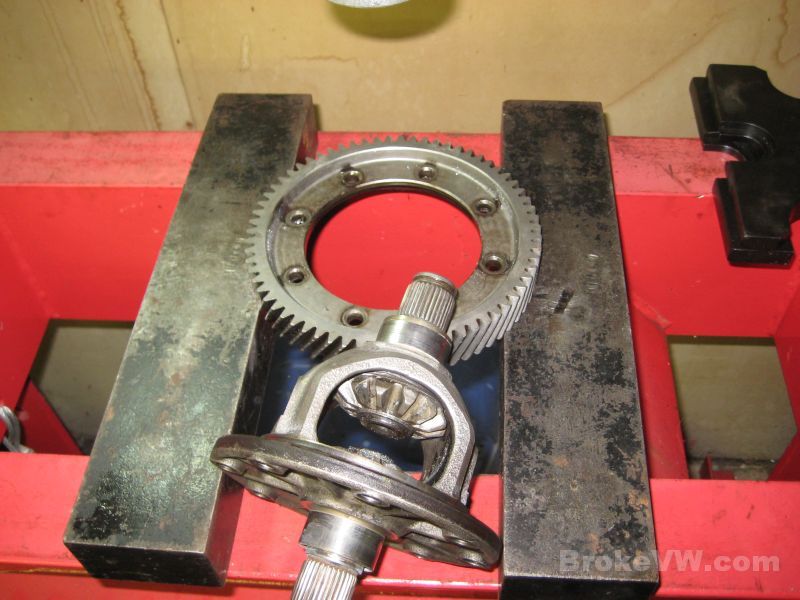
Taking the diff apart to get the ring gear from it, so it can later be installed onto the LSD. The old diff I'll keep, most people do not want them, if you want it I'll have it here and can ship it to you but to save weight I won't ship it with the trans.
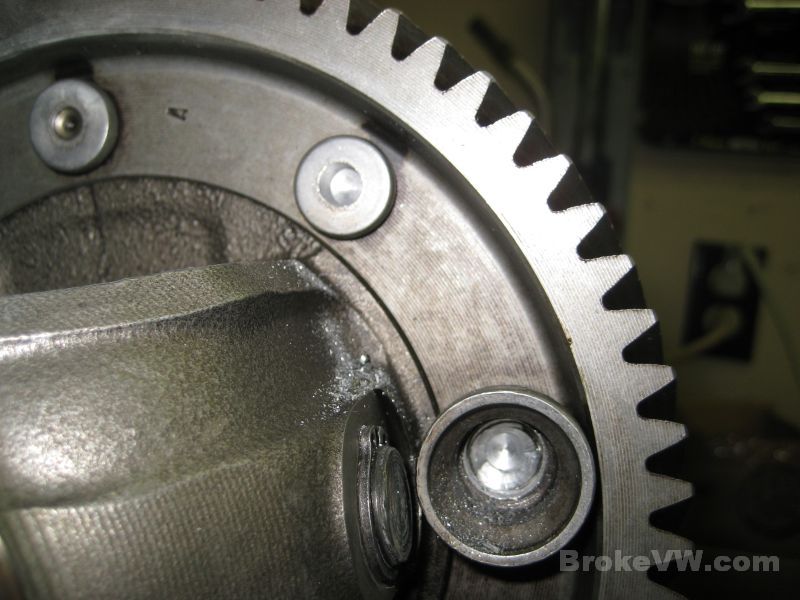
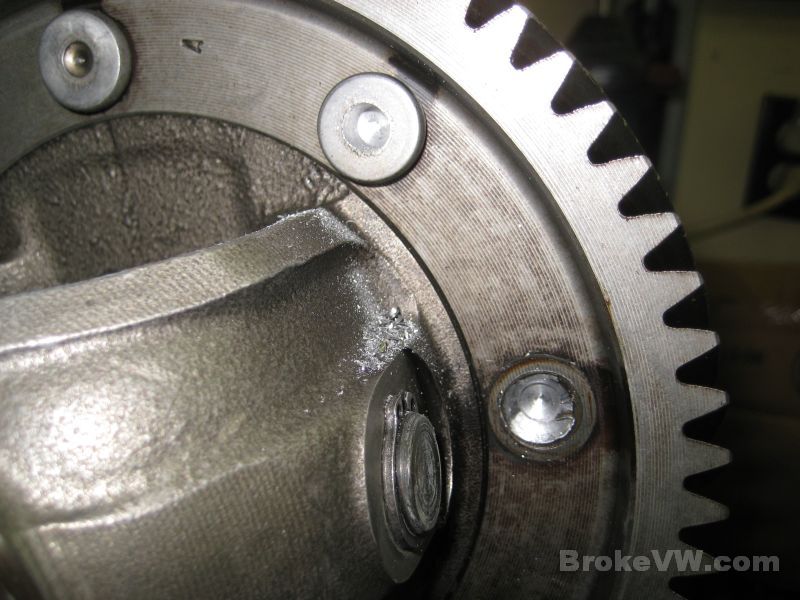
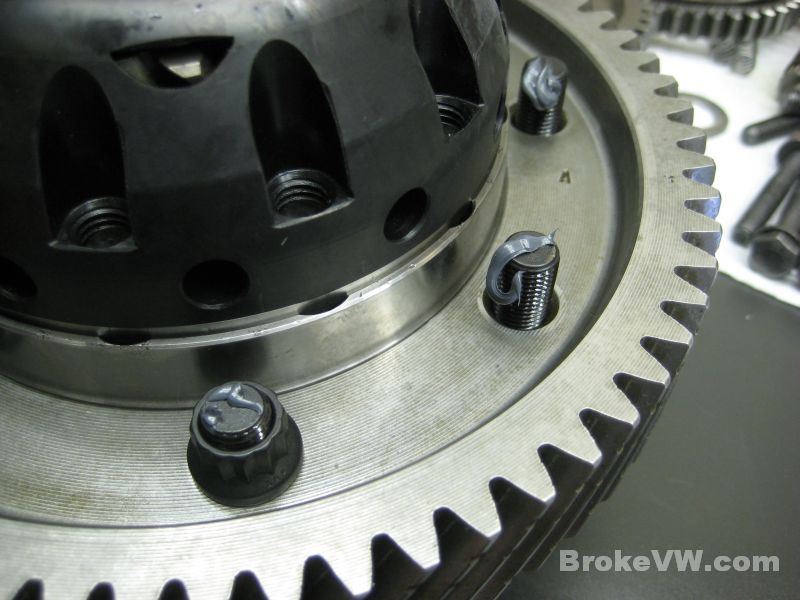
To remove the ring gear the 8 rivets must be removed. The heads are drilled first with a 6mm then a 12mm to remove the heads. This pic shows a normal rivet to the far left with the factory dimple in the center, then the next rivet clockwise is one drilled with the 6mm, then the last rivet has also been drilled with the 12mm, and it is ready to fall off. The last rivet is the large-head rivet that secures that cross shaft in the diff. Your trans has both the large-head rivet and the snap-rings on the end of the shaft. Those trans with only the large-head rivets and no snap rings are at greater risk of SMS failure. Your trans with a bolt kit and LSD won't be at any SMS risk from the diff...
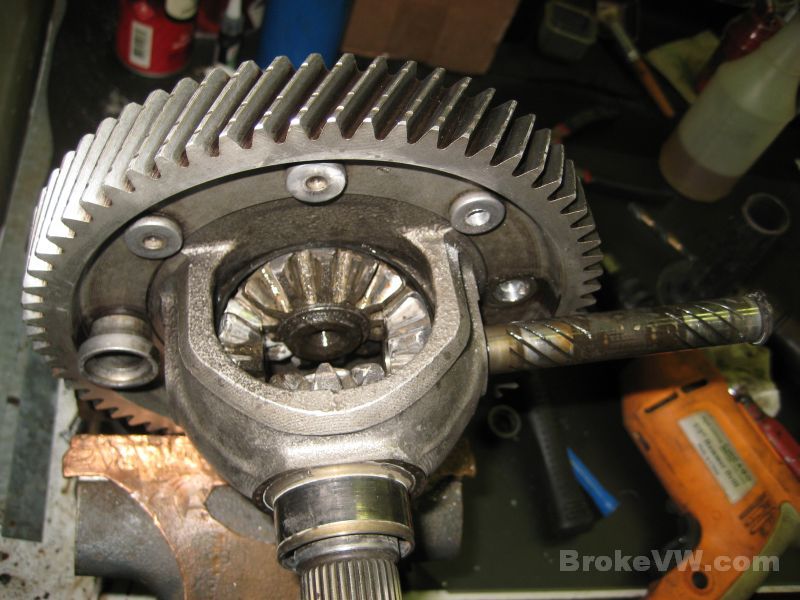
With the large-head rivet out of the way, the snap ring can be removed on one end of the shaft and the shaft driven out of the diff. The spider gears can now be removed as well. This is not needed on your trans because you won't be using anything out of this diff except the ring gear...
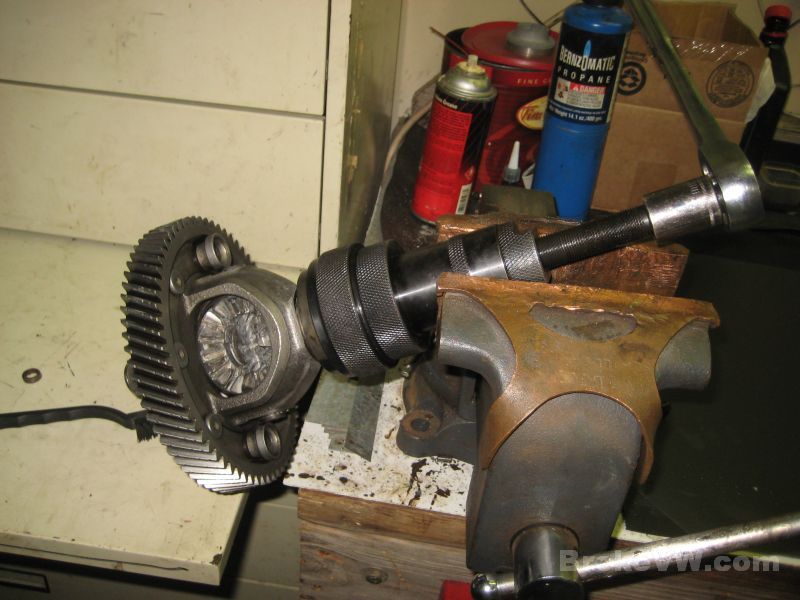
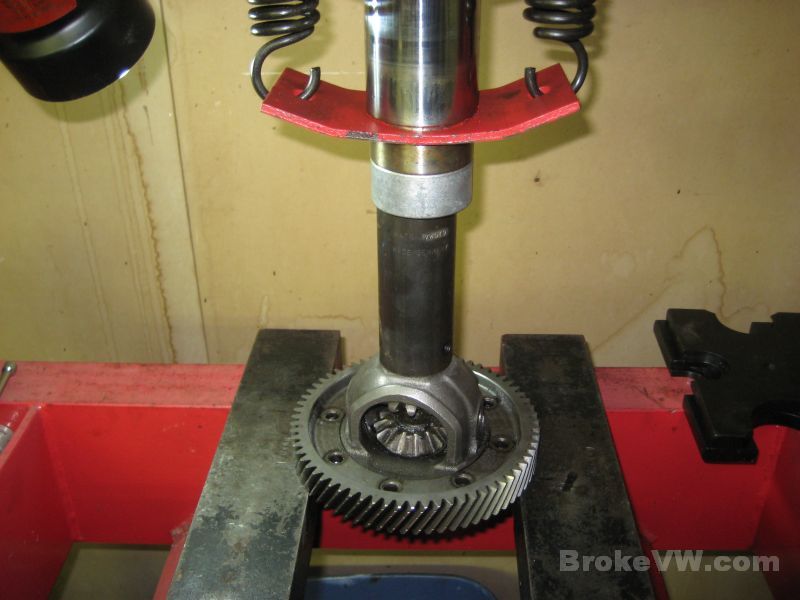
Pressing the ring gear free...
I have another trans here now and will be putting this one to the side until I prepare to start sand blasting and then your casing will be blasted at that time.
Update 11/16/11
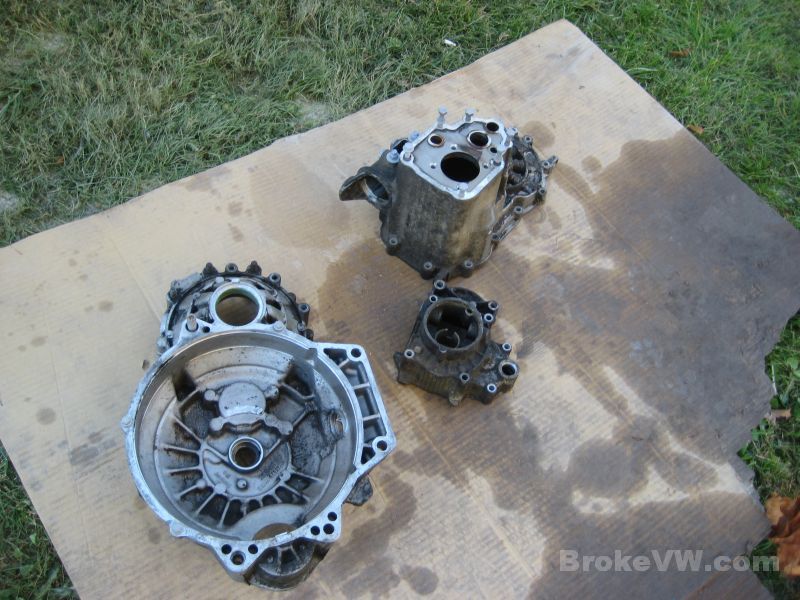
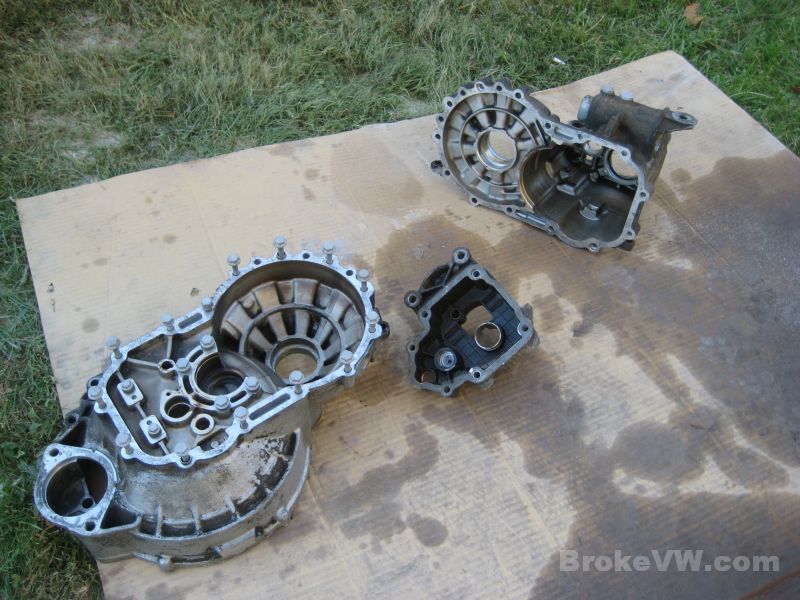
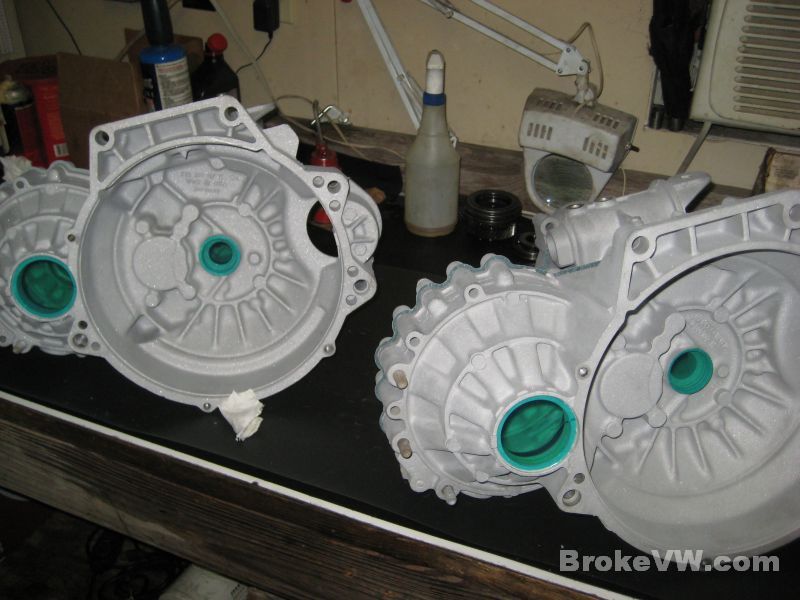
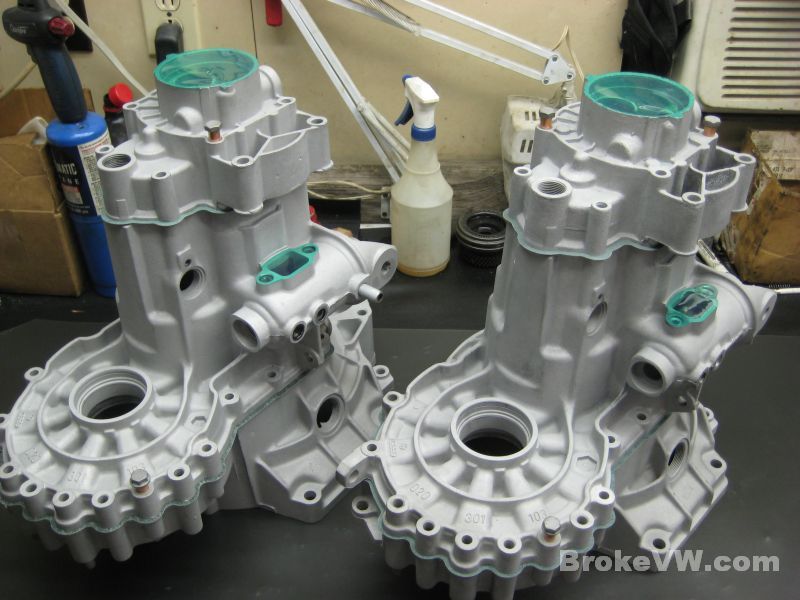
A couple pics showing the media blasting of the casing, prior to taking it to be powder coated. I think I will try to match the bare aluminum case color with the powder.
A couple before, then a couple after pics of the casing...

Next it will be taken to be powder coated, but it has to wait
until I have another case ready to be coated, as they are done in pairs to keep
costs low (the min. charge will cover 2 trans, so if I take in just one, it is
the same price as having 2 coated).
I have a case I am working on, and it will be getting coated at the same time
yours is being done.
Update 04/12/12
I have the case ready to be plugged for powder coating, but am
now waiting on the coaters to get the work done.
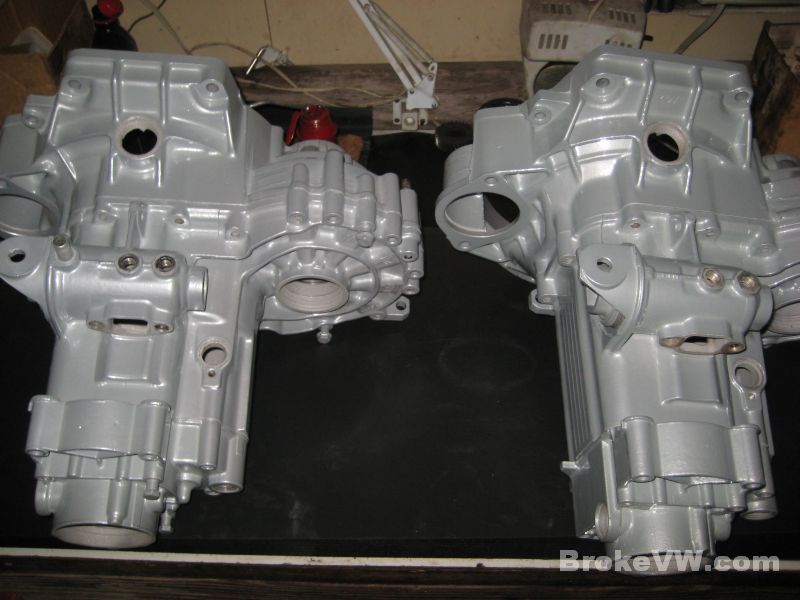
Your trans is on the right I believe.
Update 05/07/12
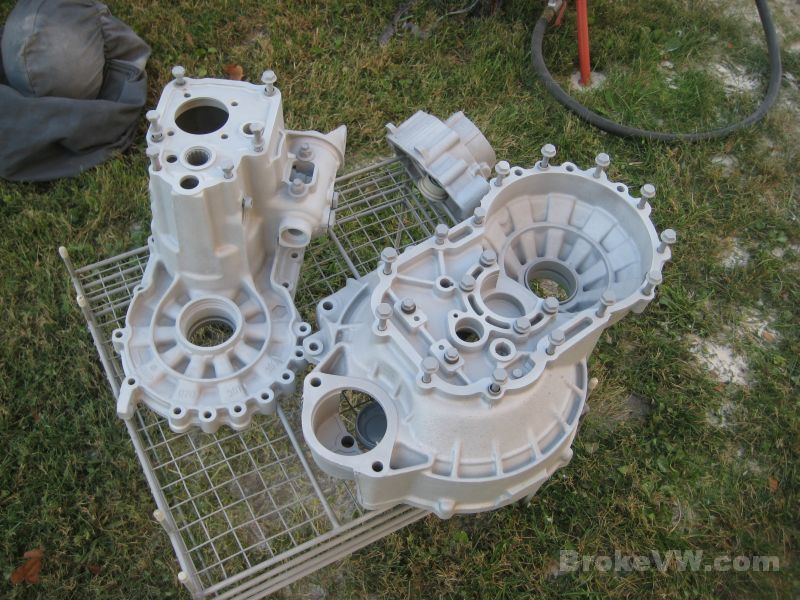
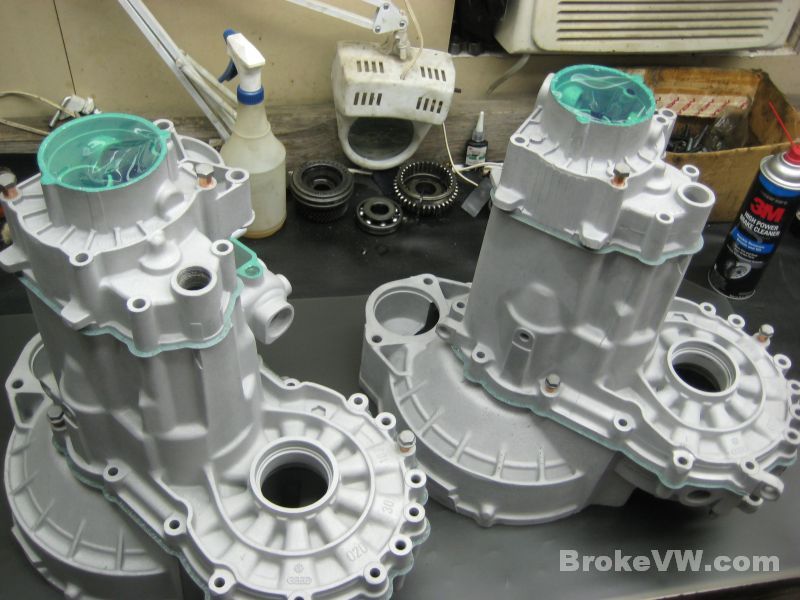
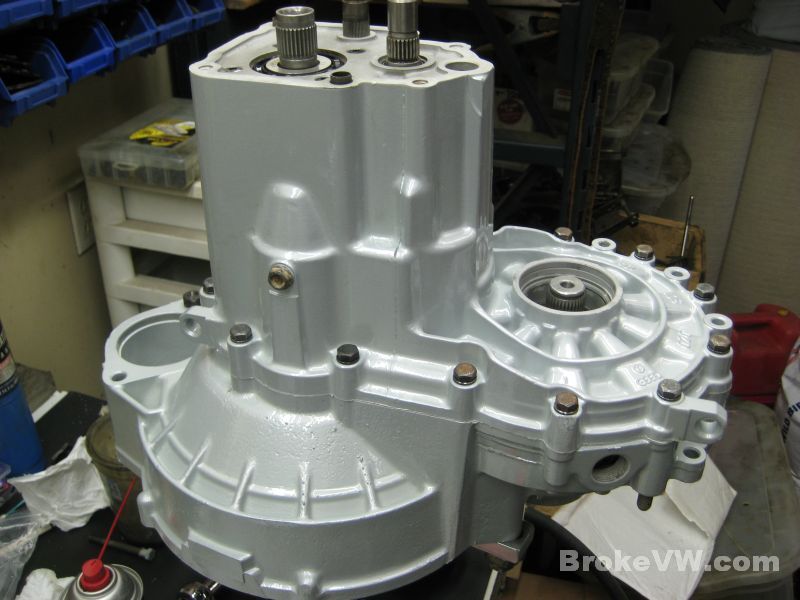
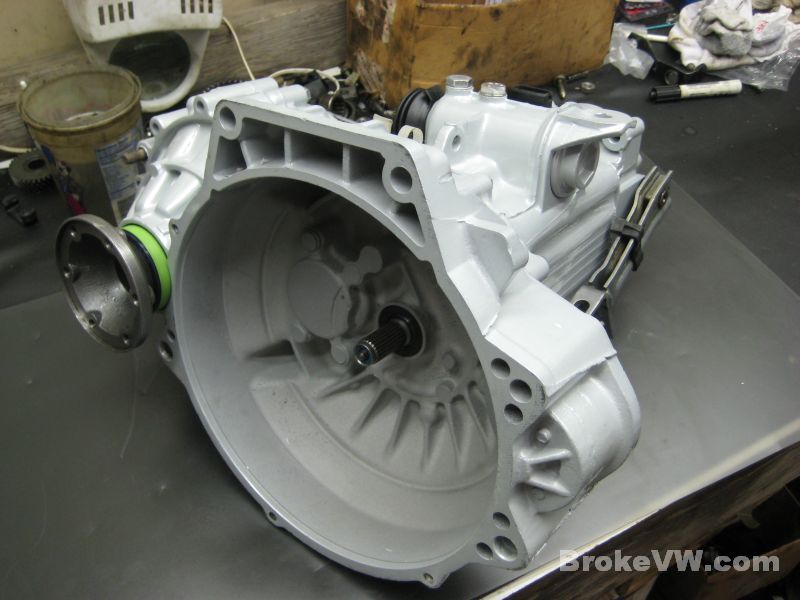
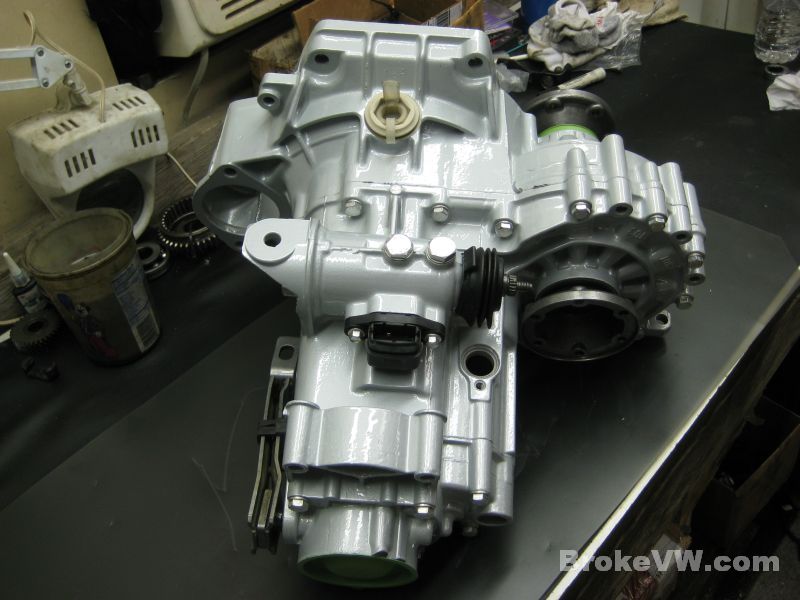
The trans case has returned from being powder coated. It is a color called White Aluminum, and it has also been clear coated, so it was a 2-stage coating. The result is a nice bright clean aluminum color, with the gloss finish of an automotive paint.
I hope you like it, I couldn't exactly ask what color you wanted :)
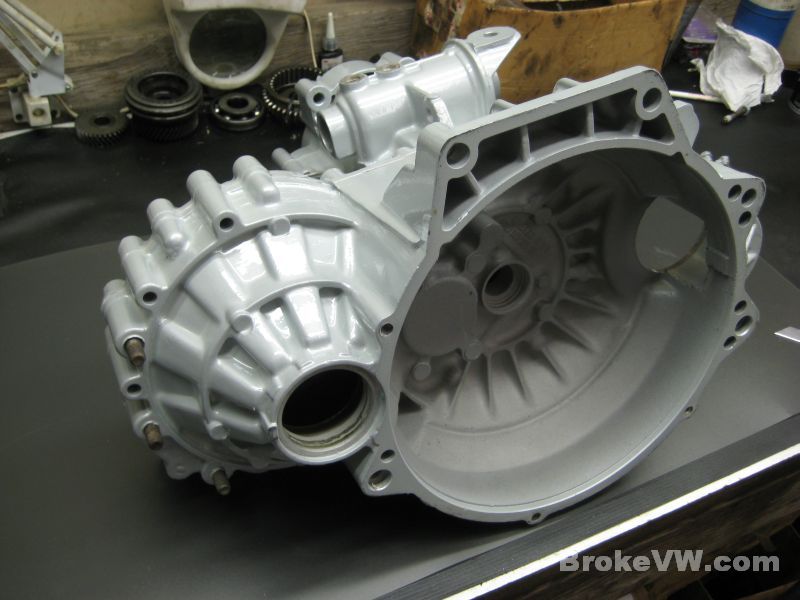
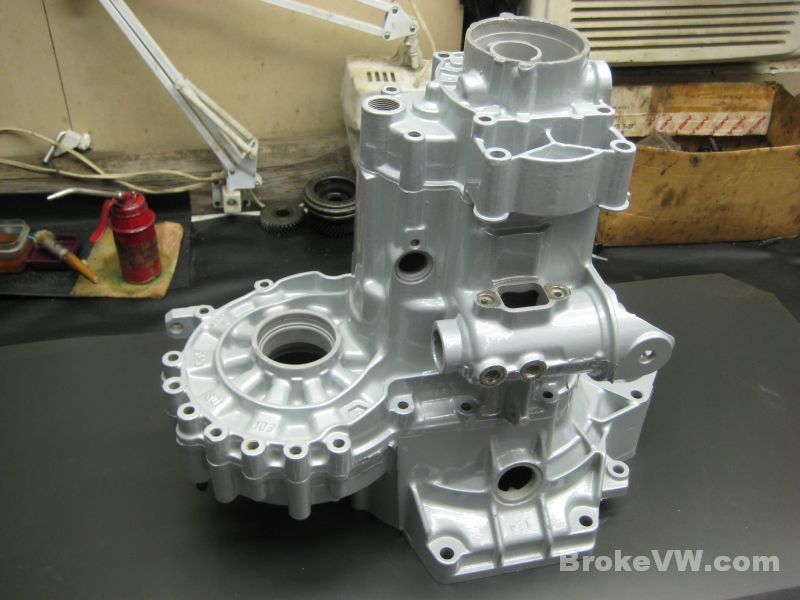

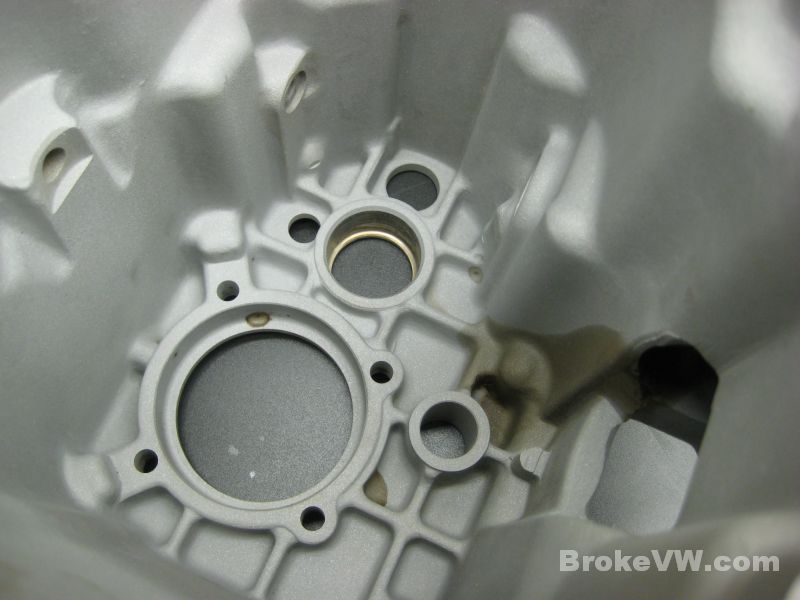
The inside had some oil in the selector assembly area and when it was out-gassed in the powder coating oven the oil thinned and ran then cooked in. It is stained, but it won't hurt a thing. I have removed all excess oil that could be pulled out of the surface with brake cleaner, the stain that remains is there to stay but it won't bother anything...
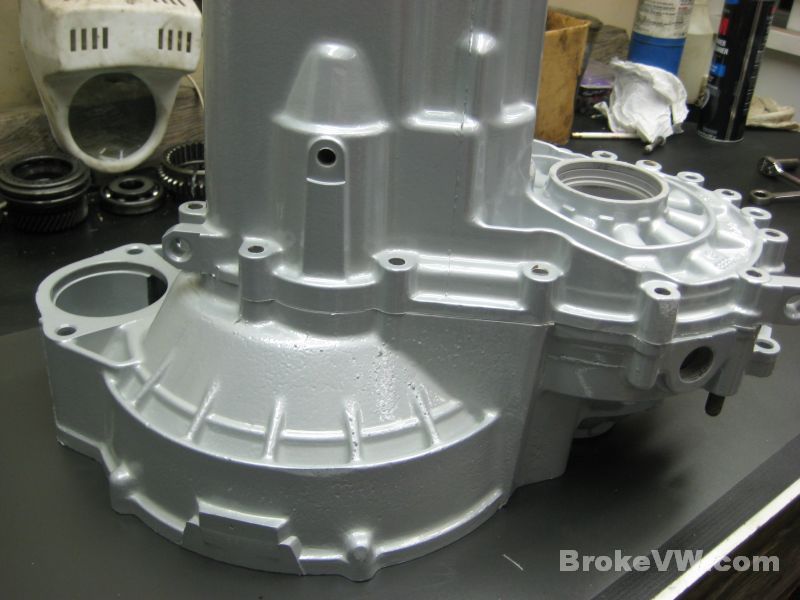
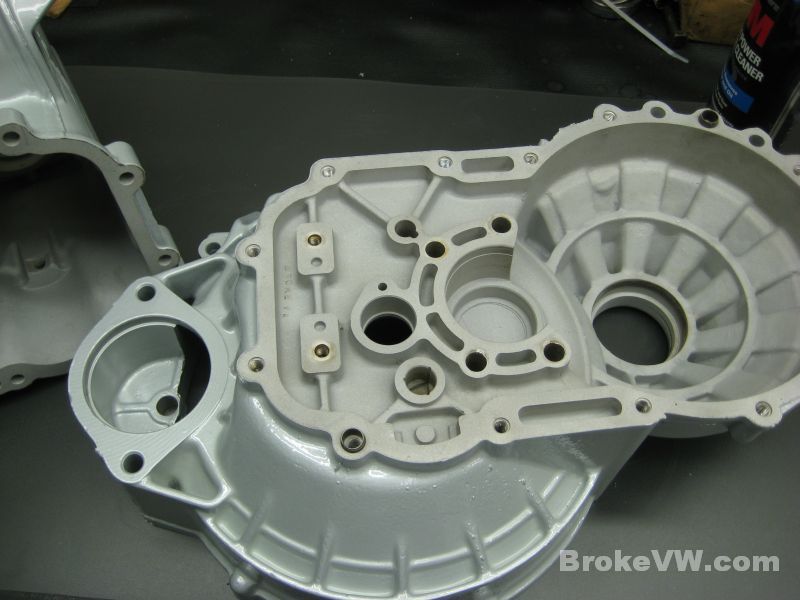
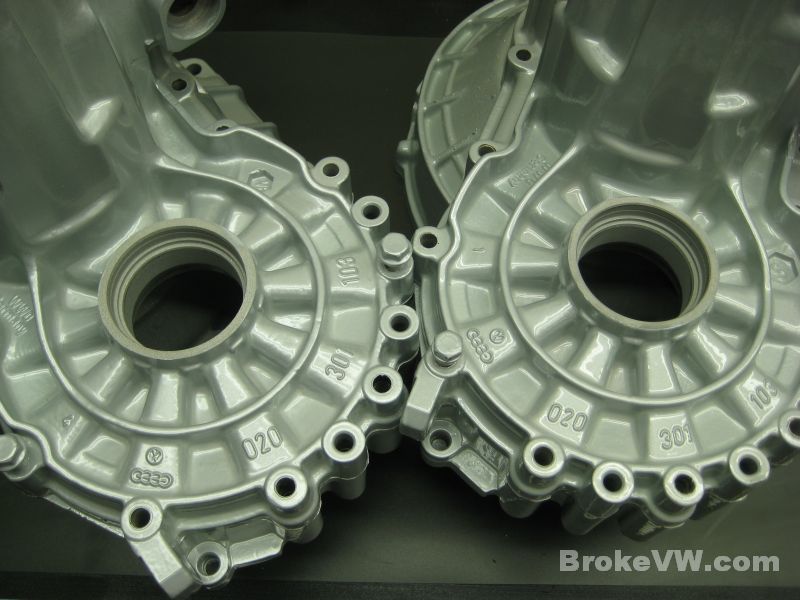
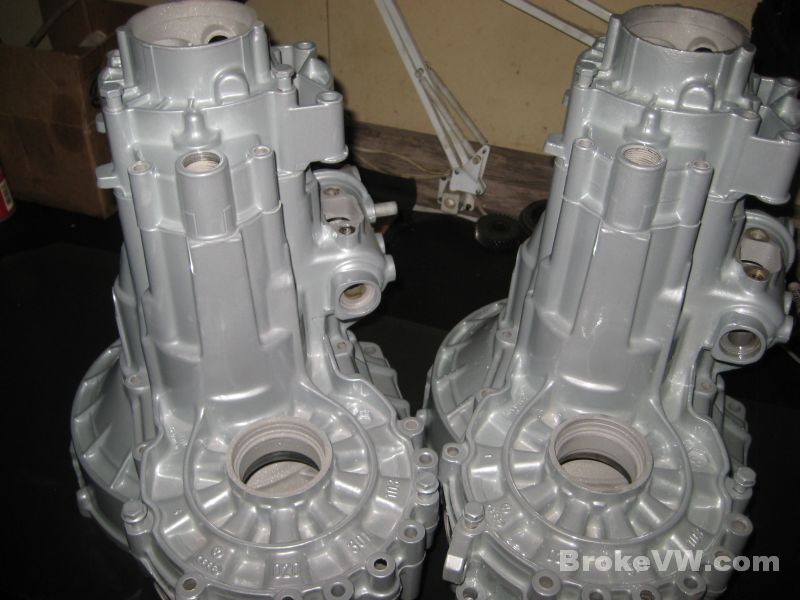
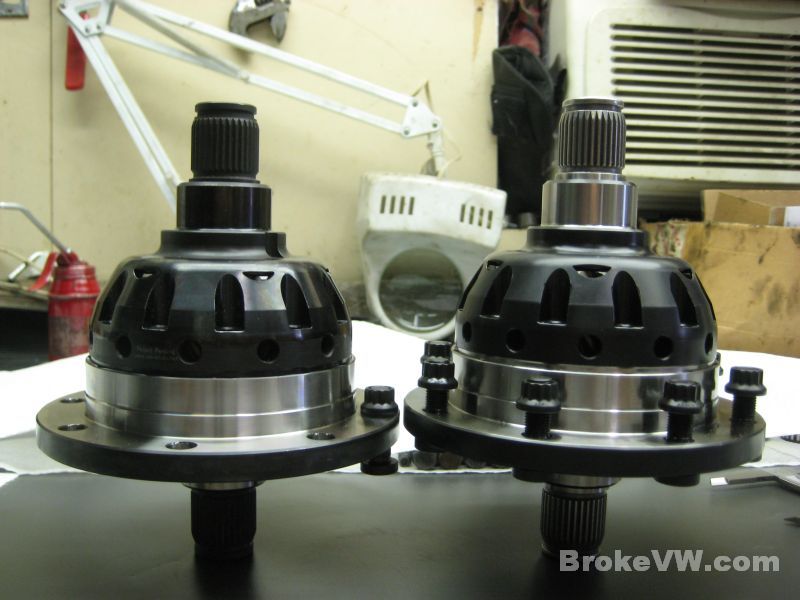
Here is a comparison of your trans, next to another trans that is the same color, minus the 2nd stage clear coating. Your trans is on the right in the following pics...
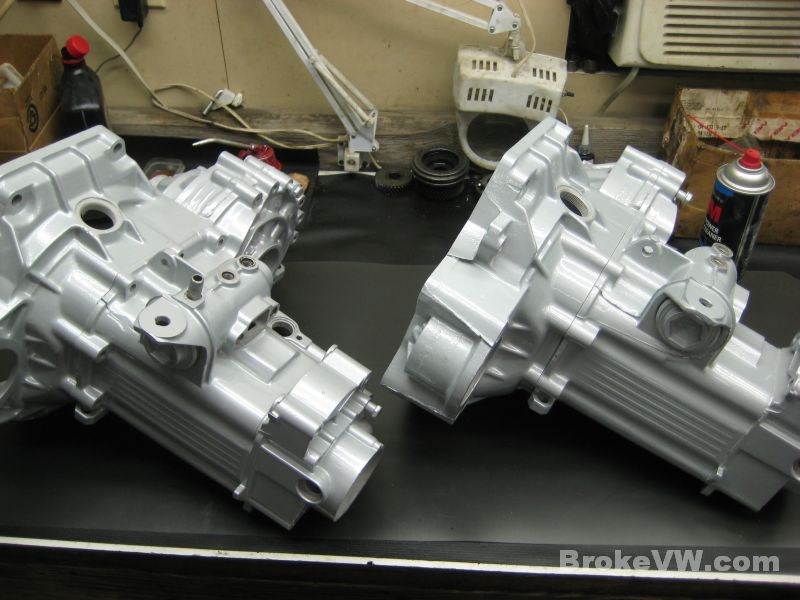
This pic probably shows the difference the best, which is minimal. The trans on the left without clear coat is the same color, just not quite a shiny looking or wet looking as your casing on the right...

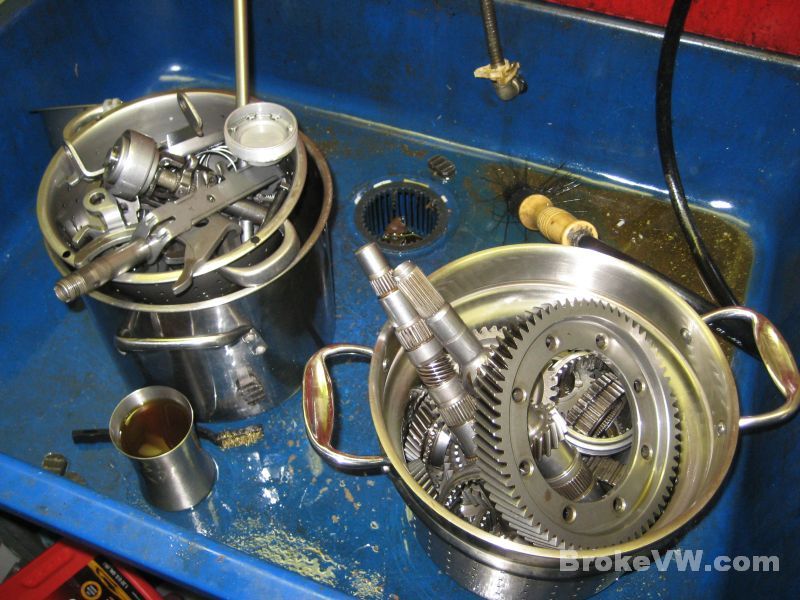
The internal parts soaking in kerosene, they will be drained, allowed to drip dry some, then brought in and rinsed in hot running water. The water carries the kerosene away, the heat raises the temp of the steel. After 60 seconds of rinsing, the parts are immediately dried with compressed air, the heat of the steel helping evaporate any water. The dried parts are then coated in fresh oil to protect them, then they are bagged up until needed later in the build....
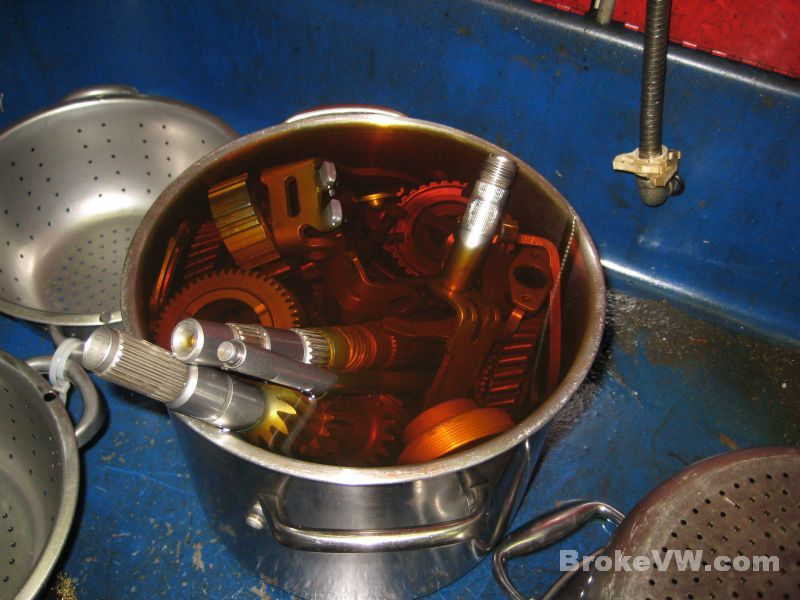
Clean parts drained and dripping dry, next will be to rinse them and get them ready for the rebuild...
Update 05/08/12
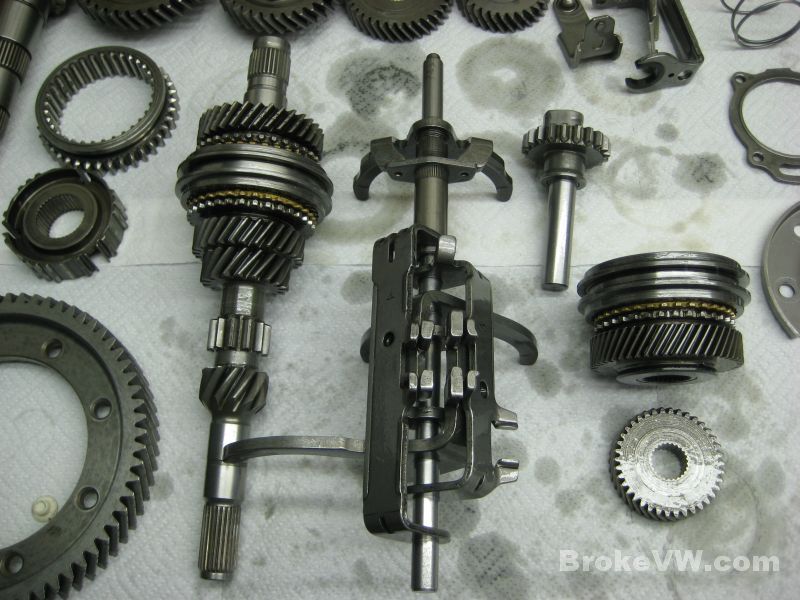
I have the internal parts out of the washer and they have been rinsed and are ready to be assembled. Missing in the next few pics are the release arm, and the flanges... I forgot the trans had no release arm so I have sourced one of those and the flanges were still in the parts cleaner when I took these pics...

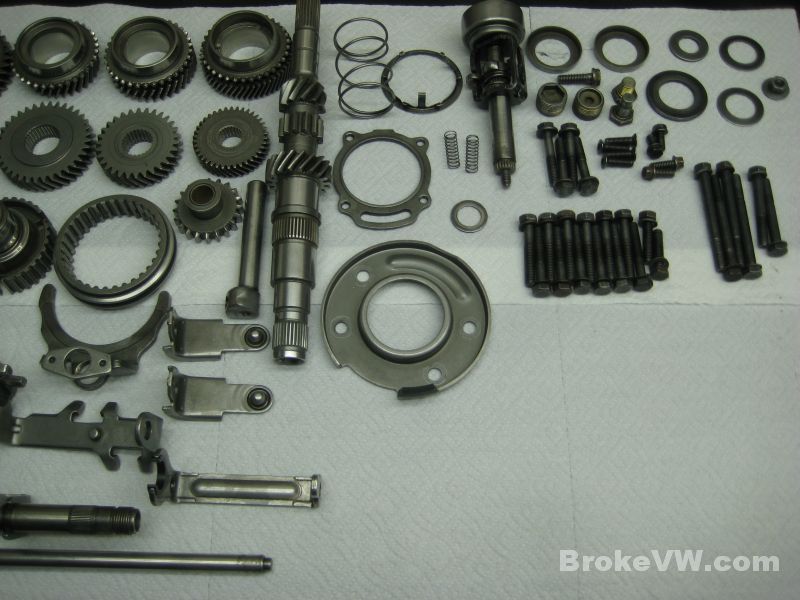
A pic of the new parts being installed... all 5 brass sync rings, 4 cryo treated Timken taper bearings, input shaft ball bearing, shaft roller bearings, and TO bearing, the pushrod seal, release arm seal, selector shaft seal, input shaft seal, 2 flange seal kits, the 5th fork lock, 5th bolt, start bushing, pushrod bushing, 5 needle bearings, input circlip, 3rd adjusting circlip, 4th circlip, 5th circlip, output thrust washer, green end cap, green seal sleeve, 6 springs, 9 keys, ARP bolt kit, and of course one Autotech Wavetrac LSD, fresh back from Autotech after being updated to the new housing type...

I didn't get pics of the assembly process, as I was in a rush
but the input shaft has been assembled with the new pushrod bushing and seal,
new 3rd and 4th needle bearings, new 3rd and 4th sync rings, and a new input
shaft circlip.
The shift forks have also been assembled.
The 5th gear assembly has new sync ring, keys, and springs, as well as a new
bearing installed...
Update 05/10/12
I've ran into another delay that is out of my control unfortunately. The LSD will have to be replaced by Autotech, it is faulty.
When I'm not working on the trans, the parts are kept covered to prevent any dust from settling on them...
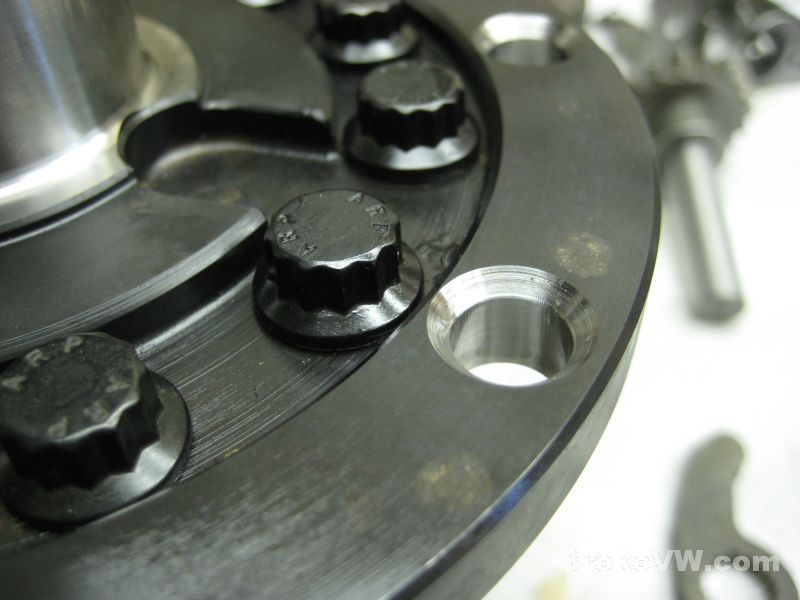
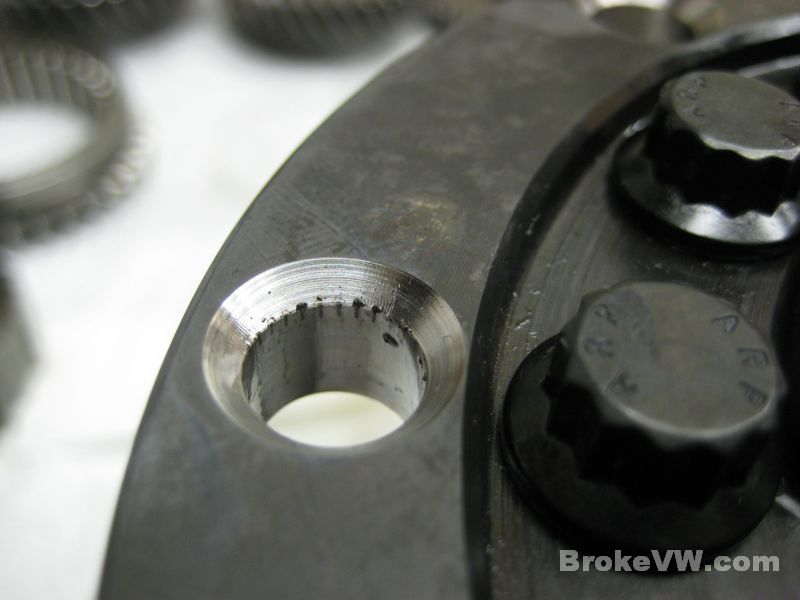
This is the new LSD that was returned to me from Autotech. It went back because of the old style bolt holes, which were cutting the splines from the bolts and collecting them under the heads, preventing them from being installed fully. This is the housing that they sent back, it has much deeper chamfers around the holes to help collect the debris, and I believe they have opened the bolt holes up to loosen the fitment of the bolt to the LSD...
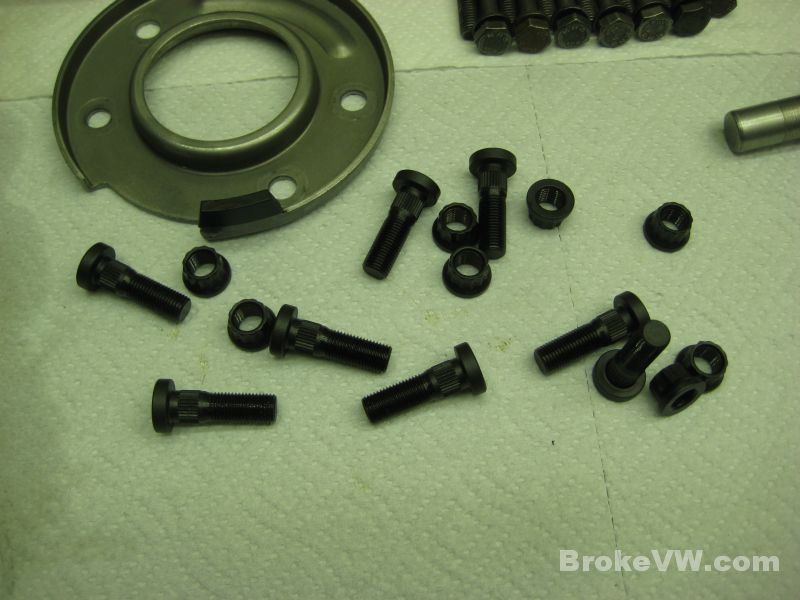
A new set of ARP bolts are prepared to be installed...
I installed them as I always do, I place each bolt in by hand,
then tap it with a rubber mallet to seat it so it doesn't fall out when turned
upside down. I tap all 8 in, then carry it to the press to drive them in 2 at a
time. When I placed the bolts in the holes and gave them the light tap to seat
them, it drove them in fully. That is a problem.
Removing a bolt showed me that the holes are too large, they opened them up too
much at Autotech...
At least 2 of the bolts simply dropped into place. They fell into the holes, so obviously they would spin if you tried to put a nut on it. I could make it work, holding the bolt heads stationary as I tightened the nuts down, but it isn't right and I don't like to cut corners, so I called Autotech and they are sending me a diff with installed bolt...

I decided to carry on, and installed the bearings onto the output shaft...
Installing the new race into the bearing carrier plate for the output shaft...
The AGS trans you found online that I picked up in Athens didn't include the parts below, but I sourced them from another trans to get yours built...
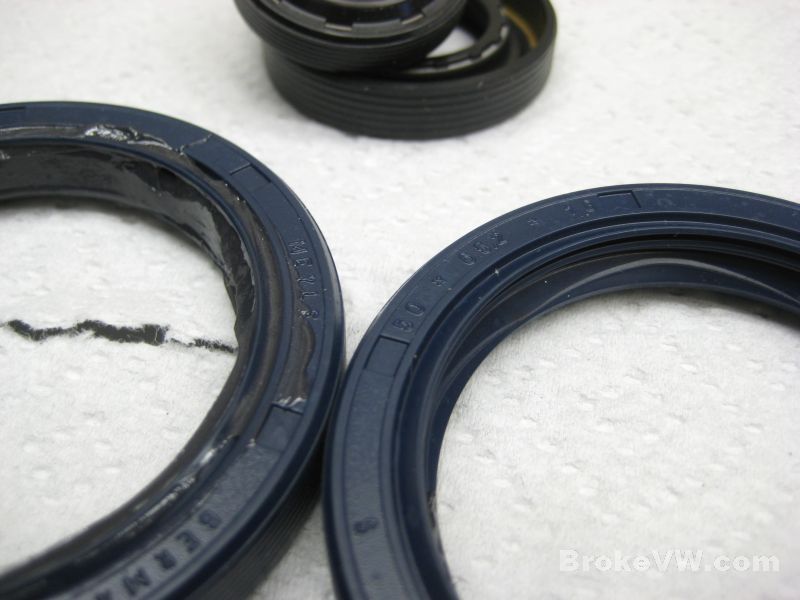
The oil seals are all greased between the sealing and dust lips, to prevent any debris from getting to the sealing lip and to facilitate installation...
The new clutch release arm seal installed into the 5th housing, followed by the parts sourced from the other trans to complete this AGS...

The TO bearing completes the 5th housing, with the exception of the bearing bore to the left of the TO bearing. That is for an additional support bearing that VW eventually deleted, and the bearing mfg. quit making. It was held in place with a small bolt. I have sourced replacement bearings from the same mfg. (INA in Germany), but they are open-ended and don't require the bolt to hold them in place. I will install one of these into the 5th housing to replace the NLA bearing from VW....
Next will be to work on the bearing preload for the output shaft, get the case pieces partially assembled with new bearings and races, and then wait for Autotech to get the replacement LSD here.
Update 05/14/12
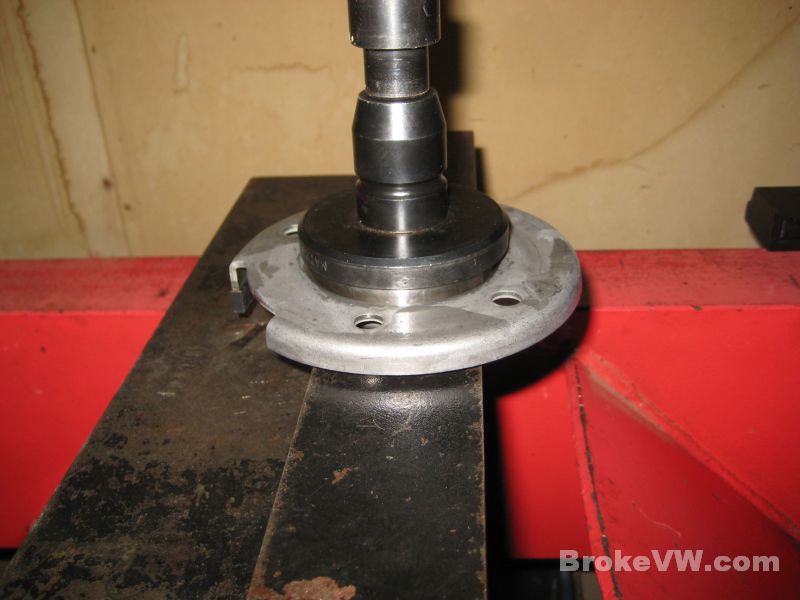
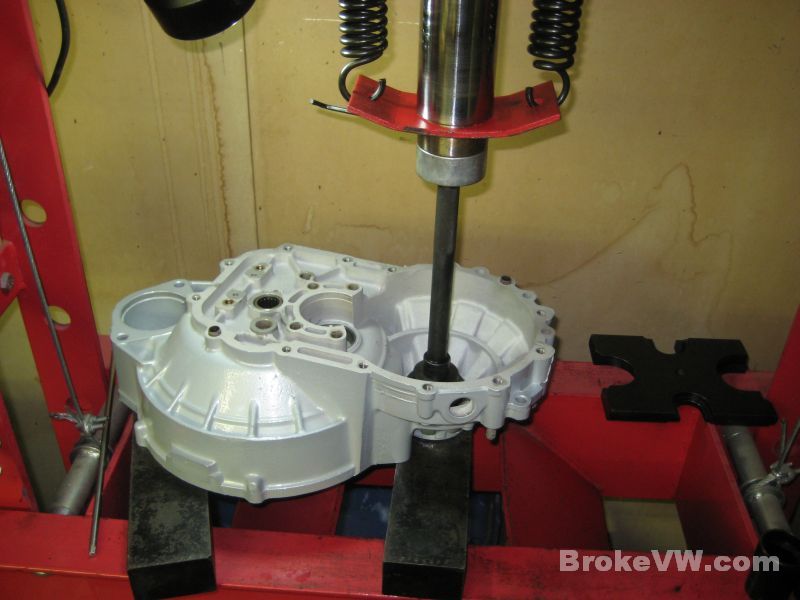
Time to press in the bearings and races for the bellhousing...
The output shaft small taper bearing race...
The input shaft roller bearing...
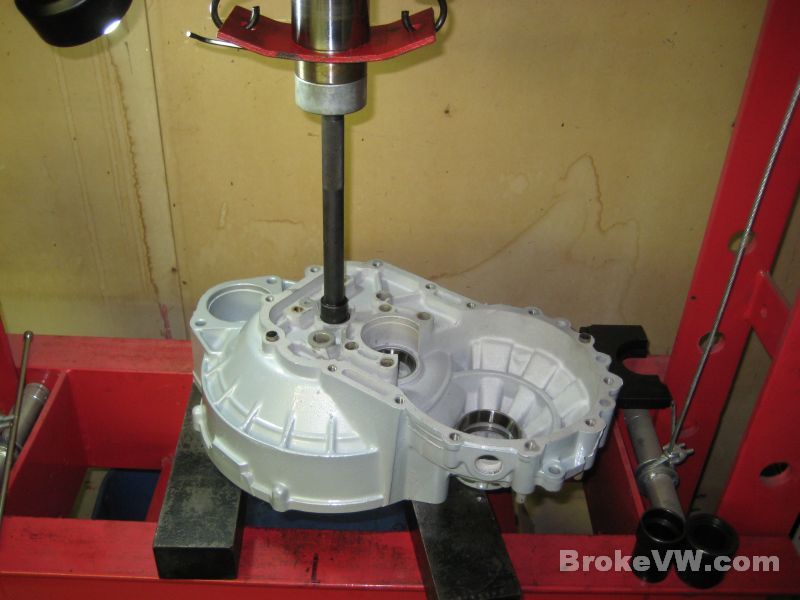
The diff carrier taper bearing race...
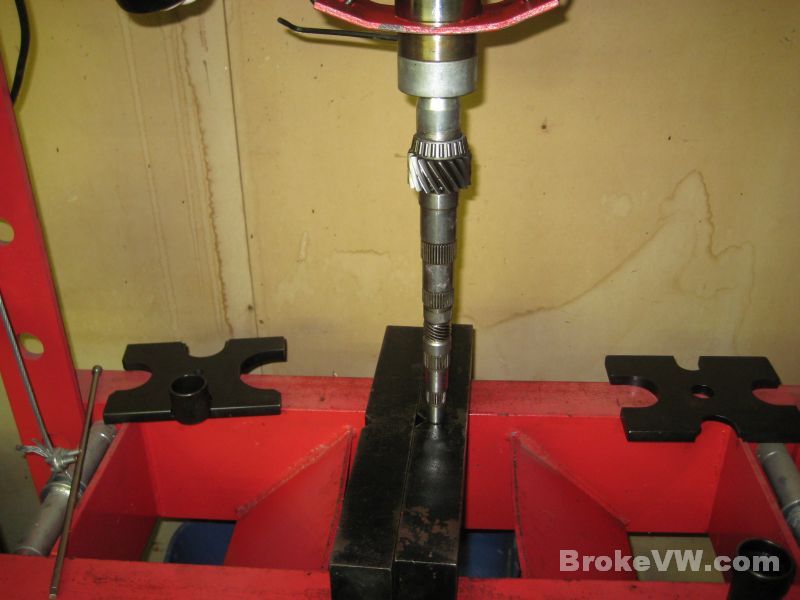
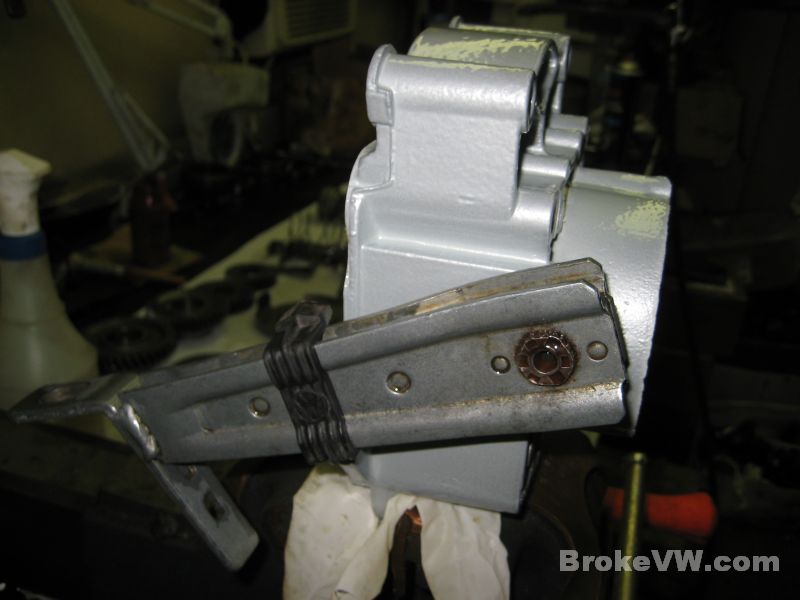
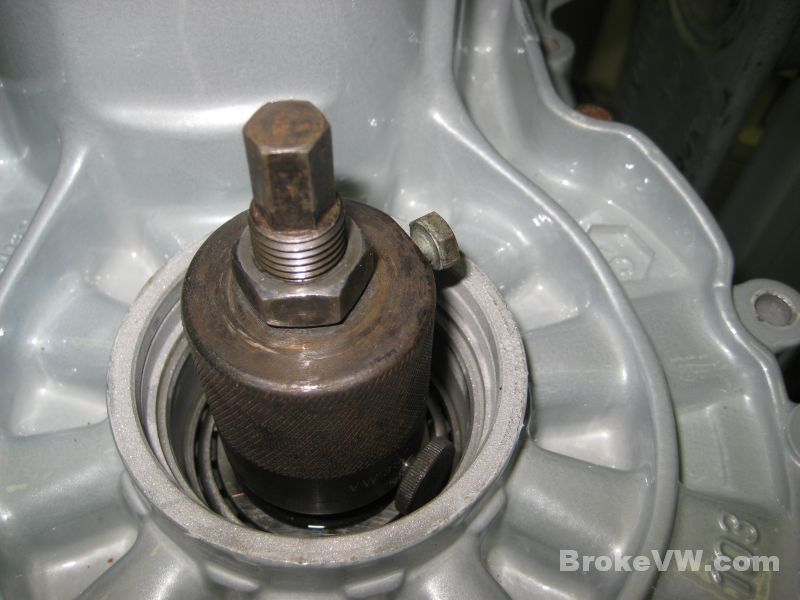
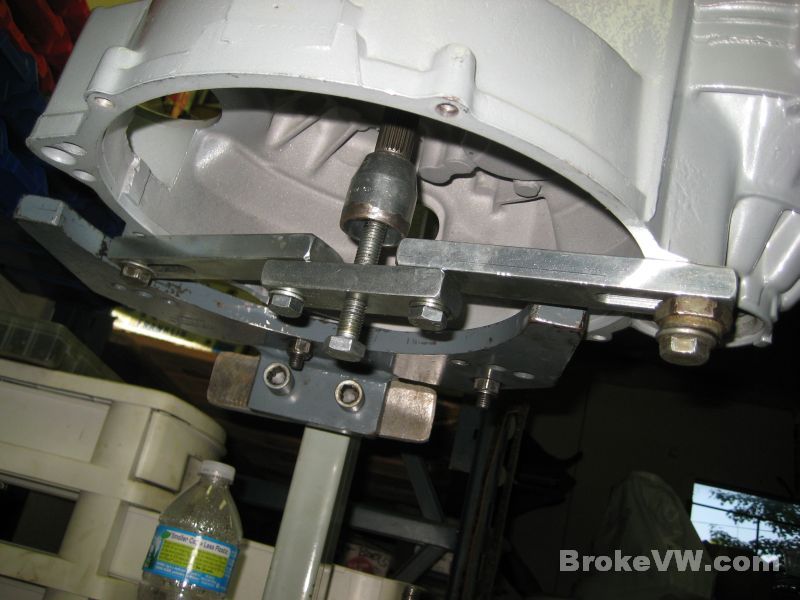
The input shaft is installed with the bearing clamping plate, the the turning torque is checked after a shim is selected and installed prior to the race being pressed in. There is a procedure to select the correct shim, but I usually skip that step and take an educated guess at the shim size, and go right to the turning torque test procedure.
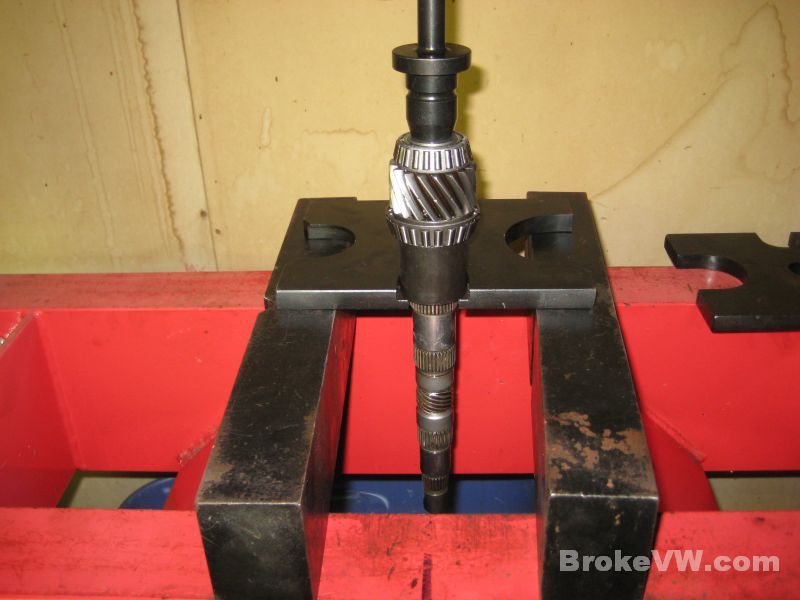
The shaft has the adapter collar fitted, which allows me to spin the shaft in the bearings with an in-lb deflection-beam type torque wrench so I can measure the torque needed to spin the shaft in the bearings...
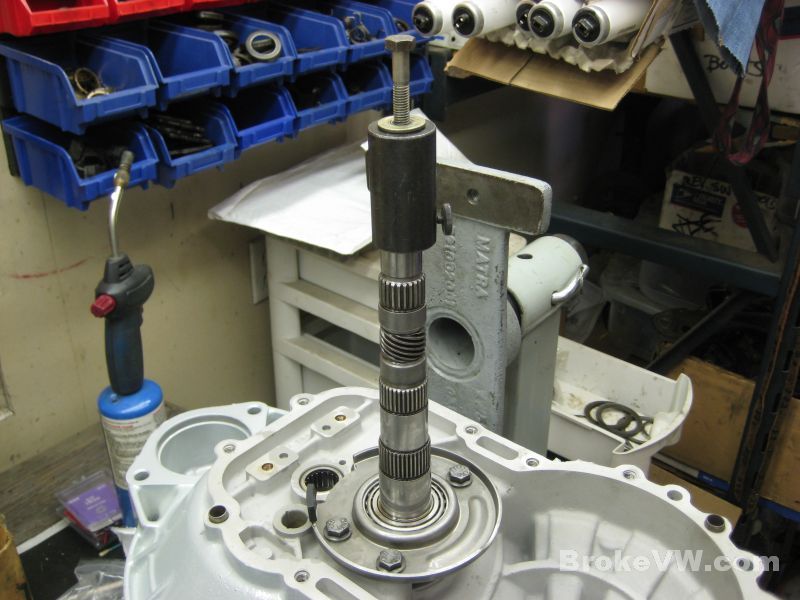
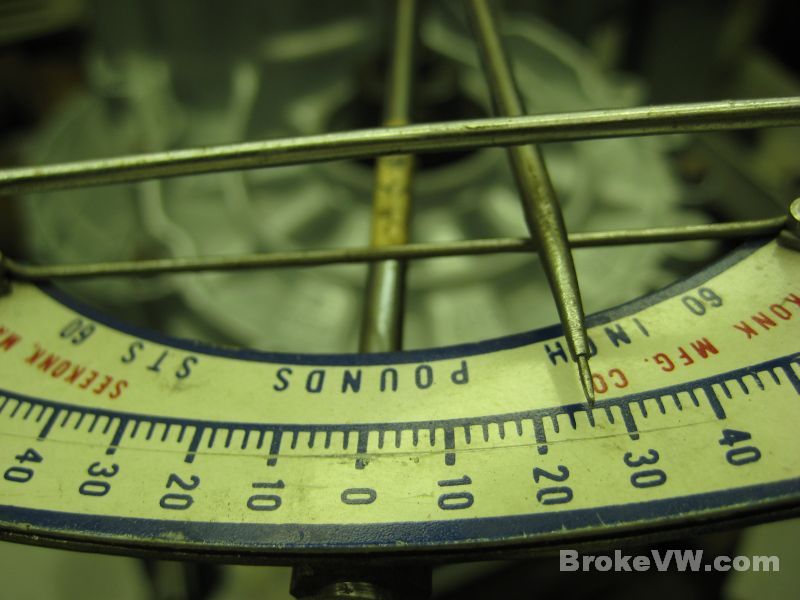
VW spec for new bearings is 4.4 to 13.3 in-lbs, I like to try for the middle of the range so just under 9 in-lbs would be ideal, my shim guess puts your preload at about 8 in-lbs, so I'm pretty happy with that and it is done.
Next will be to press the bearings and races into the gearbox portion of the casing, and wait on the new LSD and bolt kit to arrive from Autotech. When it shows up, I can do the same bearing preload procedure for the diff carrier taper bearings, and then the build can be finished up.
Update 05/18/12
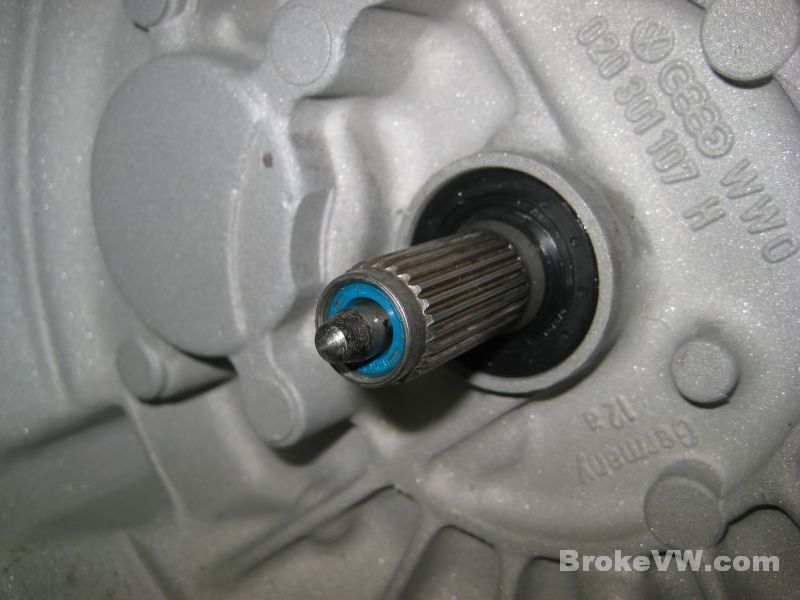
The replacement LSD arrived yesterday from Autotech, it is on the left, the faulty diff is on the right...
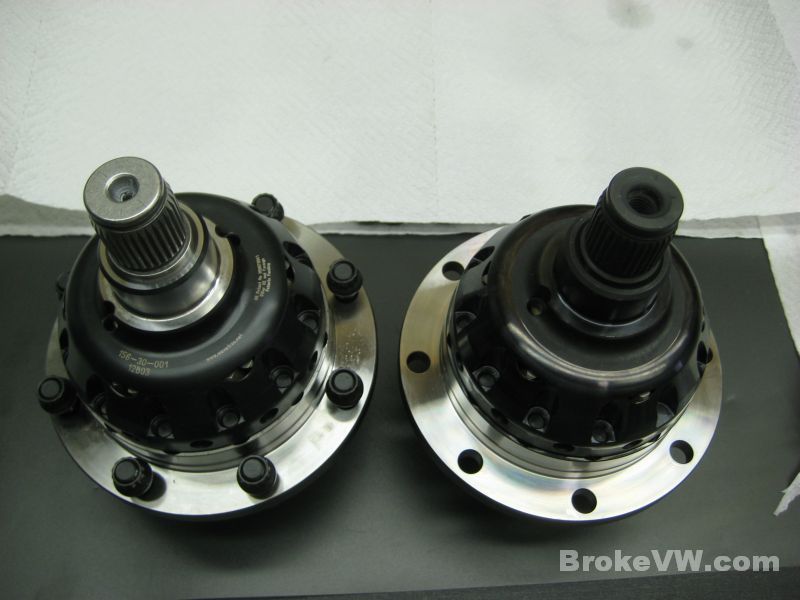
I noticed there is compound still inside the end of the shaft that needs cleaned, but worse than that is the fact there is no M10x1.50 threaded hole. The bad diff used VW stub axles, this replacement does not. The missing M10 holes will be a real PITA later...

Bad diff on the left, replacement on the right...
I knocked a bolt out of the replacement to see how tightly it fit into the diff, and what kind of debris was under the head. There was a little, but it wasn't too bad. At least the bolts were tight in this LSD...
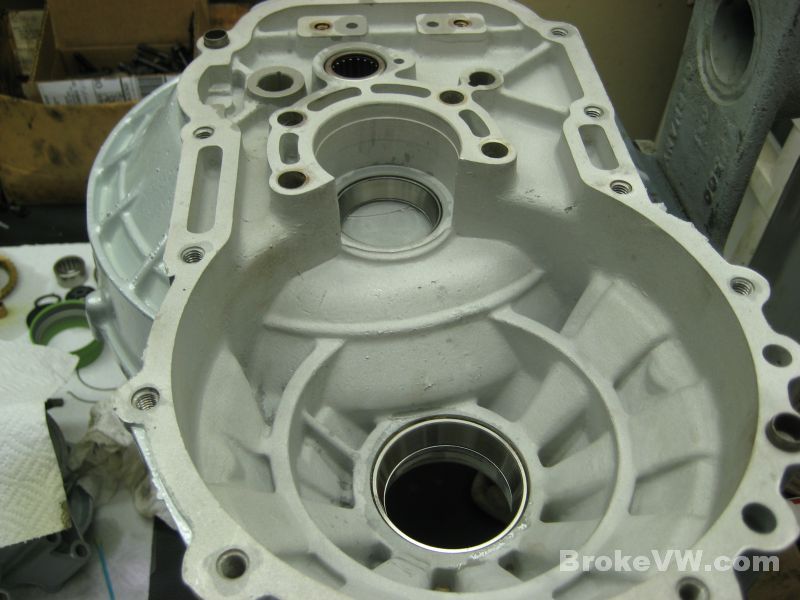
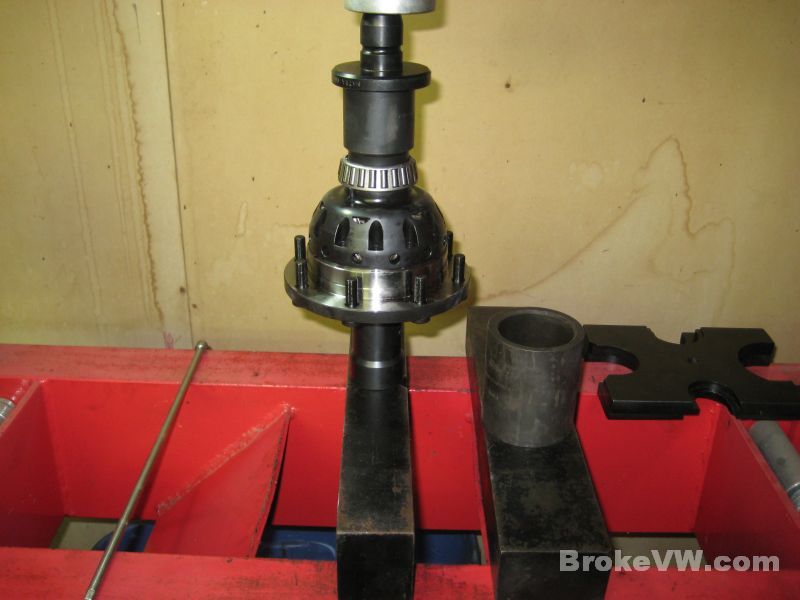
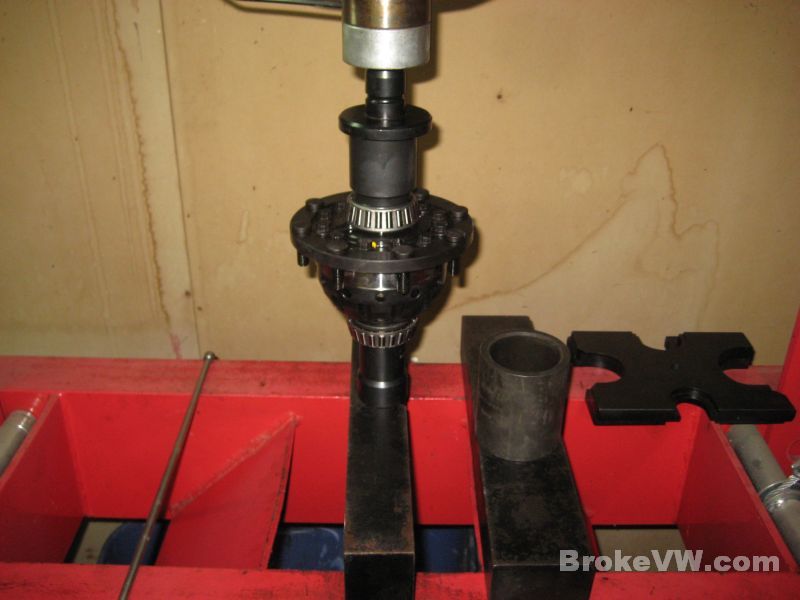
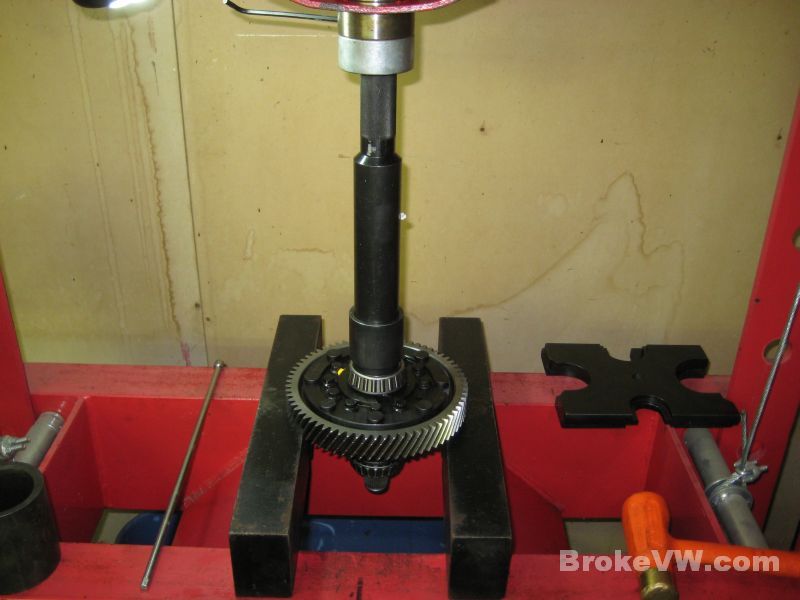
Time to press in the races and bearings into the gearbox half...

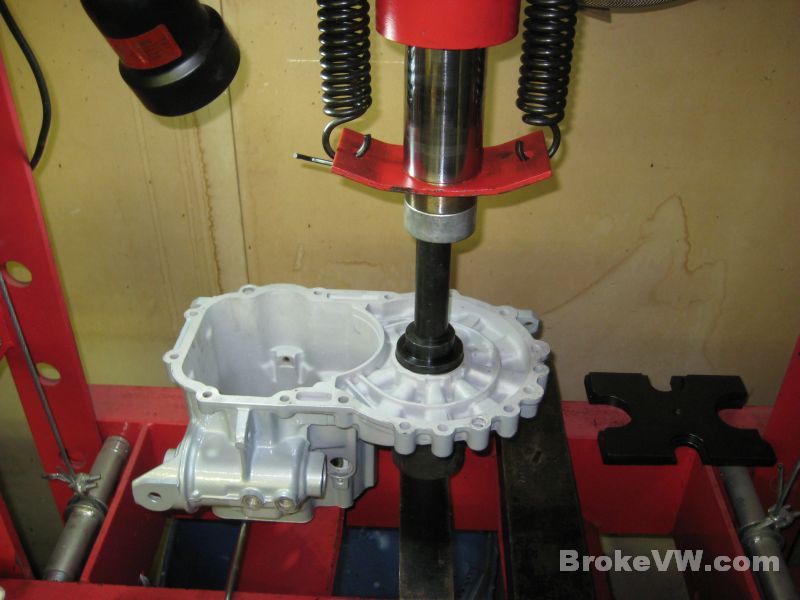
Pressing on the new diff carrier bearings and ring gear...
ARP assembly lube applied to the tops and sides of the bolts, to ensure the threads and underside of the nut gets lubed...
With the bearings and ring gear on, the bolts tightened down
to 40 ft-lbs per ARP specs, I dropped the diff into the trans to begin the
preload procedure, and ran into yet a THIRD issue trying to fit this wavetrac
LSD.
It hit the casing. The new housing on the LSD is supposed to clear inside the
020, but no, this hit the casing. I was told by autotech it is the smallest
housing they have, and I would have to grind the gearbox to make it fit.
This would have been nice to know in advance of putting everything together. Now I need to grind, then re-clean everything on the bellhousing once finished.
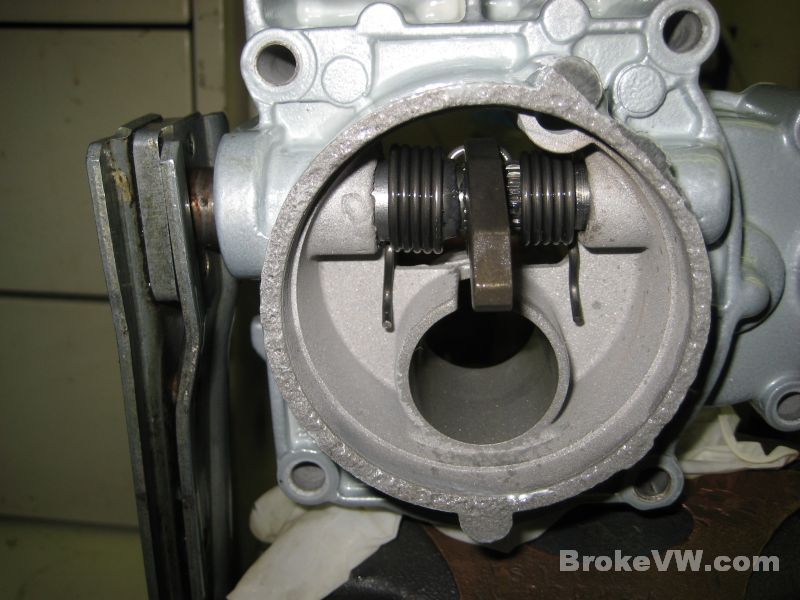
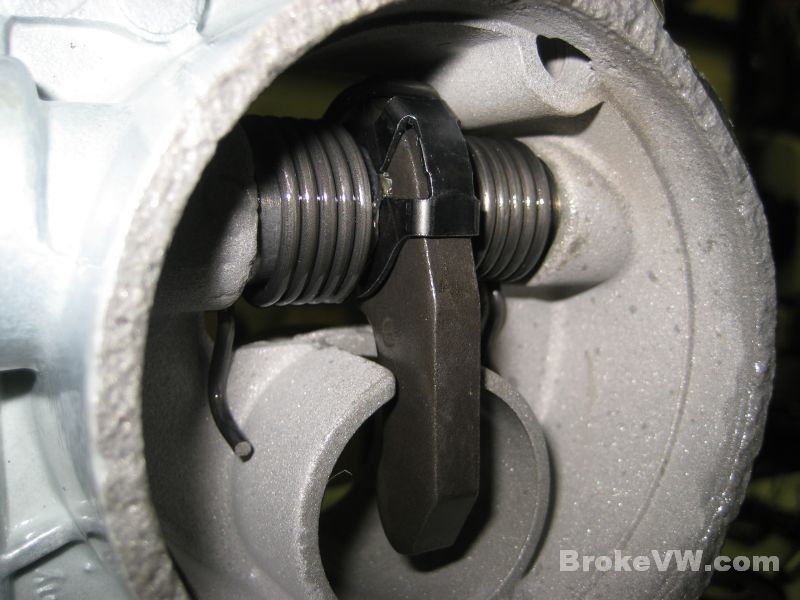
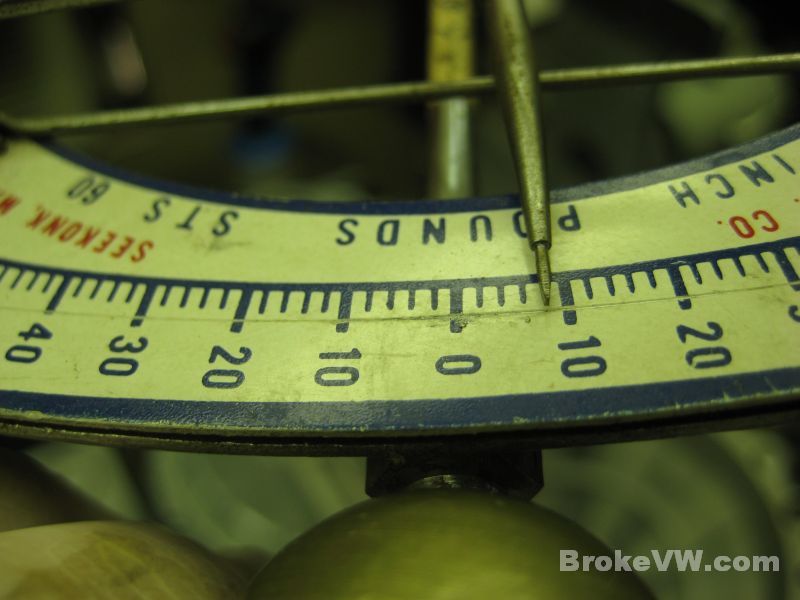
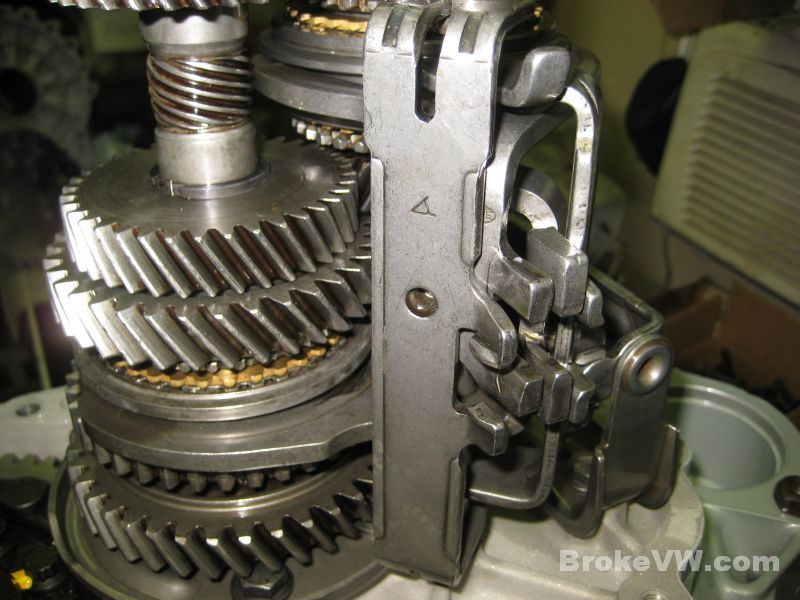
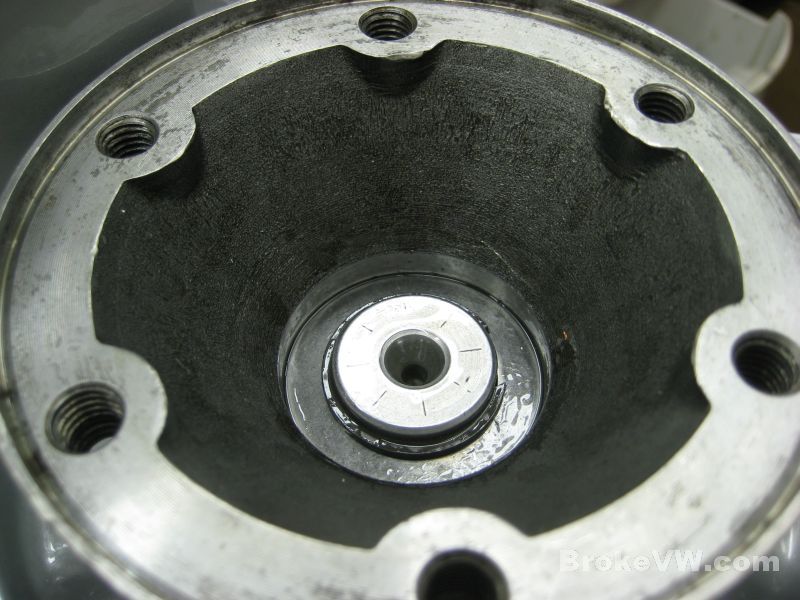
Here are the marks where the LSD was hitting the casing inside...
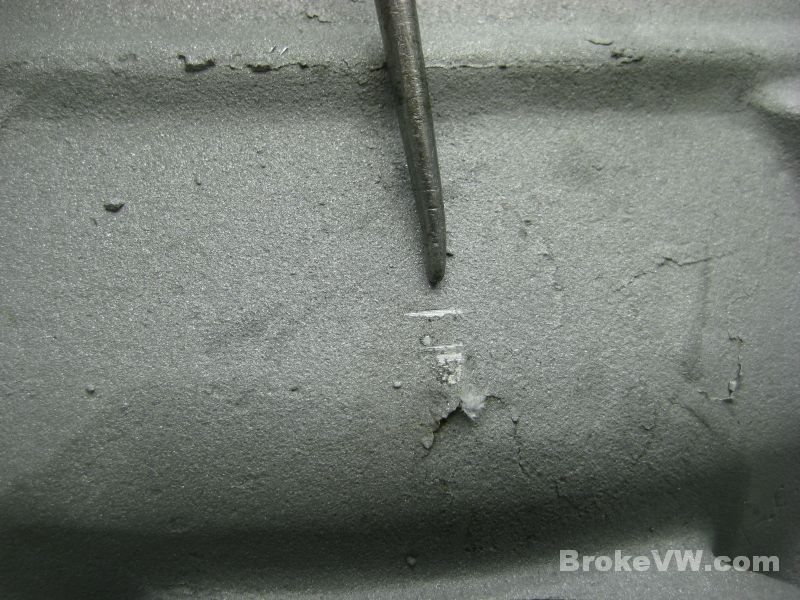
The scrape line above the pointer shows where it was contacting on the LSD housing...

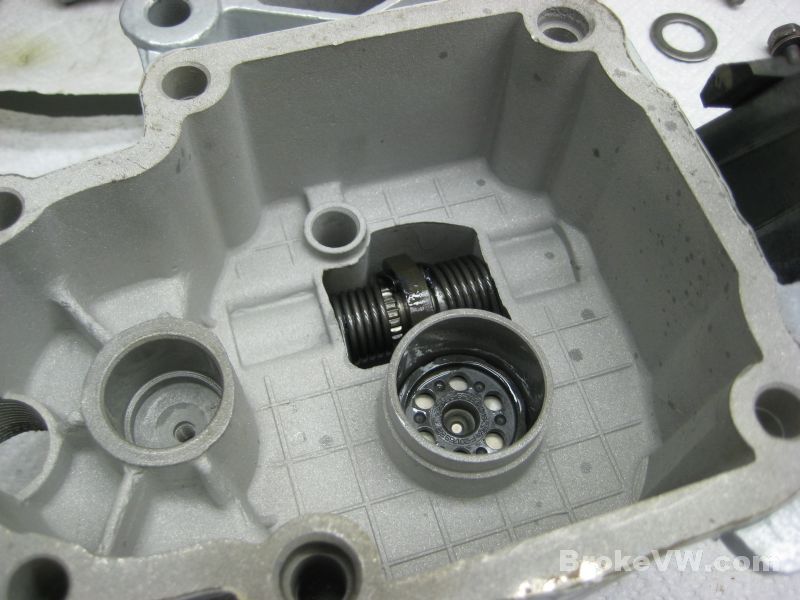
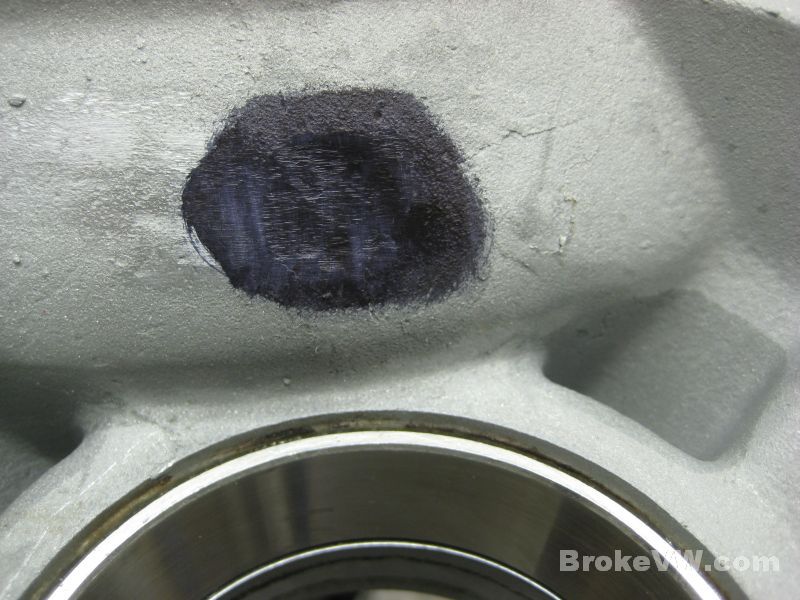
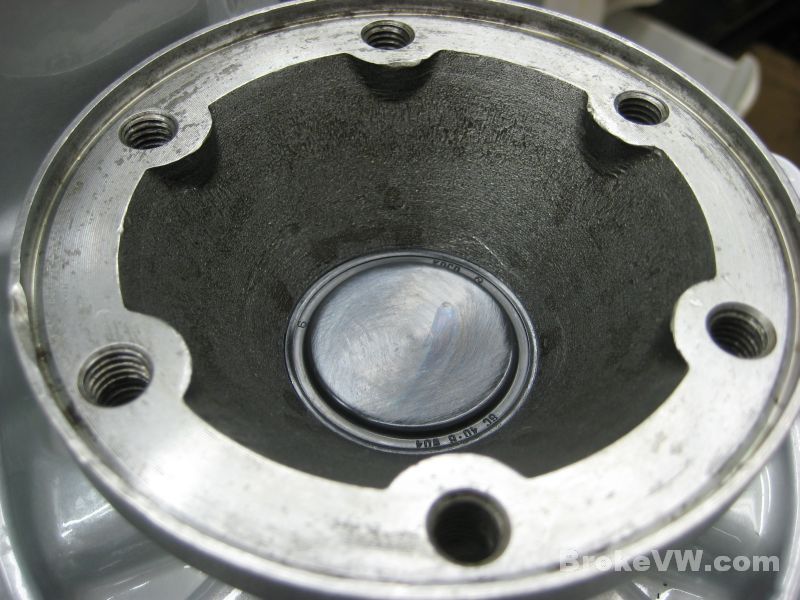
The area where the scrapes are gets ground with a Dremel,
removing some material. The area is then painted with a felt tip marker to
blacken the case. The diff is inserted again, and spun over. If there are
scrapes in the black, more grinding needs done.
It takes more time, but it ensures that only enough aluminum is removed from the
casing to clear the LSD...

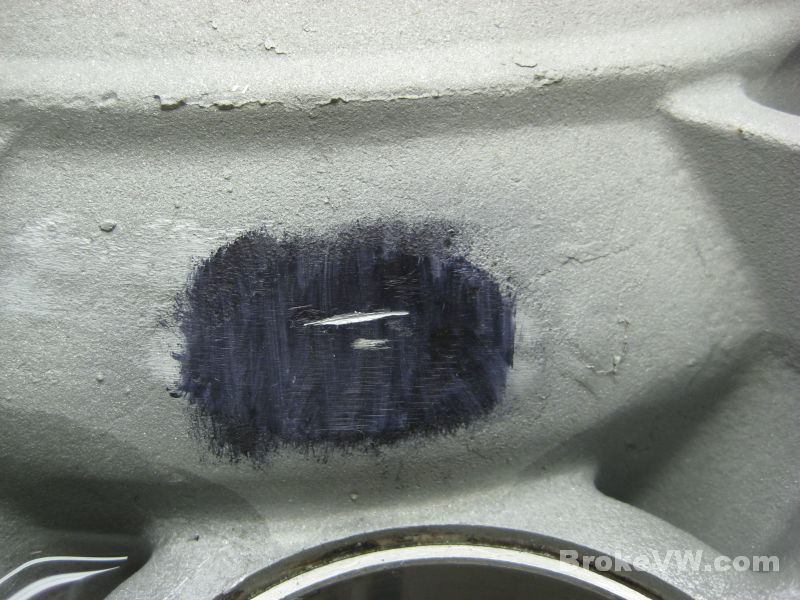
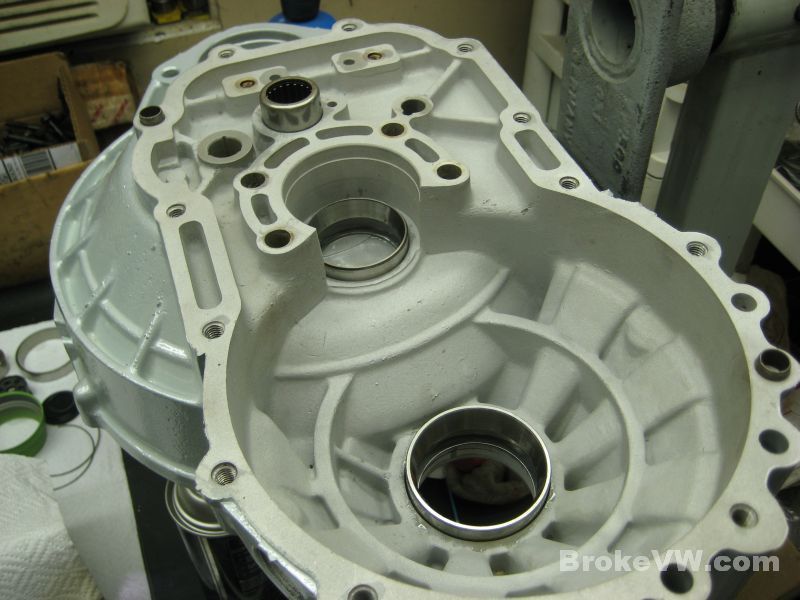
Once the case is cleared, I move to the next issue with this
wavetrac... trying to measure the turning torque when the VW tool has nowhere to
thread into the non-threaded stub axles in the LSD.
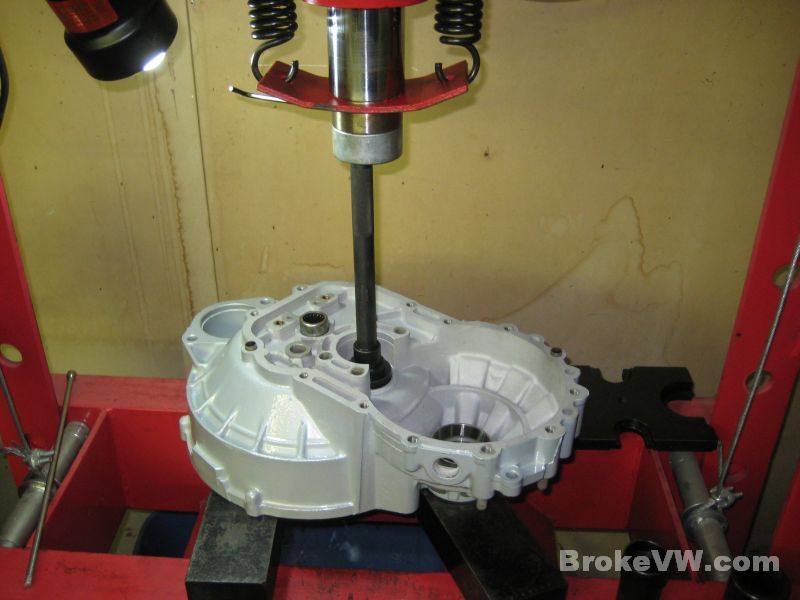
I ended up modifying a spare tool I had for the diff, drilling and tapping a
M4x0.70 hole to fit a thumb screw to lock the sleeve to the shaft so the LSD
could be spun over....

VW spec is 11-31 in-lbs, your bearings are at 26 in-lbs, so they are properly adjusted....
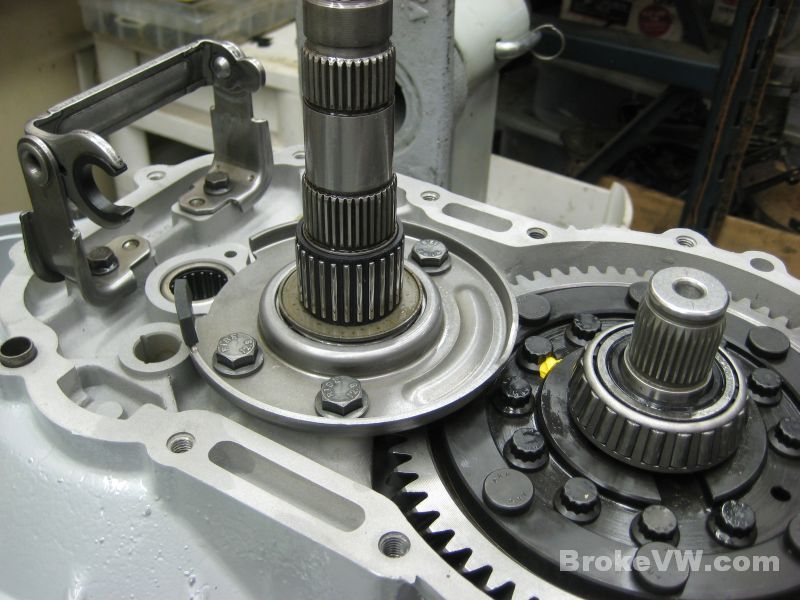
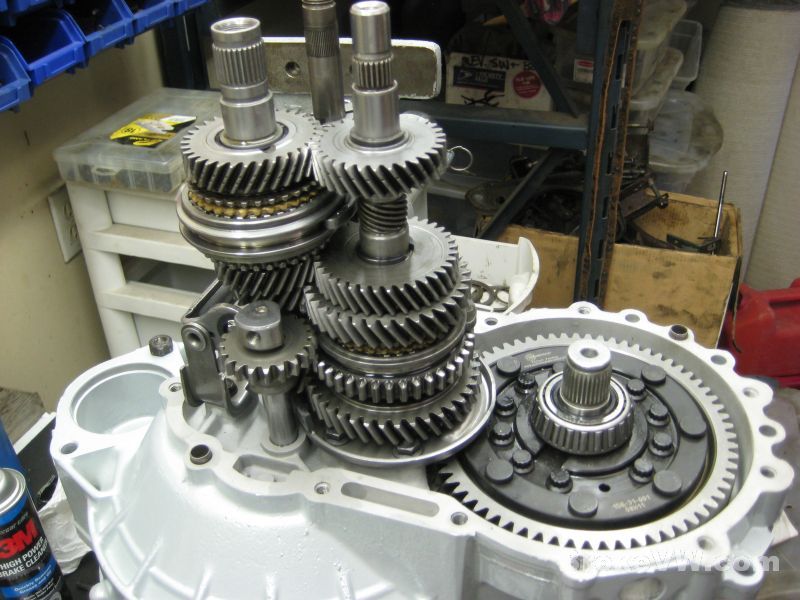
With the preload done, the build can begin. The LSD is dropped in, followed by the output shaft which is bolted in place...
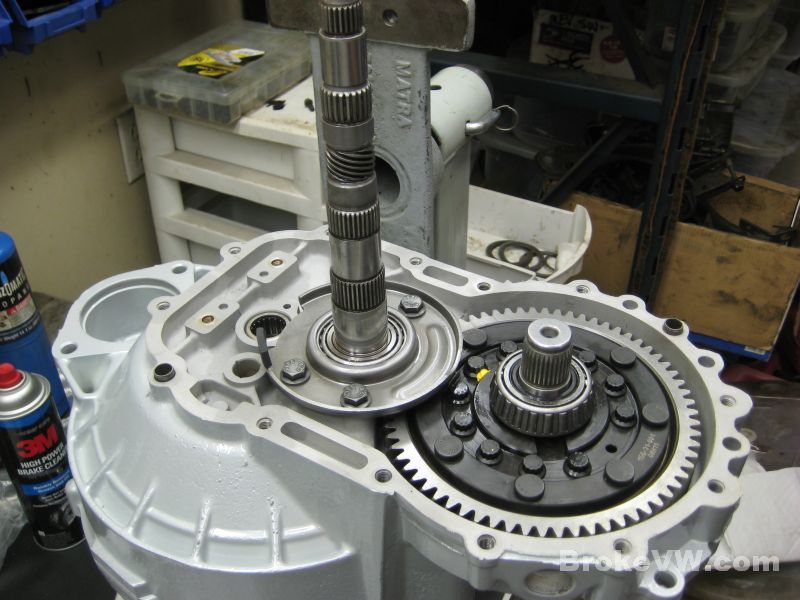
A new thrust washer and 1st gear needle bearing, along with the reverse relay uprights....
1st gear and a new sync ring...
These parts need to go into the oven to be heated to 212F before being pressed on...
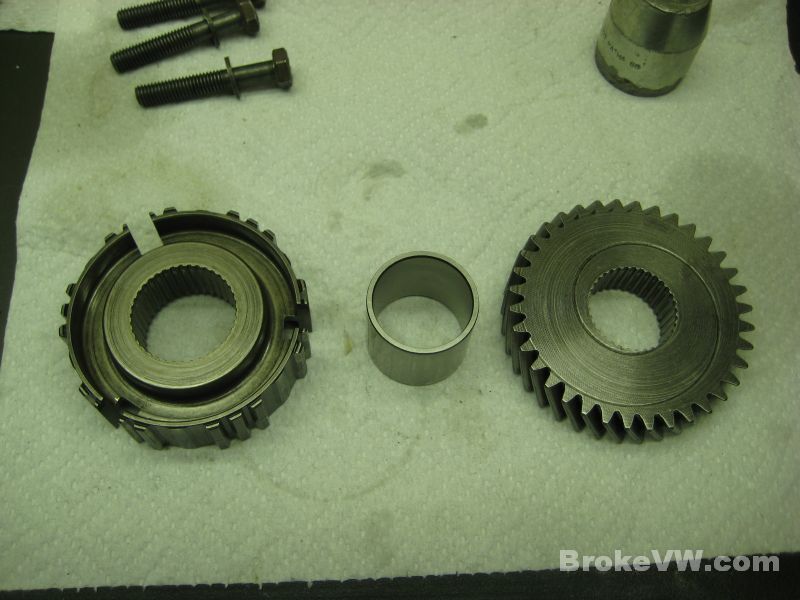
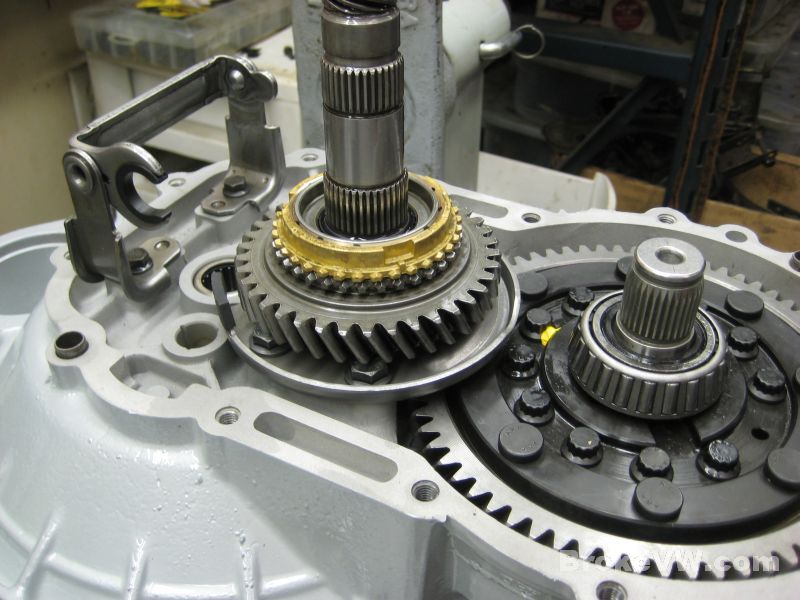
The new 1st/2nd sync hub assembly is pressed on, followed by the 2nd needle bearing race, then the sync ring and needle bearing...

2nd is installed, then 3rd is brought out of the oven and pressed into place. Once cooled, the adjusting circlip will be installed...
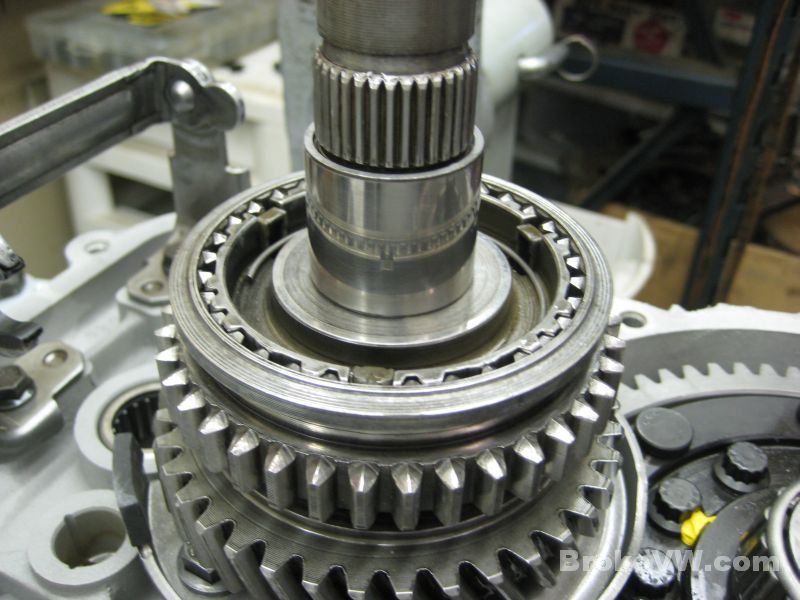
With 3rd cooled, a 3.0mm circlip is installed, followed by 4th and the circlip to secure it. At the same time, the input shaft assembly is dropped into place...

When the input shaft is installed, the gears don't align, as shown here with 4th...
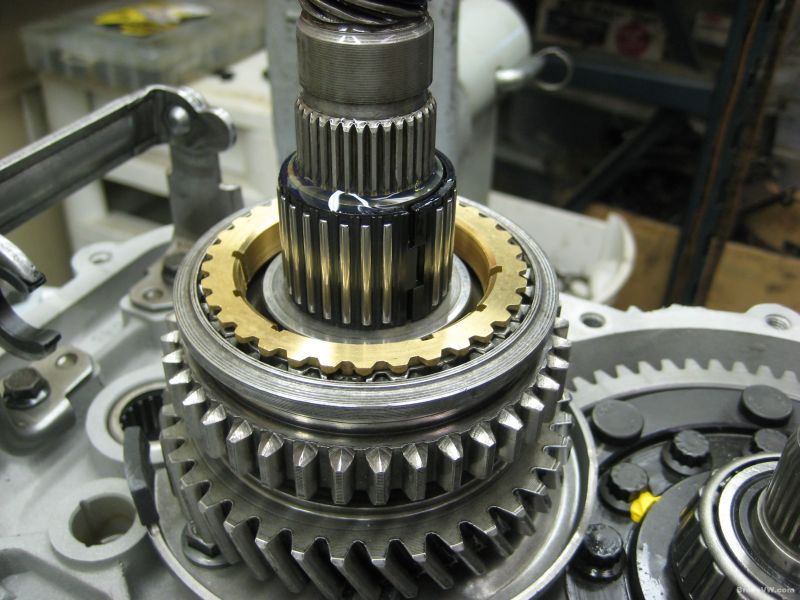
There is a VW support bar that is installed under the input shaft to support it during press operations, it is used to bring the input shaft up to ensure proper gear alignment...
All aligned now...
The reverse idler gear is installed... and this is where I would normally see the magnet out on the bench, and it would be installed in front of the reverse idler. Unfortunately, I somehow forgot to lay the magnet out with the rest of the parts, and it didn't get installed. By the time I realized it, the trans was all but built. I will be installing two magnetic drain plugs into the trans to compensate for the missing internal magnet...
The shift forks get installed...
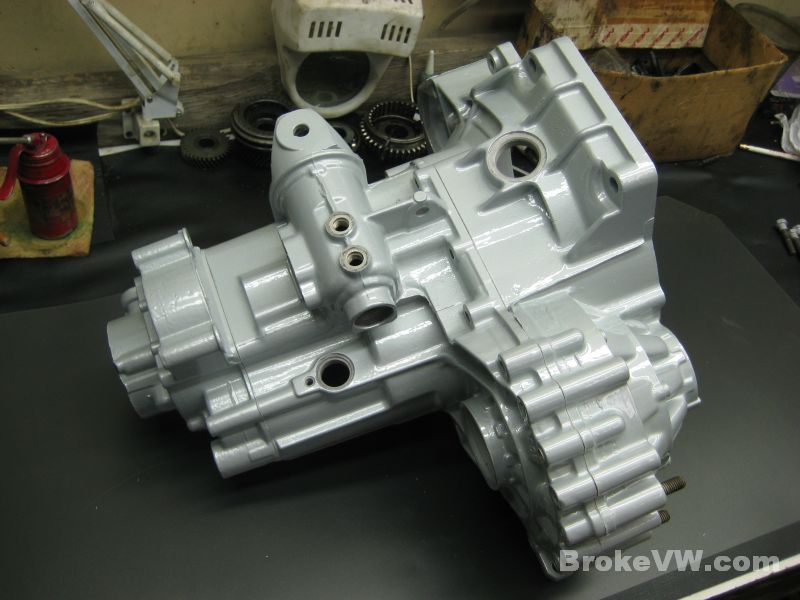
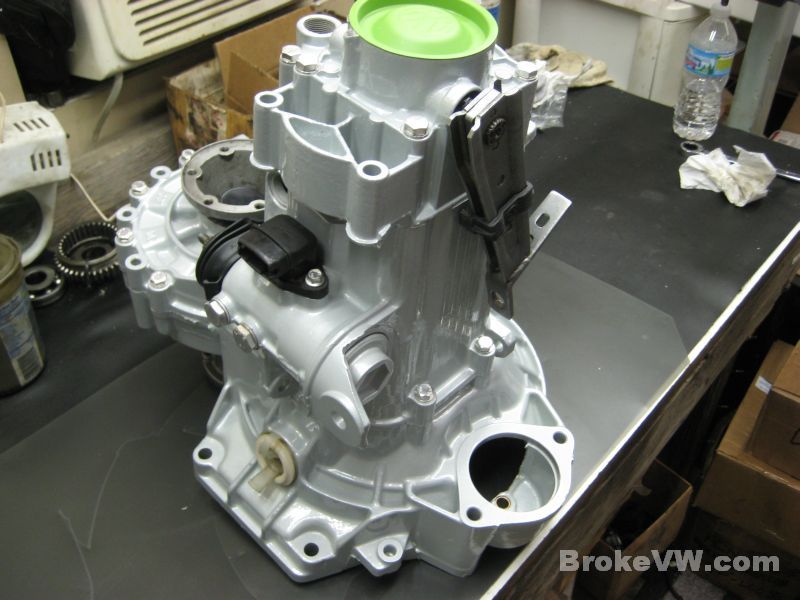
All done... minus that damn magnet.... time to paint the sealing surface with the VW sealant paste, and press the casing together...
Bolted together...
Once the 5th fork is adjusted, the fork lock plate is pressed in place...
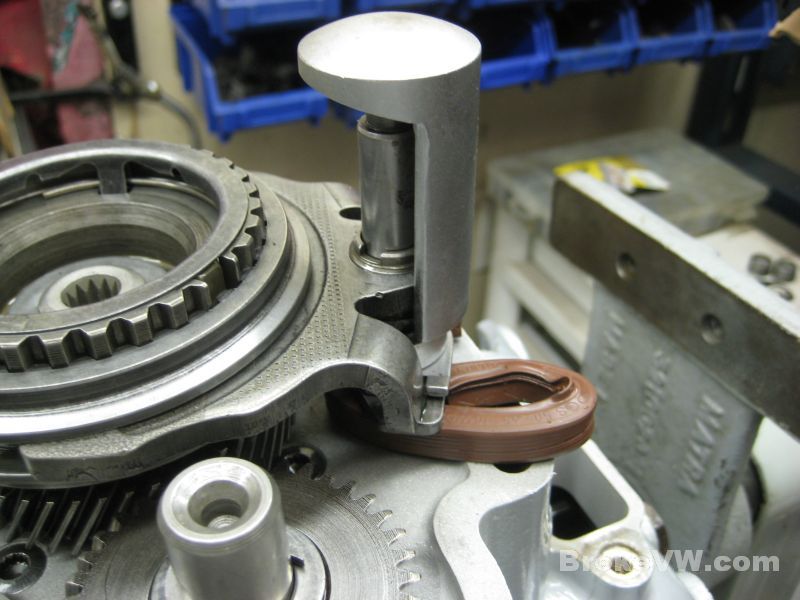
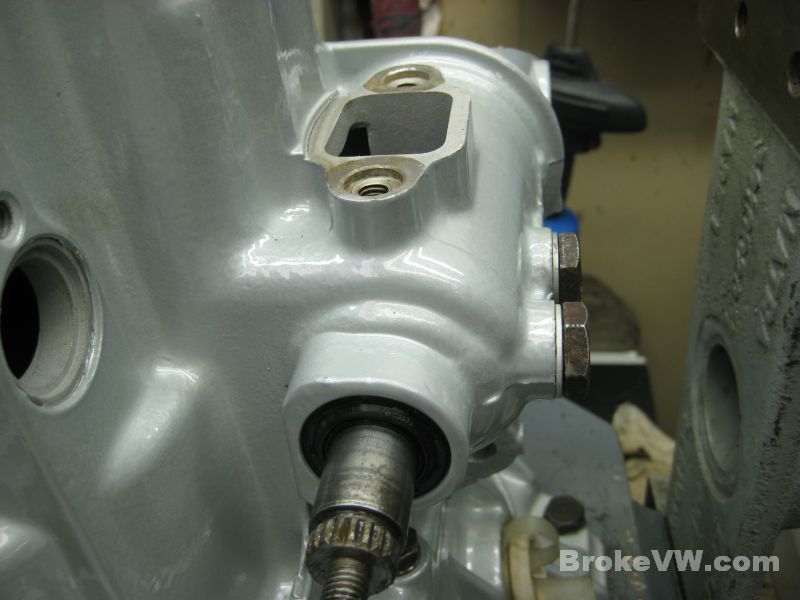
The selector detent bolts and selector shaft seal are installed...
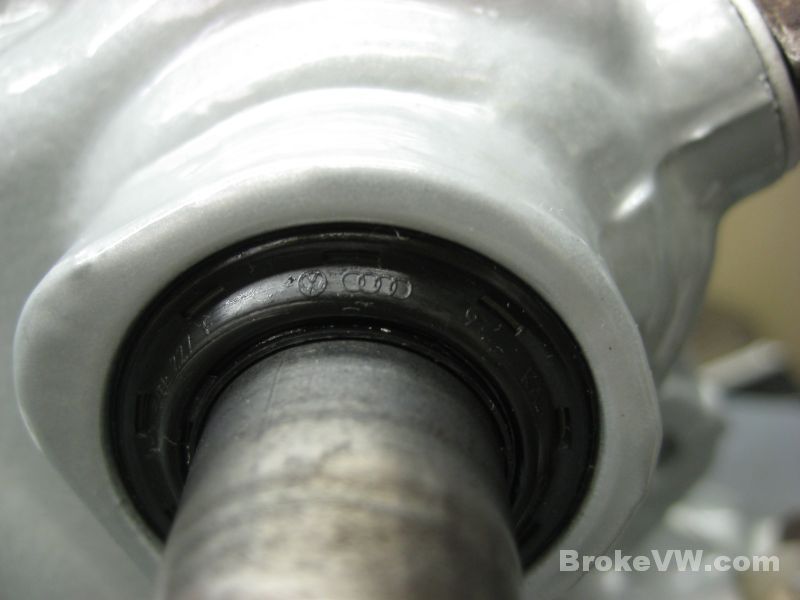
The drivers flange seal is pressed in...
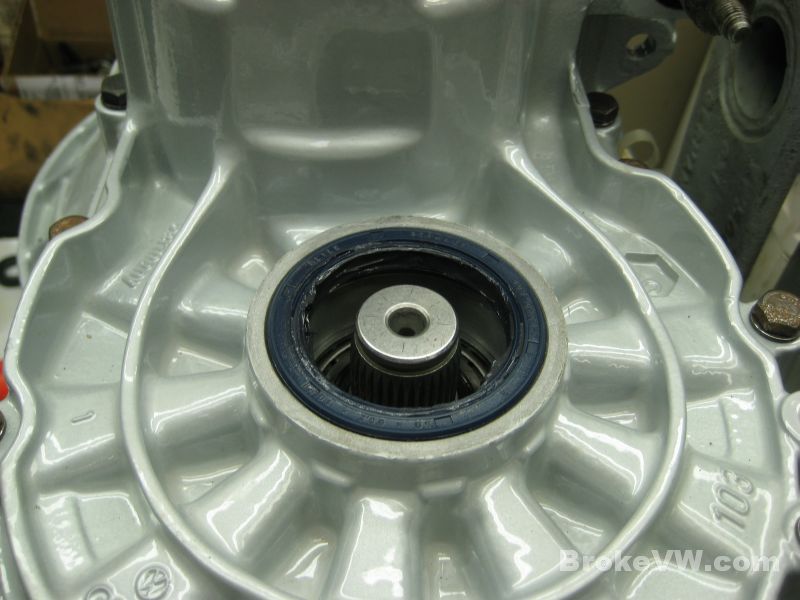
Next the green seal sleeve and the flange seal are installed, along with the input shaft seal...
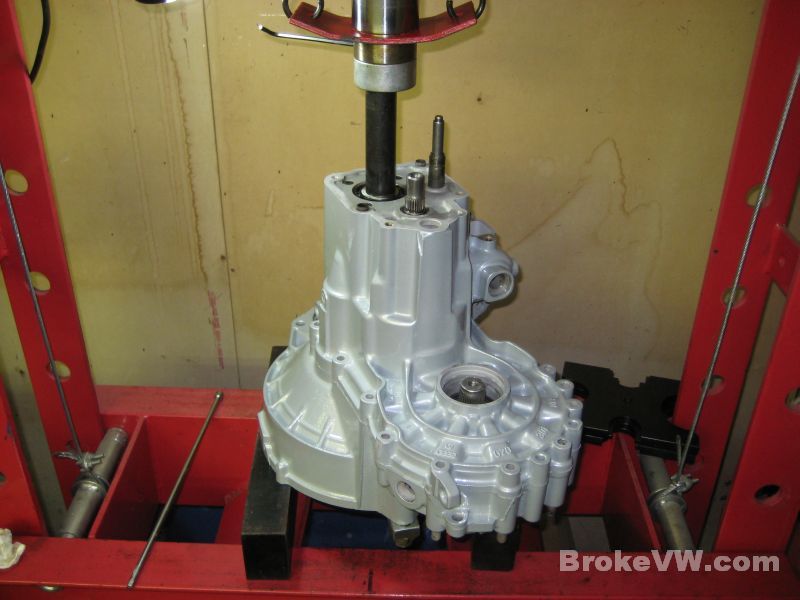
This is the only way I could get the flanges pressed onto this LSD. I'm actually fearful of the hammering that needed done on the flanges to get them to even start onto the shafts enough to allow me to get the trans into the press as shown below. I didn't dare start them with the press (you can't feel if the splines are aligned, and the press doesn't care, it WILL force them on), so I had to start them by hand by hammering them until I was sure they were going on straight, aligned with the splines correctly, and on enough to remain on the shaft to get it onto the shop press bed...
With no small amount of force, the flanges finally went on.
Woe to whomever has to try to pull those things off again.
I even heated them to 150F in the over prior to installing them, and they were
still incredibly tight. These are used 100mm flanges, not even new. I couldn't
imagine trying to force new flanges onto those wavetrac stub axle shafts. This
has been, by far, the hardest and most aggravating LSD install I've done to date
:)
The flanges are secured with a concave washer and circlip, then sealed with a center cap seal...
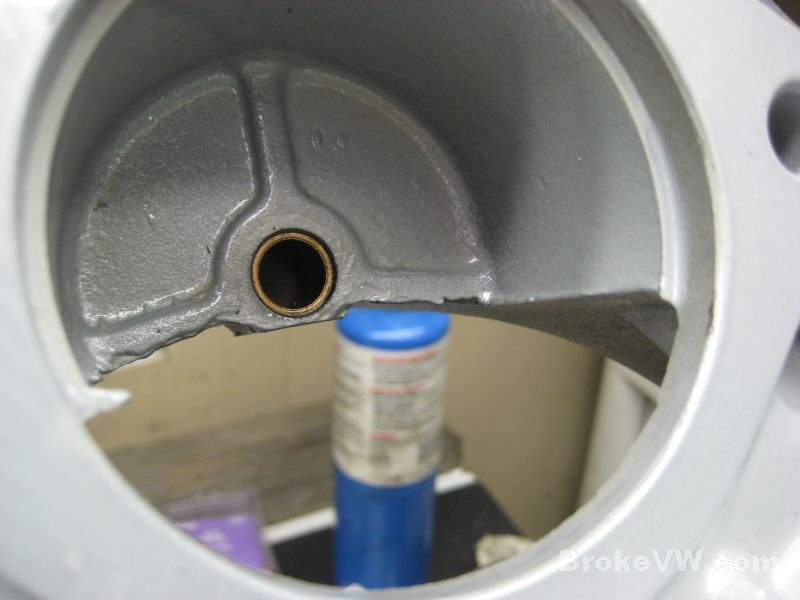
The new oil-impregnated starter bushing being installed. The new bushing is filled with oil completely, held between the thumb and index finger, and squeezed tightly on the open ends so the oil inside is compressed. Oil doesn't compress, so it is forced through the porous side walls of the bronze, impregnating the metal with oil...
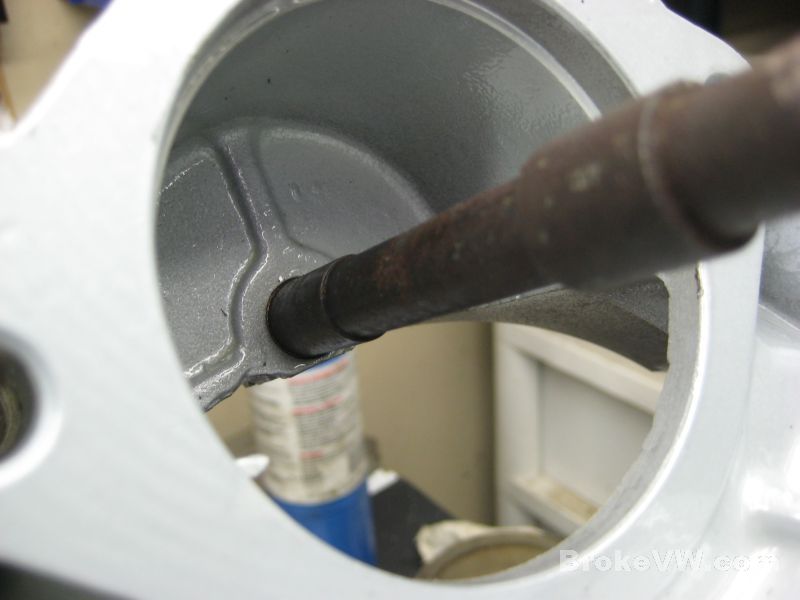
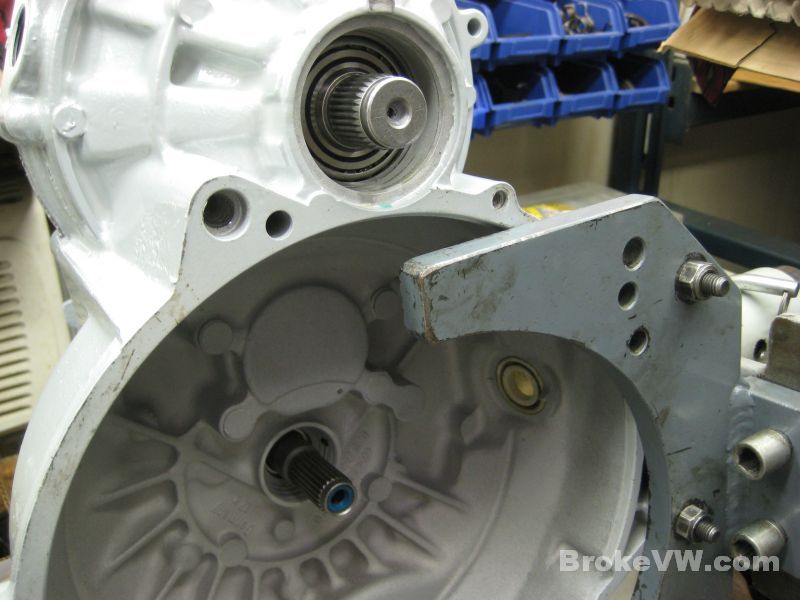
The new OE VW pushrod is installed...
The old rusted bolts were removed one at a time, then plated
bolts were installed and torqued until they were all replaced with better
looking bolts.
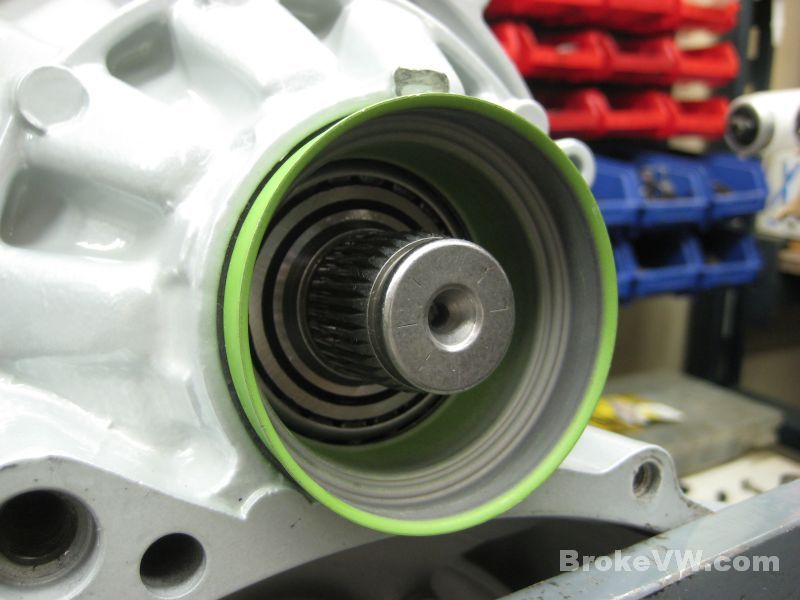
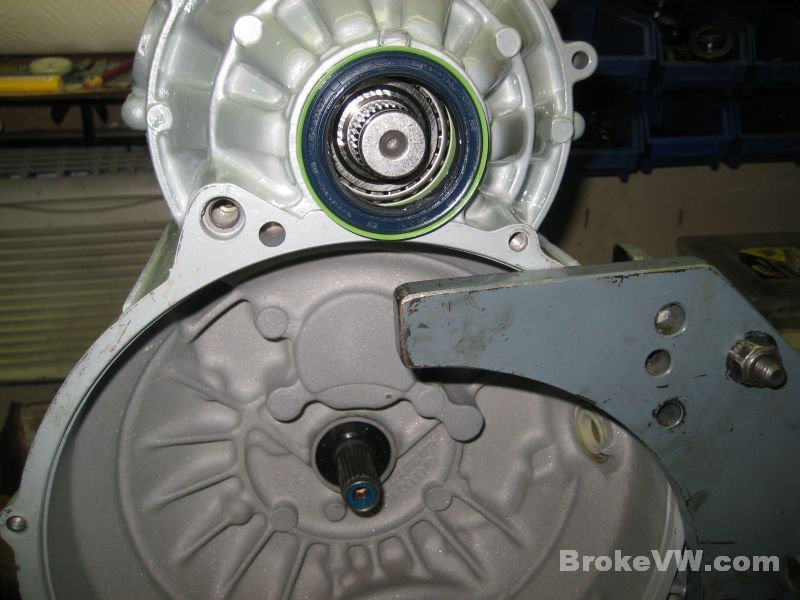
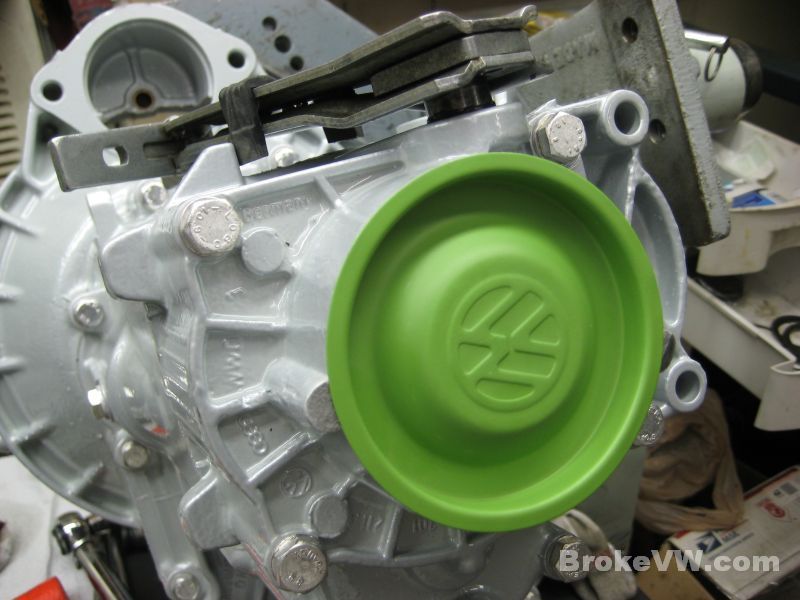
The new green end cap is the last part to be installed, and with it, the trans
is done...


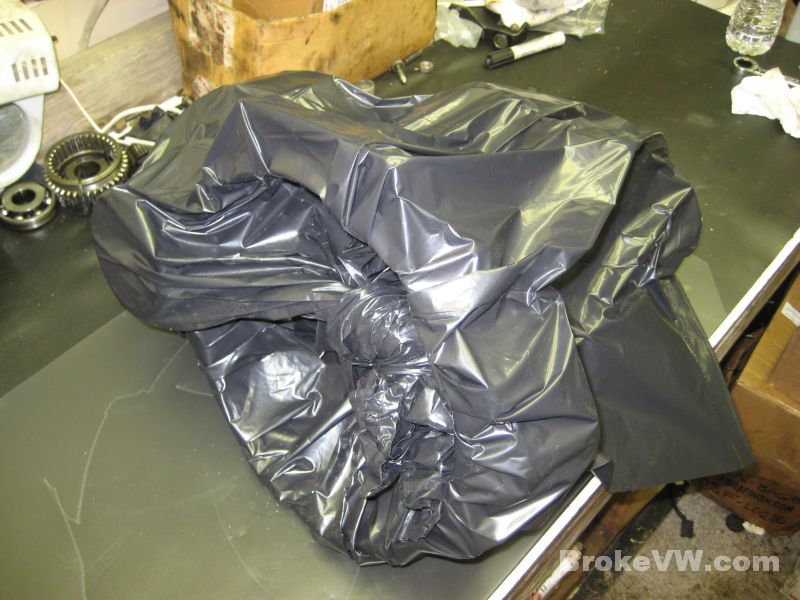
It is bagged up... and while typing this out, I realize I don't have the drain plugs installed. I will open it back up when they arrive, or just put them in a bag and ship them with the trans.... but the completed trans is bagged up, ready to be boxed and shipped once the magnetic drain plugs arrive...
Run it easy for about 500 miles, shifting at lower RPMs to
allow the new sync rings to seat into the old gears. Drain the oil, and replace
it with fresh oil after 500 miles. Don't be alarmed at lots of gold or yellow
colored glitter in the oil. Silver is bad, let me know if there is silver
glitter in the oil. That is steel if it is magnetic, or aluminum if not, either
way it shouldn't be there. Use a GL4 75-90 oil like Amsoil, Redline, or OE VW
oil.
The reverse switch that came with the trans has been tested and it works, but it
is older and dodgy. Don't expect it to last forever. I didn't have any better
switches to give you, and a new one is about $30 or so last I checked, but I
don't have any handy. This one is completing the circuit when the trans is put
into reverse though, so it should kick the lights on.
Thanks and let me know if you have any questions!