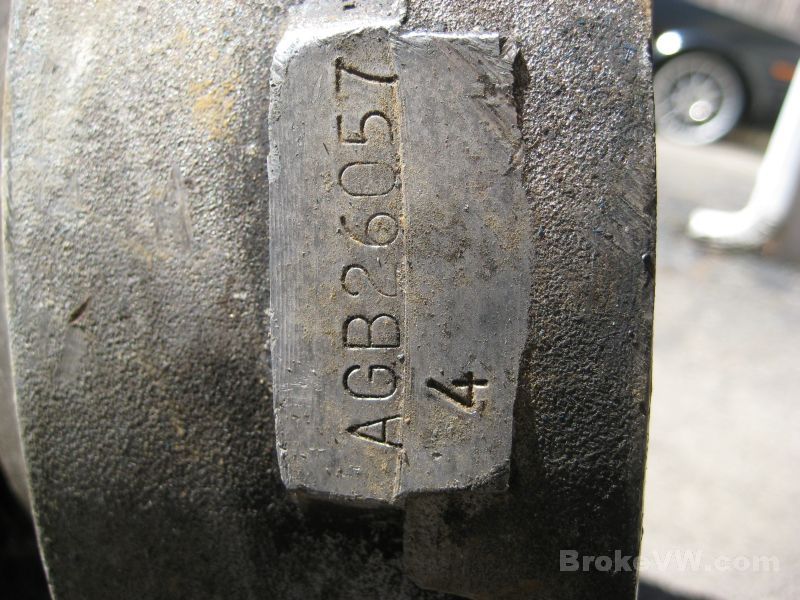
Grant AGB 26057
Arrived 03/29/12
The box arrived today, it seemed to be packed very tightly in there which means the box had no damage to it from the trans shifting around inside. It was packed very well.
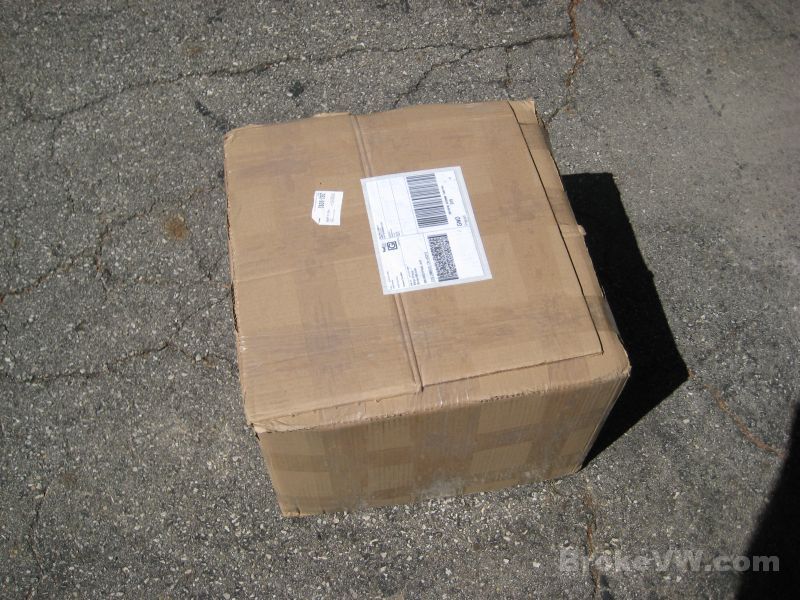
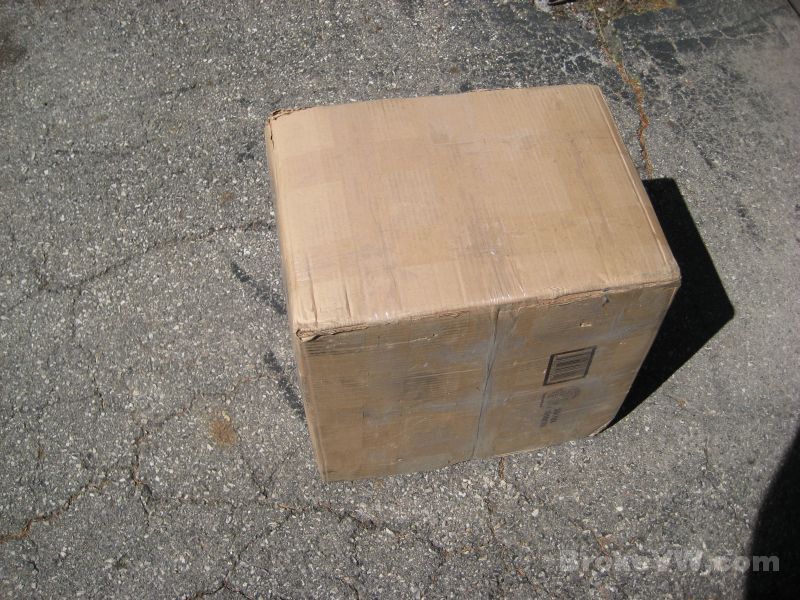
Just corrugate cardboard was used but if it is tight enough, it's almost like wood...
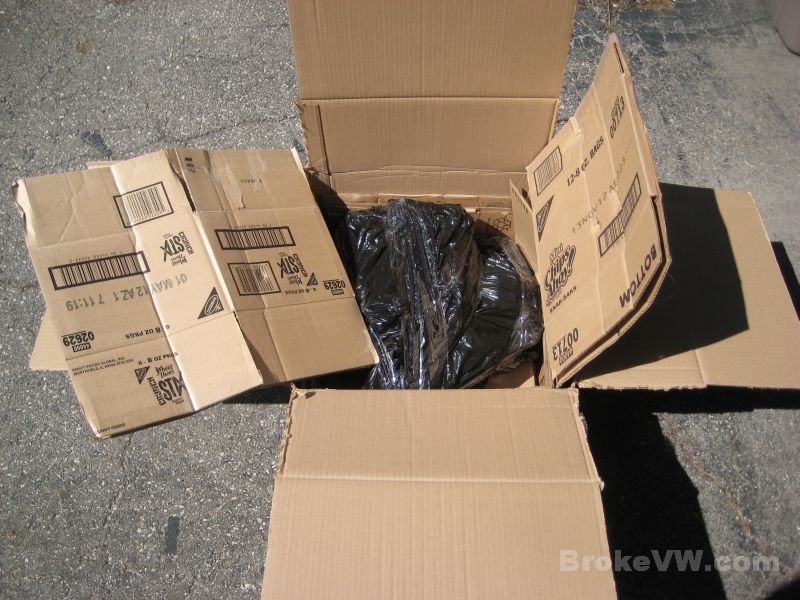
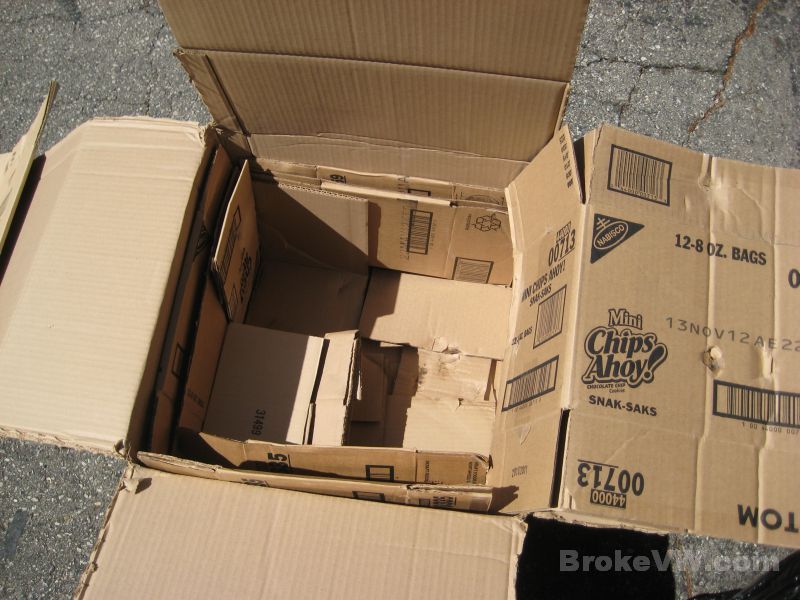
The gaps around the trans were filled with cut pieces stacked to provide support...
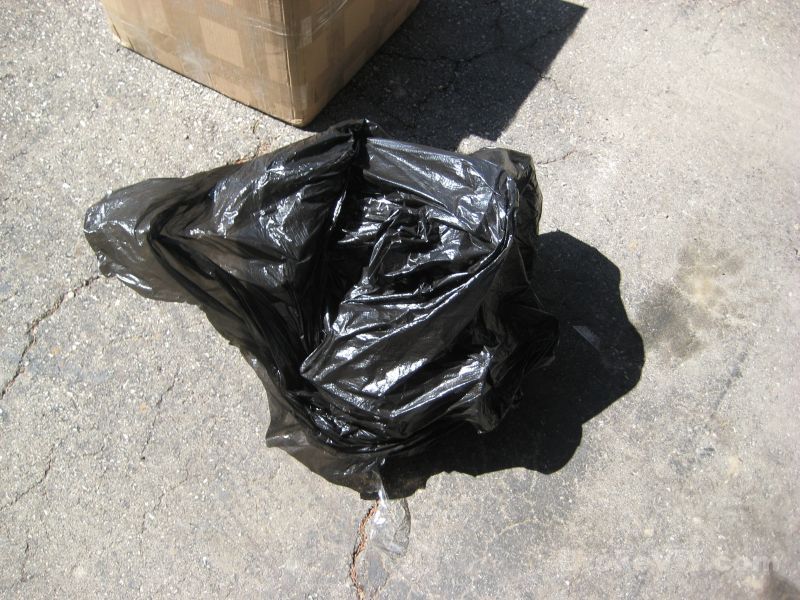
Wrapped in a garbage bag to contain any leaking, and it was even double bagged. Outstanding...
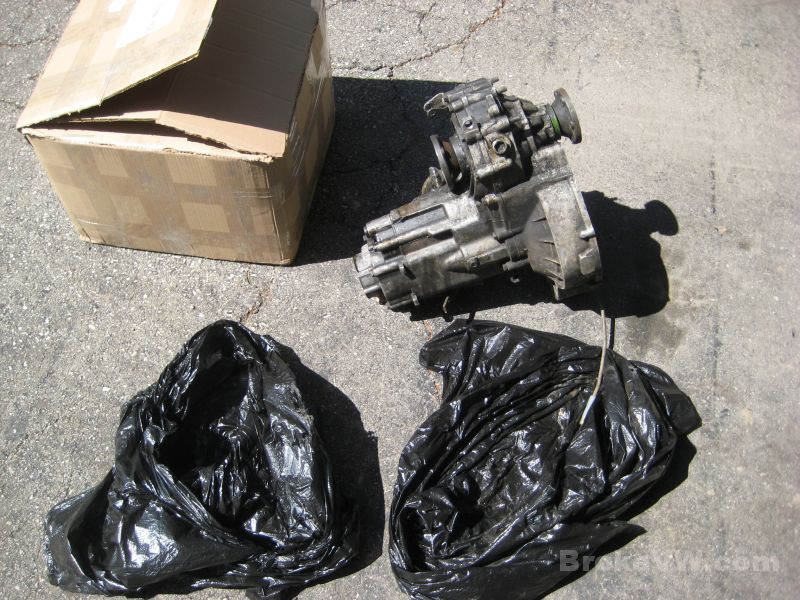
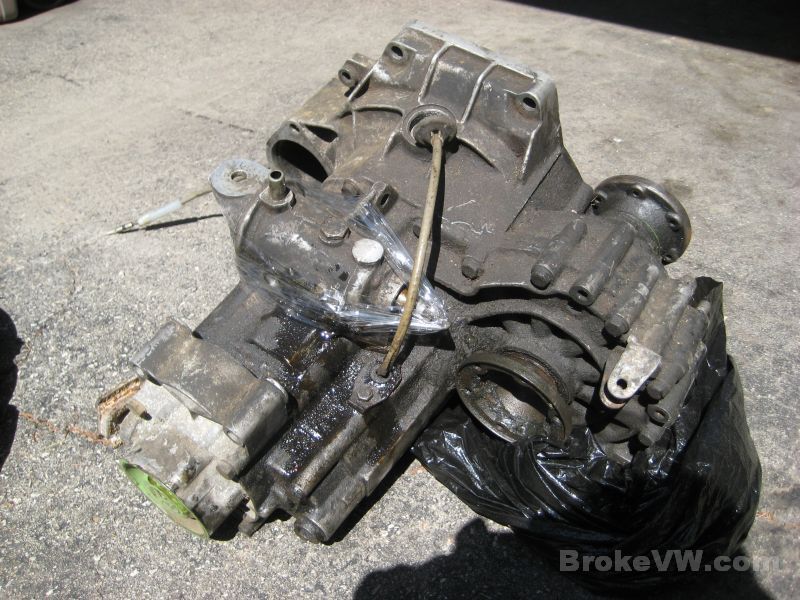
An AGB 16V trans built May 26th, 1987.... I have no clue what the 4 designates, I wish I did though...
It is missing a few small items but it looks complete for the most part...
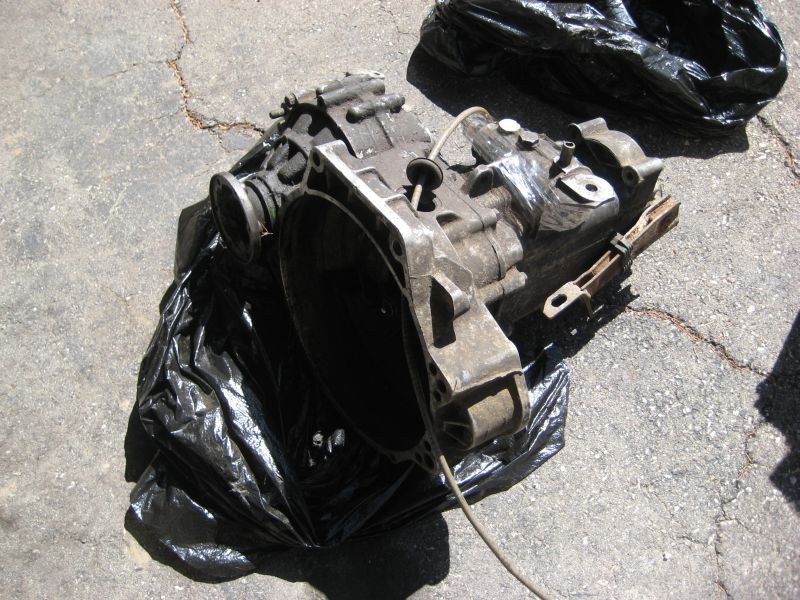
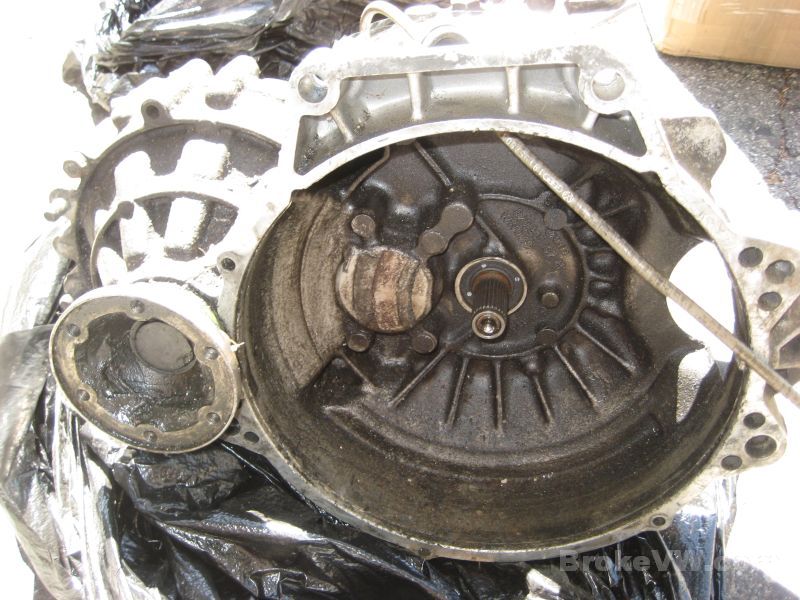
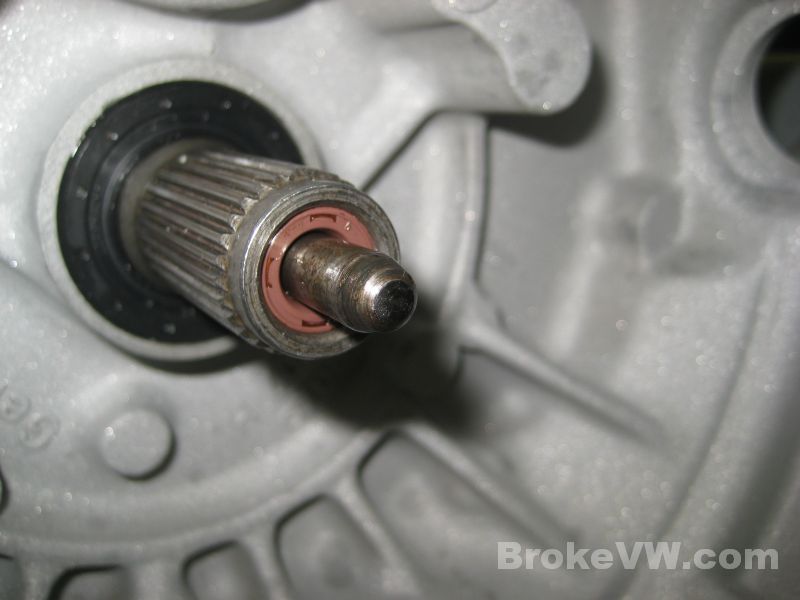
The timing plug, vent tube cap, and reverse switch are missing but they are easily replaced. Spinning the input shaft and flanges over by hand didn't provide any surprises, no grinding, no bad noises or sloppy parts, we'll know more once it is apart and inspected though...
That's going to be it for a bit now, I might try to get it split apart just to see if any gears are shredded or anything, but I won't be able to really get into it for some time as I work through the other trans on the waiting list that are here.
Update 03/29/12
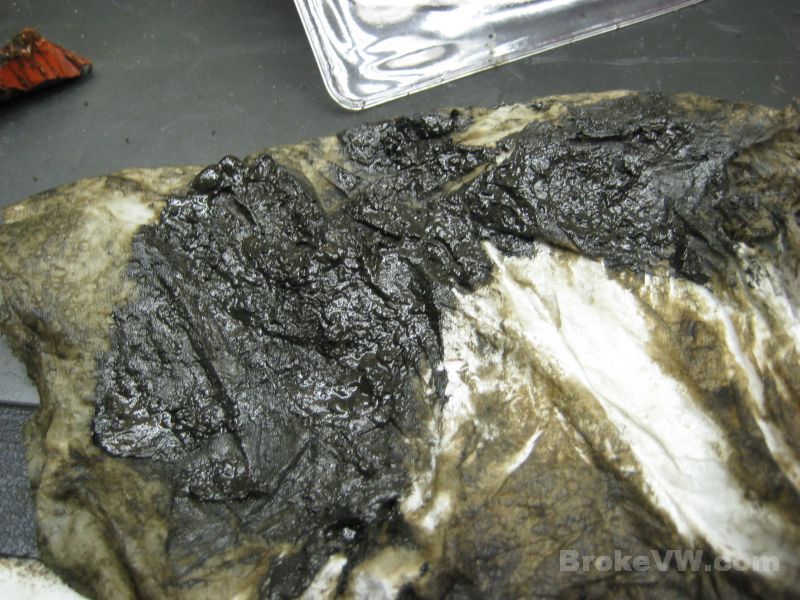
I decided since you are so far away it would be best to crack this trans open real quick tonight and have a look to see what is inside. In a word: Filth.
This is one of the worst trans I have ever opened as far as grime and film build-up, it is like someone just took a full tube of grease and emptied it into the trans at some point.
As far as actual damage, it doesn't look too horrible from what I can see... nothing major is broken anyway that I can tell.
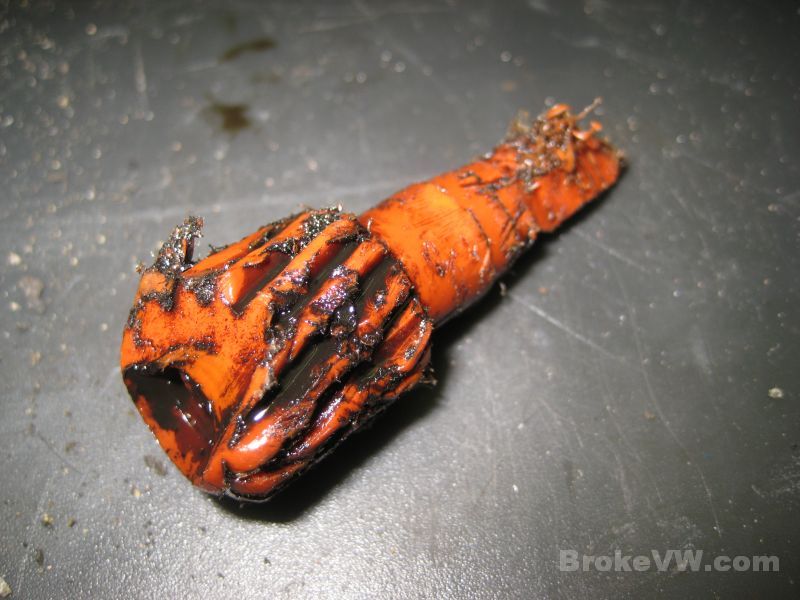
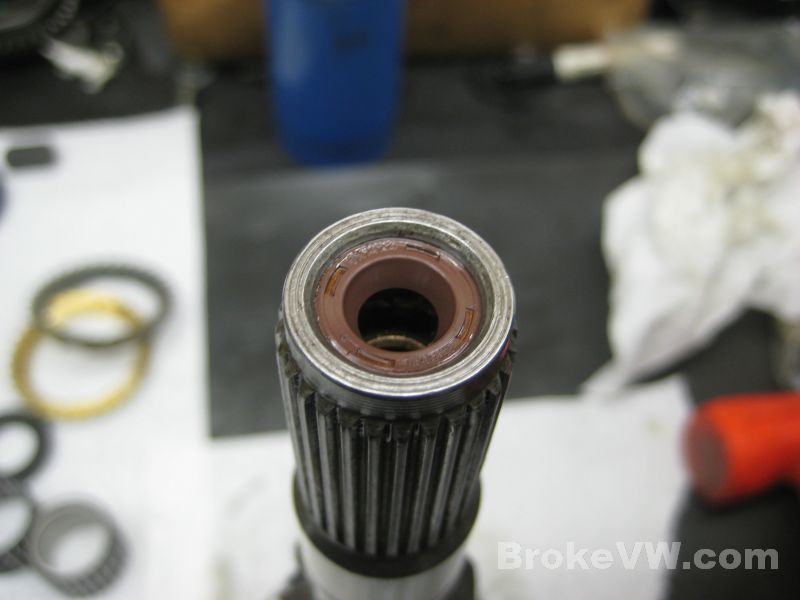
Pulling the speedo cable out resulted in it being jammed up, so I took the opportunity to grab some pics as I know I have answered this question on the forums before, so the next time I will have pics handy...
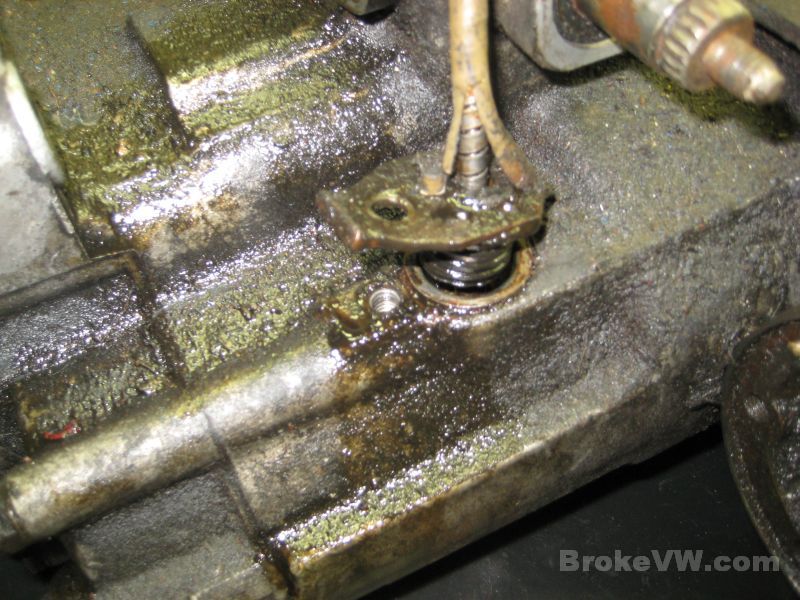
The speedo cable partially lifted out, then stopped... if you look close, you can see there is a silver sleeve in there holding it up that needs lifted out with a screwdriver or something....
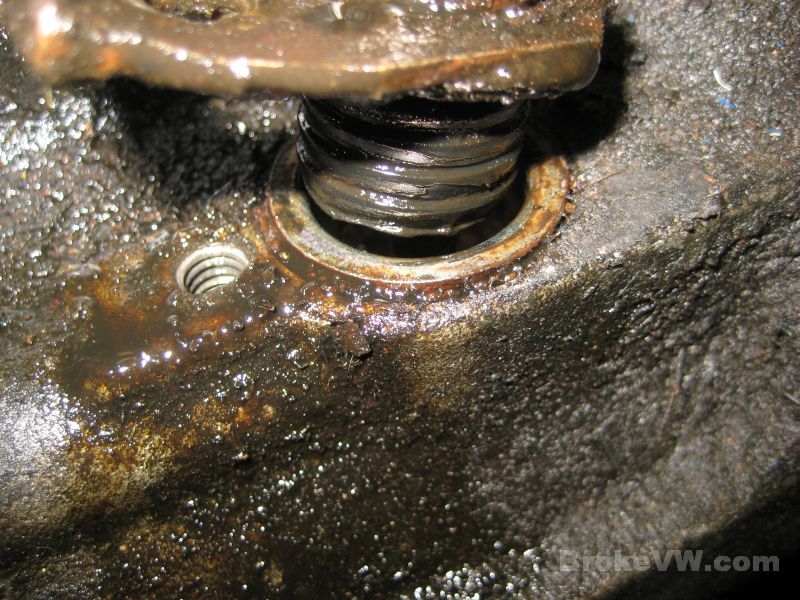
Finally free of the trans...
I spy with my little eye... something missing! There seems to be no speedo gear on the end of the cable. I bet I know where it is... around the reverse idler. When they fall off, they settle to the lowest point in the box, which is next to the idler gear. This can result in the idler gear not being able to slide if the plastic speedo gets in the way. Sometimes it locks it in reverse, sometimes it locks it out of reverse...
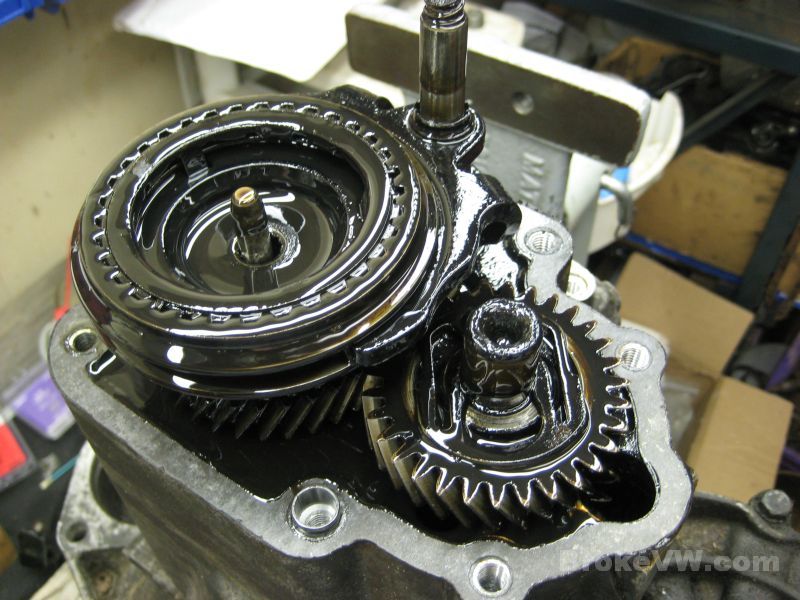
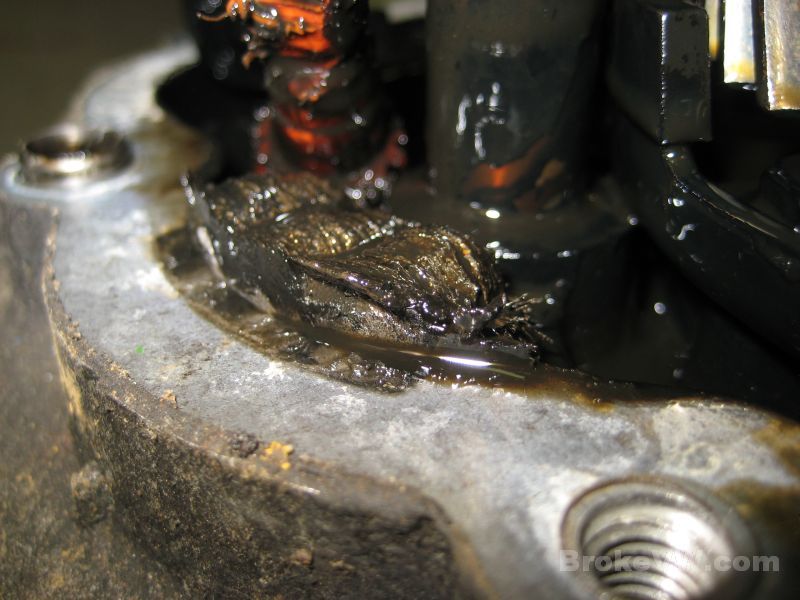
The selector pulled out... and oh dear, it looks manky...
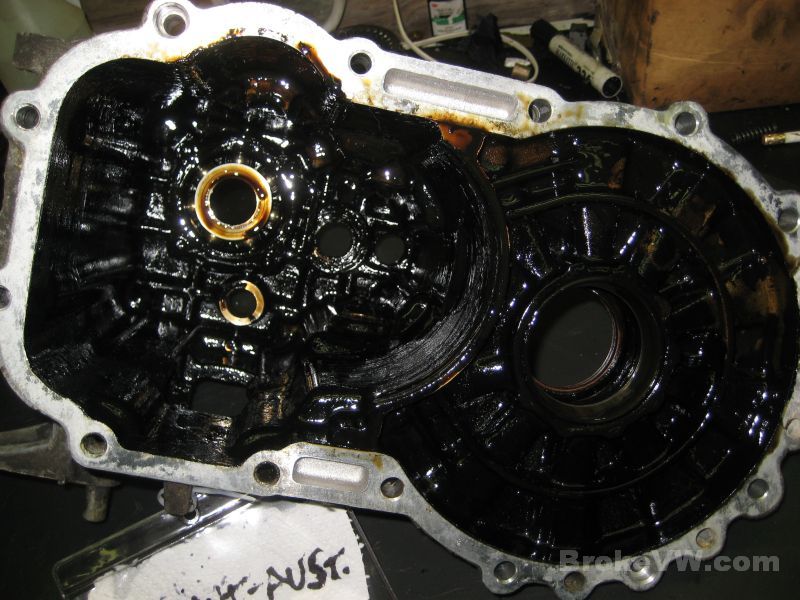
Pure black filth op everything once the 5th housing was removed....
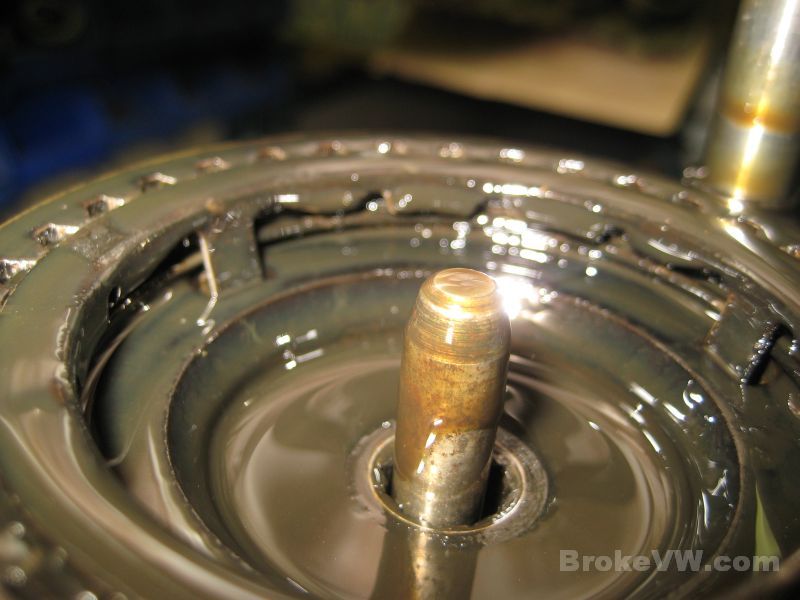
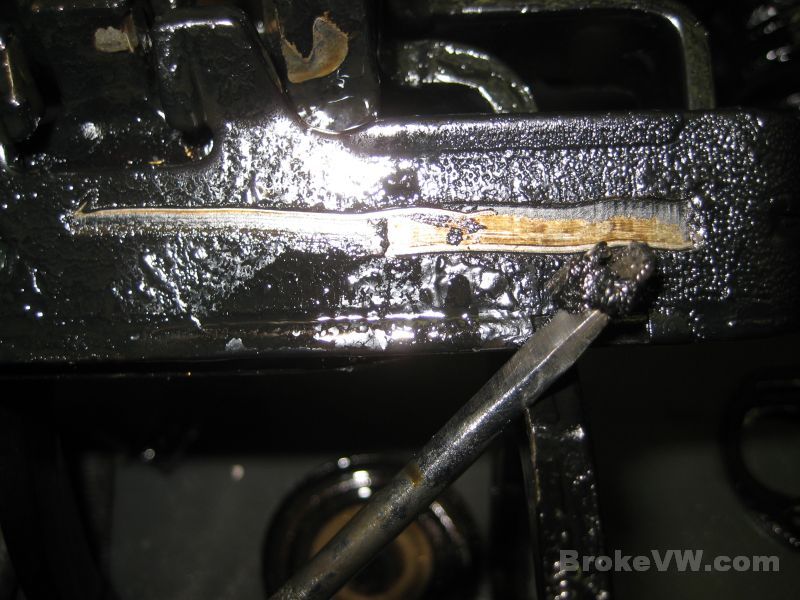
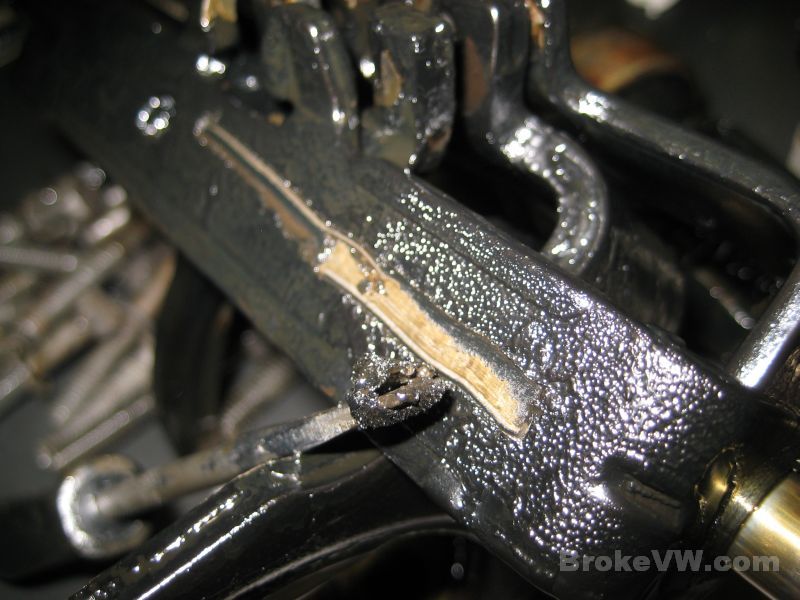
The pushrod has been flipped, and it is an OE VW pushrod as one end is tapered and one rounded. This is the tapered end, and it should be at the clutch parts...
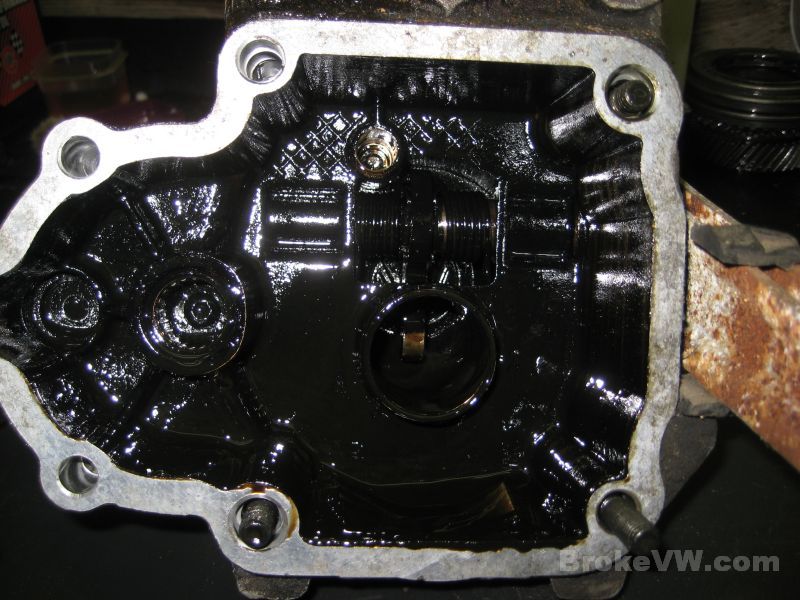
Funky film coating everything inside the 5th housing....
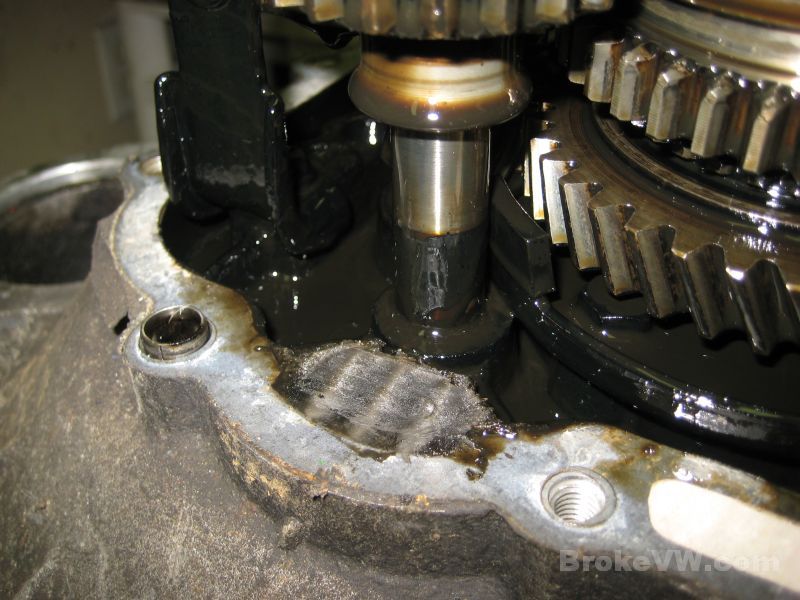
The reverse gear bolt removed looked smooth at first. By the time I grabbed the pic the oil had started to run off and expose the threads, but when it came out it was packed so it looked like a smooth shaft. Normally you can see the threads no problem. I knew the rest of the trans was going to be nasty inside...

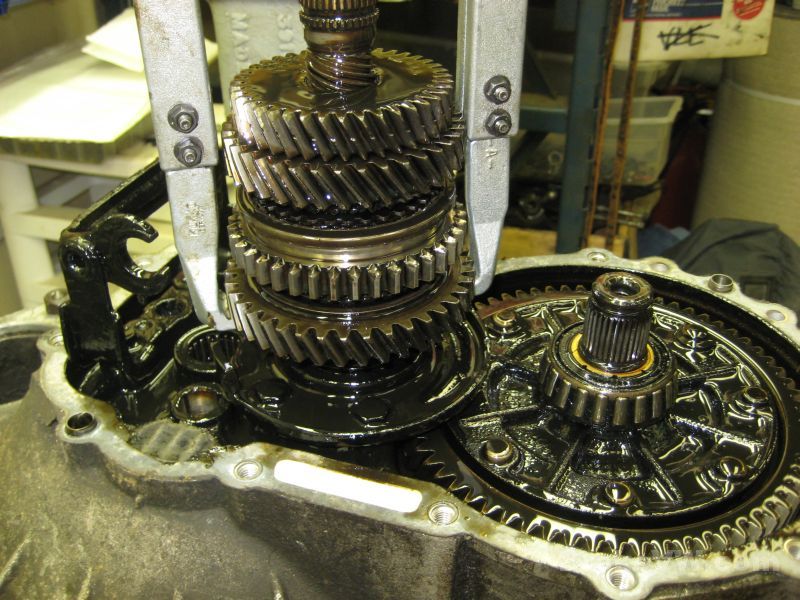
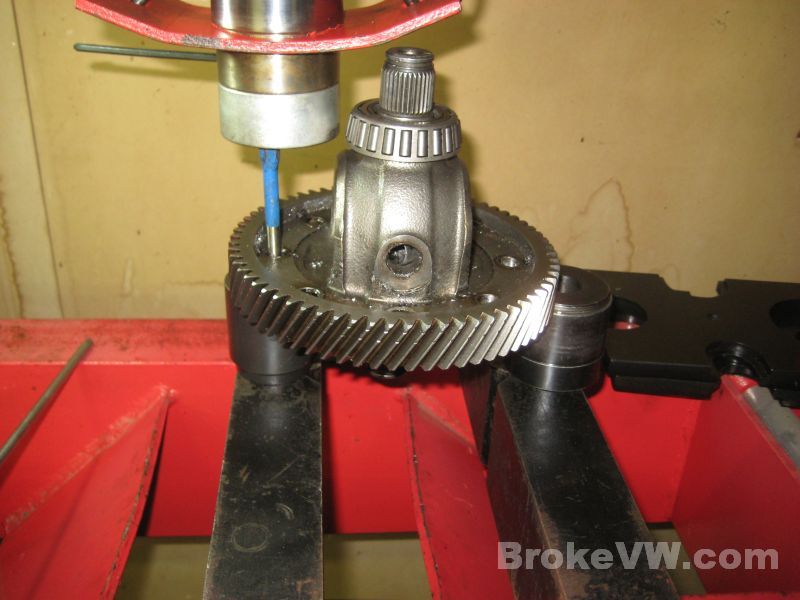
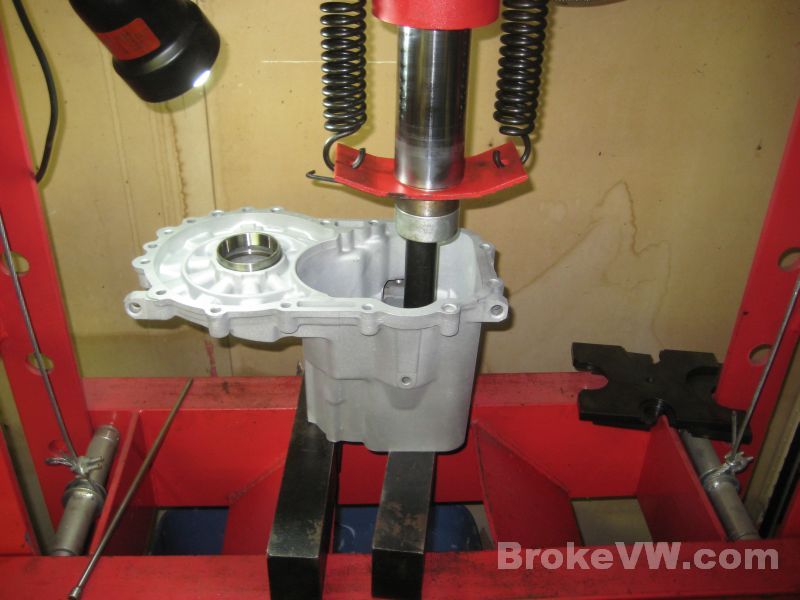
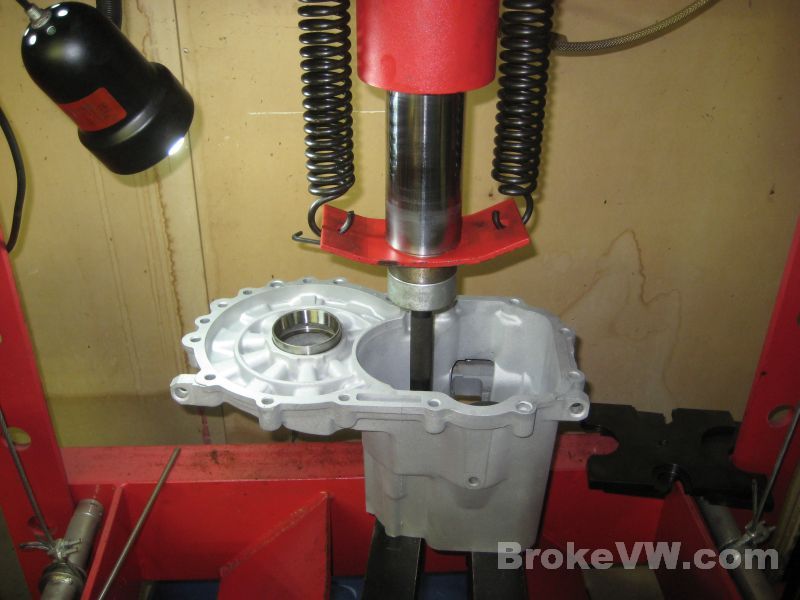
5th gears off, time to split the casing...
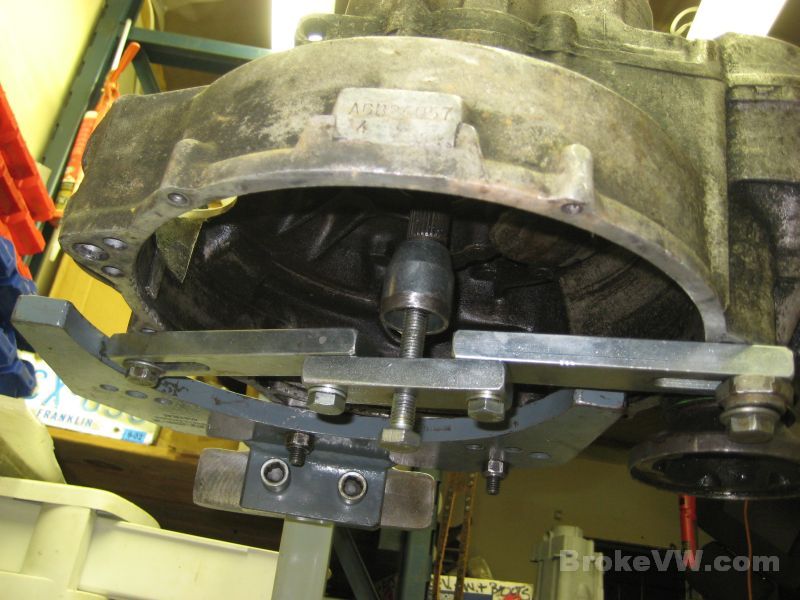
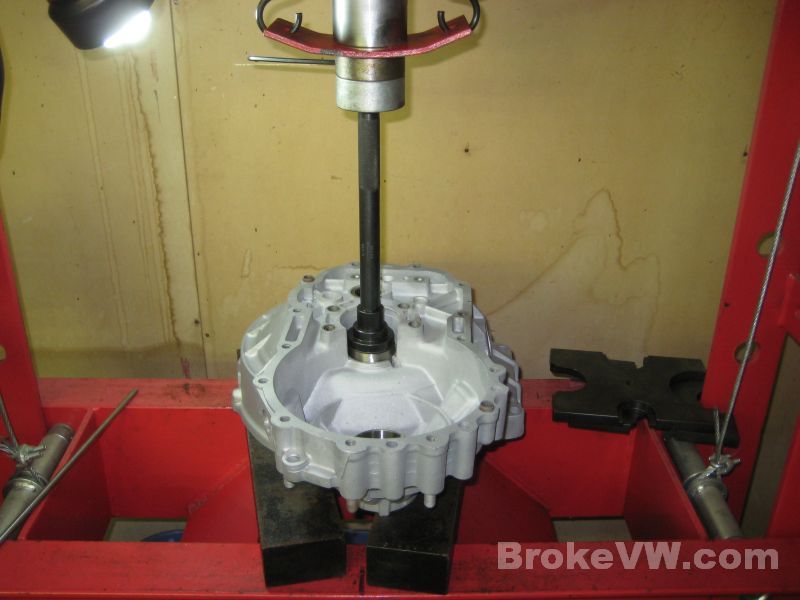
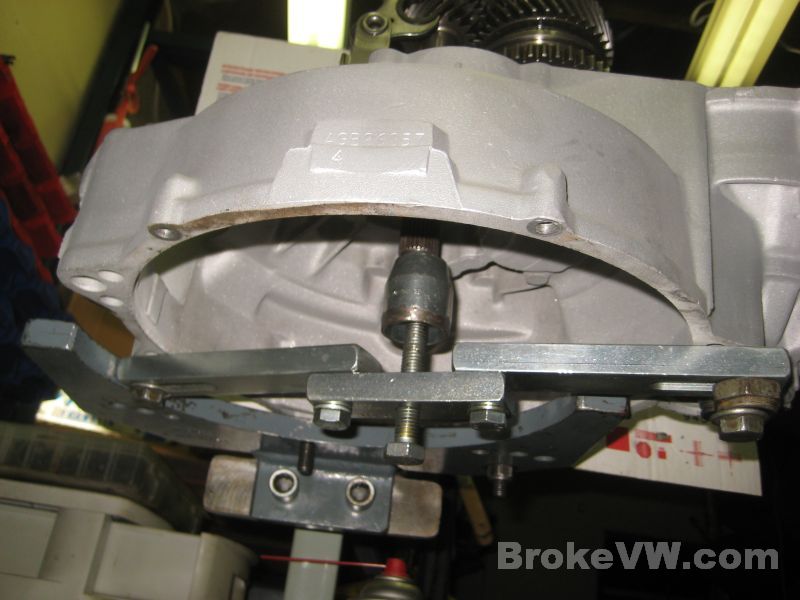
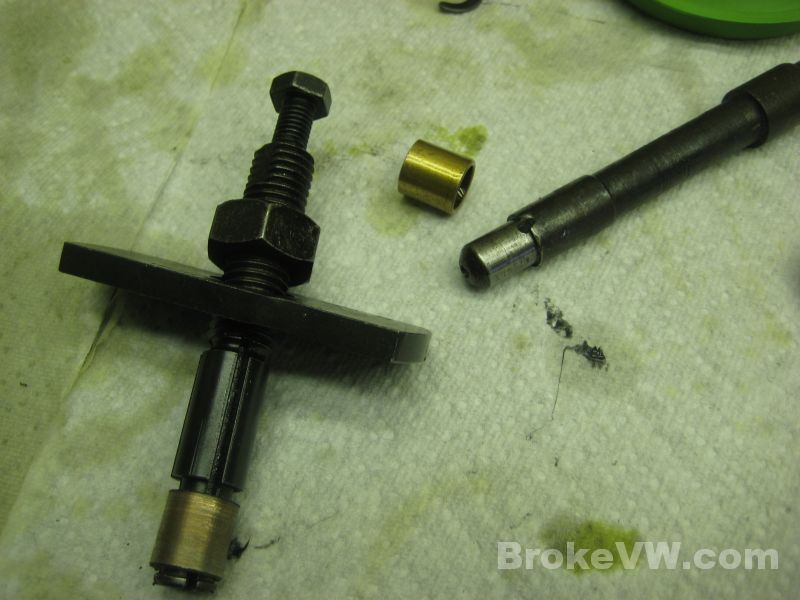
Support the input shaft from below with the VW support bar...
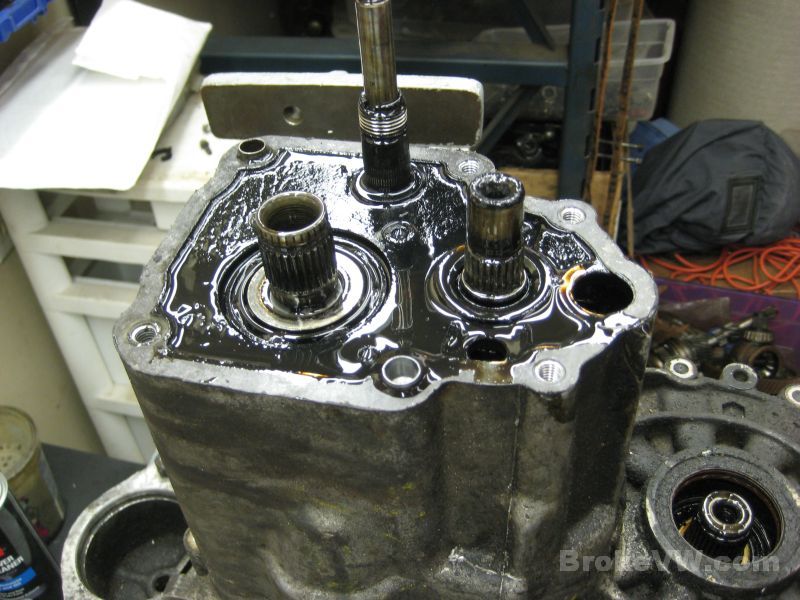
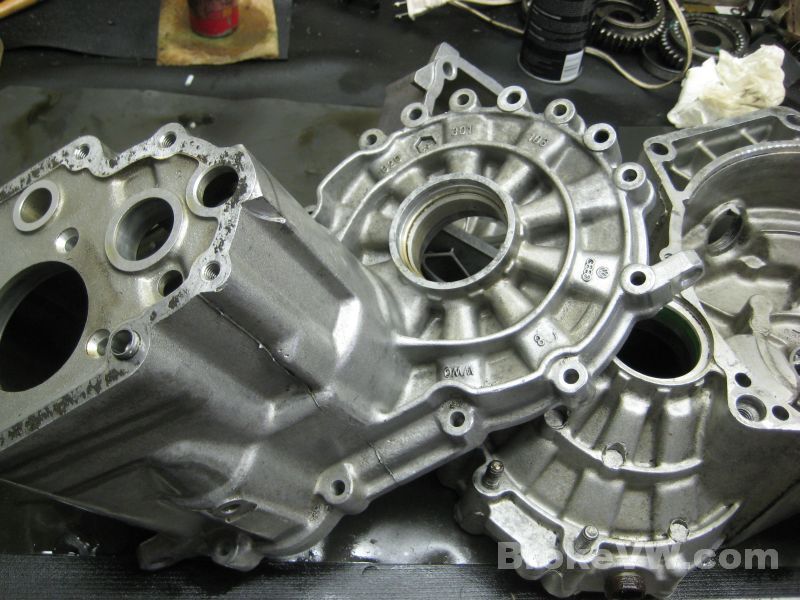
And the case is split... and it is indeed nasty inside...
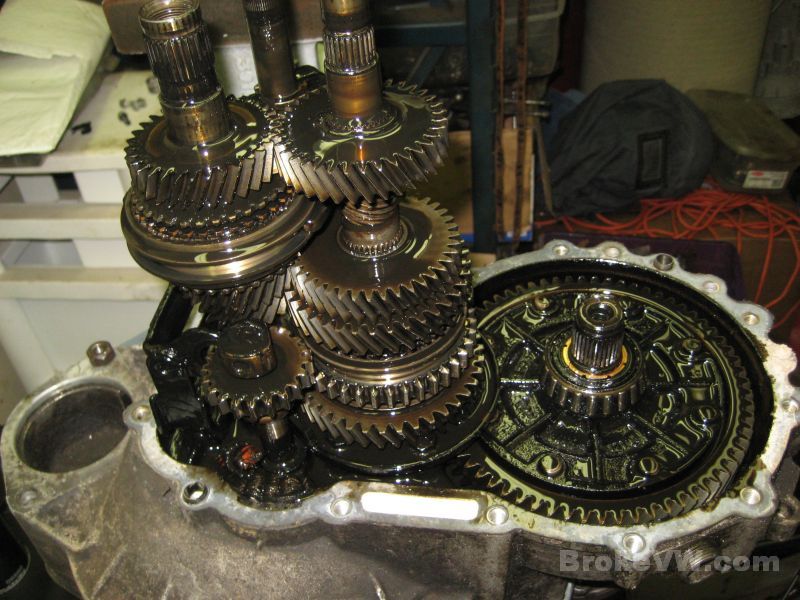
One of the worst I have seen as far as that black film build-up...
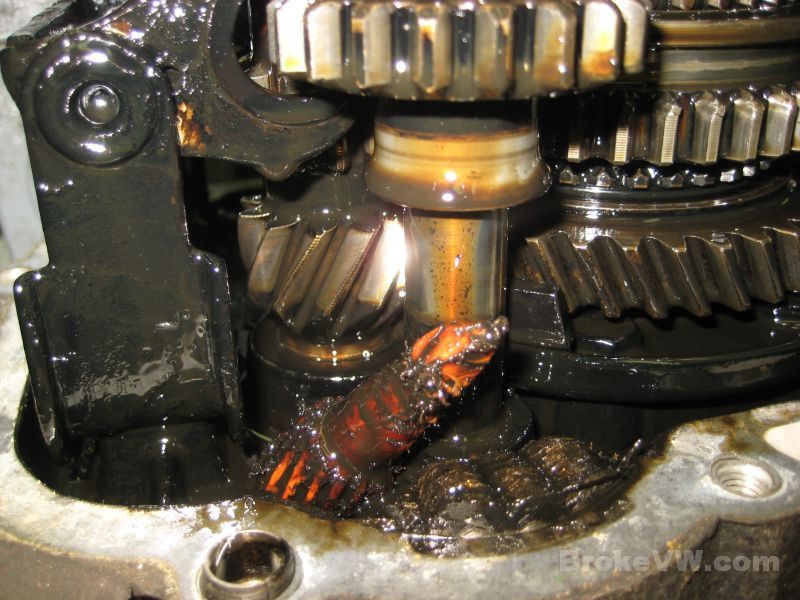
Oh look! A plastic speedo gear right under the reverse idler... and you can see it has been rubbed a lot, someone likely had the trans locked in or out of reverse at some point due to the gear. A little driving forward is usually enough to move the gear around and allow the selection of reverse again, but this gear has been hitting moving parts...
That is quite the build-up of grime on the magnet, which isn't a good sign. If there are chunks in there, it's even worse...
Dead speedo gear...
Scraping the clump of goo from the magnet, it is smooshed into a paper towel to look/feel for any big pieces. Thankfully, it was all just fine particles in there so there is no chunks, but that is a lot of material on the magnet, so something might show up later once everything is cleaned and can be inspected...
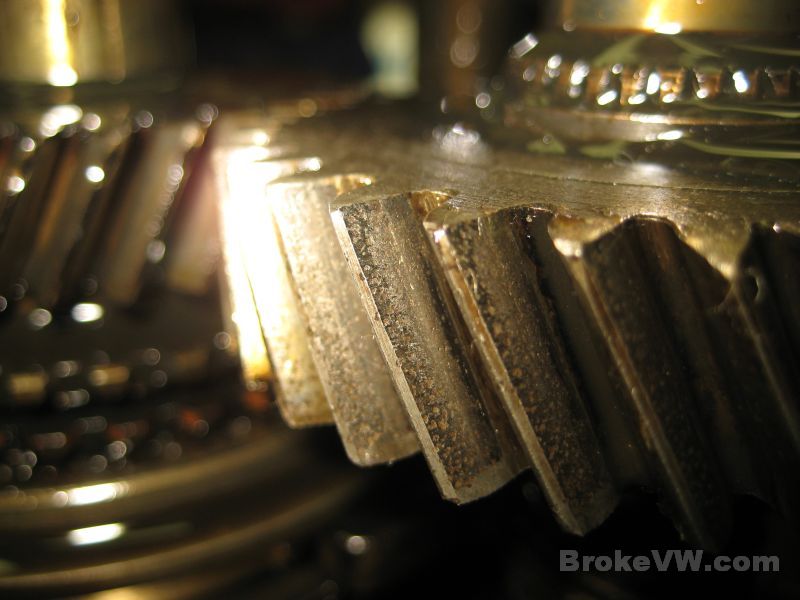
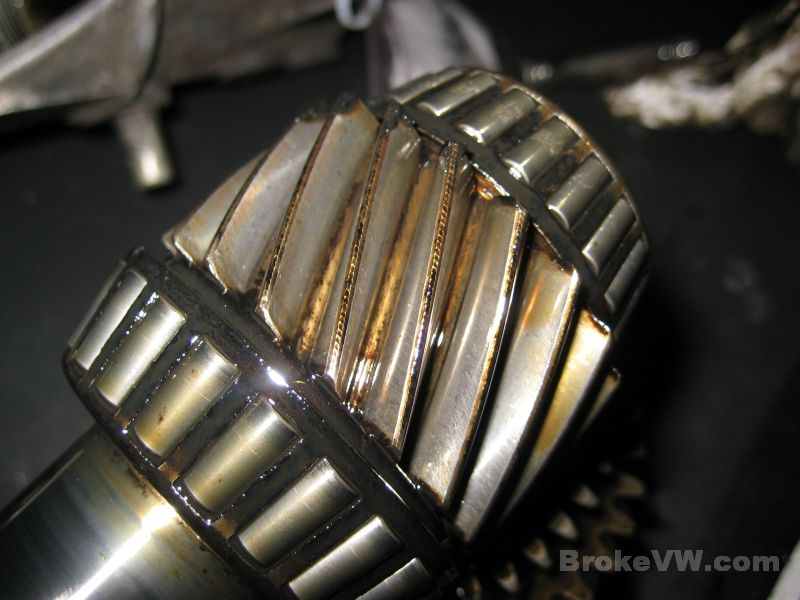
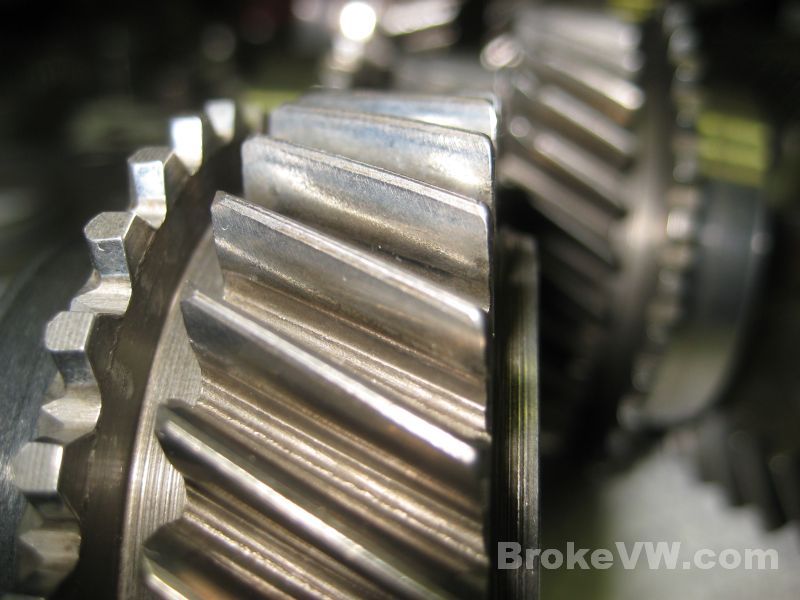
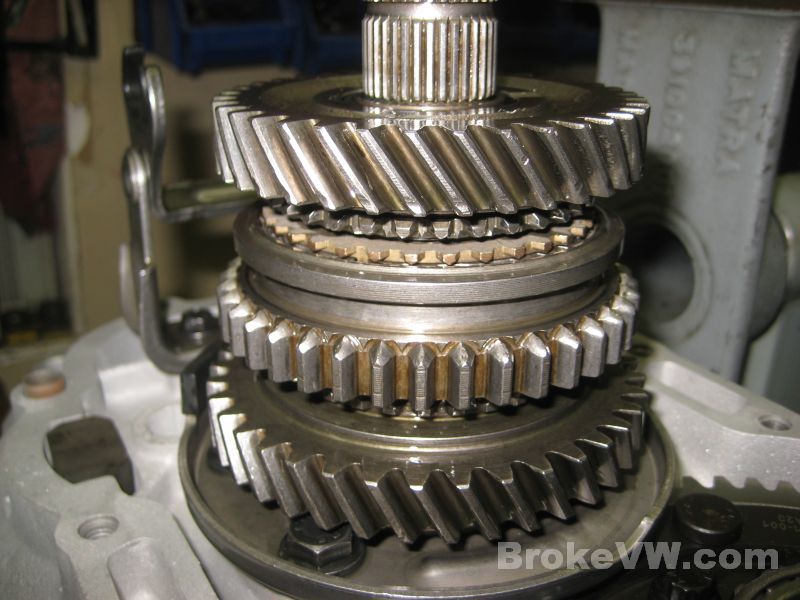
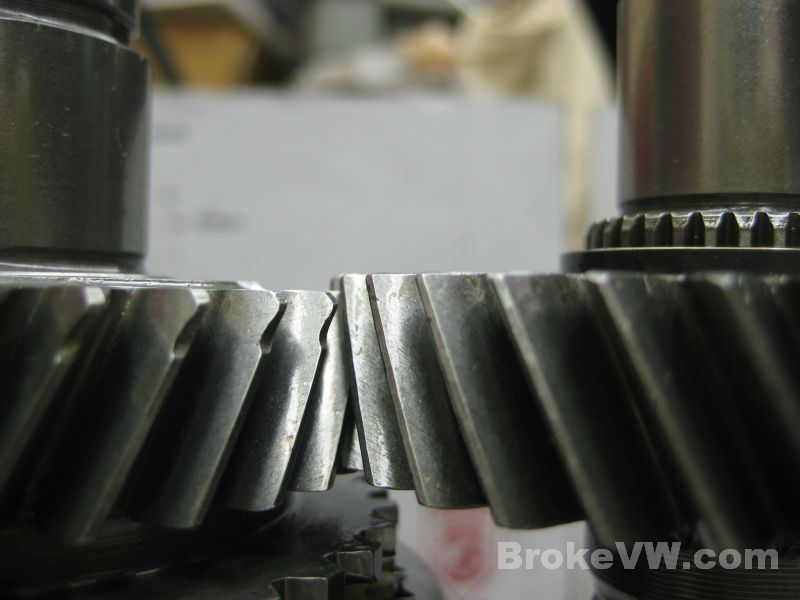
This is the 4th gear set, and I noticed the tell-tale signs of old rust... little spots on the gears that didn't look right...
Cleaned off, a better look reveals it is indeed rust. The trans has sat for some time and the oil ran off the gears, they got wet or moist, and started rusting. The dots are small pits in the gear teeth. It was then filled with oil and ran again, as they look smooth like they have been running against each other so I think it sat, rusted, then got used again, and here we are...
The film coating the shift forks is quite thick...
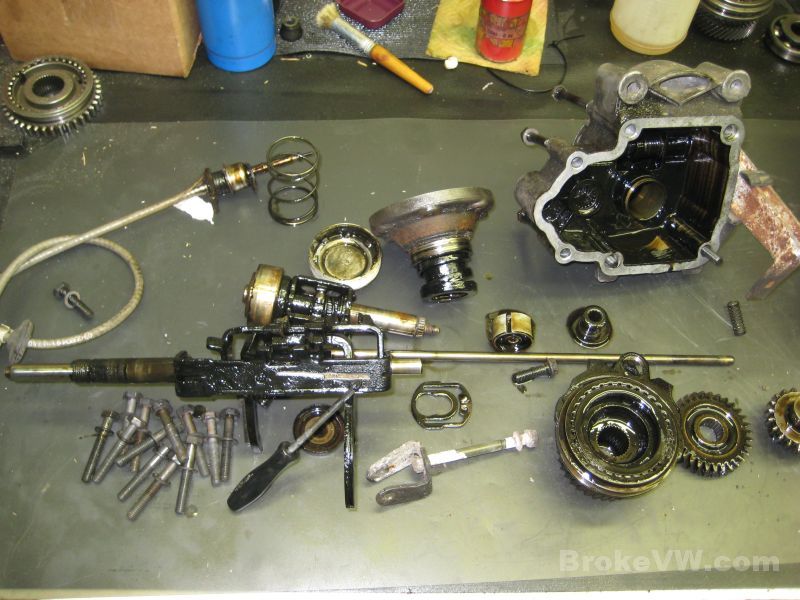
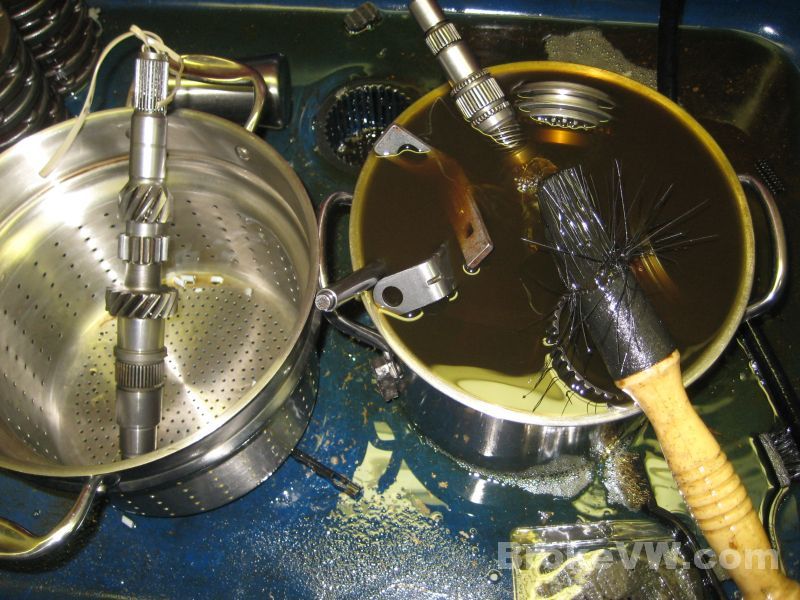
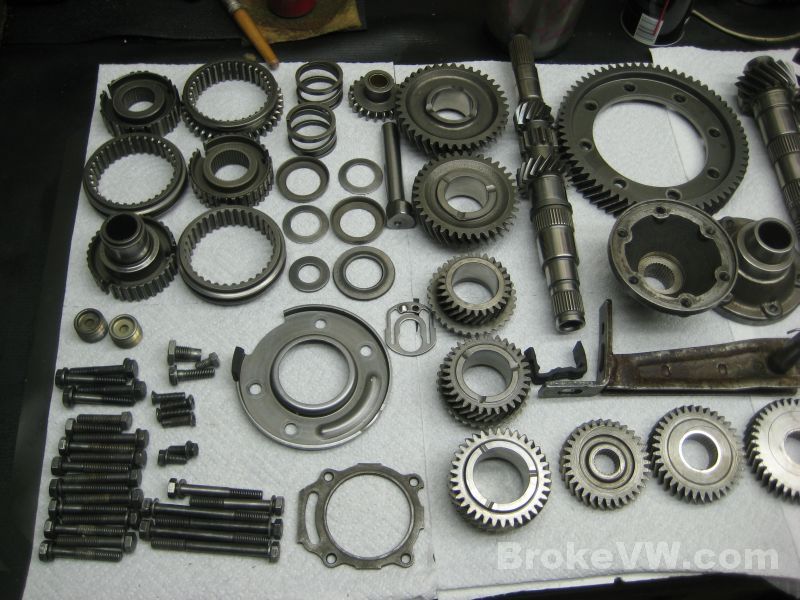
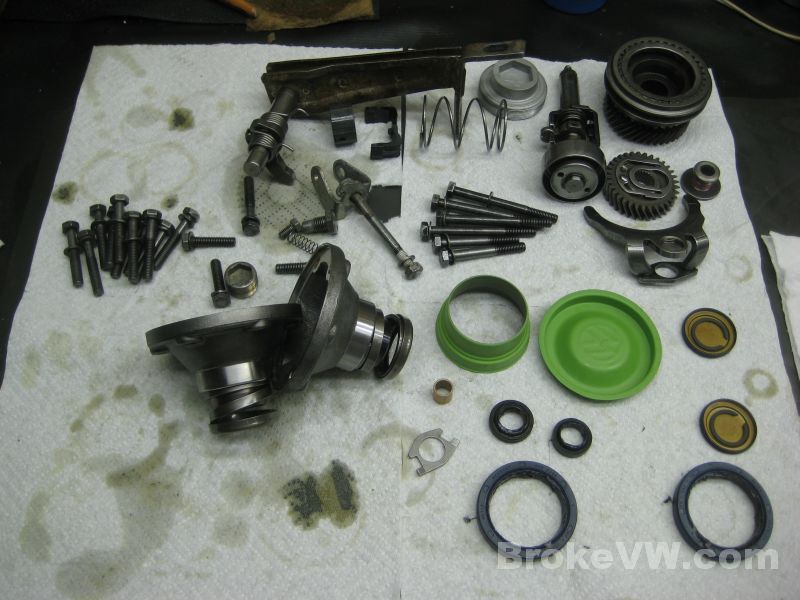
The parts yanked out of the trans at this point...
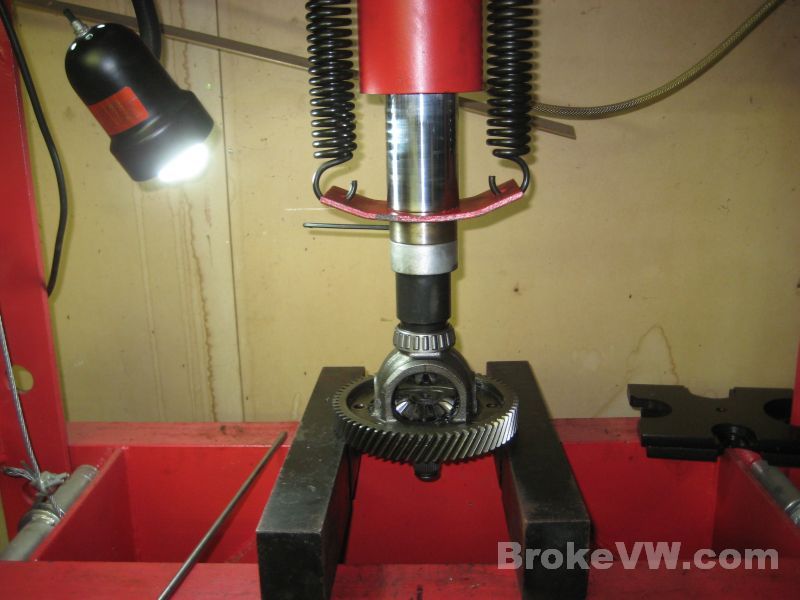
Pulling the gear stack from the output shaft...
The film on the inside of the casing...
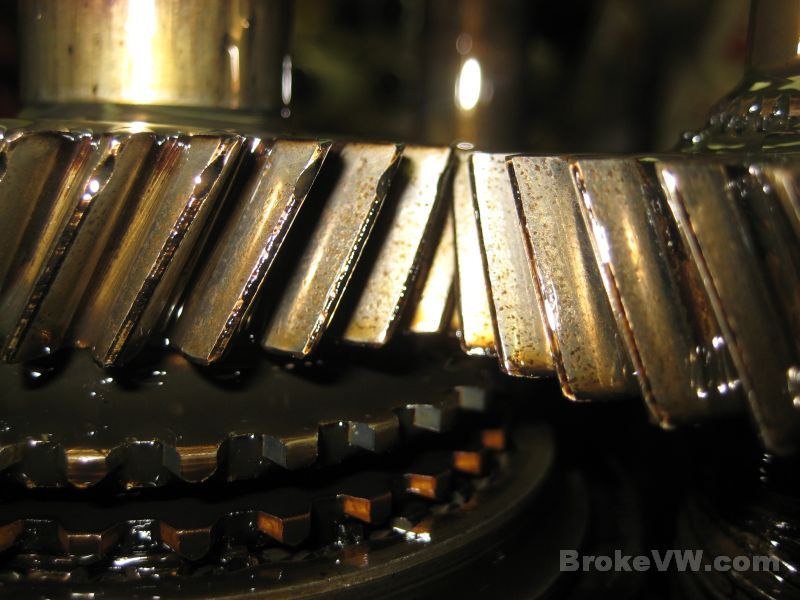
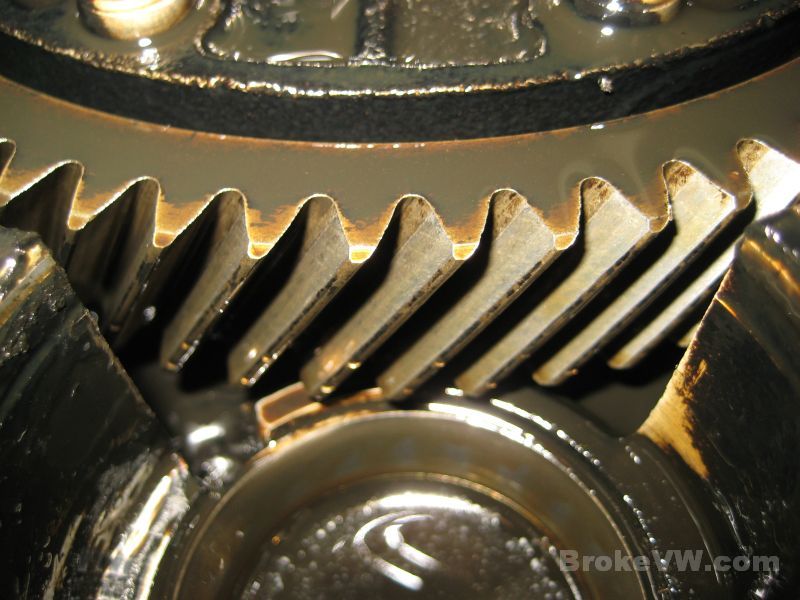
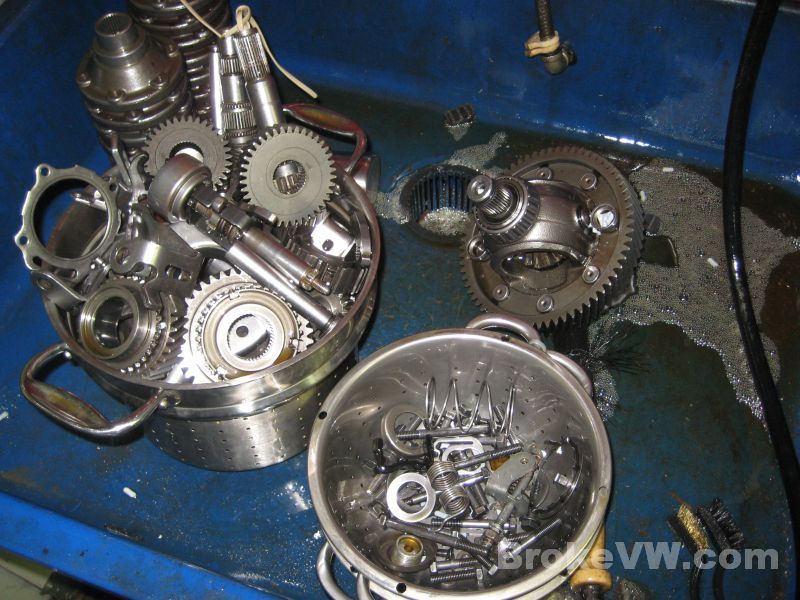
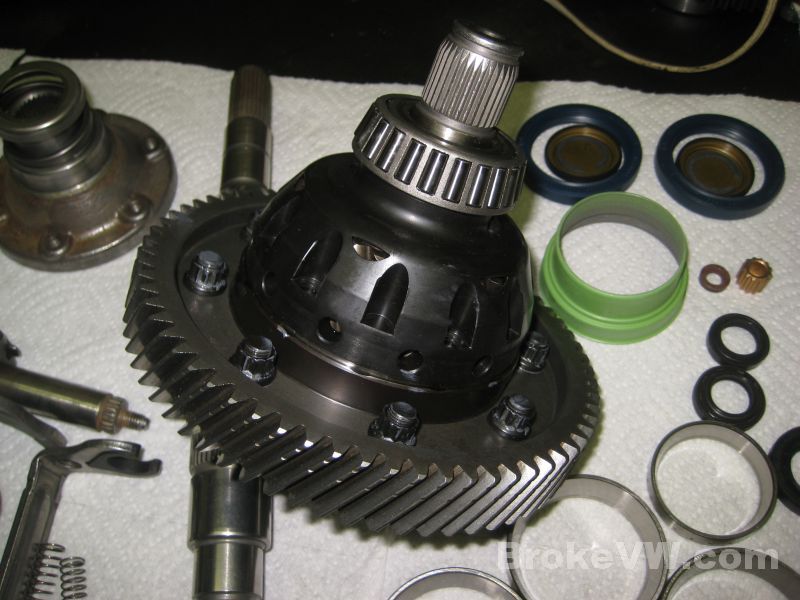
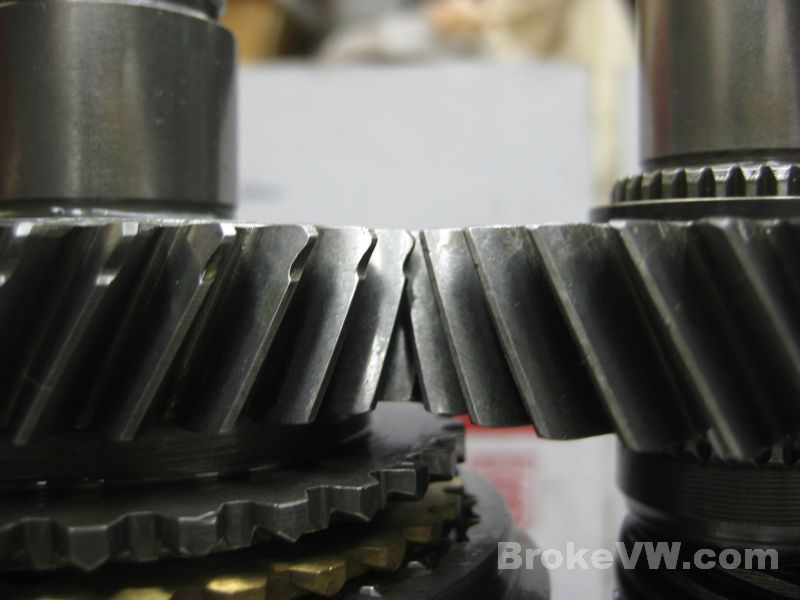
The R&P gears looks like they are in good shape...
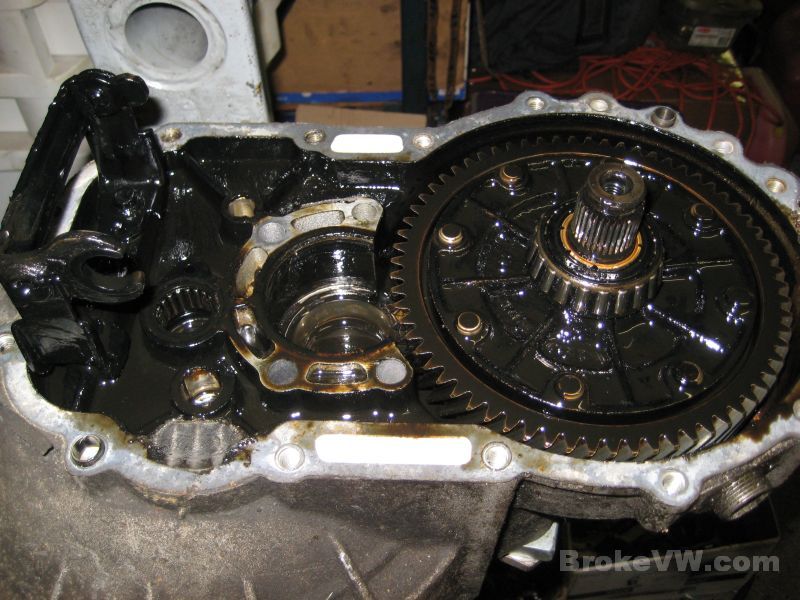
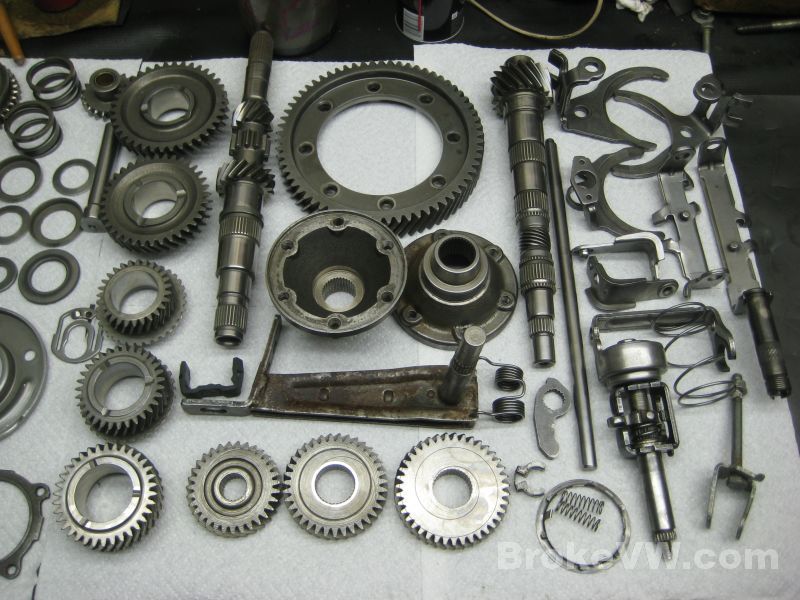
Everything out but the diff, but I've seen all the major parts at this point now... if the spiders in the diff are bad they can be sorted out, the big items like the shafts, gears, etc. are all in one piece so that's good...
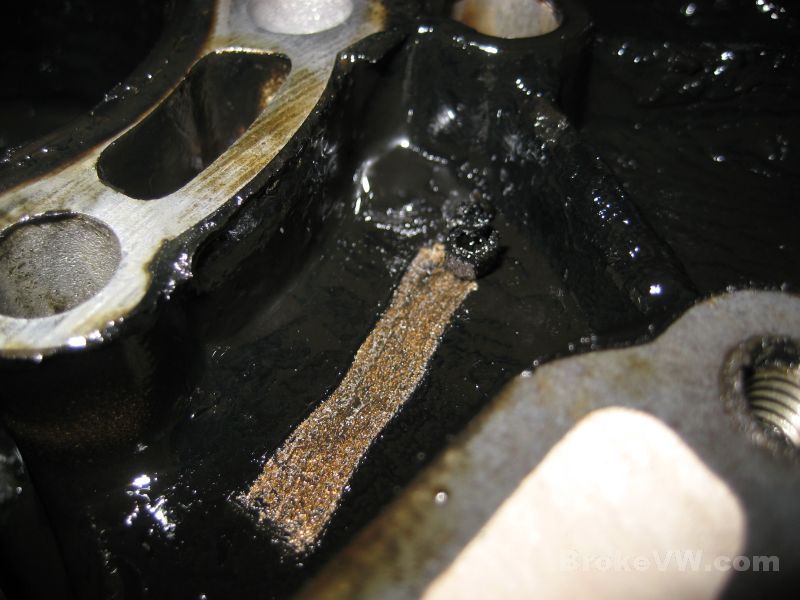
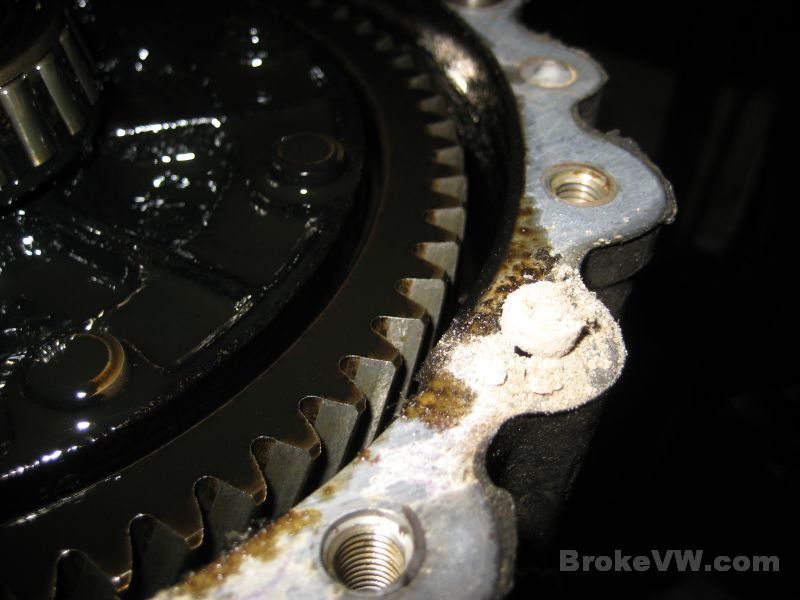
Some sand made it to the trans at some point, it was packed into an unused hole in the casing, the plug of sand was exposed once the case was split apart...
OK, now I'll get everything bagged or boxed up and put away until later... but I know that the big items in the trans look to be in decent usable shape at this point :)
Update 11/15/12
I've started cleaning on your trans now, trying to make the December ship date. The parts are finally clean of that horrible black film, it was quite thick.
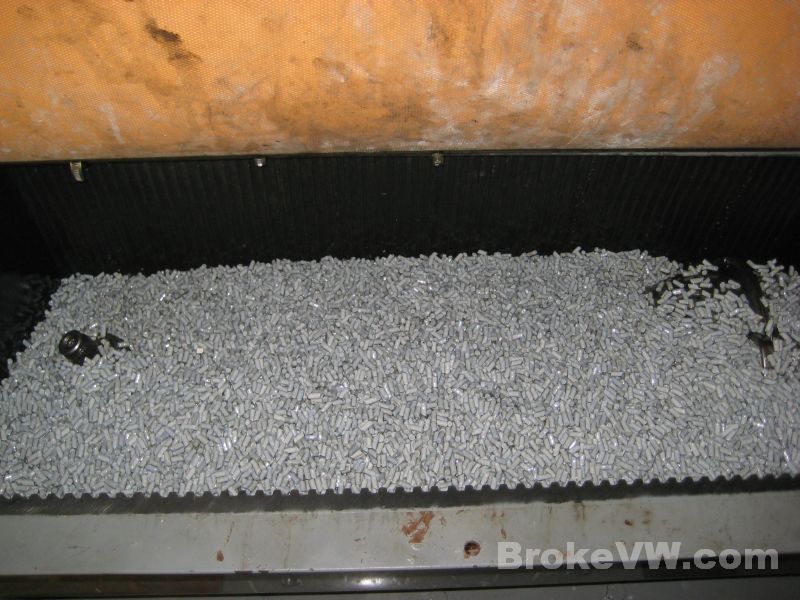
Here is your diff and some small parts being spun in the vibratory cleaner....
These parts have gone thorugh the vibratory cleaner and are being rinsed in the parts washer...
Hey, look! Silver parts! With the black film removed the parts can be closely inspected but they look better than they did!
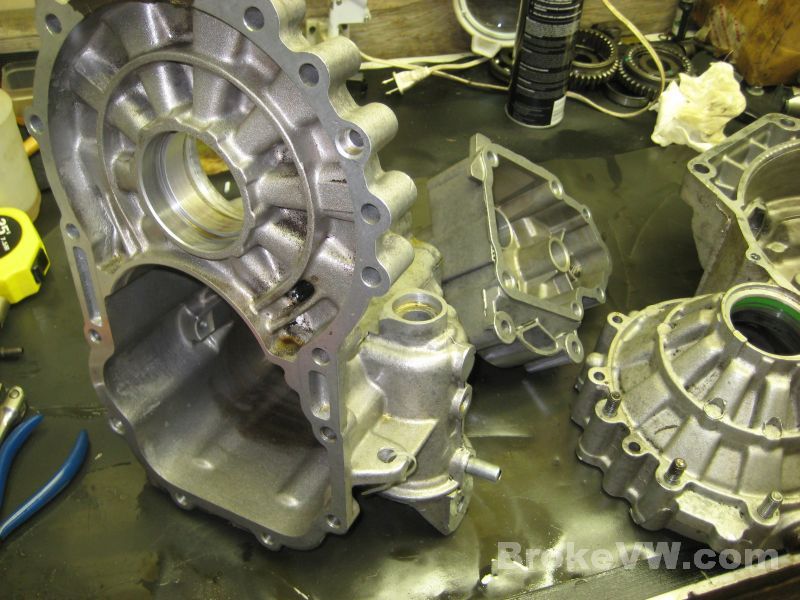
The cases have also been cleaned, there was a LOT of gunk on them, but they are now clean enough to be prepped for media blasting to clean them fully...
Next I'll plug the threaded holes and bearing race bores, then media blast the casing clean, and continue on cleaning the internal parts prepping for the rebuild.
Update 11/18/12
The case has been media blasted and is cleaned and only needs
rinsed and it is ready for the build.
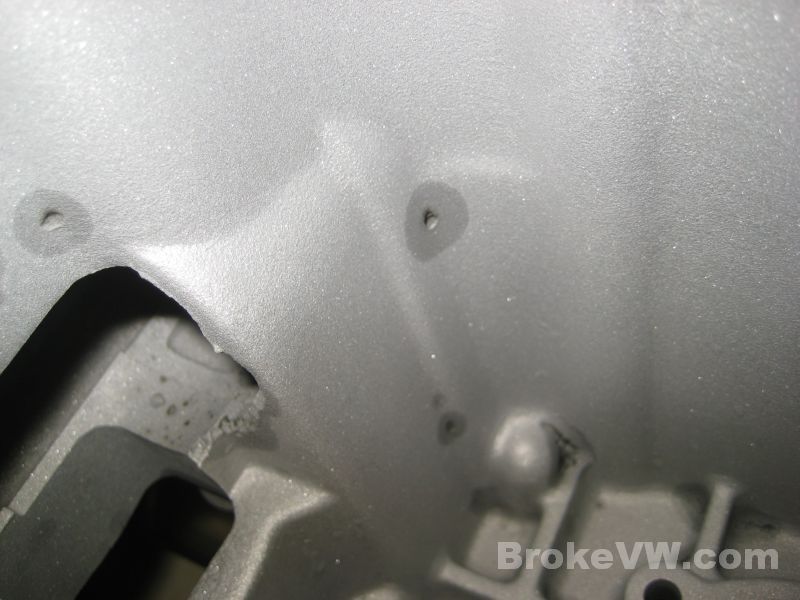
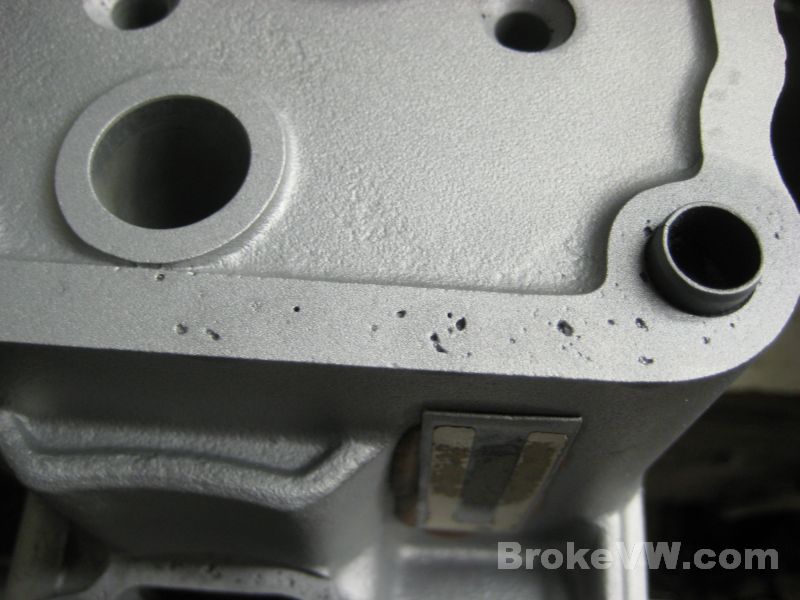
The casting was actually pretty rough... nothing that happened over time, this
was rough from the factory, I'm surprised to see a casting with such extensive
pitting made it through the factory, but they must have decided it was OK and
machined it and made a trans out of it.
The trans pieces still plugged and prepped for blasting...
Old bearing races are installed into the bores to protect them...
Some of the dark spots you see inside the casing in the pic above is from the pitting in the original casting. The pits hold the oil and it just keeps bleeding out of the holes... I'm quite happy you don't want this casing powder coated, all this trapped oil would make it a nightmare...
The bolt holes are are plugged with bolts to keep as much sand out as possible...

Old seals are also used to plug the seal bores to protect them. In this pic, you might notice the inside of the bellhousing has a slightly different texture or look than the diff portion of the casing... the inside of the bellhousing is sand blasted, the rest of the casing on the outside is glass bead blasted and the bead blasted metal is smoother, and doesn't have the same "sparkly" look that freshly sand blasted metal has...
Another pic to show the difference in the 80 grit glass bead... the 5th housing is beaded, the inside of the bellhousing is medium sand. The sparkly look is from the sand hitting the aluminum and making a small flat facet to catch the light. The glass bead is round and doesn't make flat spots, so it is a matte finish, and not as sparkly...
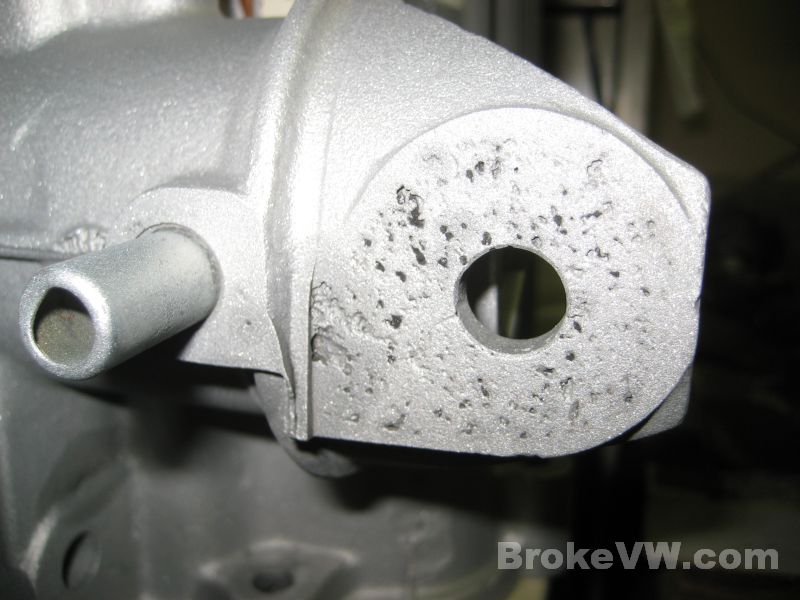
More of the bad casting....
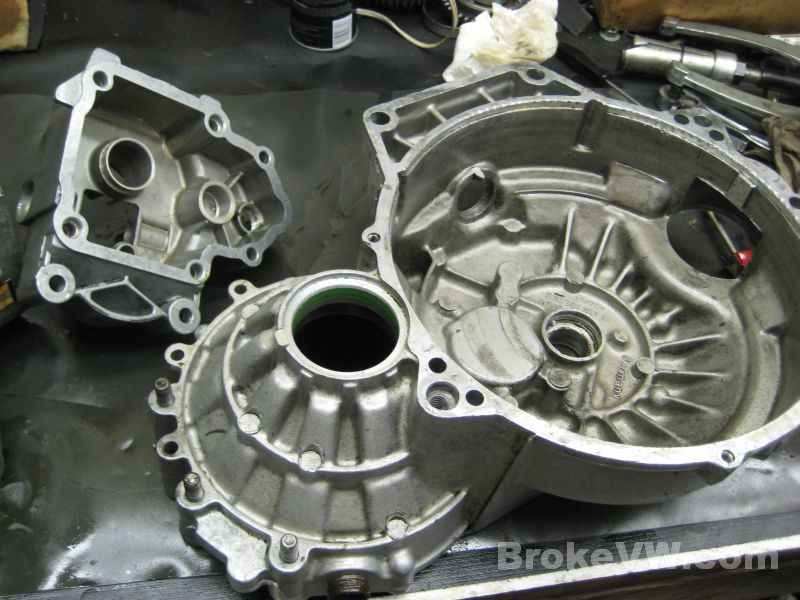
The bellhousing with the bolts removed. I have to rinse everything a few times to make sure the sand is all gone...
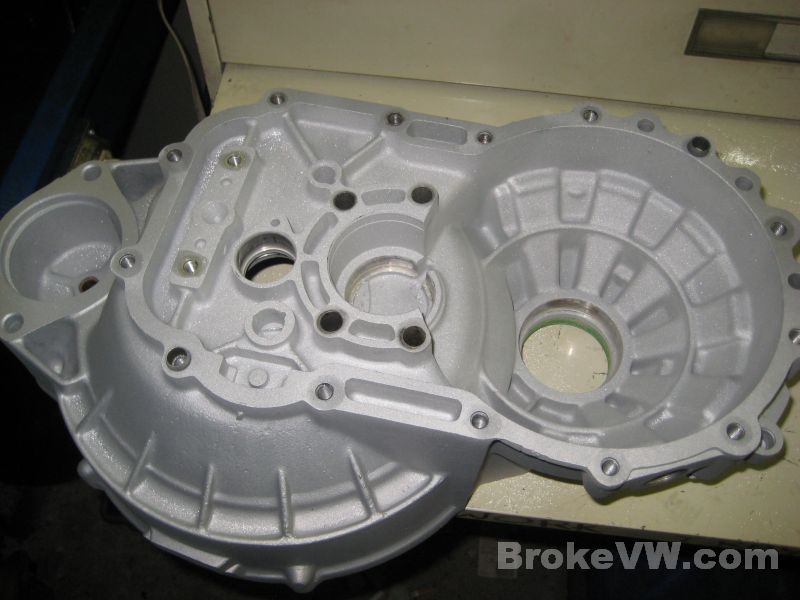
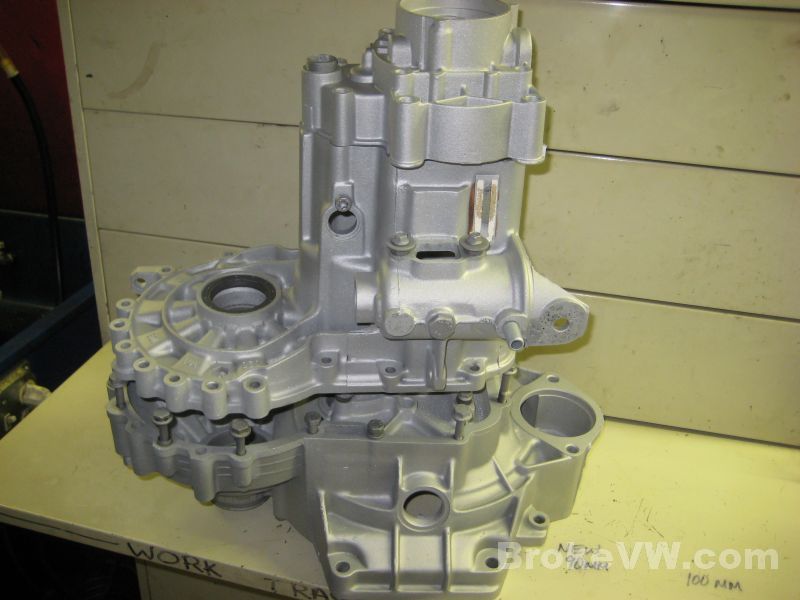
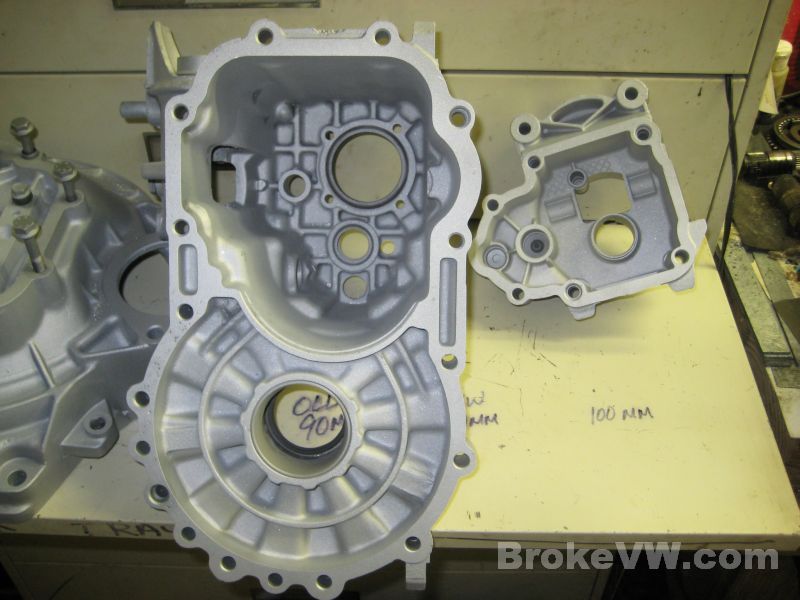
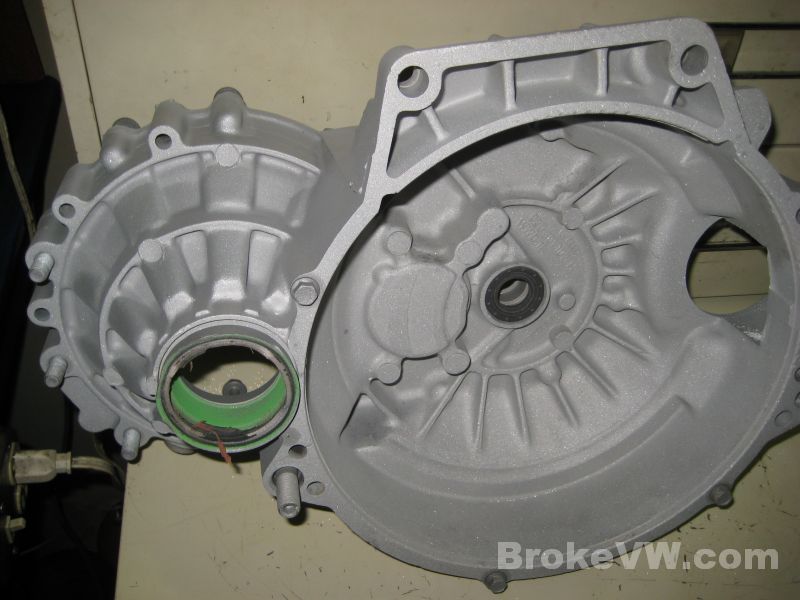
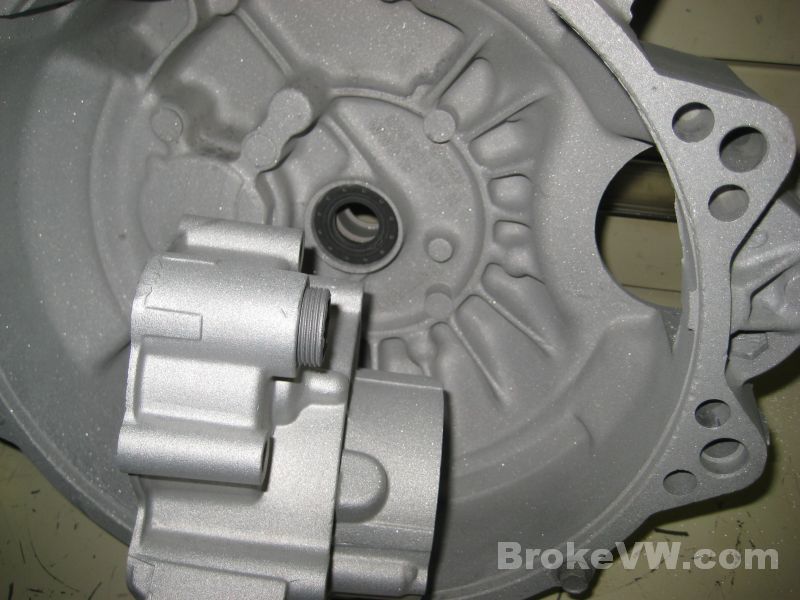
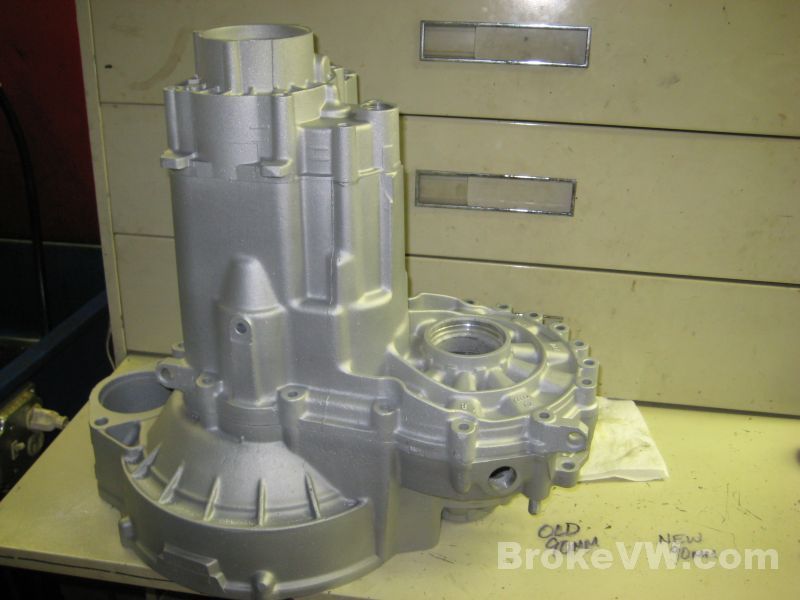
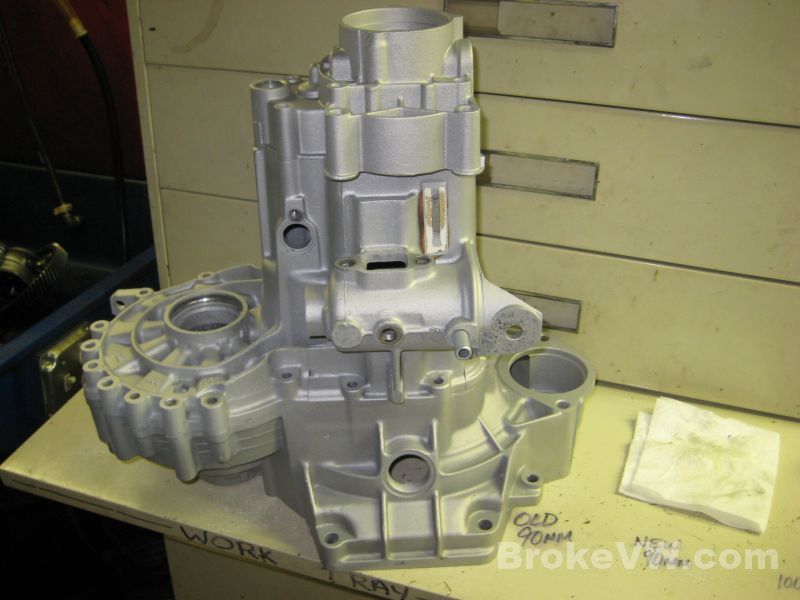
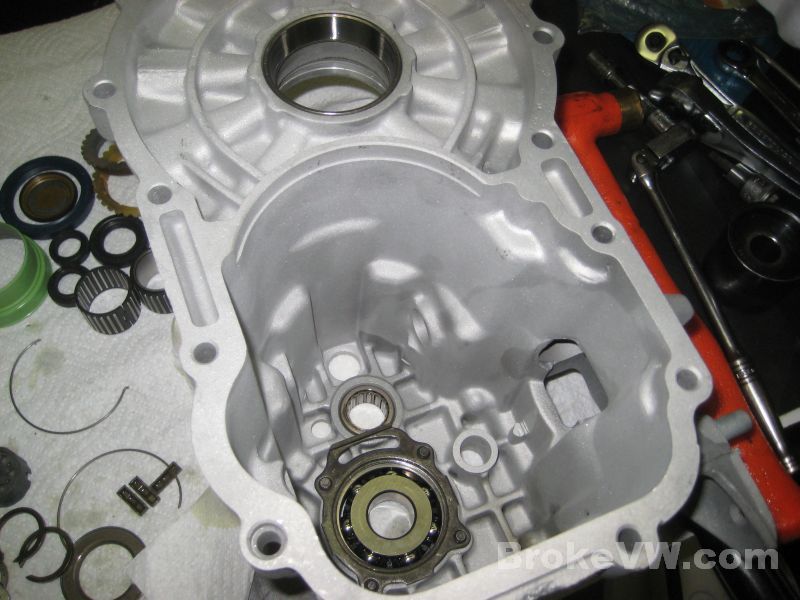
A couple pics of the cleaned casing, this is pretty much what your trans will look like when done...
I've got to work on the internal parts now, they've been cleaned but I need to go over them, inspect them, do any spot cleaning, then I can start assembly.
Update 02/23/13
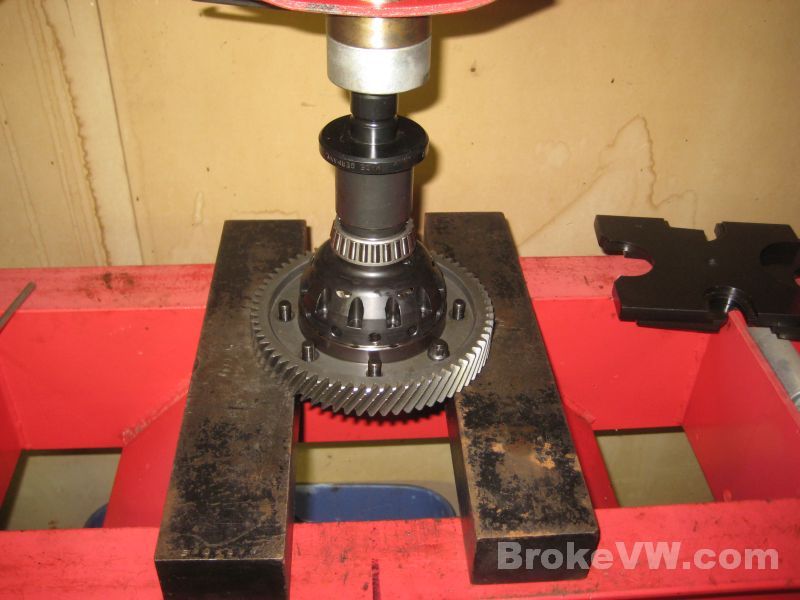
I had a little spare time today and was able to drill the rivets from your diff carrier to remove the ring gear. The heads are drilled once with a 6mm drill and then again with a 12mm, and finally a chisel is used to knock the heads off...
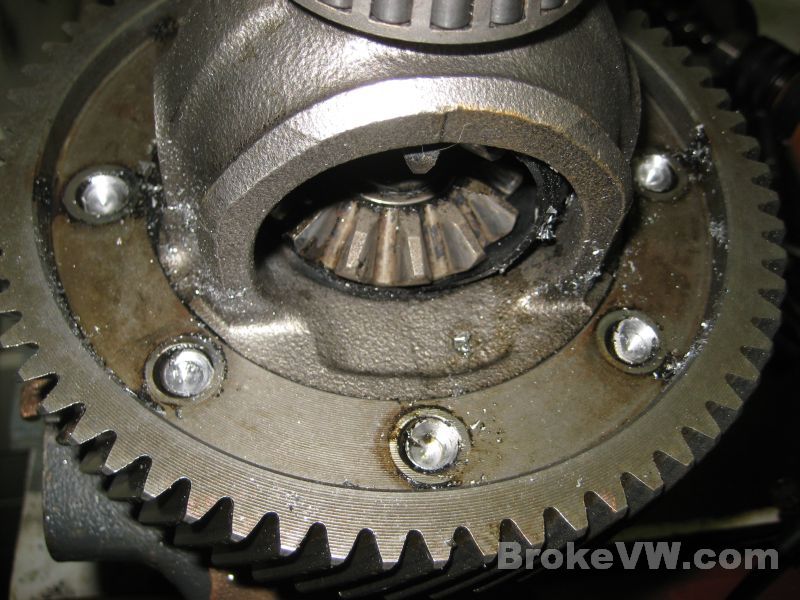
The shop press makes quick work of the remaining rivet studs in the carrier...
With the rivets removed the ring gear can be pressed free of the carrier...
The ring gear has been cleaned in the vibratory cleaner and tomorrow I am going to start on final cleaning of the internal parts to prepare them for assembly.
Update 02/24/13
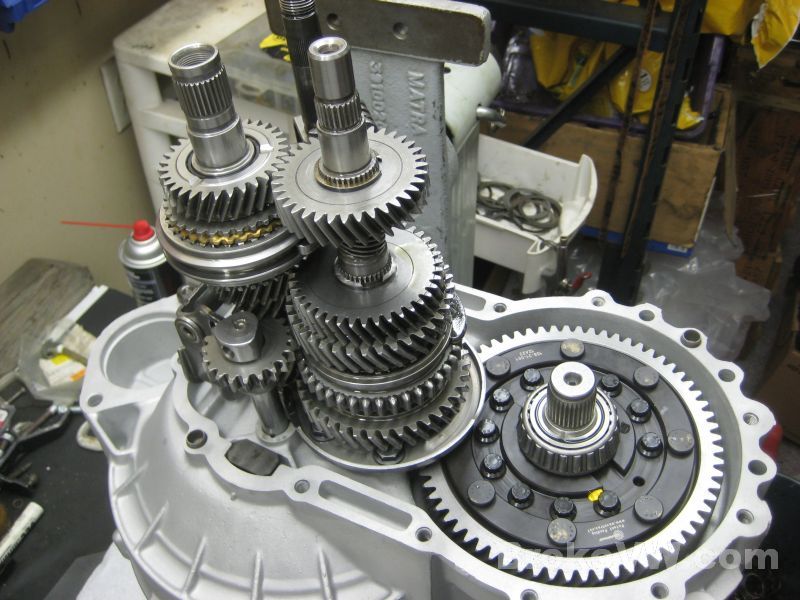
The internal parts are cleaned and rinsed and ready to be assembled...
When I'm not working on the trans the parts stay covered...
Next I'll bring all the new parts and LSD out and will start building the sub-assemblies like the 5th gear, the input shaft, the shift forks, build the LSD, etc.
Update 02/25/13
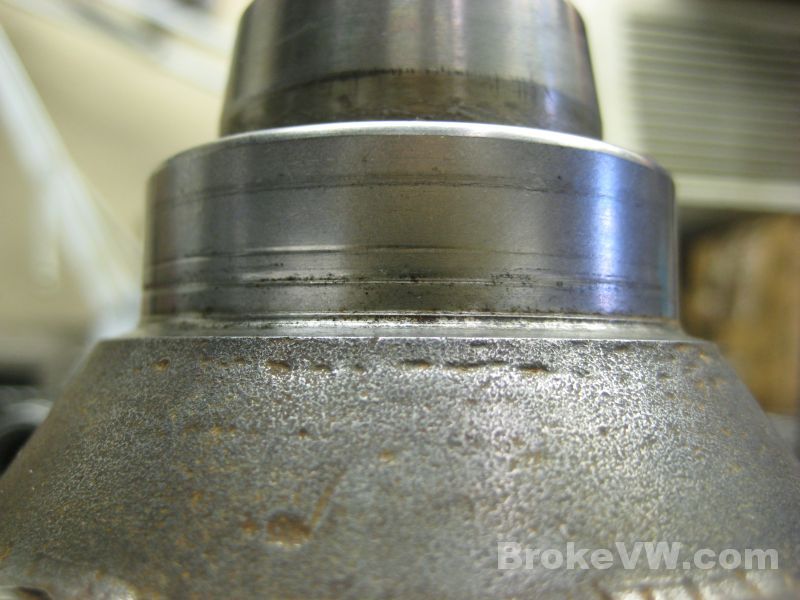
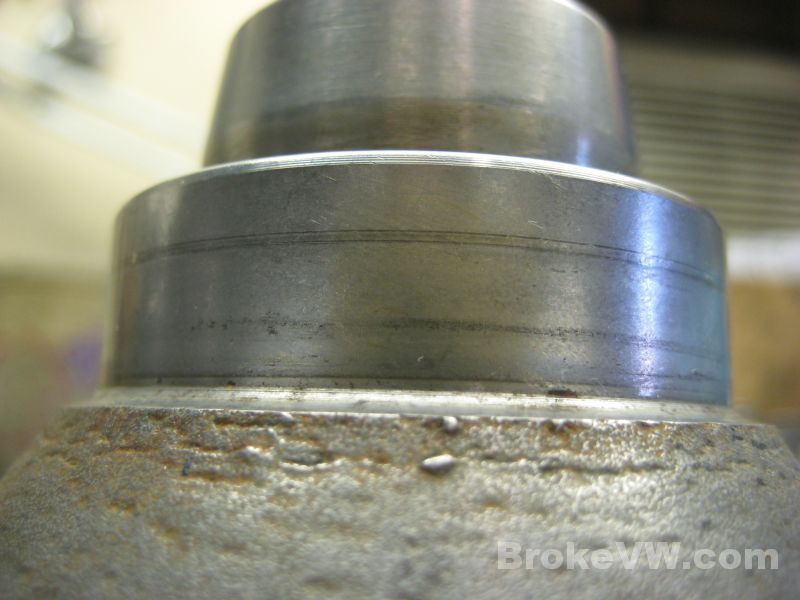
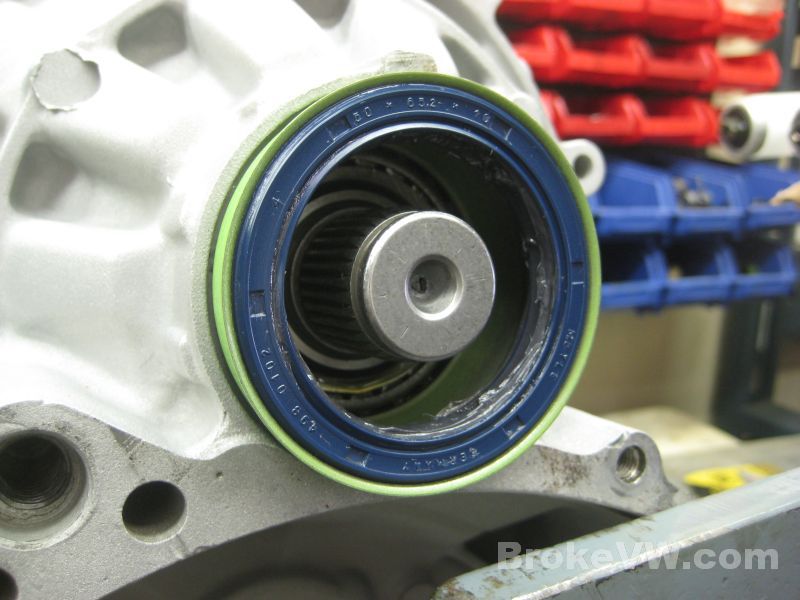
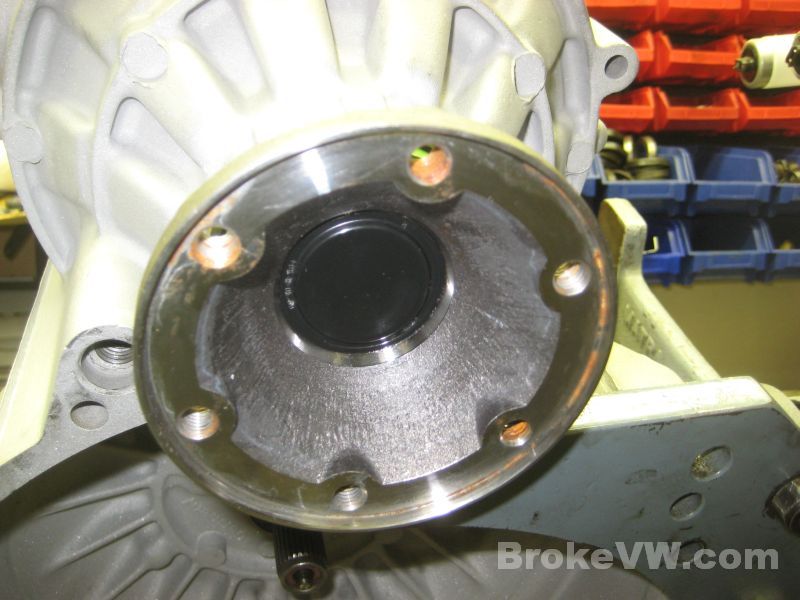
Final inspection time and unfortunately it is turning up a few bad parts that need replaced. The flanges are showing wear grooves on them... the result is that they may leak. They can be replaced at anytime though, the trans doesn't need opened to do that. I have new flanges here available...
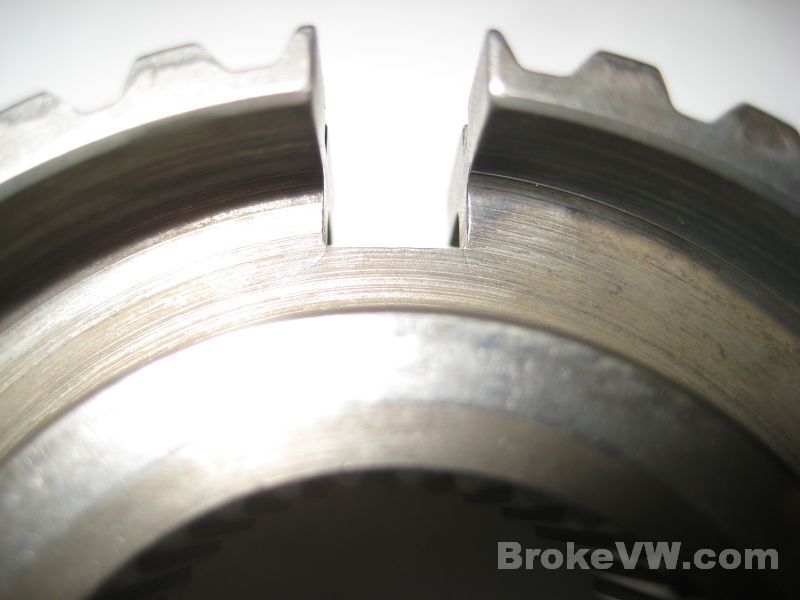
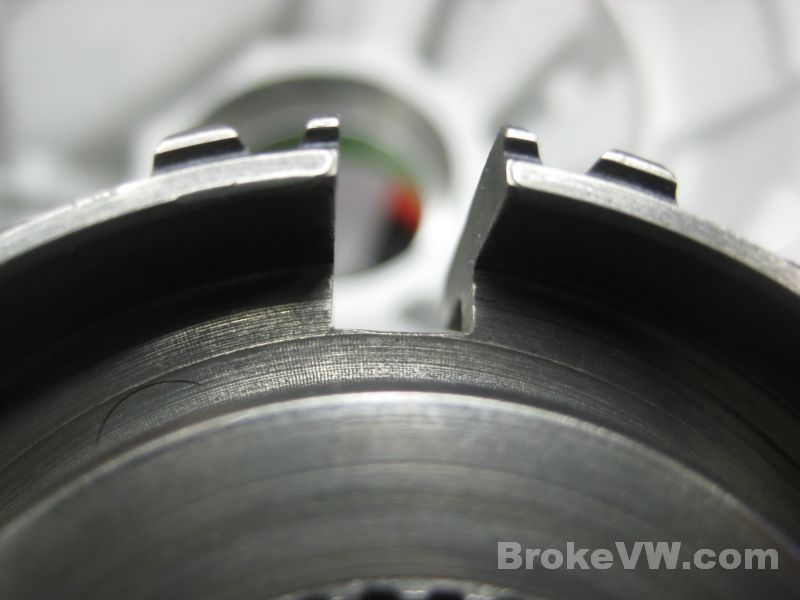
This is your 3rd/4th sync hub, it has stress cracks in it and should be replaced. You can see the 2 hairline cracks starting from the corners of the key slot and heading down into the hub. VW replaced the hub design with one with rounded cuts for the sync keys to avoid the stress risers in the corners with this design, I can replace the hub with one of the newer designs...
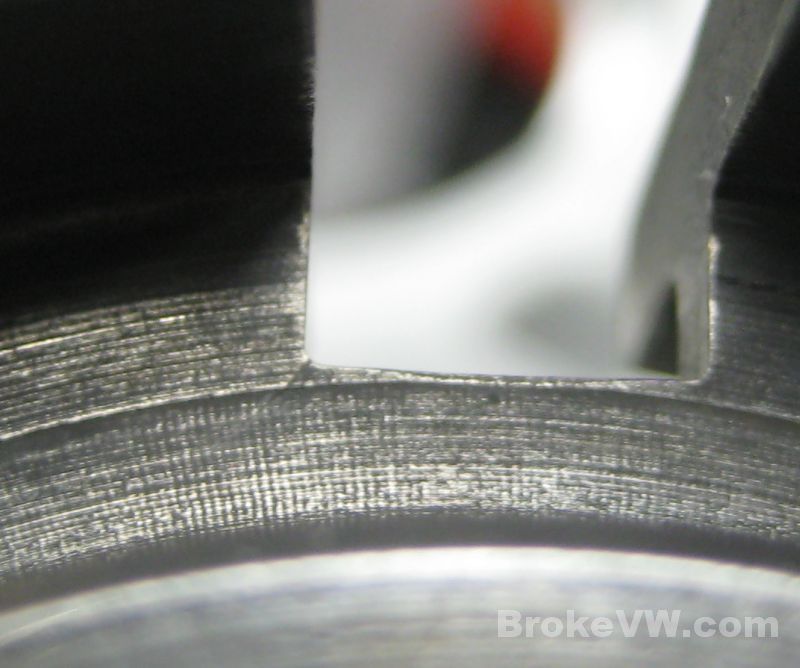
Unfortunately your 1st/2nd hub is also showing a crack. These fail more rarely, but they can crack the same as the 3rd/4th hubs. This one is a little more difficult to see so I've zoomed in on it in the next pic, it is on the left side of the key slot. I can replace it with a good used VW hub or I also have new aftermarket hubs that have been cryo treated...
This is the 1st and 2nd gear teeth...
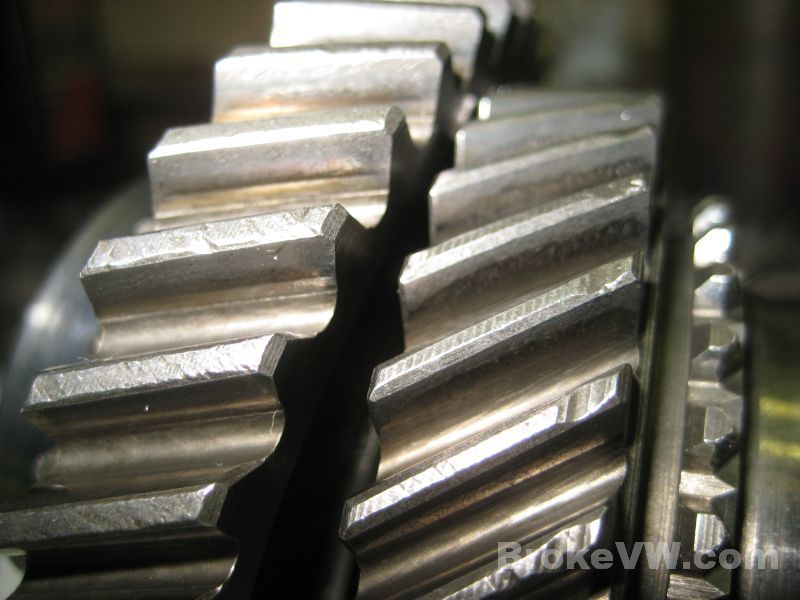
This is 3rd and 4th and you can see there is still some pitting on the 4th gear, on the right...
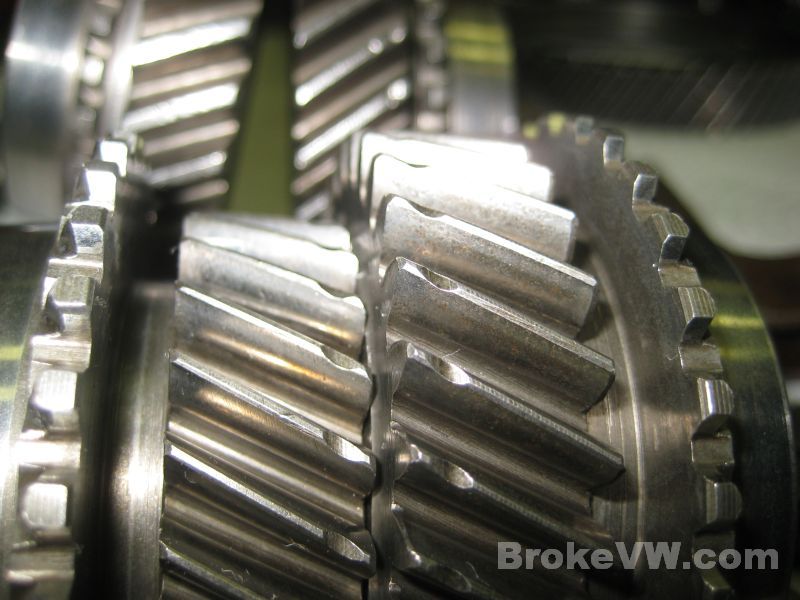
5th gear...
This is your set of 4th gears on the left, and a replacement set I have available on the right if you'd prefer to replace them...

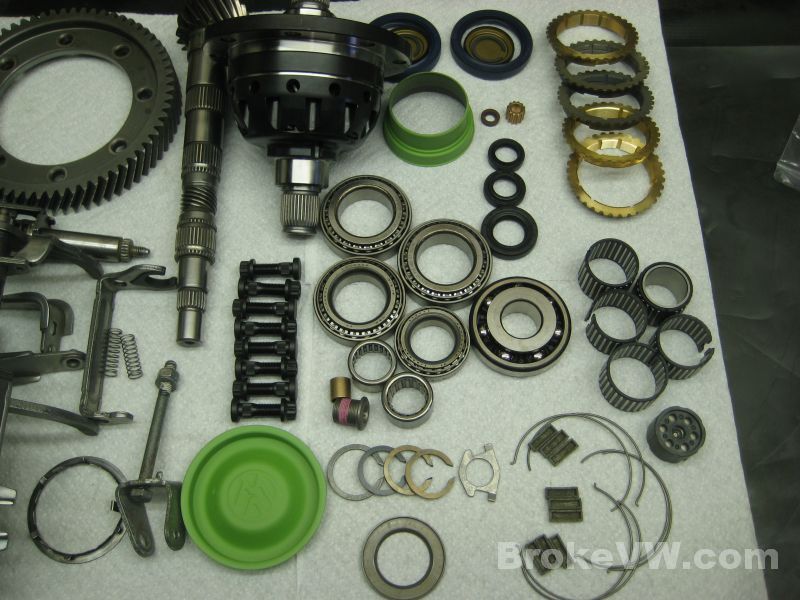
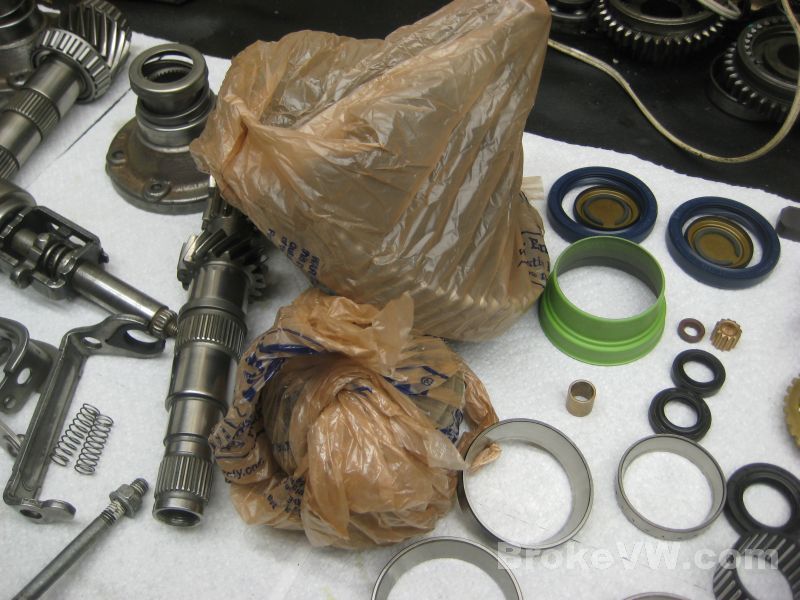
All of the new parts and LSD laid out and ready for assembly...
Before starting the build, I wanted to double-check that the LSD would fit without needing to grind the casing. Some cases need grinding to clearance the LSD inside. I have a tapered bearing that I have modified to use in testing the LSD. The bearing cone has the ID ground to be larger and the bearing race has the OD ground to make it smaller. This allows the bearing to fit onto the LSD and into the casing without needing to press them in, they are a precision fit now versus a press fit....
This is where the LSD would contact if it is going to. There is a standard 1.0mm shim installed behind the race and the LSD is placed inside and spun to see if it contacts the casing...
Your LSD spins freely and no grinding is required...
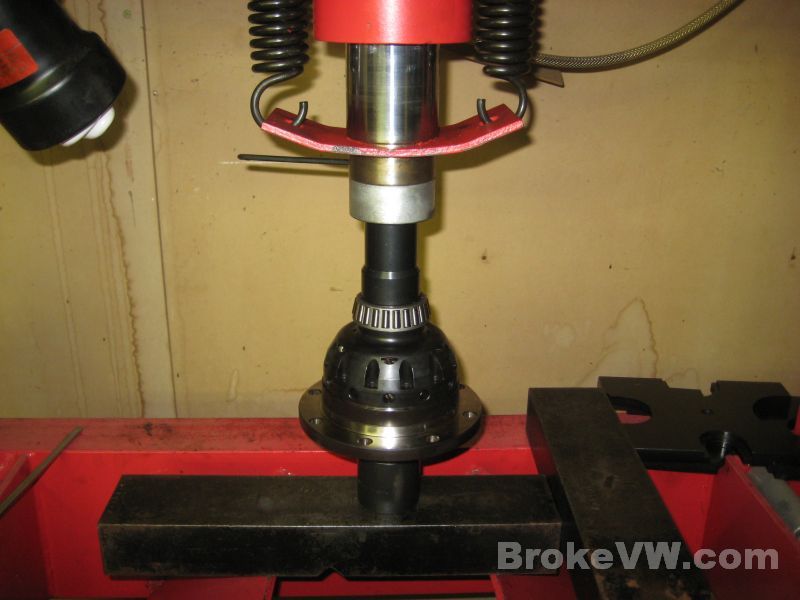
With the tapered bearings heated to 100C/212F they are pressed onto the output shaft...

Same with the tapered bearings for the diff...
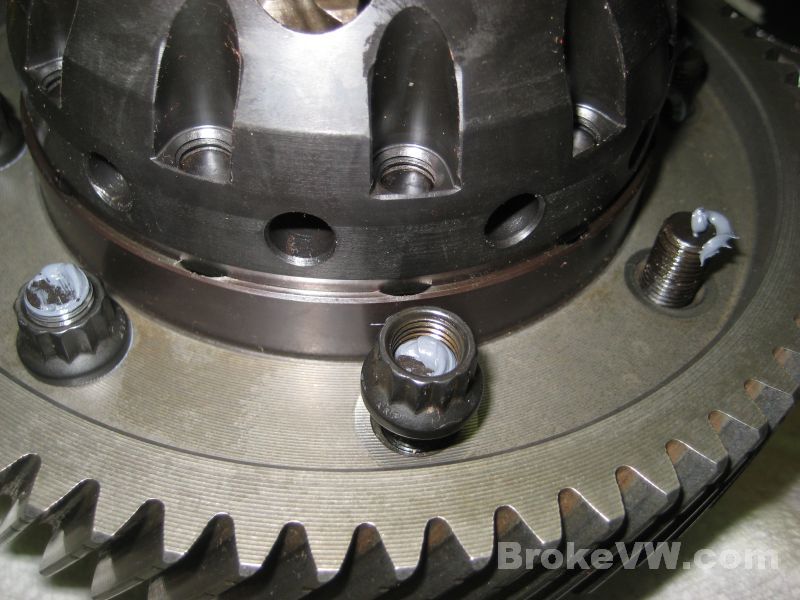
The ARP bolts are driven into the LSD...
ARP bolts come with special grease to be used which lowers the torque required to tighten them. Normally it is 52 ft-lbs, ARP calls for 40 ft-lbs due to the use of the grease. I like to apply it so it coats the threads and the underside of the nut, as this is where most of the friction comes from. Some of it is on the thread surfaces, most of it is between the nut and ring gear so having grease under it helps reduce friction, and less torque is needed to get them properly tightened...
This is your updated 3rd/4th hub assembly, you can see the slots for the sync keys are rounded now...
Your taller 0.80 5th gears out of a MK3 2.0L trans...
The completed 5th assembly with new sync ring, keys, springs, bearing, and 5th bolt...
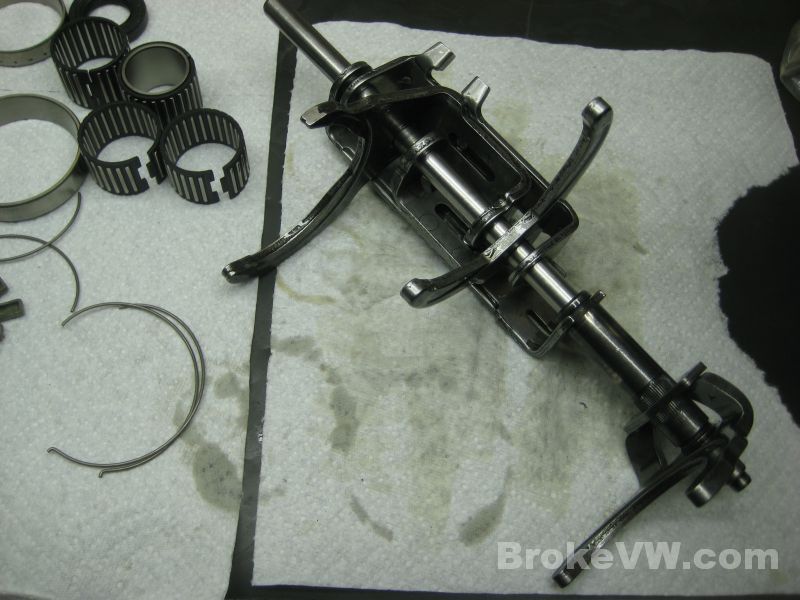
The assembled shift forks...
Everything is kept bagged up once assembled until it is needed for the rebuild...
The 3rd/4th hub is heated as well, then pressed onto the input shaft...
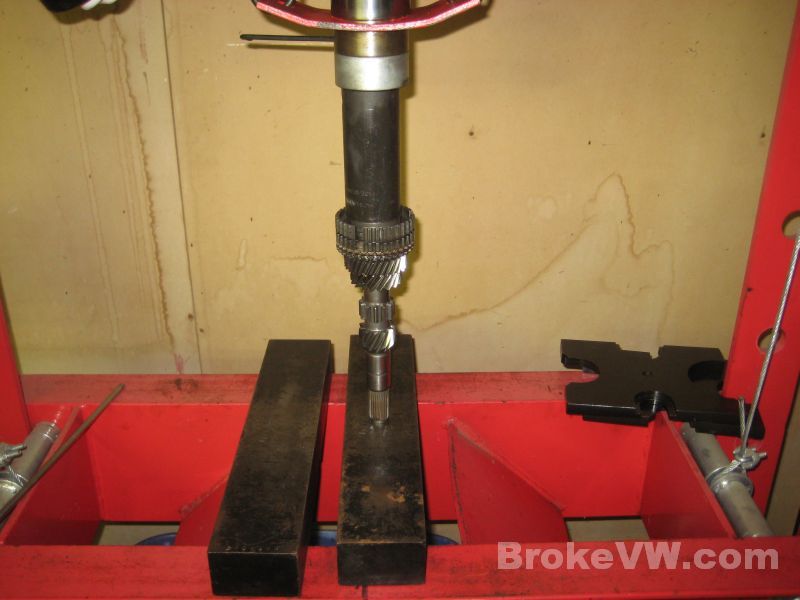
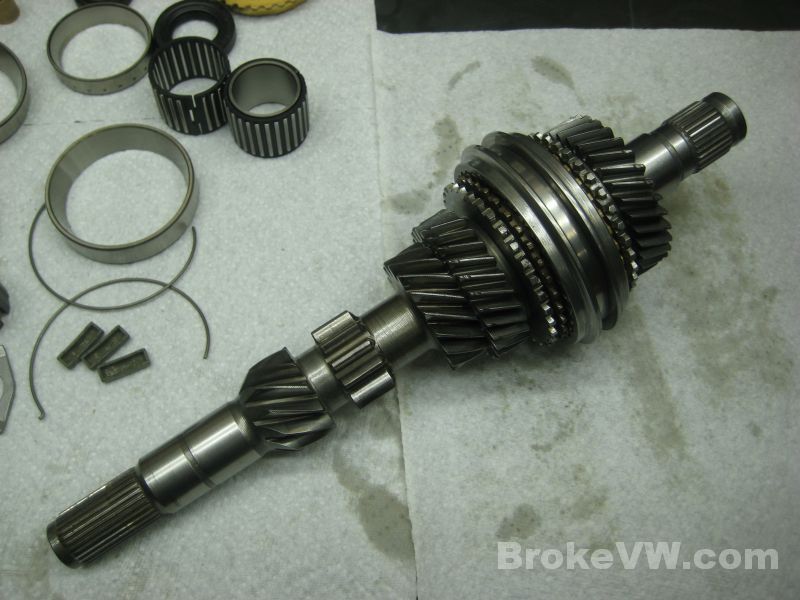
The completed input shaft with new aftermarket sync ring for 4th, new Porsche moly-coated sync ring for 3rd, new springs, keys, circlip, and gear needle bearings...
A new pushrod bushing and pushrod seal are installed and the input shaft is completed and ready to be bagged up...
Next will be pressing the bearing races into the case pieces and then I can start on the bearing preloads and get those adjusted.
Update 02/28/13
Pressing in the small output shaft taper bearing...
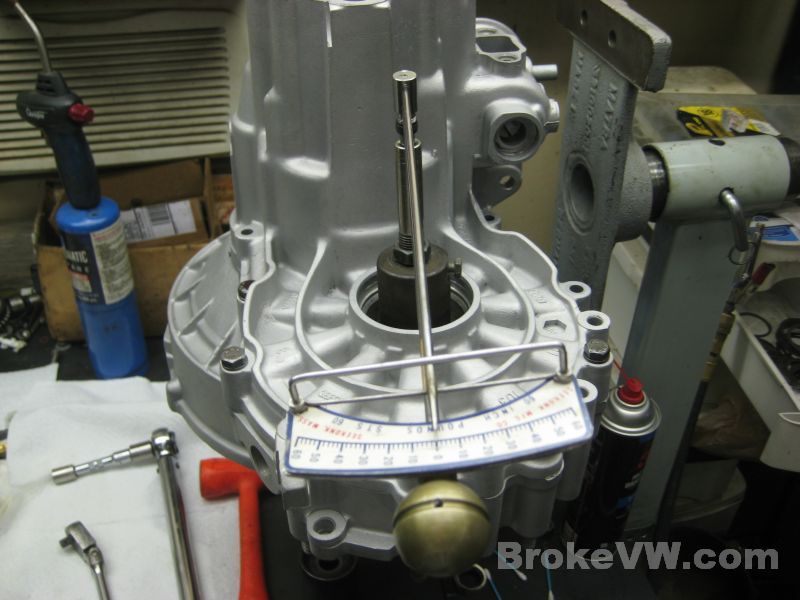
With the bearing installed into the retaining plate the output shaft is installed and tightened down so the turning torque can be checked...
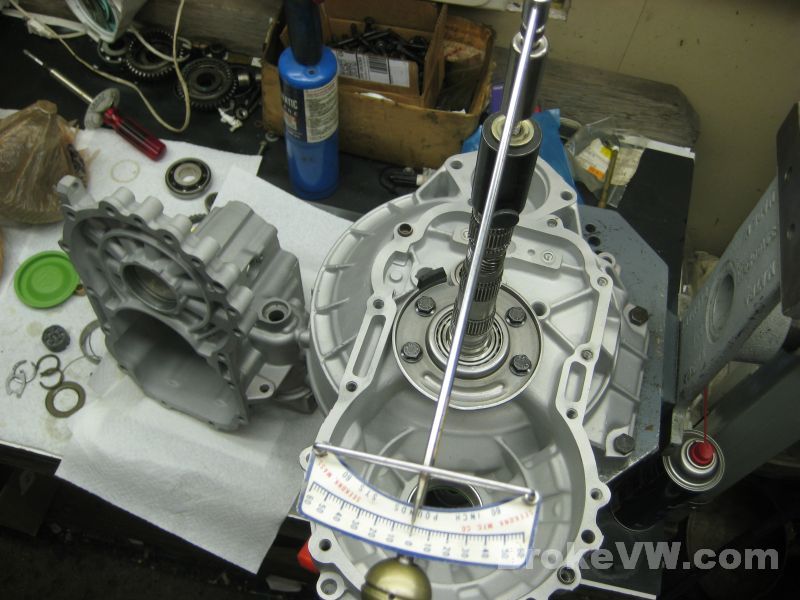
VW spec is 4.4 to 13.3 in-lbs, your shaft took about 7 in-lbs. so it is in spec and the bearing preload is preoperly adjusted...
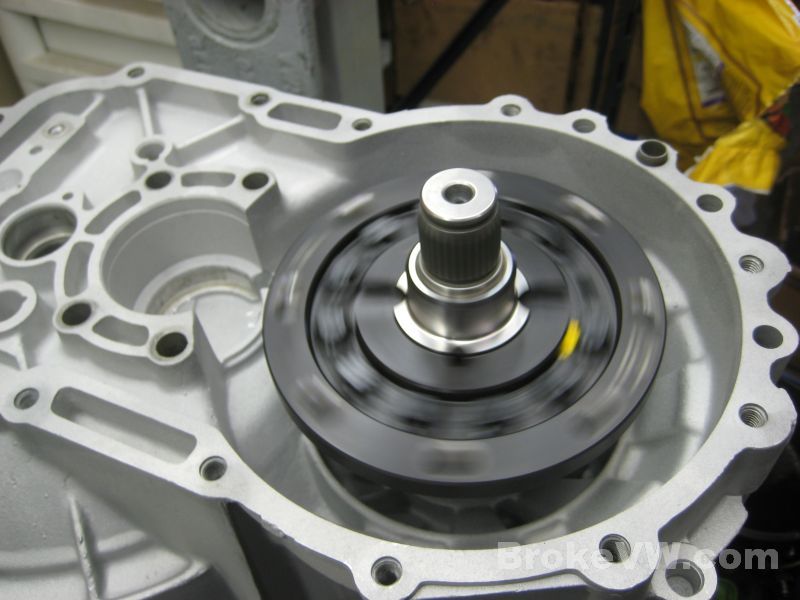
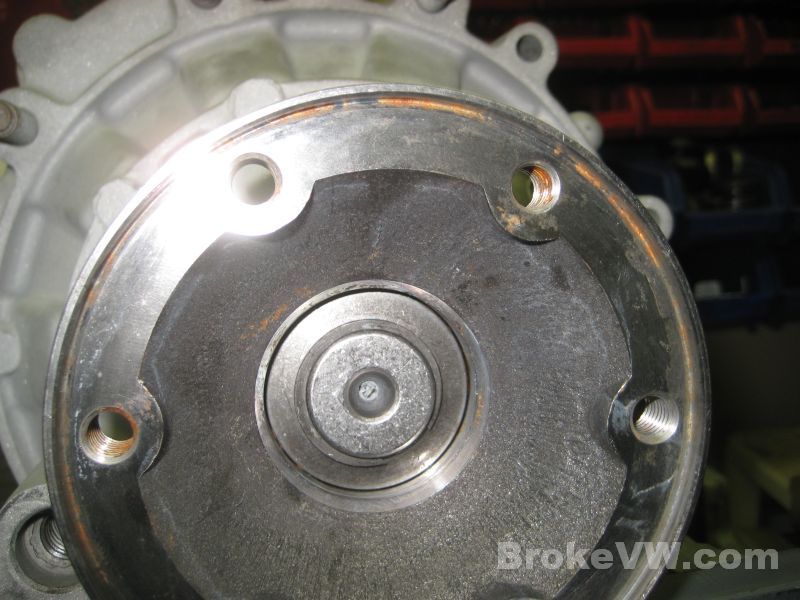
The input shaft ball bearing, output shaft roller bearing, and the diff taper bearing race are all installed into the gearbox half of the casing...
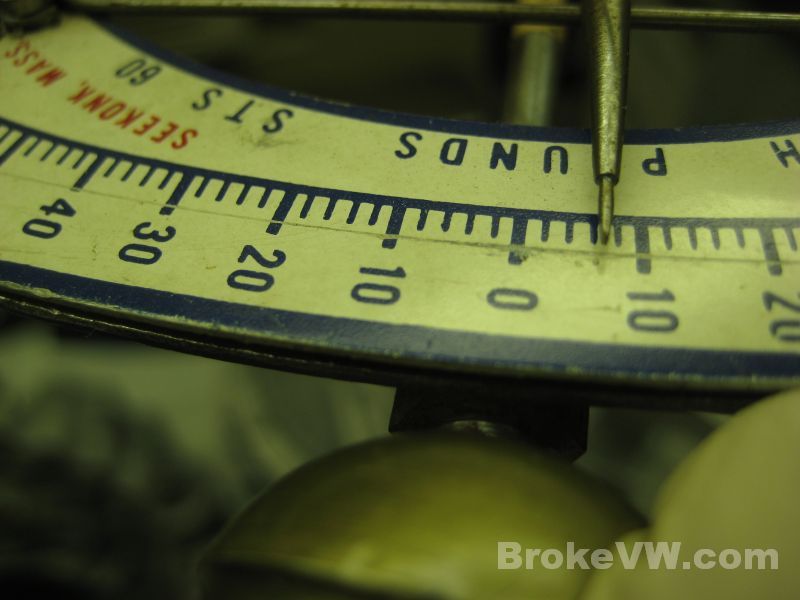
With the races installed the output shaft is removed and the LSD only is installed. The case is tightened down and the turning torque of the LSD is measured....
VW spec is 11 to 31 in-lbs, your LSD took about 17 in-lbs so it is in spec and the bearing preloads are properly adjusted...
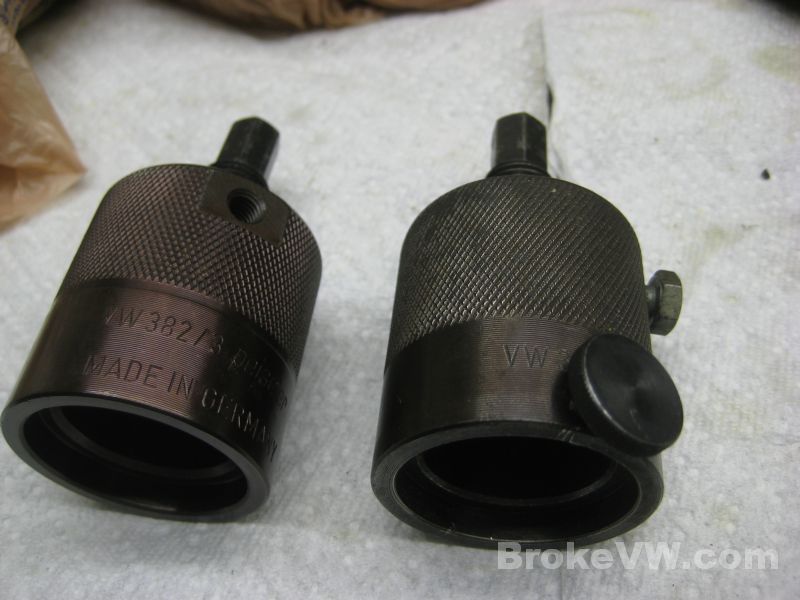
I had to make a special tool to measure the preload on LSD units that don't use a threaded hole in the end of the output stub axles like the stock VW stub axles do. I added a grub screw to tighten onto the shaft and used a small bolt to lock the center post in place. The stock tool is on the left, the modified tool used on your trans on the right...
Update 03/01/13
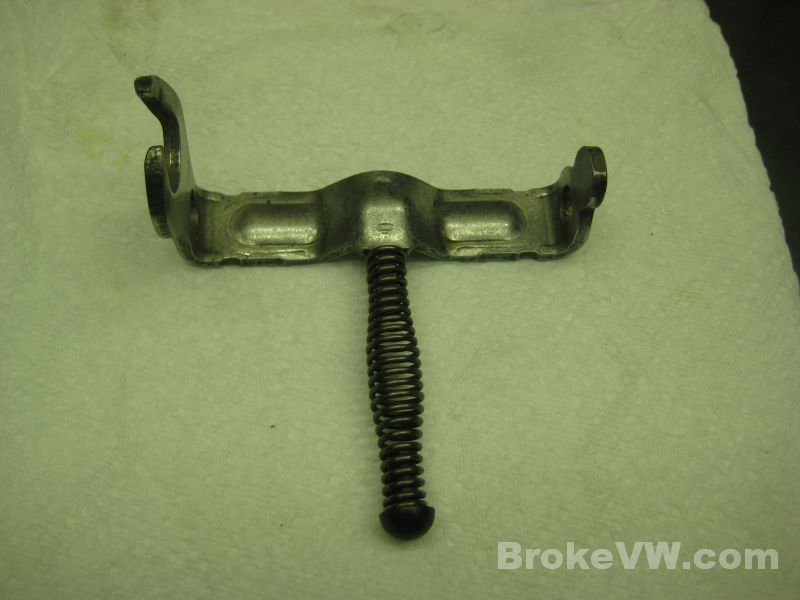
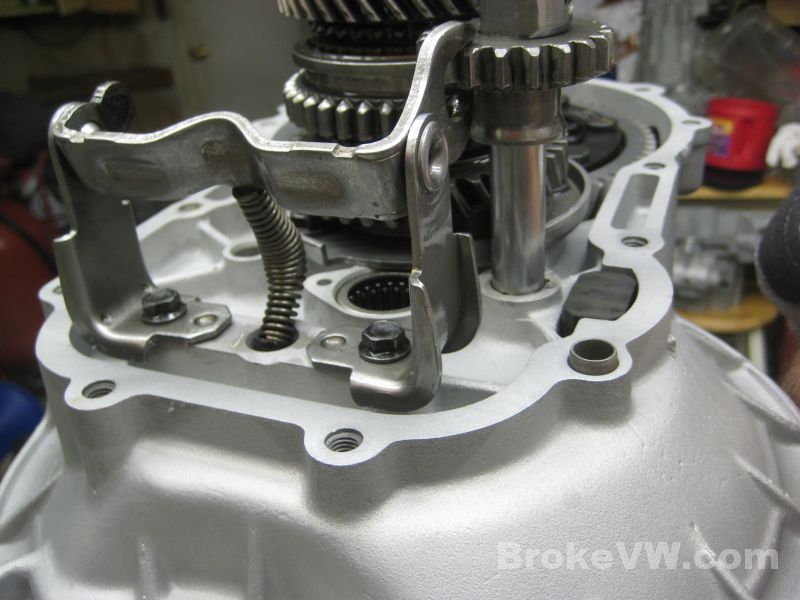
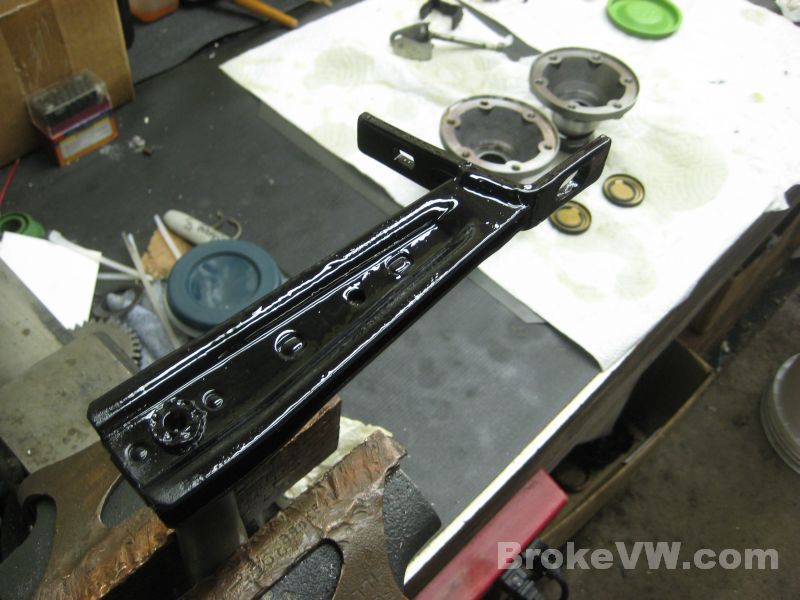
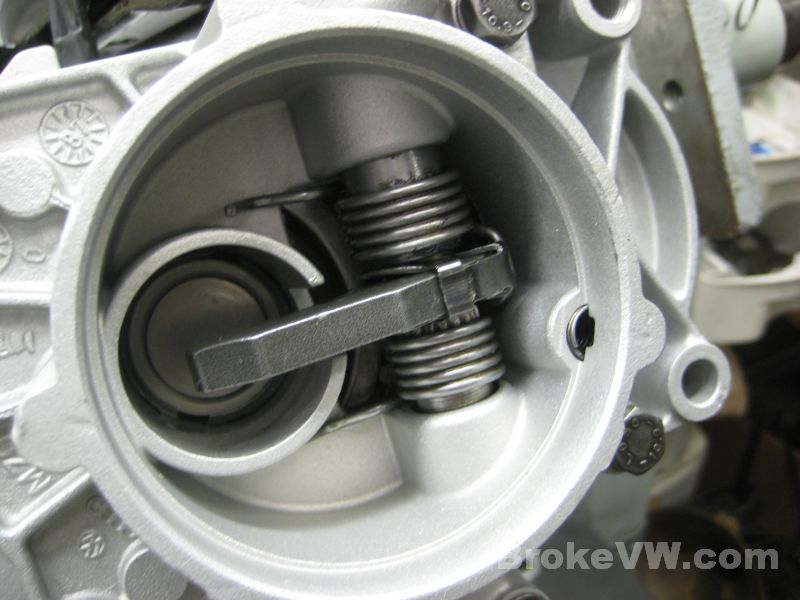
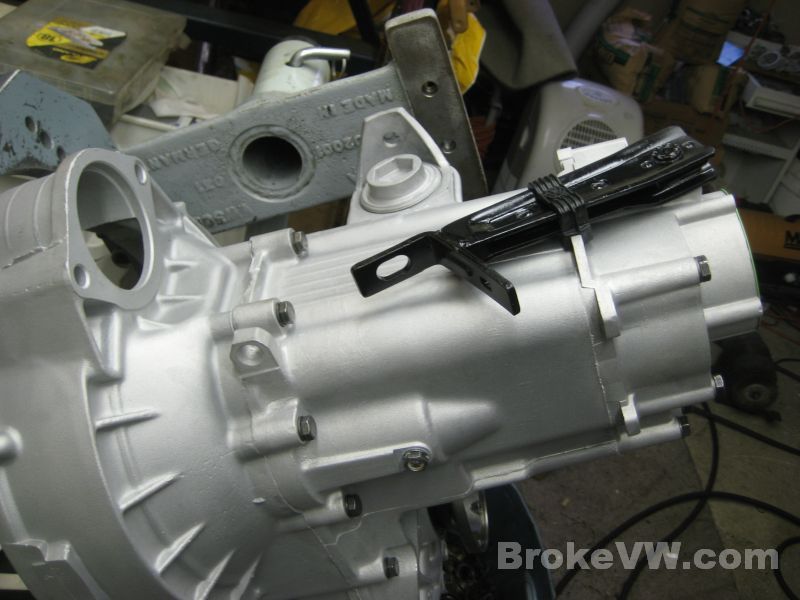
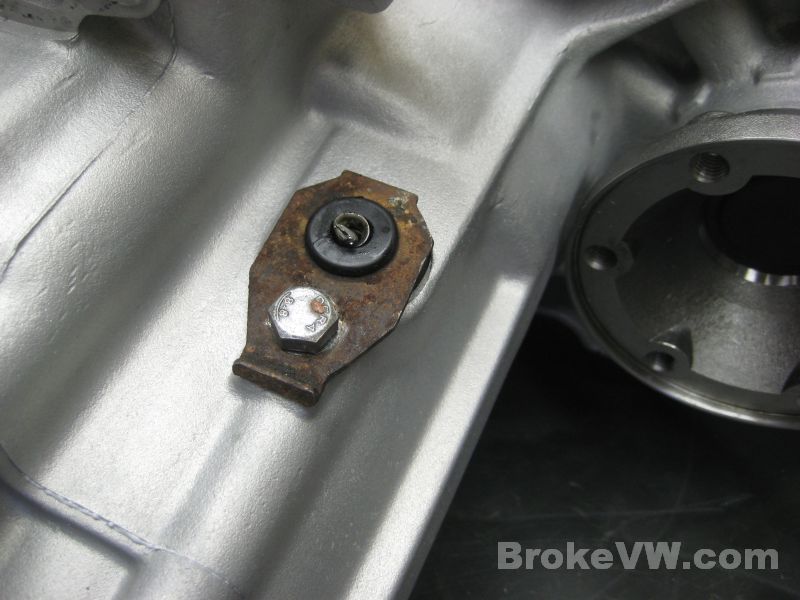
The reverse forks, magnet, and fork rod spring are installed. Your trans happens to be built during a transitional time, when VW was implenting a running design change in the 020. Your reverse relay lever is the older type, while the bellhousing casing is a newer type. This means that during production on the factory floor they ran out of old bellhousings before they ran out of old reverse relay levers...
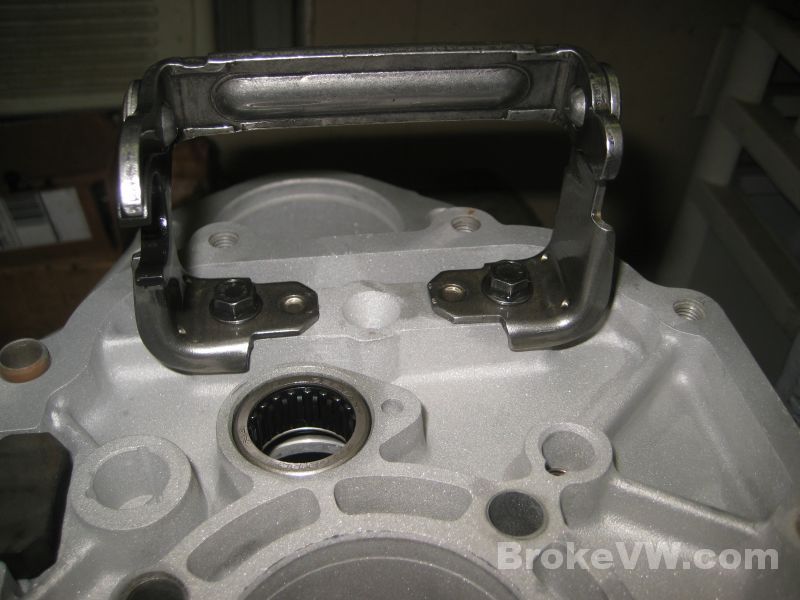
The new reverse relay lever has a spring attached which assists in flipping the gear in and out of engagement when you select it and remove it from reverse. VW also changed the uprights that are bolted to the case...
I have since switched your trans to the new style relay lever and uprights...
The input shaft bearing retaining plate is installed loosely...
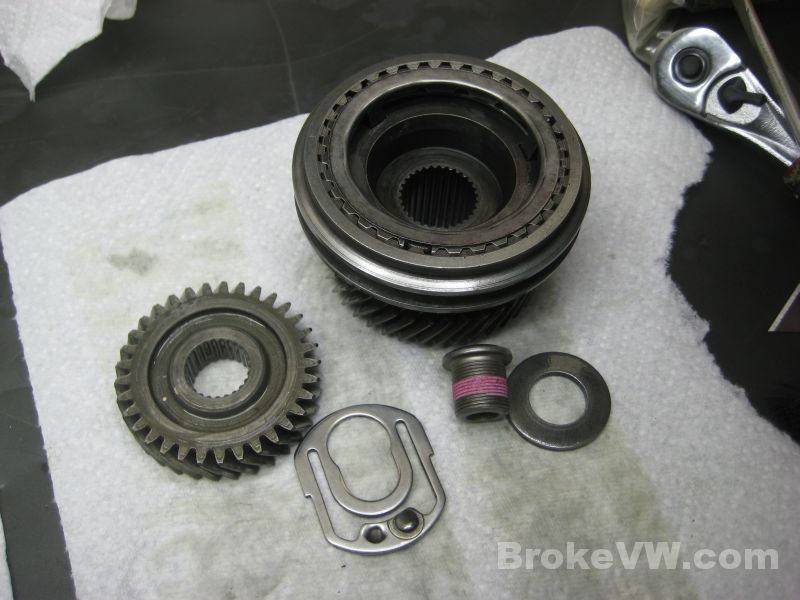
The 1st/2nd sync hub is heated to 212F/100C and pressed onto the output shaft, followed by the 2nd gear needle bearing race...
A moly-coated 2nd sync ring is added and the 2nd gear is installed...
Third gear is installed along with the input shaft at this time. 3rd is secured with an adjustment circlip, you simply fit the thickest circlip that can be accepted by the shaft groove in order to take the slop out of the gea stack below it. Also installed is the lower circlip for 4th gear...

This special tool is used to thin down the 3rd gear adjustment circlip. They sometimes need thinned very slightly and to allow me to hold it flat against the side of a bench grinder wheel, I used 3 old circlips around a socket they fit tightly onto, then I left just enough socket to let a 4th circlip be added but it sticks out past the end a bit. You shove that against the side of a grinder wheel and hold it flat and it thins the circlip out evenly...
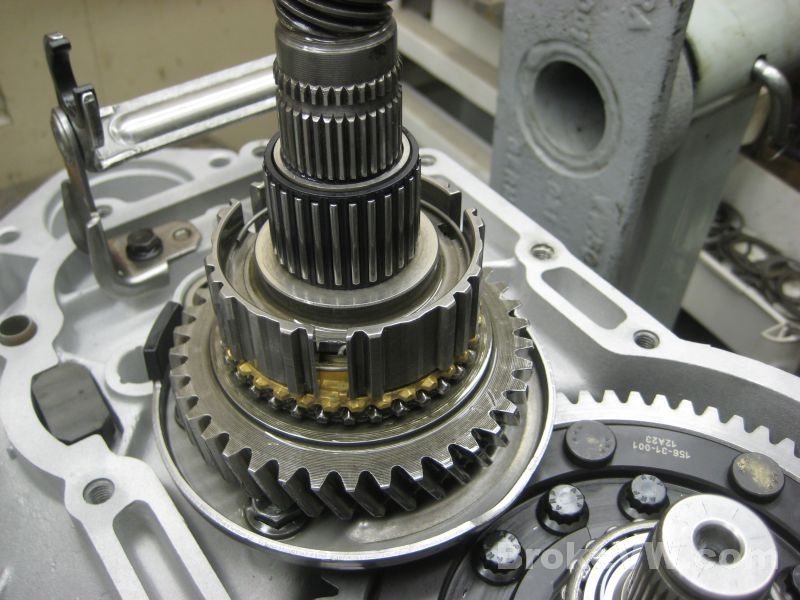
4th gear installed and secured with an additional upper circlip which is only used on the 16V and MK3 2.0L trans codes... it is also 2mm larger around in the splined area than the other codes...
The shift forks are also installed...
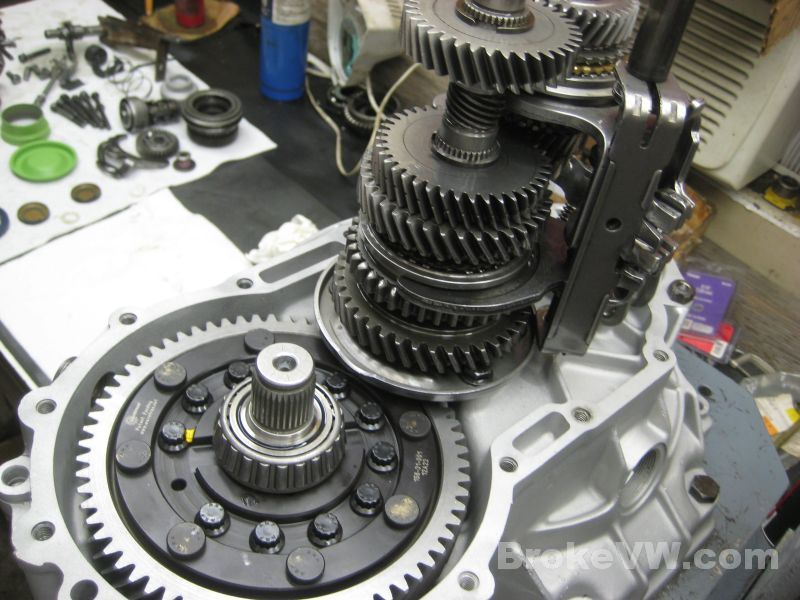
When the input shaft is just laying in place the alignment of the gears is not ideal, as shown in this pic...
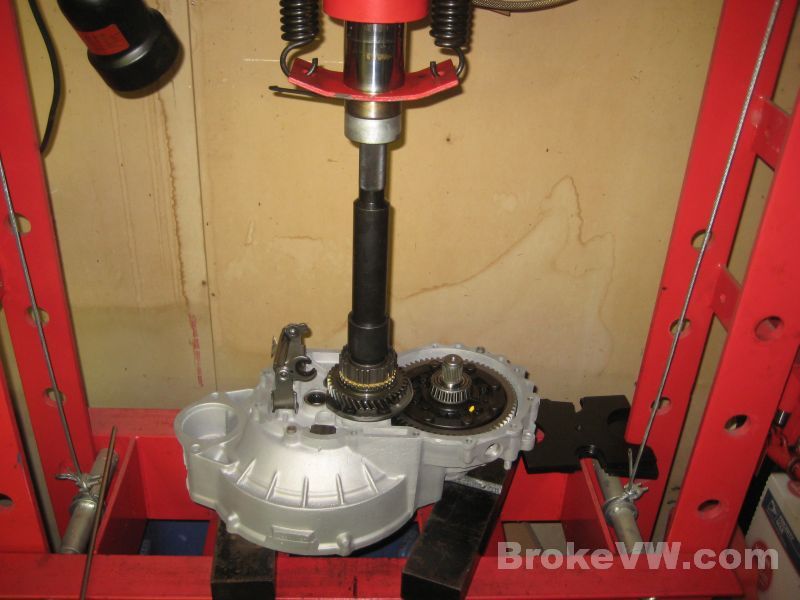
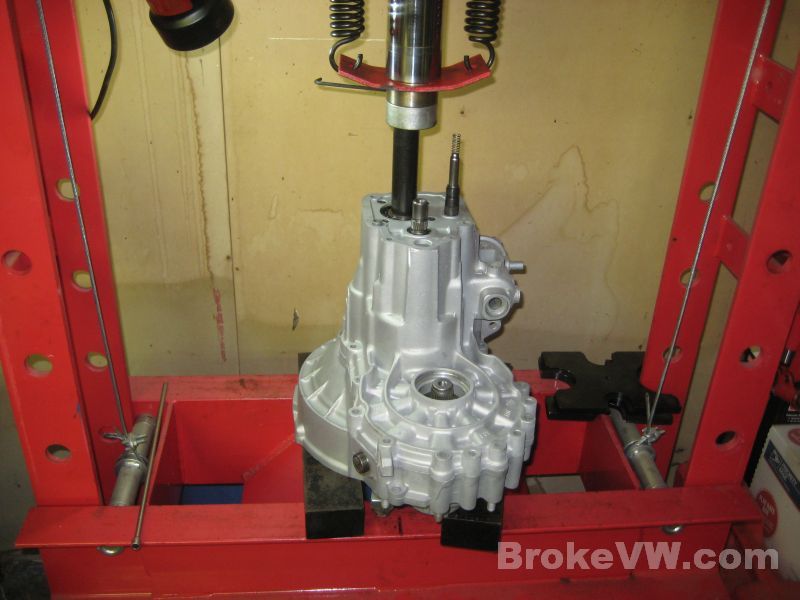
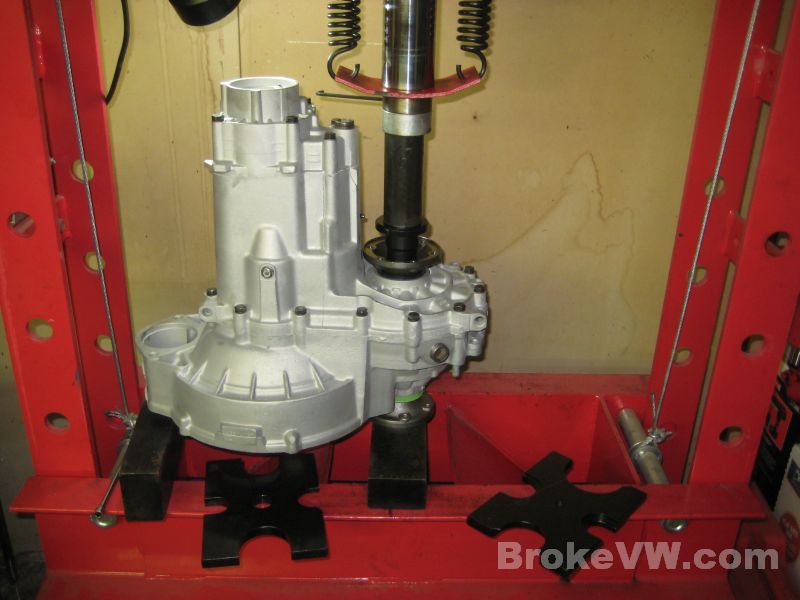
A support bar is installed and adjusted to support the input shaft and to take the press forces that will be used to close the trans up...
Once adjusted, the gear alignment is correct...
Not many parts left to install... I want to clean up the clutch release arm before I install it though...
The seals prepped by packing the seal lips with grease prior to install...
Update 03/04/13
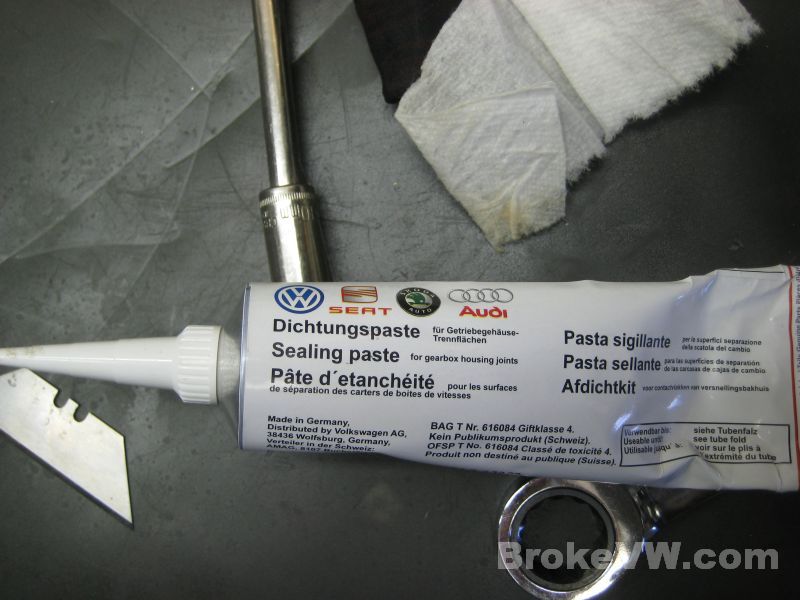
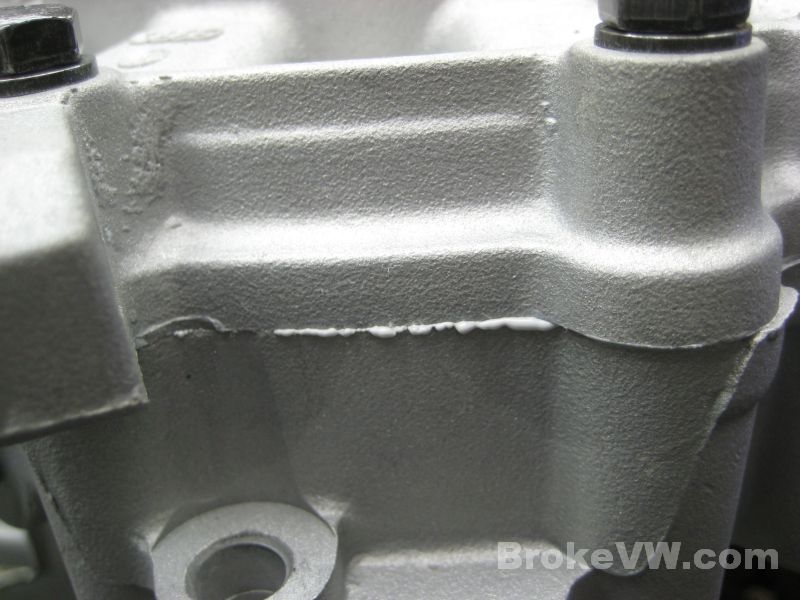
Time to close the casing up, VW sealant paste is used because it works well...
The gearbox is coated and the sealant allowed to flow out and self-level...

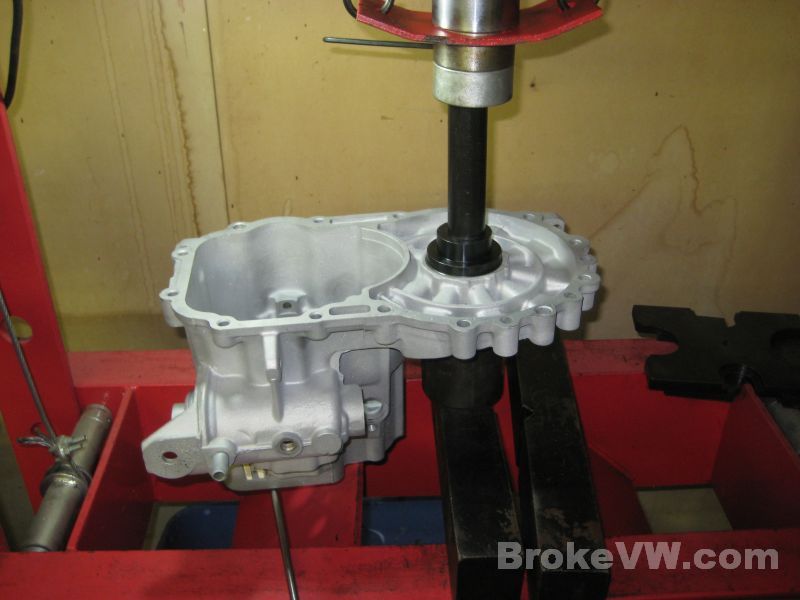
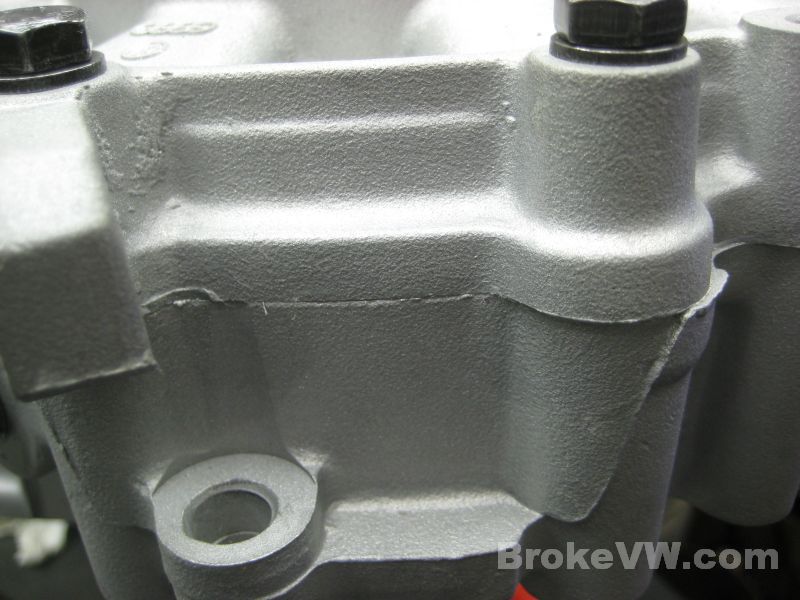
Pressing the casing together...
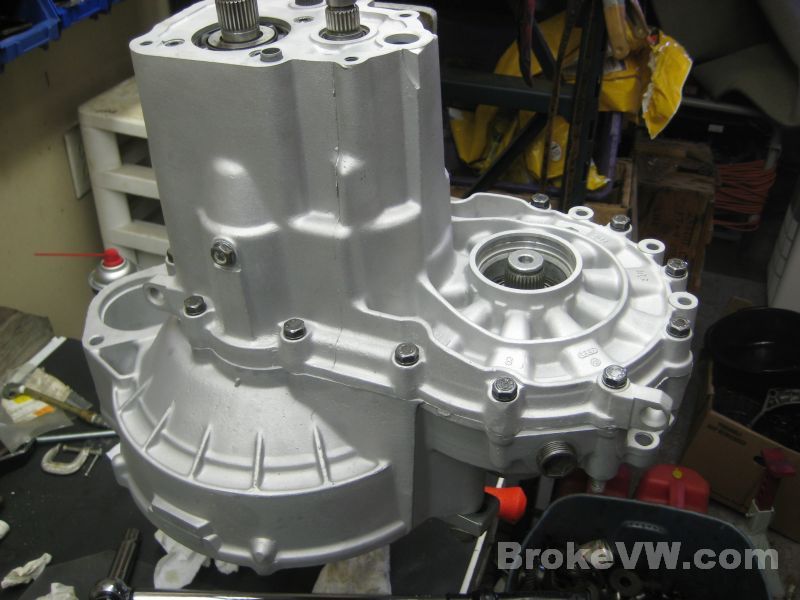
Bolted up...
A little excess sealant paste is easily wiped away while it is still wet...
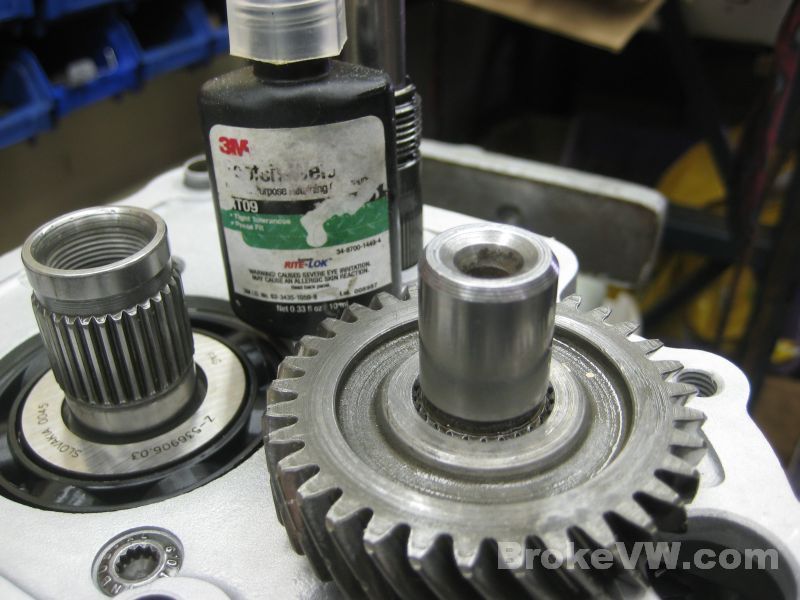
The small 5th gears are usually a little loose on the shafts after time, and to help tighten them up I bond them in place with some 3M RT09 compound, which does require some heat to remove....
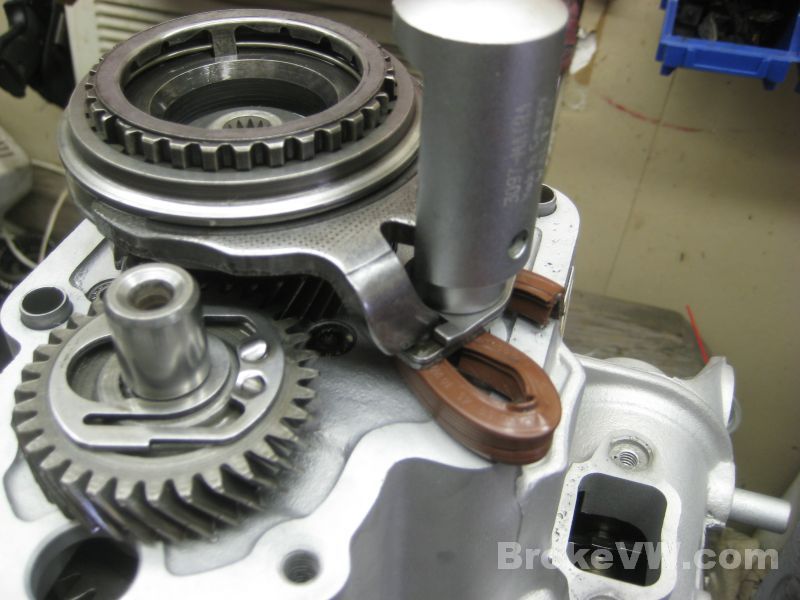
The 5th fork lock plate is pressed into place once the 5th fork is adjusted. I use an old flange seal cut and bent to shape to fit under the fork and protect the fork and casing while the lock plate is pressed on...
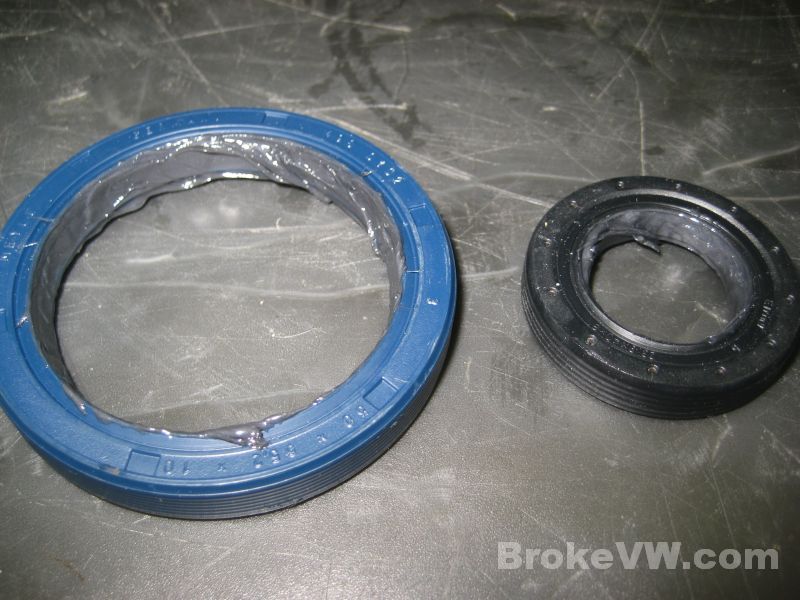
The selector shaft seal and flange seal are installed...

Your pushrod is installed, it is a little worn, I can replace it before it heads out if you wish, or it can be replaced at a later time...
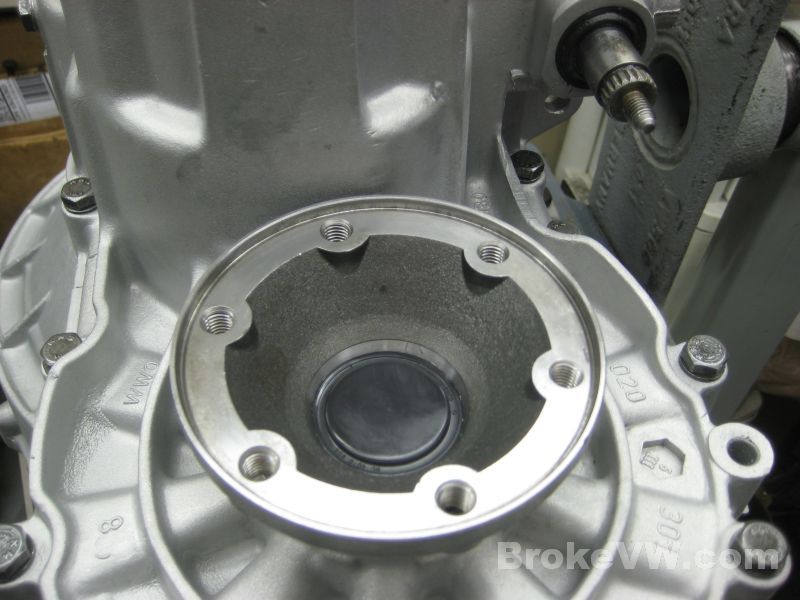
The flange seal sleeve and seal are installed into the bellhousing...
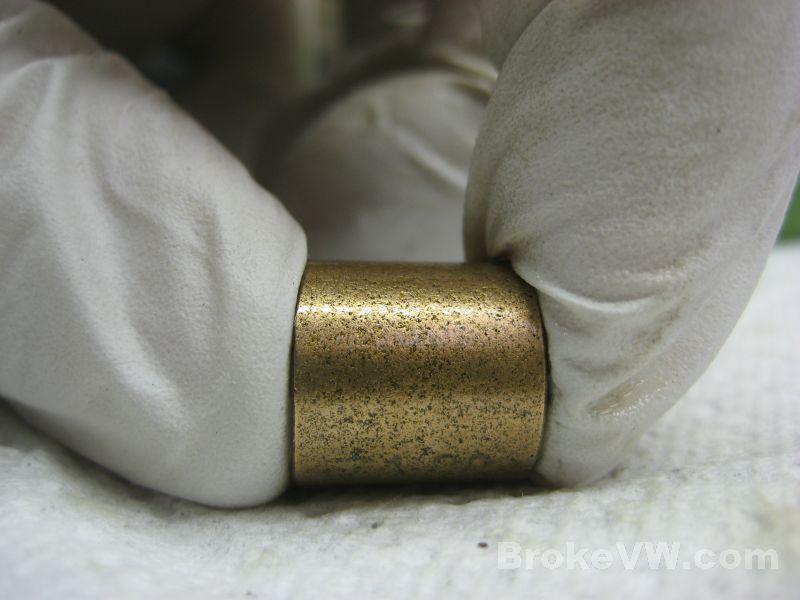
The starter bushing is impregnated with oil by filling it full then squeezing it tight to hydraulically force the oil through th porous bronze...
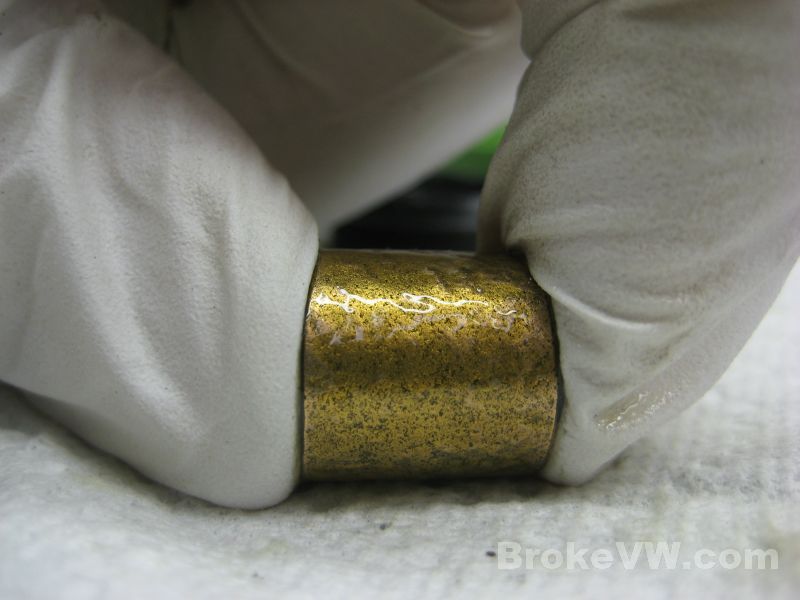
The old bushing is removed with the puller, the new bushing is driven in using a punch that supports the shape while driving the bushing into the bellhousing...
I sandblasted the rust from the clutch release arm and just hit it with some black paint out of a rattle can. It won't last but it looks nicer than it did when it got here...
The Wavetrac doesn't use stock stub axles which makes installing the flanges a PITA, especially on this trans as the flanges and LSD were both new, so they would need a lot of force to seat them. They were pressed on in the shop press since no other tool could be utilized due to the missing threaded hole in the stub axles...
The flange concave washers, circlips, and center cap seals are installed...

The actuation finger and retrurn spring are installed onto the clutch release arm...

The stop clip is installed onto the release arm...
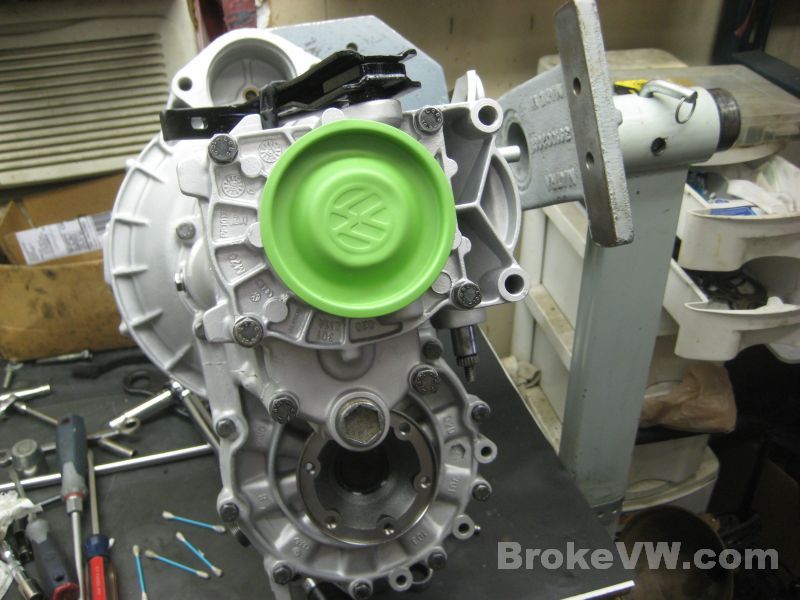
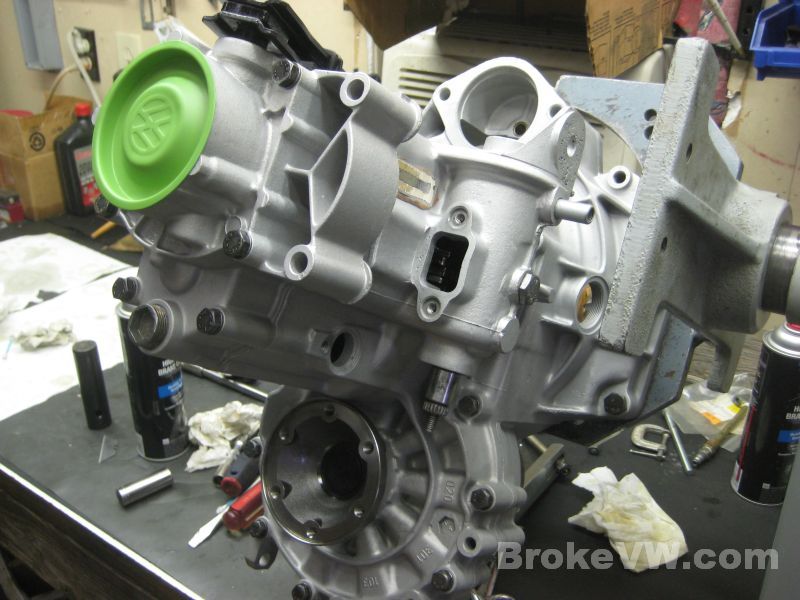
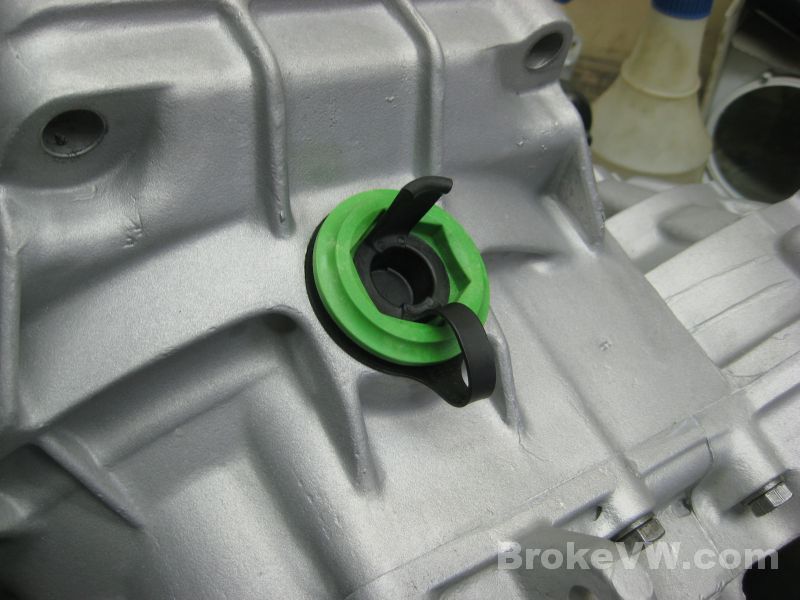
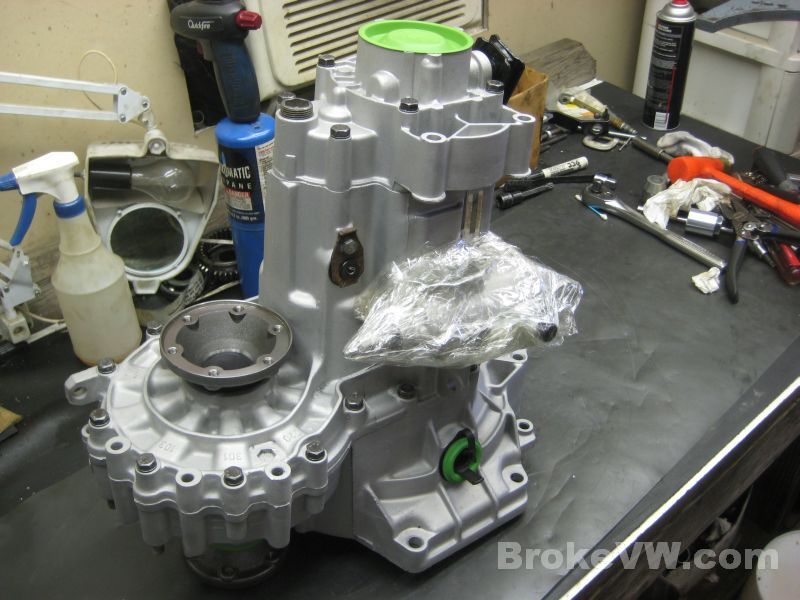
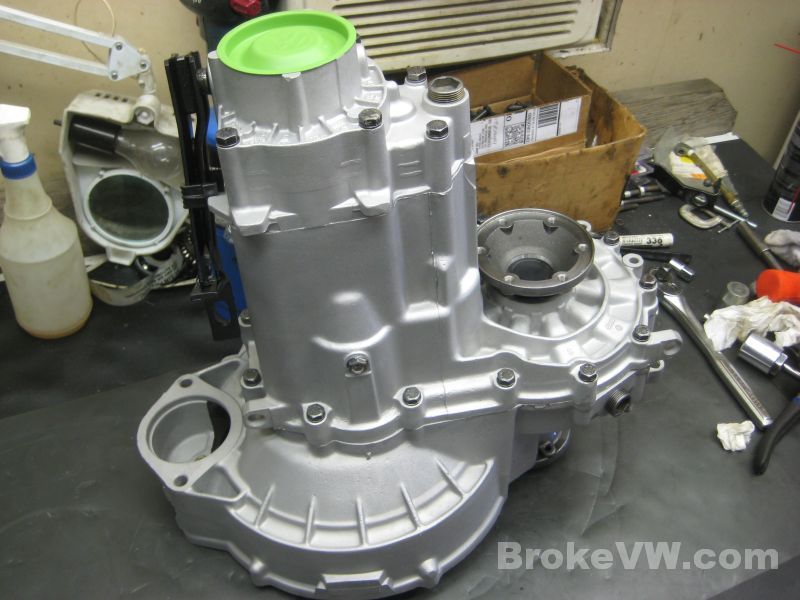
Lastly the green end cap is installed...

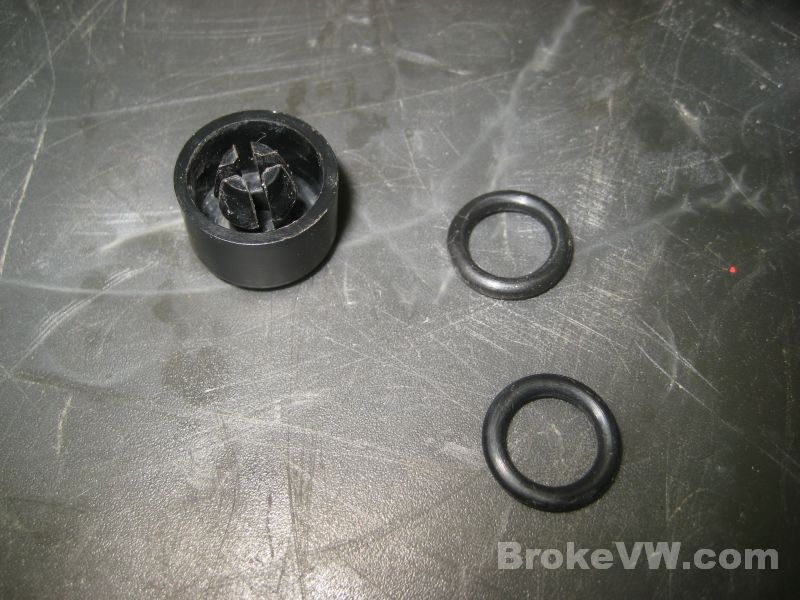
The trans needs a selector boot over the selector shaft, a
timing adapter and plug for the bellhousing, and it could use a new pushrod. It
didn't come with a reverse switch or a cap for the vent tube either, but I have
replaced the cap on the vent tube.
I can install a new OE VW pushrod and timing adapter and plug as well as
replacing the selector boot if you need them.
Next will be packaging everything up.
Update 03/08/13
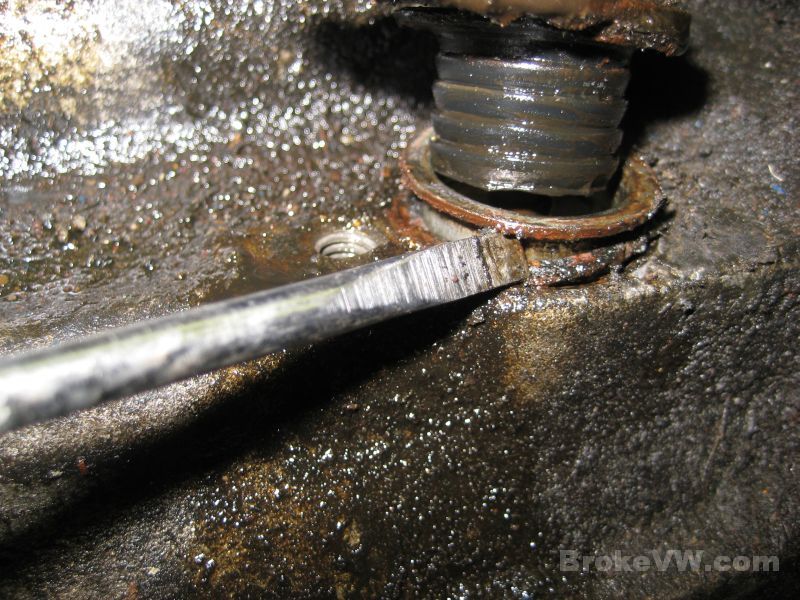
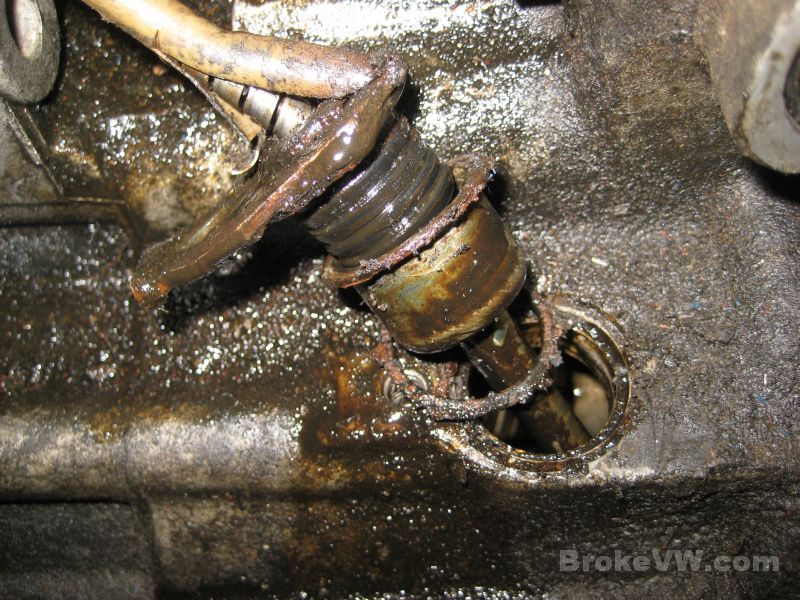
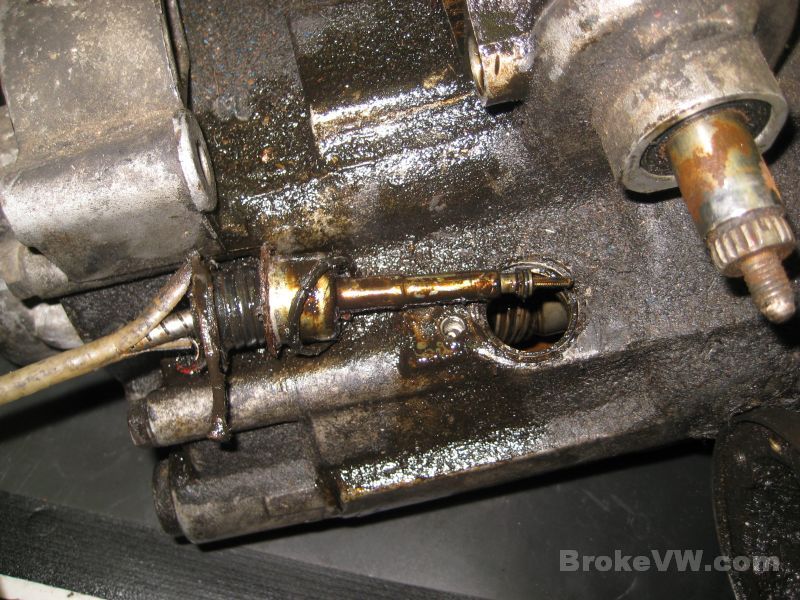
The speedo hole is plugged with the old speedo insert. I removed the cable and hammered the end of the tube flat so it is sealed up now...
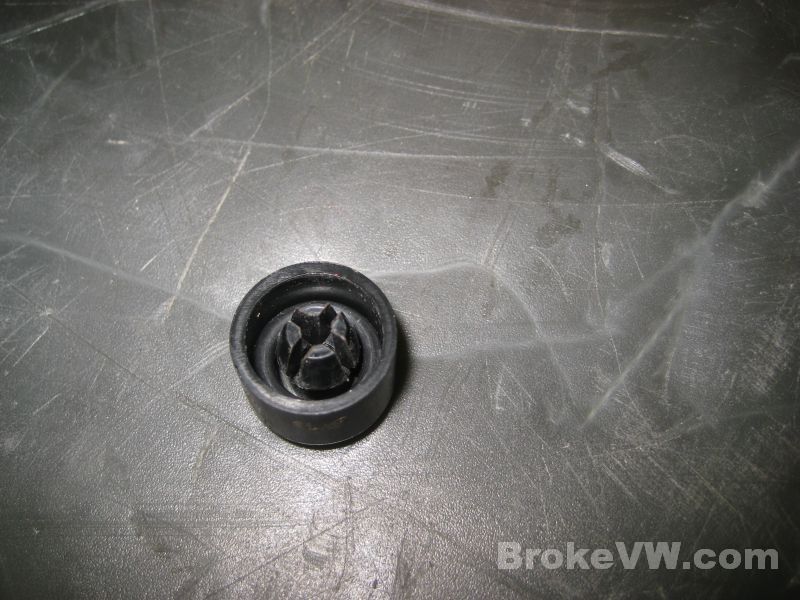
The new timing adapter and plug installed...
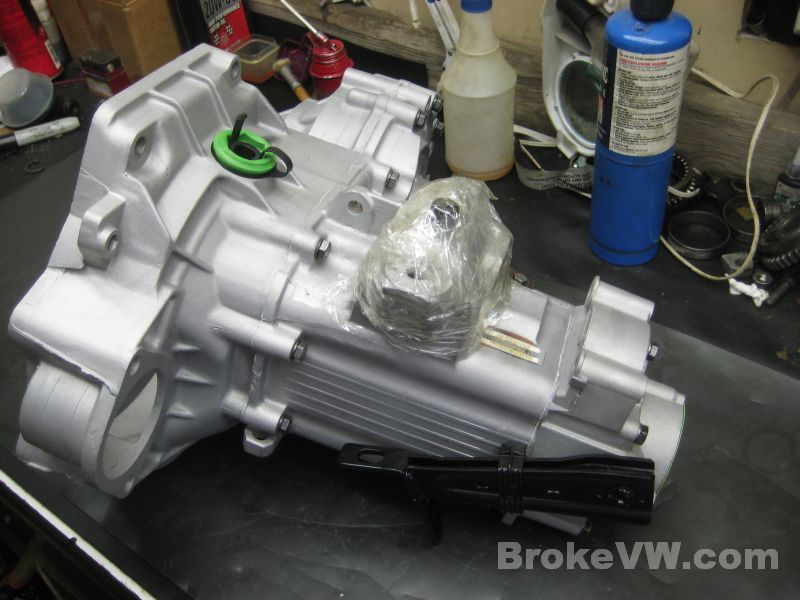
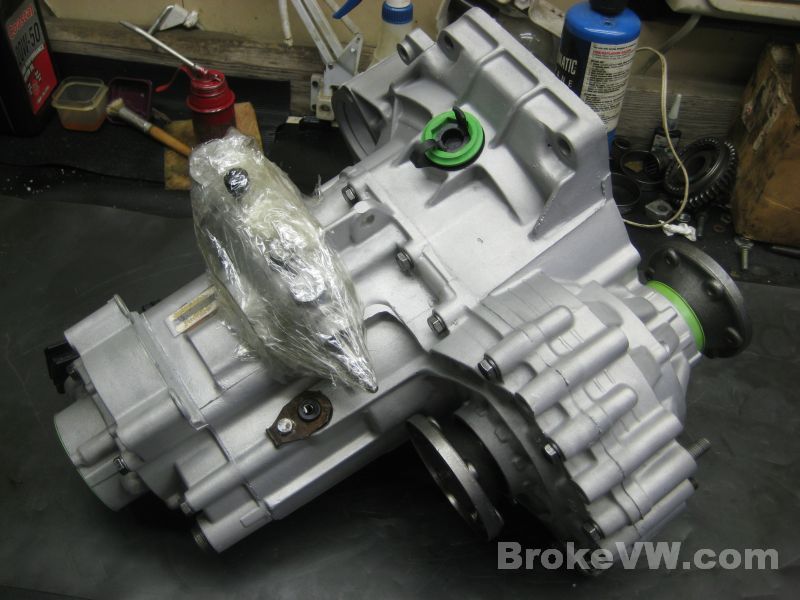
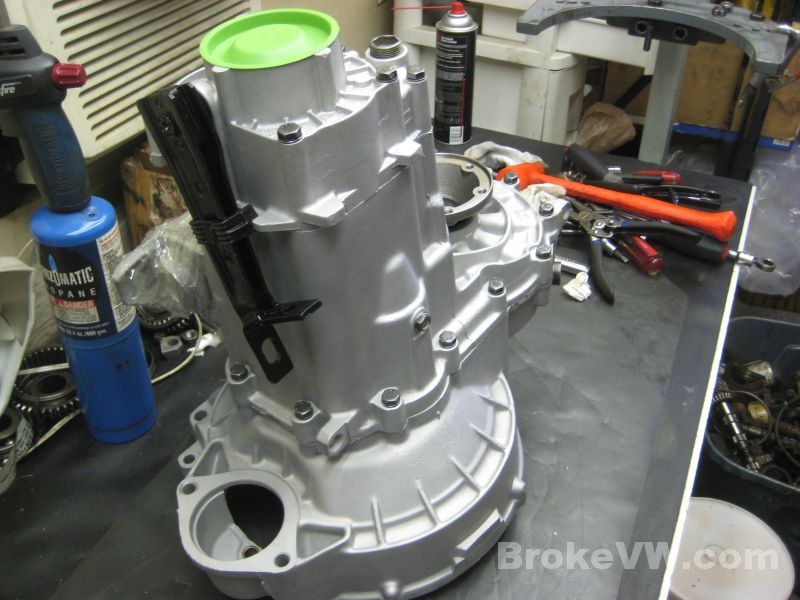
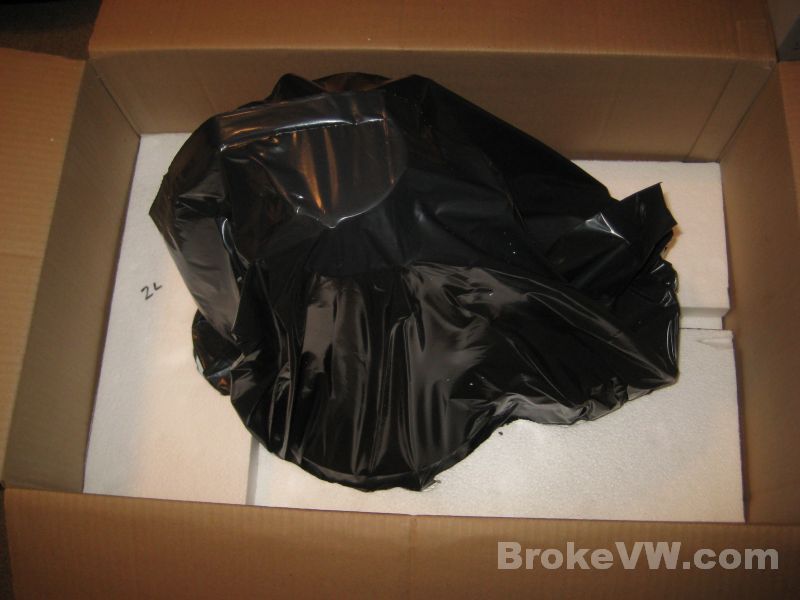
Some cling wrap is used to cover the selector area on the trans and it is done....
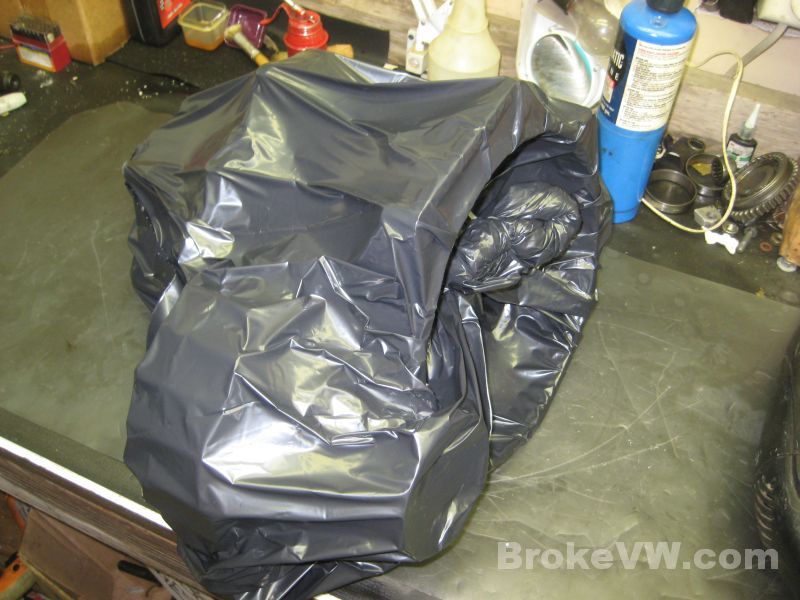
It gets tossed into a lawn and leaf bag and tied off, I need
to make a box to ship it to AZ. The nice box the trans arrived in... well... I
used it :)
I thought a steel pallet was going to be used for this trans so that box was
used to ship another trans out, and now I have to source another box for your
trans, but that won't be a problem....
Update 03/29/13
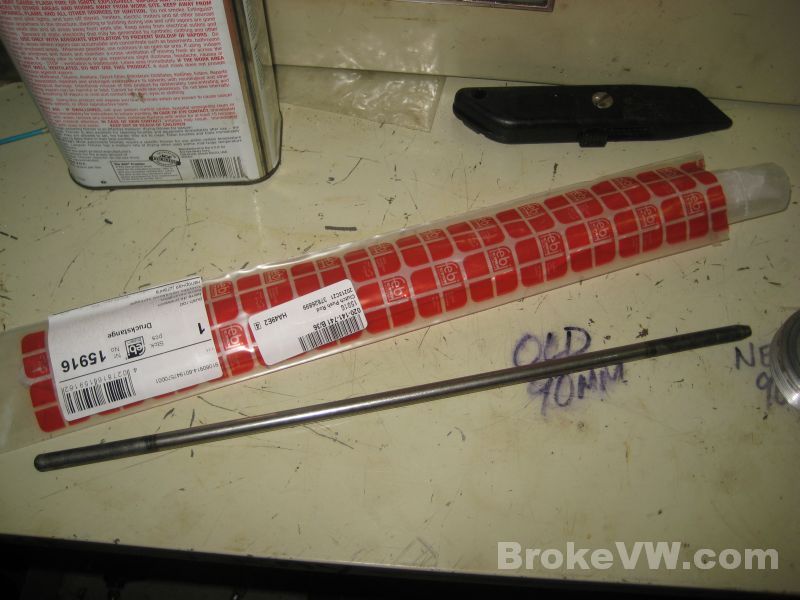
Your Febi pushrod arrived and while I was impressed it had heat tretaed ends and was tapered on one end like the OE VW pushrods, it unfortunately was bent up on arrival and couldn't be used. I've replaced it with an OE VW pushrod...
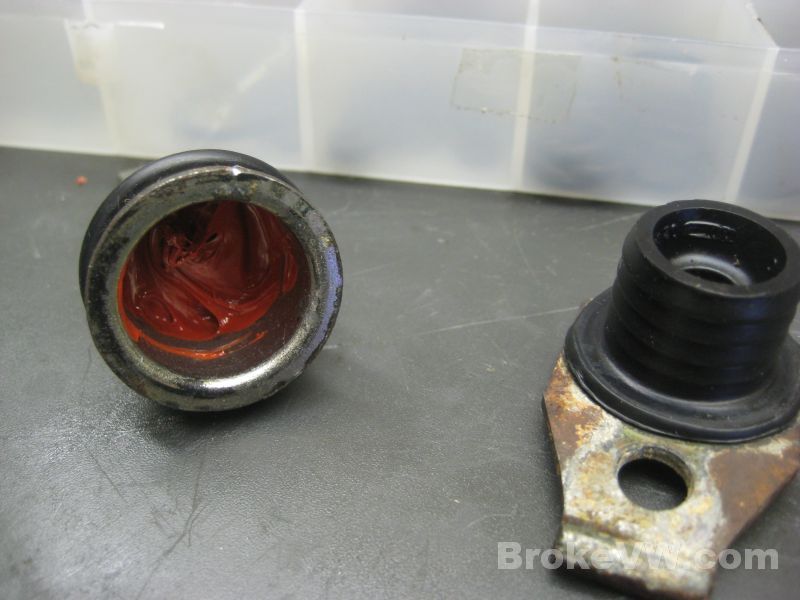
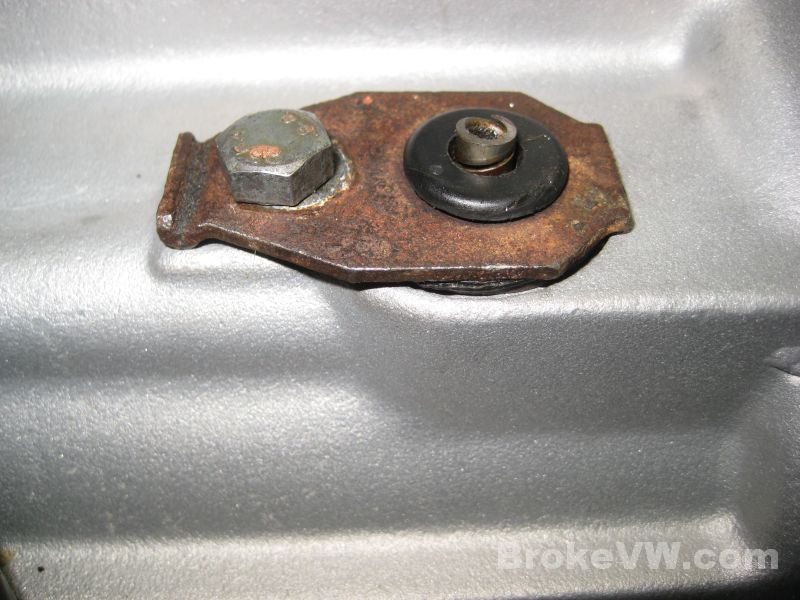
To seal the speedo hole I filled the old speedo cable housing with RTV silicone, then installed a new o-ring and bolted it all in place...
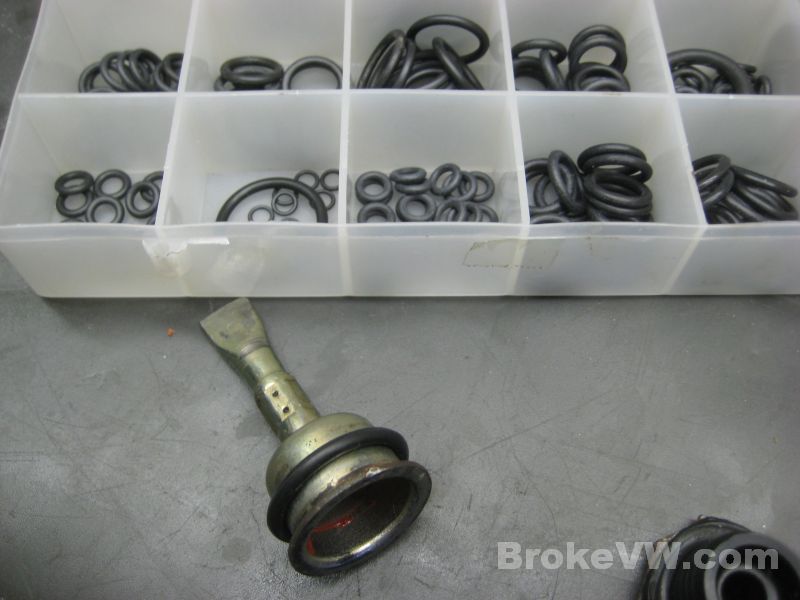
I added a couple smaller o-rings to the inside of the vent tube cap. You'll need to dig these out of there when you get it. They allow the cap to be popped onto the end of the vent tube and should prevent any liquids from entering the vent tube...

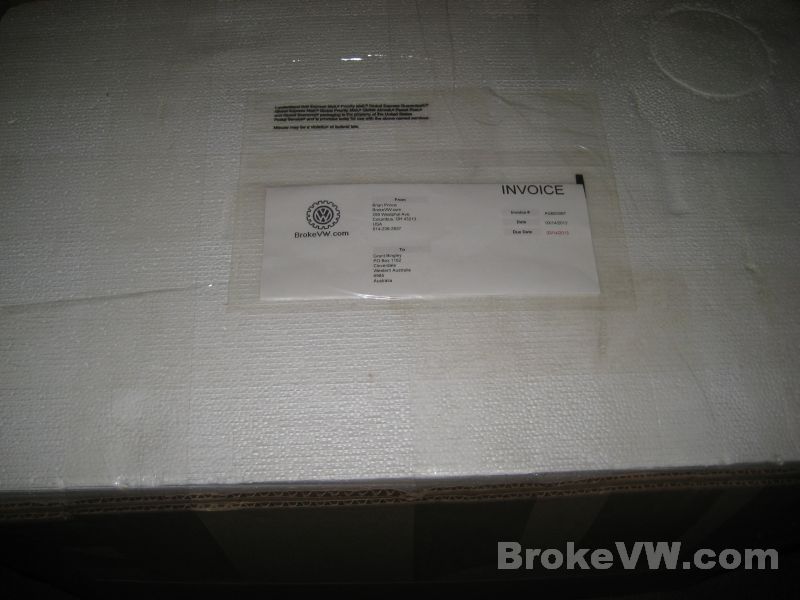
This is the ESP rigid foam sheeting I purchased, I made a hot wire to cut it and packed it around the trans so it was solid inside the boxing...
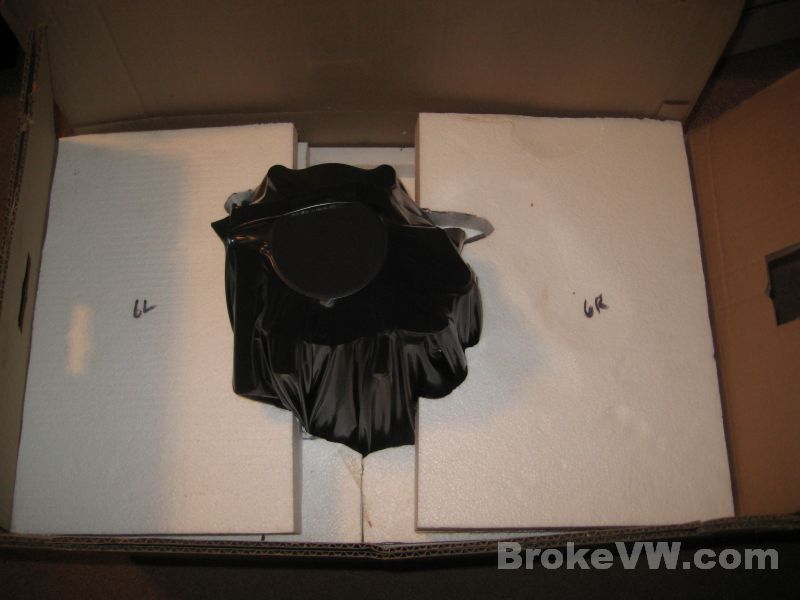
On the top was a final sheet of ESP, and the invoice is attached to the top of that. There is another invoice copy inside the box, dropped down between the ESP sheeting and the corrugate boxing. Another box was flipped over and slid down over everything and it was taped up throughly. I rolled it all over the floor and couldn't feel the trans shift or move, and it feels nice and solid so I think it will make the trip OK...
I've ran it to UPS this evening and it should make it to Chapman VW in Arizona on Thursday, 4/4/13
Thanks!