Stuck in 3rd gear? (over shifted)
These pics show an AGB 16V trans that was stuck in 3rd gear. Sometimes you find an 020 stuck in 3rd, and it is due to over shifting. Unfortunately, I'm not sure what part or parts fail to cause this to happen.
To repair the trans, it must be opened. To open the trans, you have to remove the selector. To remove the selector it has to be out of gear. When it is stuck in gear, you cannot split the trans apart.
The VW procedure calls for the selector assembly to be driven out of the trans. The Bentley has a diagram and brief instructions... and I completely don't understand what they mean :)
Here is the diagram which I stole from Bentley...
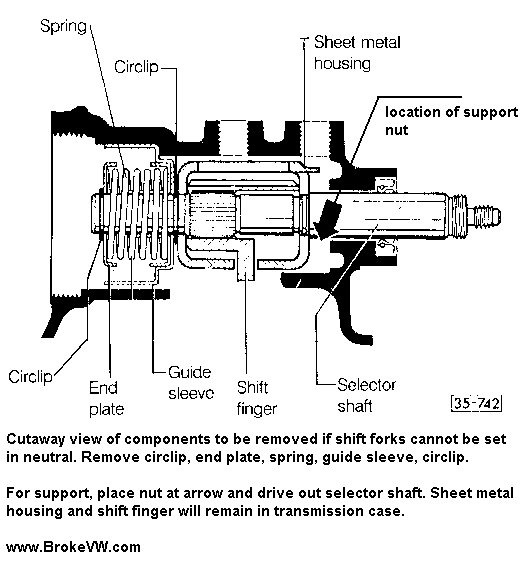
They call for a nut to be placed at the arrow for support... and I have no clue how they intend for you to get a nut in there for support. Possibly if the trans has the big multi-terminal switch you could get something stuck in there, but it would only support one side of the sheet metal housing, so I'm not sure what they mean there.... if you do, lemme know!
Right, so I had this 16V trans stuck in 3rd. Often I can aggressively work the selector while moving the flanges or input shaft and can get them to pop out of 3rd. Not always though, and this was one of those times.
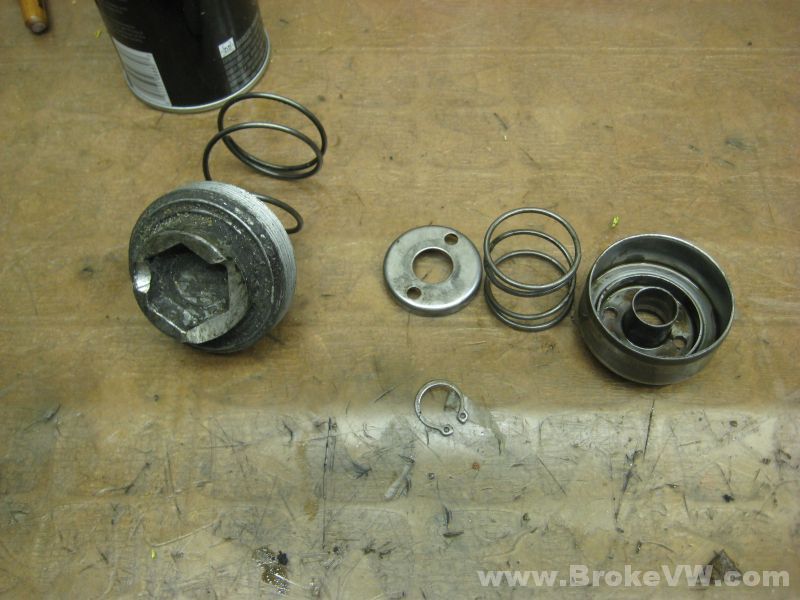
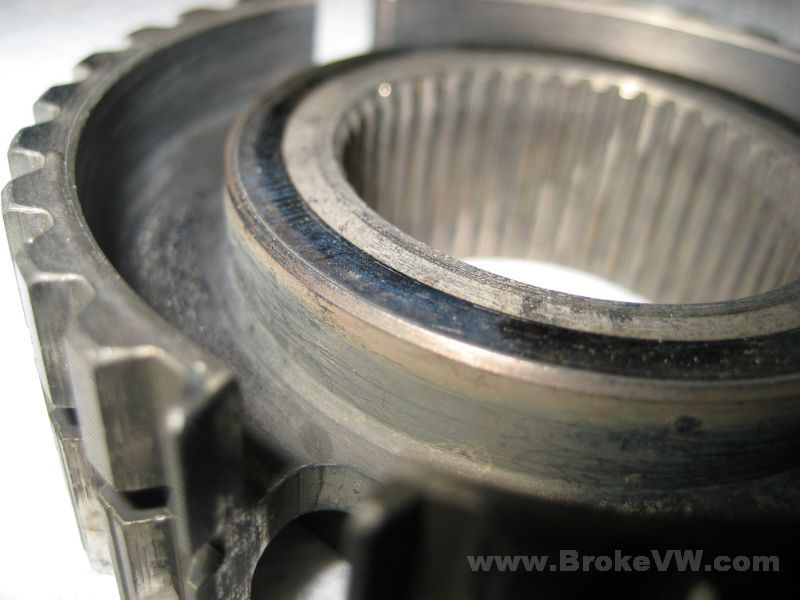
Start by removing the detent bolts on top of the selector, the reverse switch, and then the 27mm selector cover, which is shown on the far left in this pic with the large spring behind it. Remove the snap ring and the top cover (it has the 2 holes in it... when you remove the snap ring, the top cover will want to fly off at you so watch it!), then the smaller spring, then the spring cup (shown in order in the pic).
After the spring cup is removed you'll find one more snap ring, remove it and you should be looking at something like this...
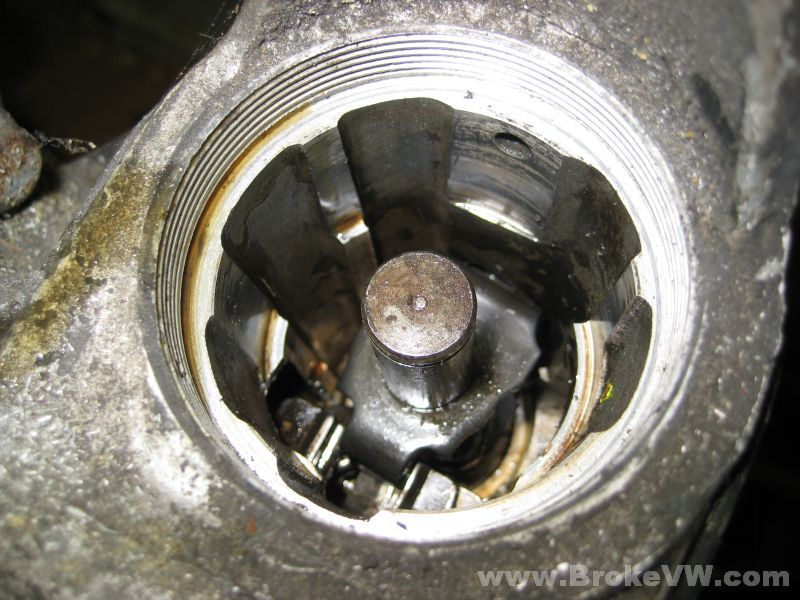
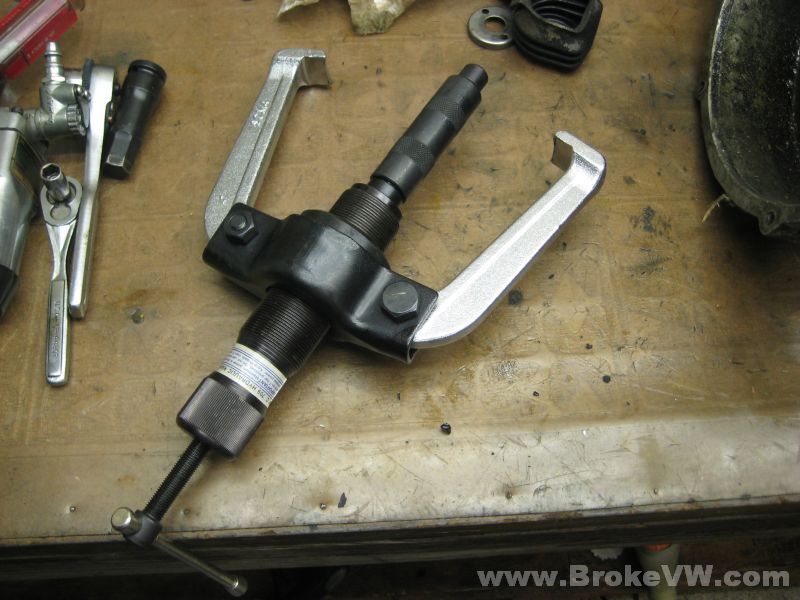
I hammered on that shaft, but it just sprang against the shift forks and ate up any force I tried to put into it... so I grabbed a tool I bought probably 6 years ago now, and this is the first time I ever got any real use from it. It is a cheap chinese puller kit, with a hand operated hydraulic ram.
I tried fitting the trans into the shop press so I could drive the selector shaft out, but there was no way to balance the trans and support it while I pressed the shaft. As a last ditch effort, I tried the cheap puller set....
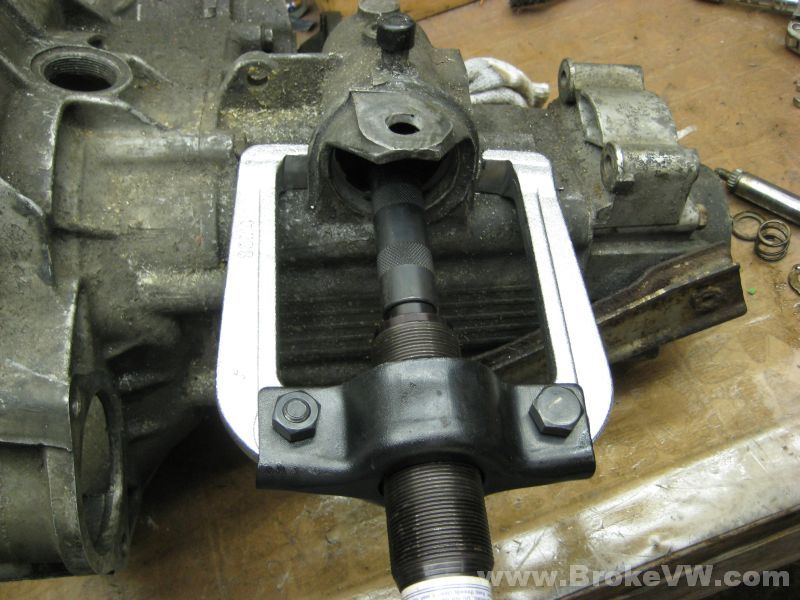
I attached it as shown, which I wasn't sure would work. I figured the force would be great enough to break the aluminum casing where the hooks are, as they are just barely snagged on the lip of the casing around the selector, and aluminum is fairly weak. Surprisingly, the force needed wasn't as much as I expected, and the case was just fine....
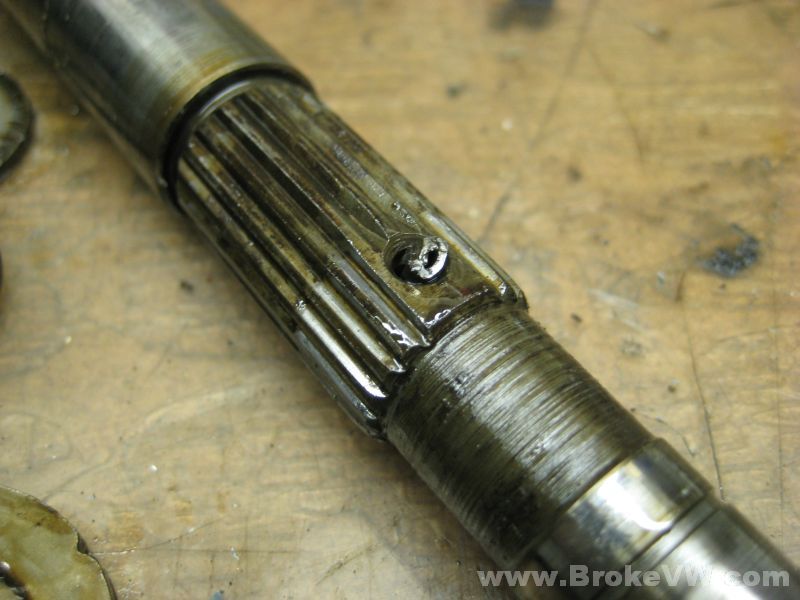
This is the shaft that was pressed out, and the parts I managed to dig out of the hole. The finger that actually moves the shift forks has been broken in half.
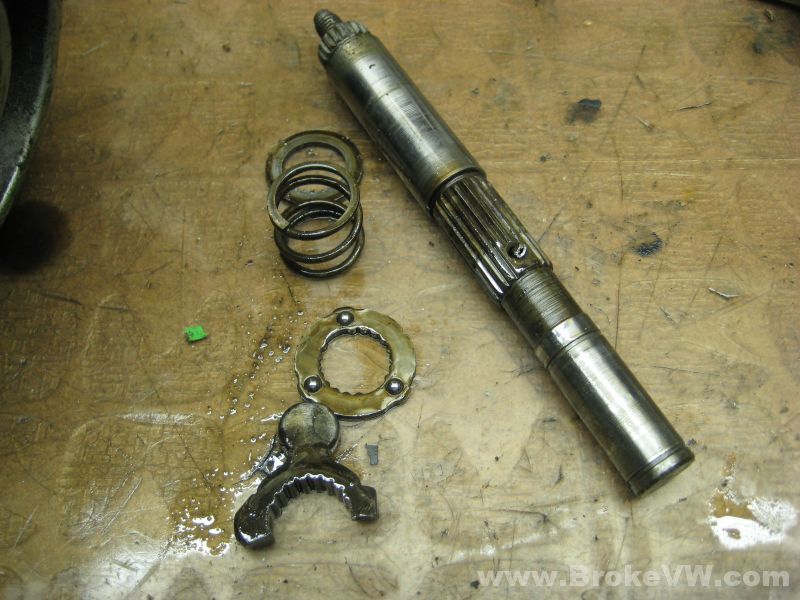
The roll pin that secures that finger on the shaft was sheared on both ends...
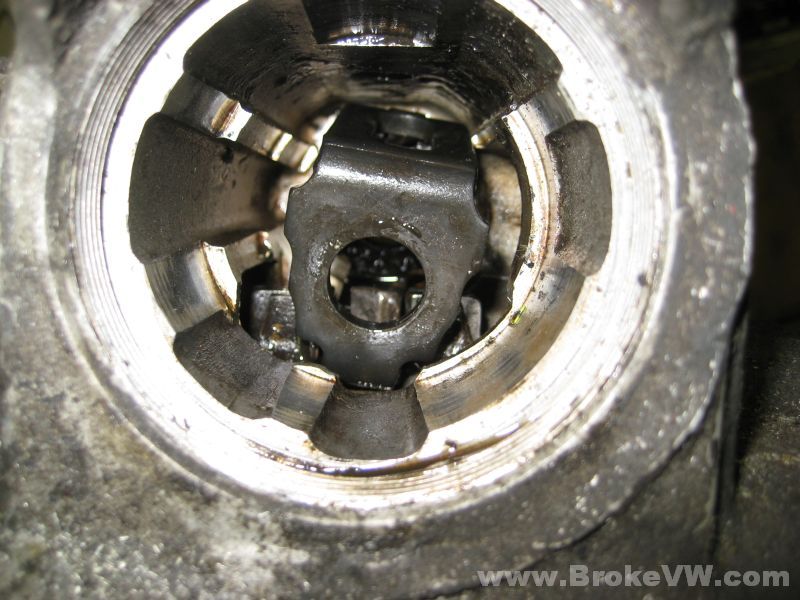
Inside will be the "sheet metal" cage, as VW calls it. When I think of sheet metal, I think of something easy to bend or flex. Apparently the Germans do not, because that cage is quite tough.
I couldn't get it to come out of the trans, it was stuck right there as shown in the pic. It was very loose, and ALMOST would come out, but not quite. I decided to split the trans and as I split the case, I worked that cage around out of the way of the shift fork tabs as the case came apart.
The other half of the broken finger was found on the magnet of the trans, it dropped into the box when the shaft finally let go under the ram pressure.
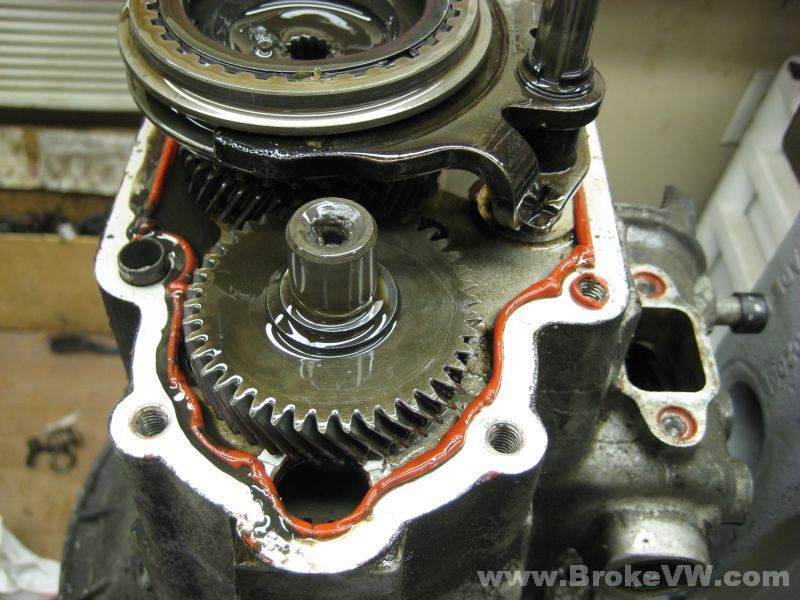
With the selector out, I could carry on splitting the trans. This pic is a reminder to go light on the sealant if you use it... the machined sealing surfaces of the casing will mash together very tightly, squeezing 90%+ of the sealant out of the joint, and it'll leave a bead like this inside the trans, and one outside the trans as well. You only need a very thin coat to fill in any micro imperfections in the sealing surface, so it doesn't take much at all!
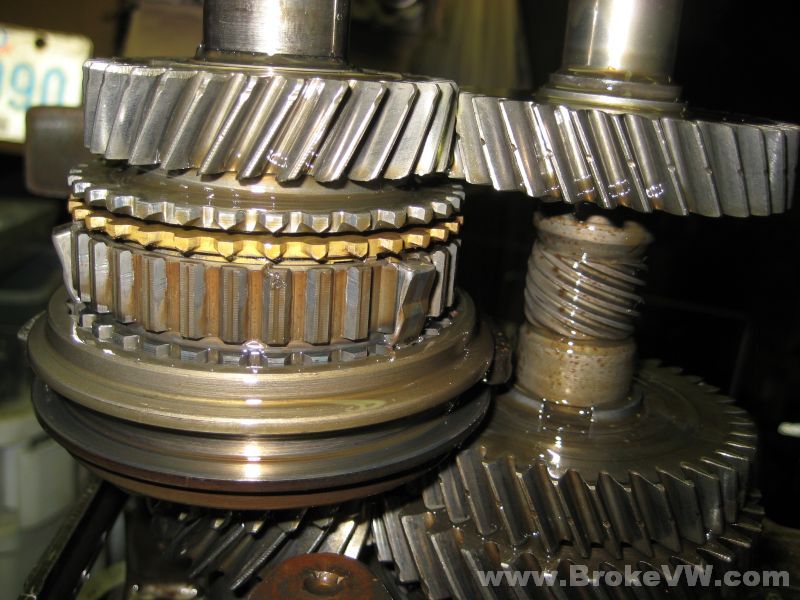
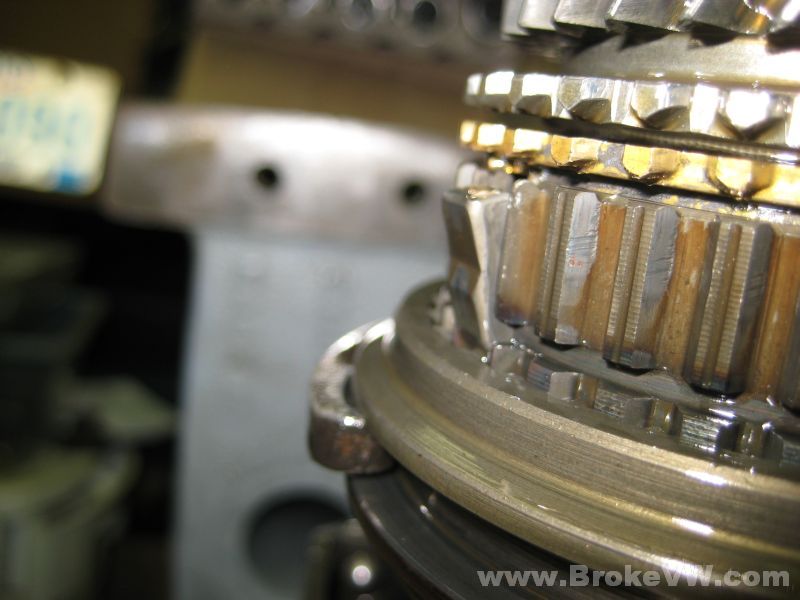
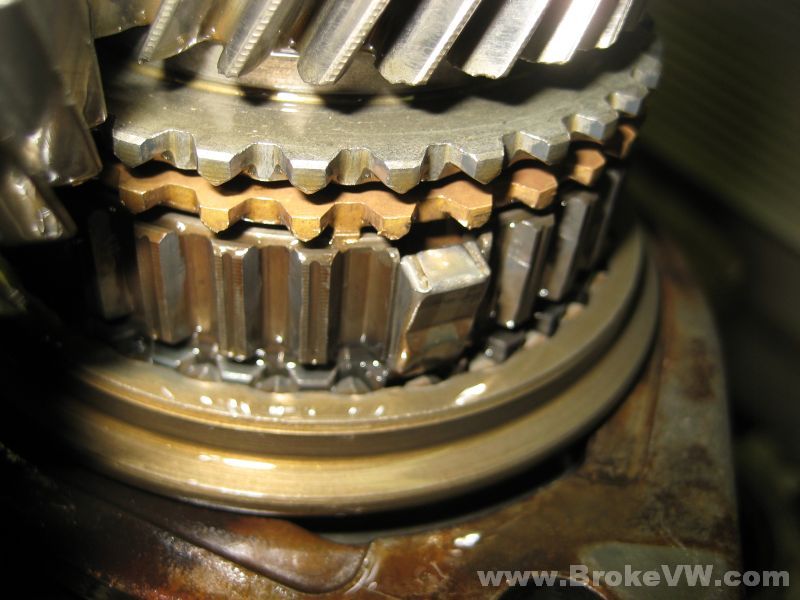
And here is why the trans was stuck in 3rd gear.... the sync hub sleeve moved too far over 3rd gear, allowing the keys to pop out behind the sleeve, preventing it from coming out of 3rd gear again. All 3 keys were popped out and tilted, getting in the way of the sleeve.
As I mentioned, I don't know what is allowing this to happen. The gear stack assembly will do this normally... if you have the input shaft assembled on the bench and select 3rd by hand, you'll likely over-select it and the keys will pop out on you... so it isn't a problem with the shaft, sync hub assembly, gear, or the sync sleeve.
The shift forks may be one cause, but the selector should limit how much travel the forks have... so it is something with the selector or the forks as far as I know at this point, but I'm not positive what exactly causes it. Sometimes it is a hard shift into 3rd that does it, sometimes people shift gently and it gets stuck.
3rd and 4th gears are the only 2 gears in the trans physically smaller in diameter than the sync sleeve... so the sleeve can actually fit over the gear, allowing it to move too far, but this rarely happens with 4th, so I don't think it is the actual size of the gear that causes it... it is either worn forks, a worn selector (or selector detent bolt), or a combo of both.
Old Vs. New 3rd/4th Sync Hub Design
Here are pics of the old and new style 3rd/4th sync hubs, the older style used square cut key slots where the sync keys fit into the hub. These square cuts resulted in stress risers being formed in the corners of the key slot, which can result in small hairline cracks devolping, which can continue to get worse until the hub fails.
Later, VW redesigned the hub to have rounded key slots by adding a radius to the slot which removes the stress riser points, and spreads the load around the curved cut, which helps prevent them from cracking as the old hubs would.
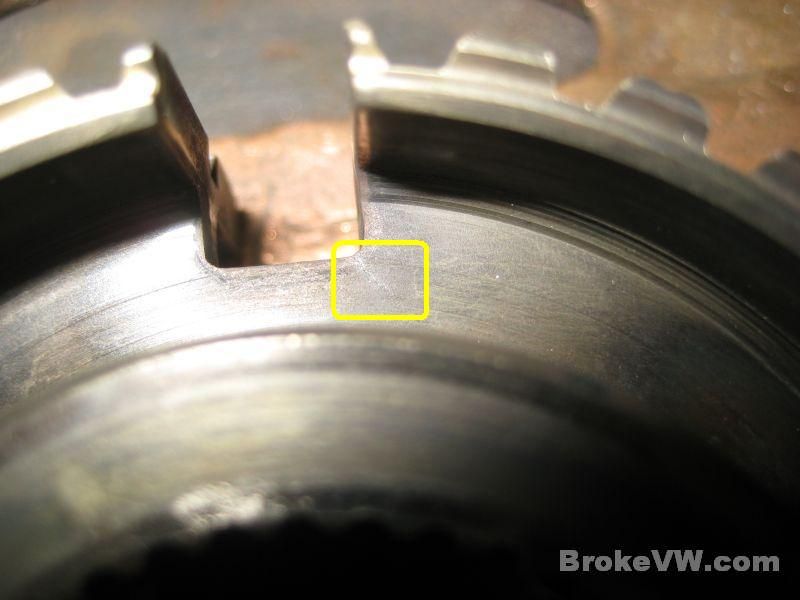
The pic above shows an older style hub which has the crack starting in the corner, they usually head out from the corner at a 45* angle through the hub itself. If you wait 3-5 minutes after drying the hub out with the brake cleaner, you may begin to notice an oily line forming from the corner of the key slot, heading out at a 45* angle.
The crack is inside the yellow square, and it can be difficult to see. To make the cracks easier to spot, I will clean the hubs in kerosene, scrubbing away any oil and grime and so on, this will allow the kerosene to leach into the small cracks if they are present.
After being soaked in the kerosene, to check for the cracks I use brake cleaner (or carb/choke cleaner, or another similar volatile solvent cleaner) to completely rinse the hub off, which washes away the kerosene. Kerosene is very thin oil, essentially. Once the brake cleaner is applied the hub will be very dry and oil-free.
This is the kerosene that had leached into the crack which the brake cleaner didn't remove. The oily kerosene will wick out of the hairline crack and onto the nice dry sirface of the hub, where it will be very visible to the naked eye.
If you see the oily line forming, the hub is cracked.
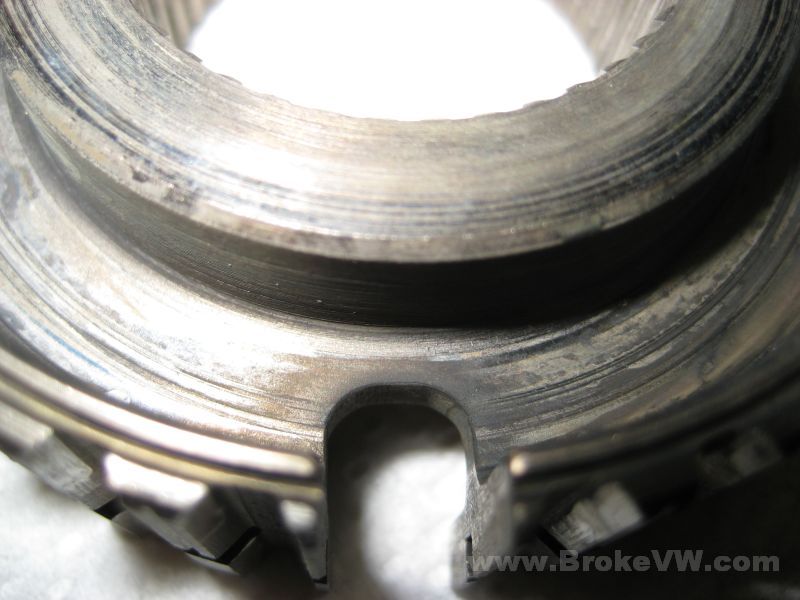
The pic above shows a new style hub which has the rounded key slots, when compared to the old style hub which has a much more squared key slot. This helps prevent the cracks from forming... but it does NOT ensure the cracks won't ever form.
In the pic above, this new style 3rd/4th sync hub with the rounded key slots has a crack forming! It is quite rare, but as the picture shows, it CAN happen.
In the pic above, if you look carefully you can see a crack that is all the way through the hub on the RIGHT hand side of the rounded key slot.
Here is another pic of the exact same new style hub shown earlier, but with the crack now on the LEFT side of the slot, as I had flipped the hub over for this picture. The 3rd/4th sync hub is most prone to this kind of failure. The 1st/2nd sync hub is not, for whatever reason, most likely the torque sent through the hub is different due to the mechanical advantage offered by the lower ratio gears of 1st and 2nd compared to 3rd and 4th which are taller and don't offer the same mechanical advantage. It just isn't as common with the 1st/2nd sync hub. The 1st/2nd sync hub will always have squared key slots, VW never changed the design as they did for the 3rd/4th sync hub. While it is very rare for the 1st/2nd sync hub assembly to develop these cracks, it IS possible so they should also be checked. I have seen the 1st/2nd sync hub crack, and I have seen the new style 3rd/4th sync hub crack. It is fairly common for the old style 3rd/4th sync hub to crack, so they should be checked anytime you see a 3rd/4th sync hub with the square cut keys.
The hub has been cleaned in kerosene and then rinsed in brake cleaner as outlined above, which leaves the hub nice and dry. You can see the crack clearly on the left side of the key slot as it looks oily and wet... this is the kerosene being wicked out of the crack and onto the hub surface, making the crack easily visible.
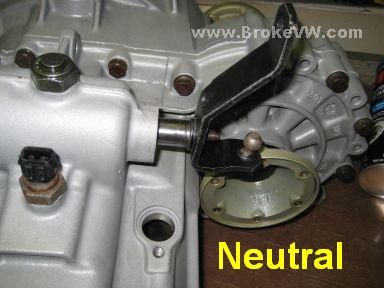
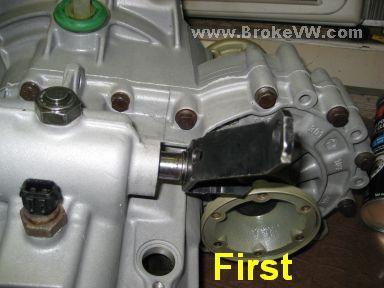
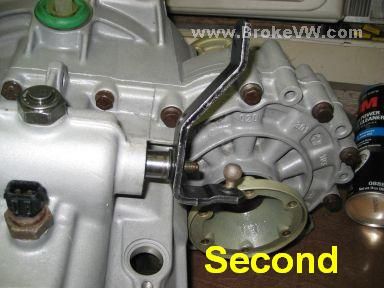
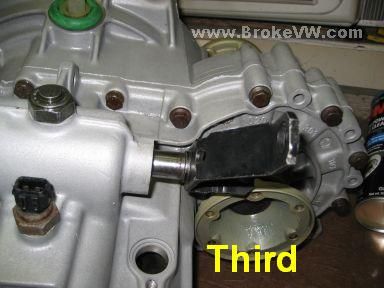
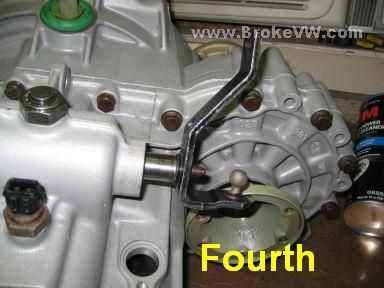
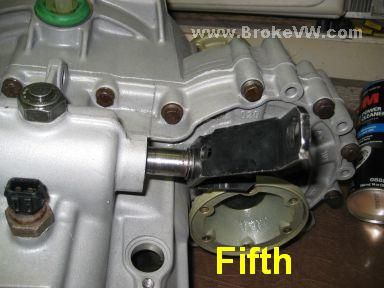
Selector position in each gear