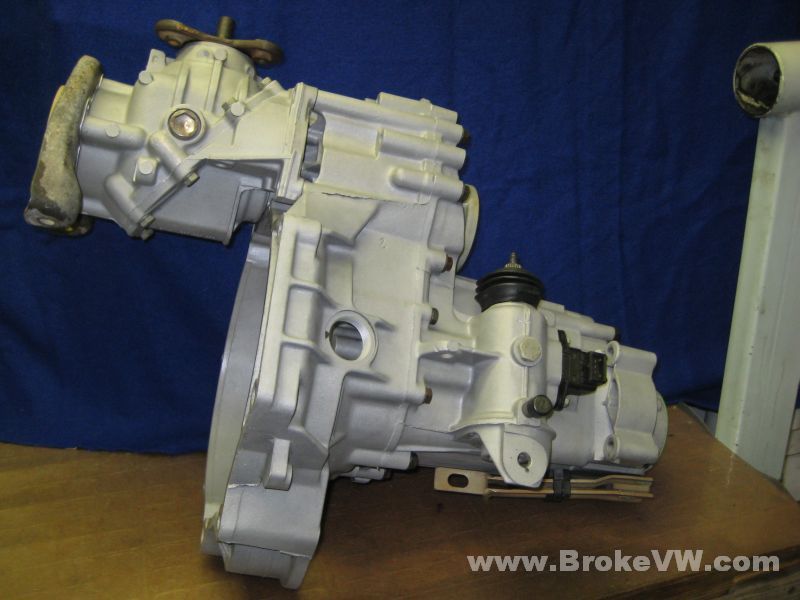
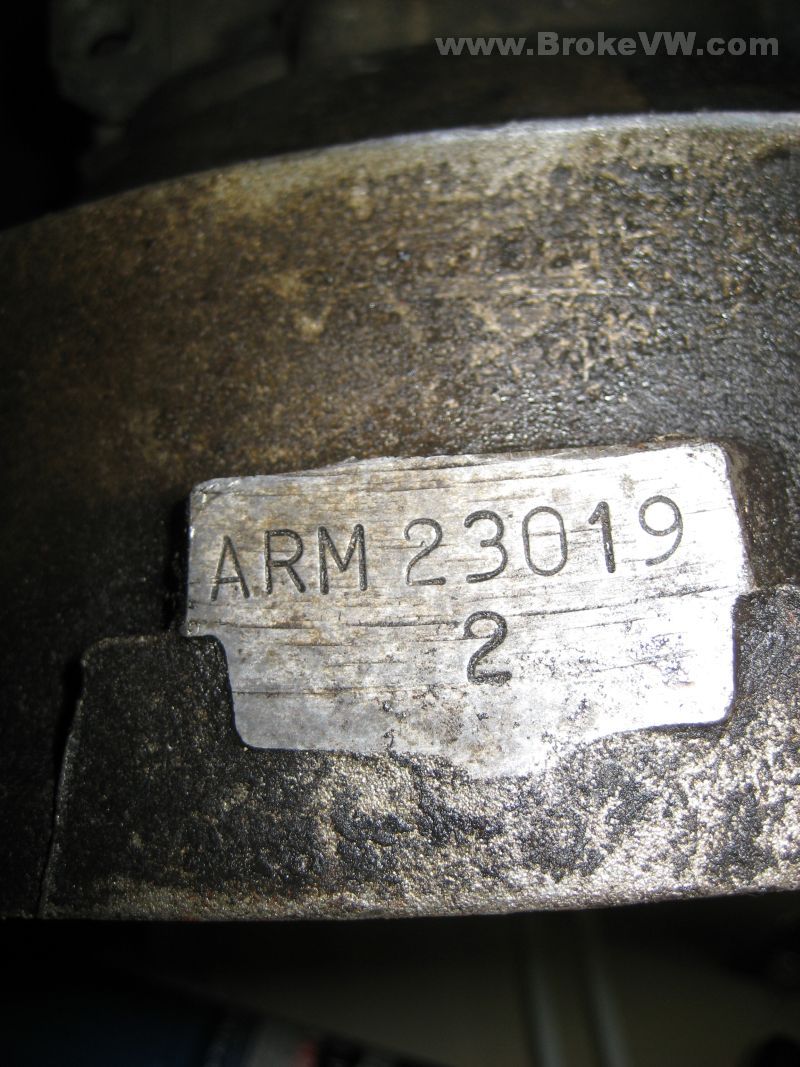
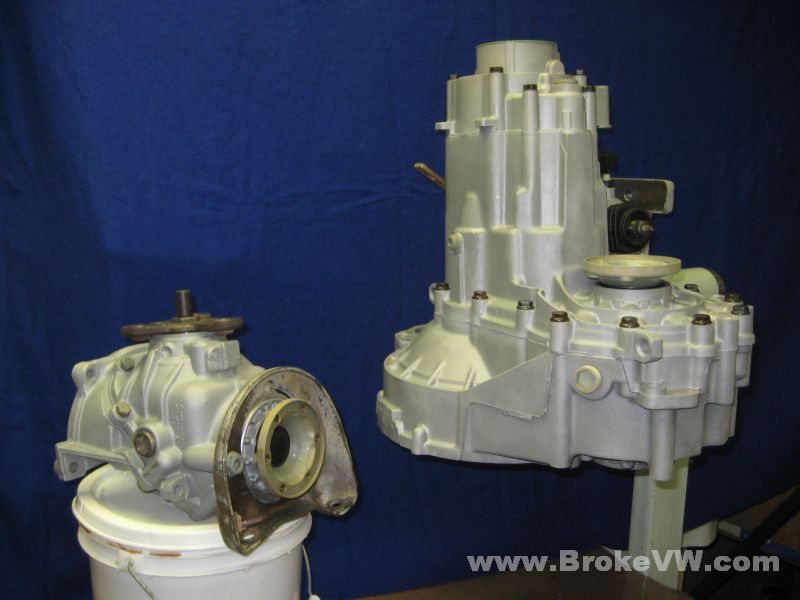
Gary ARM23019 Syncro 020
Arrived 6/26/08 - Started 8/8/08 - Done 10/22/08


Update 7/01/08
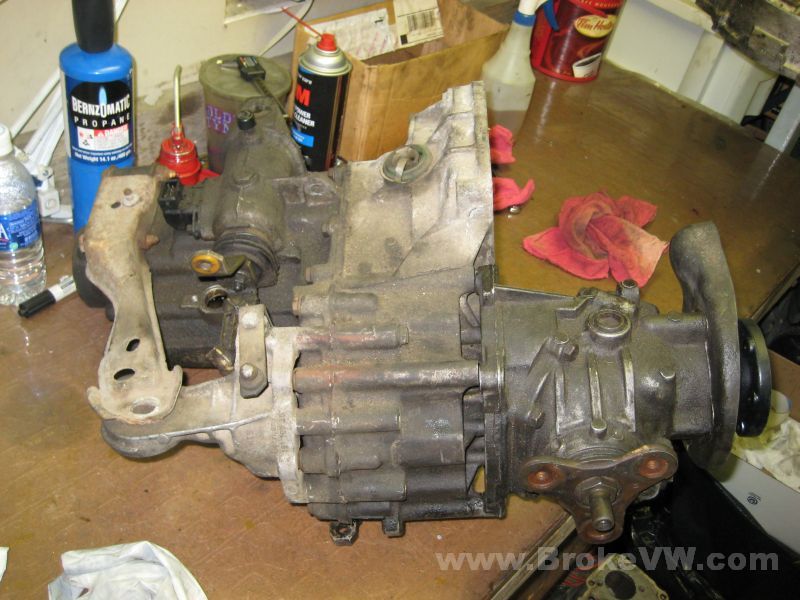
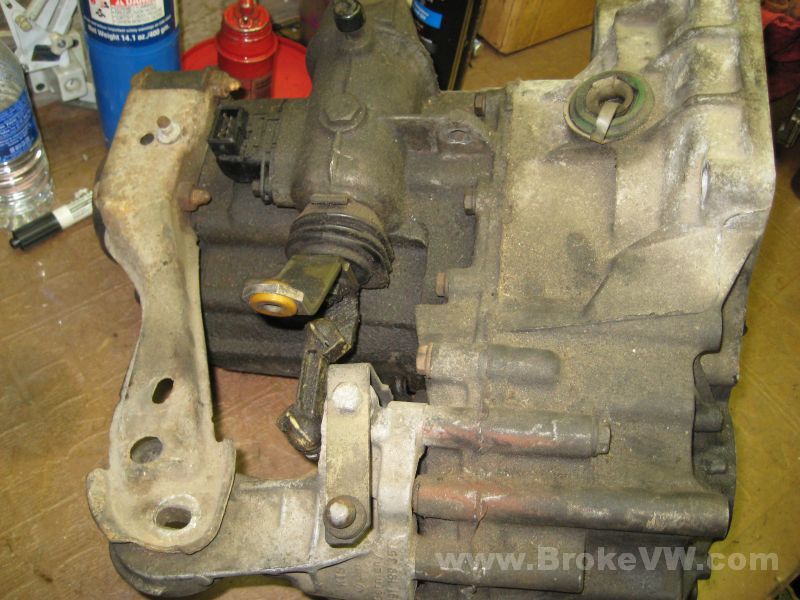
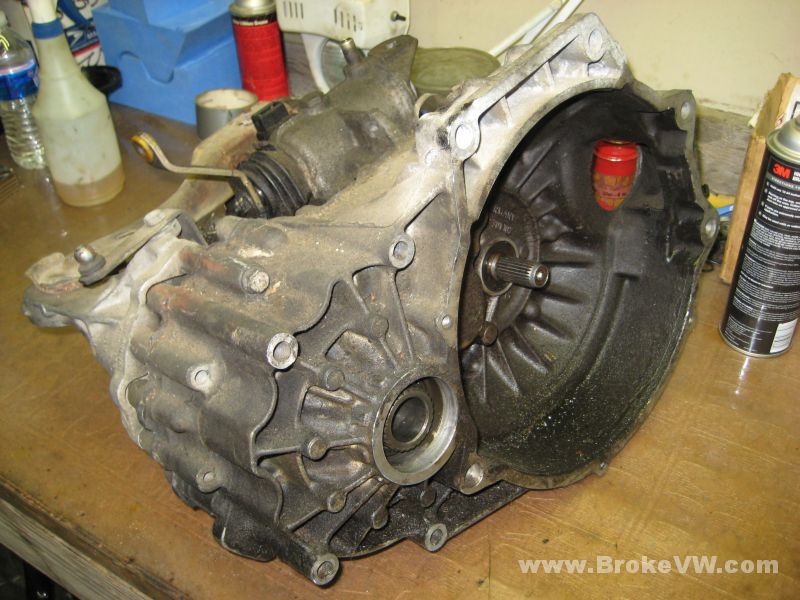
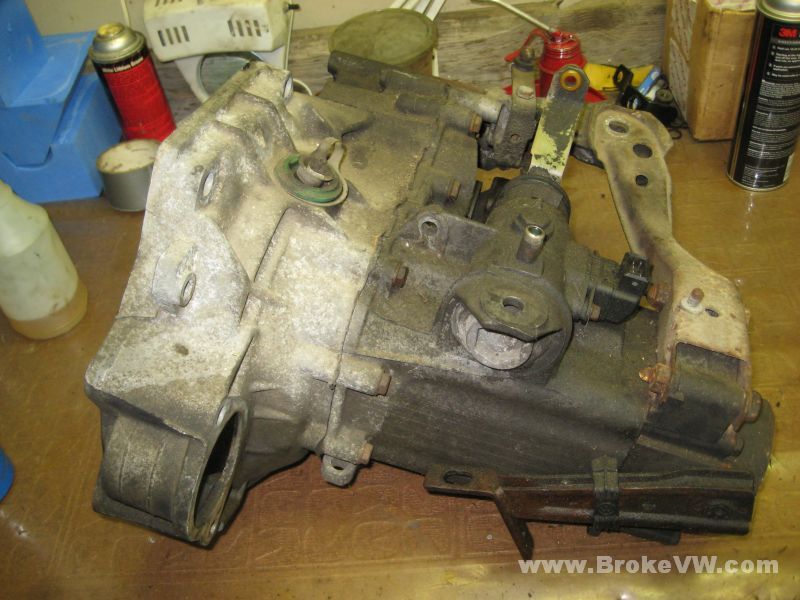
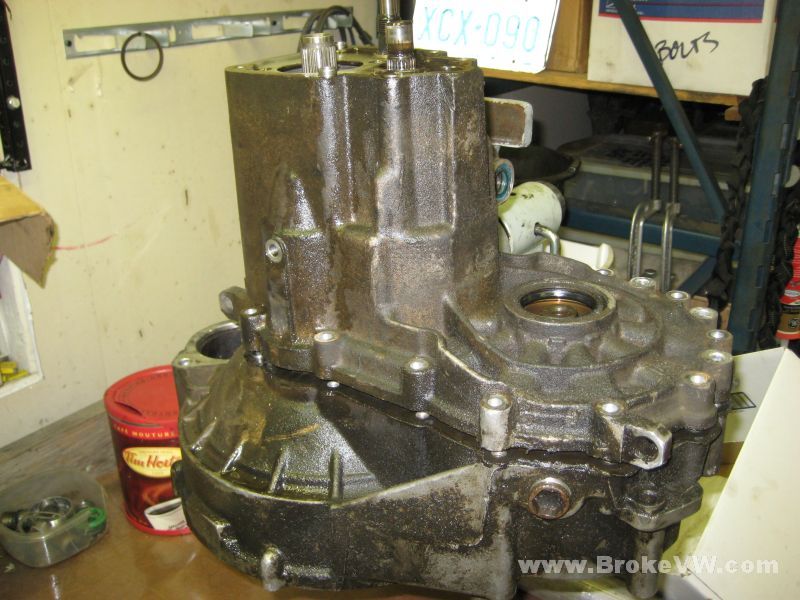
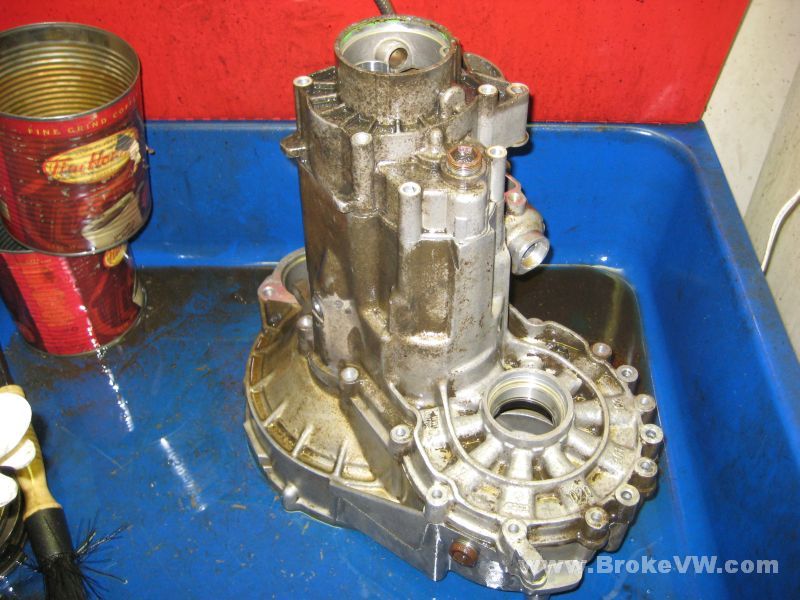
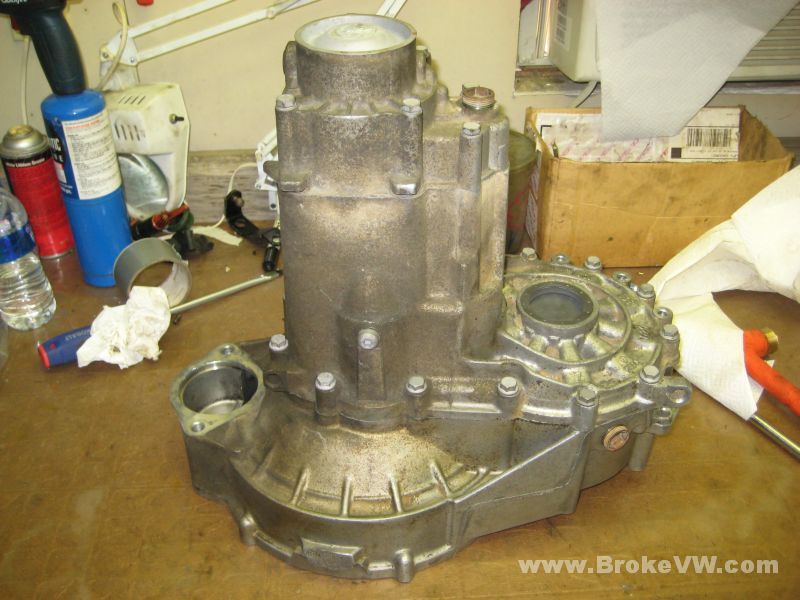
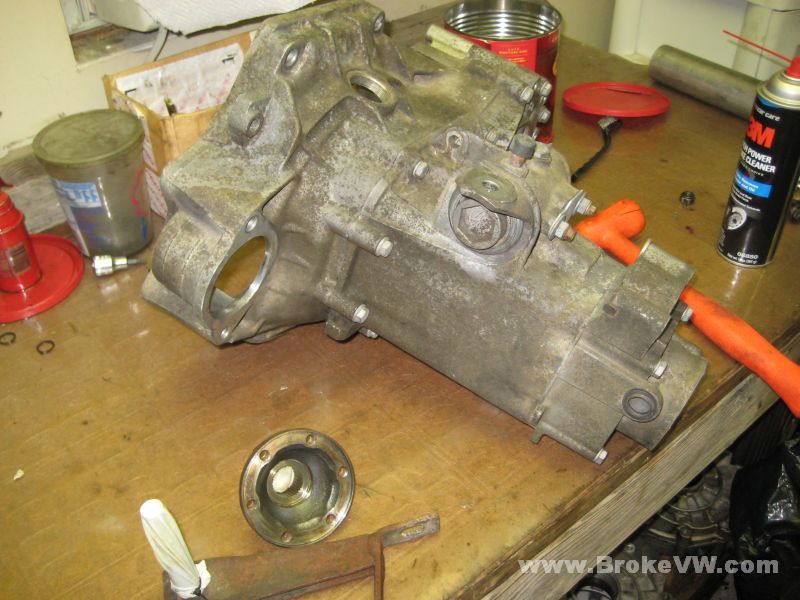
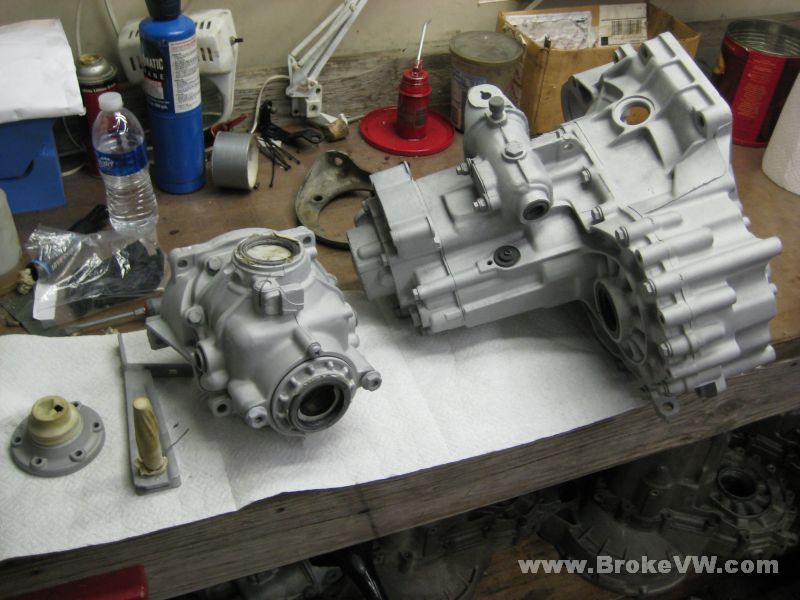
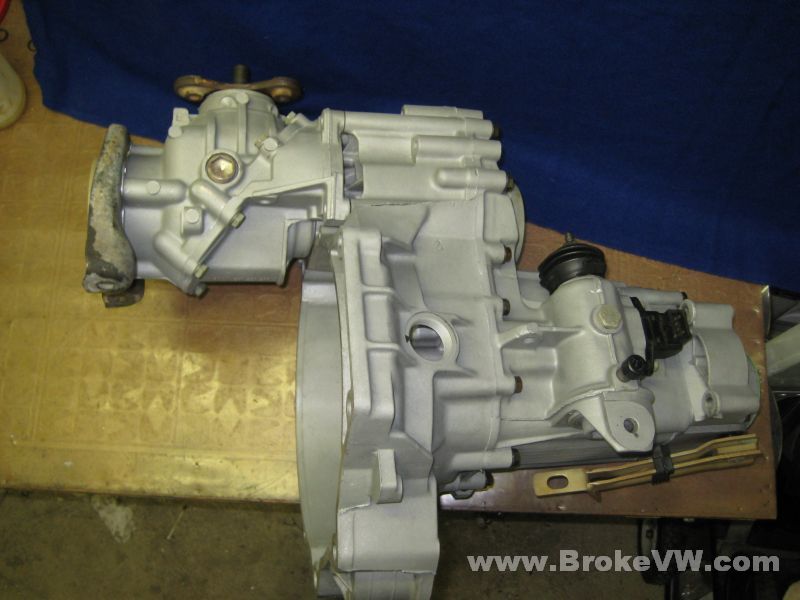
Just knocking the majority of the grime from the outside of the transfer case... it is cleaning up fairly well...
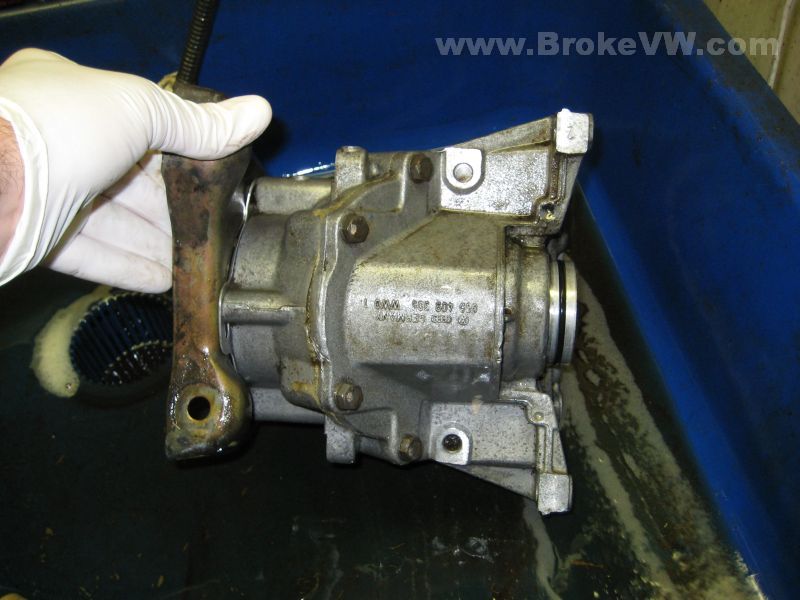

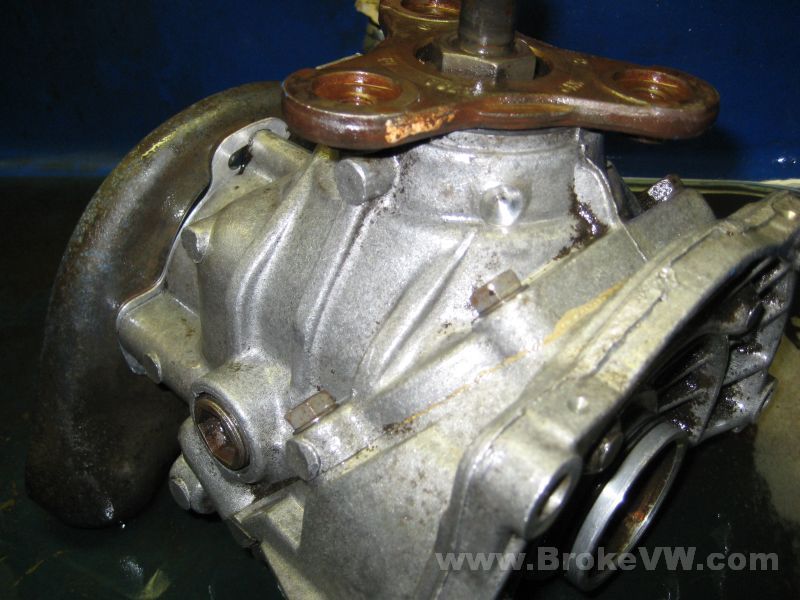

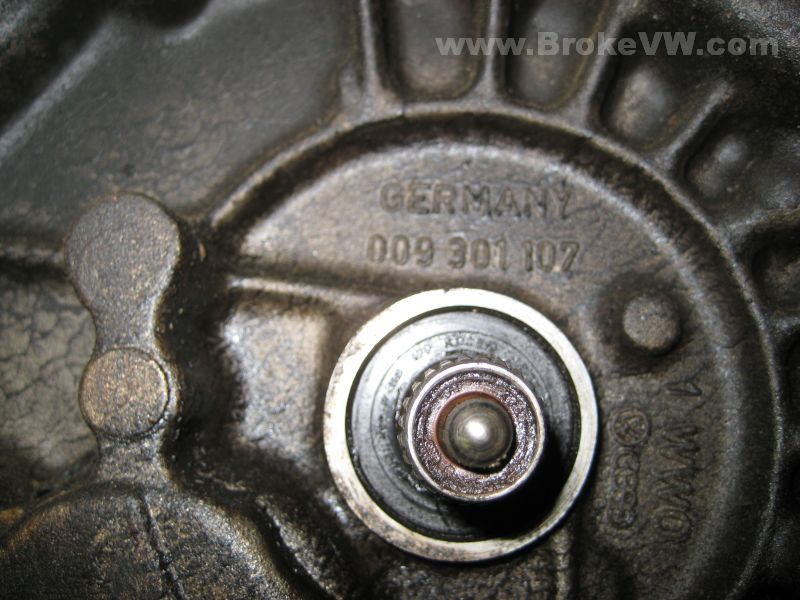
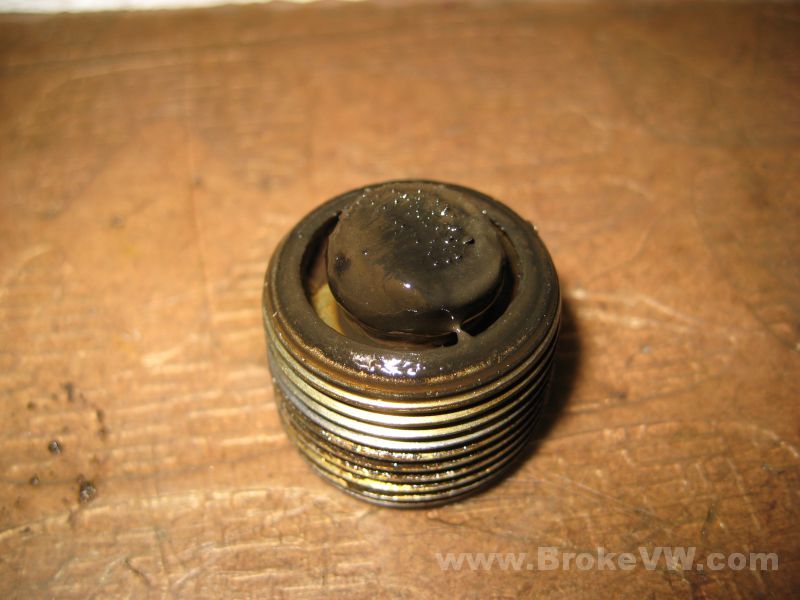
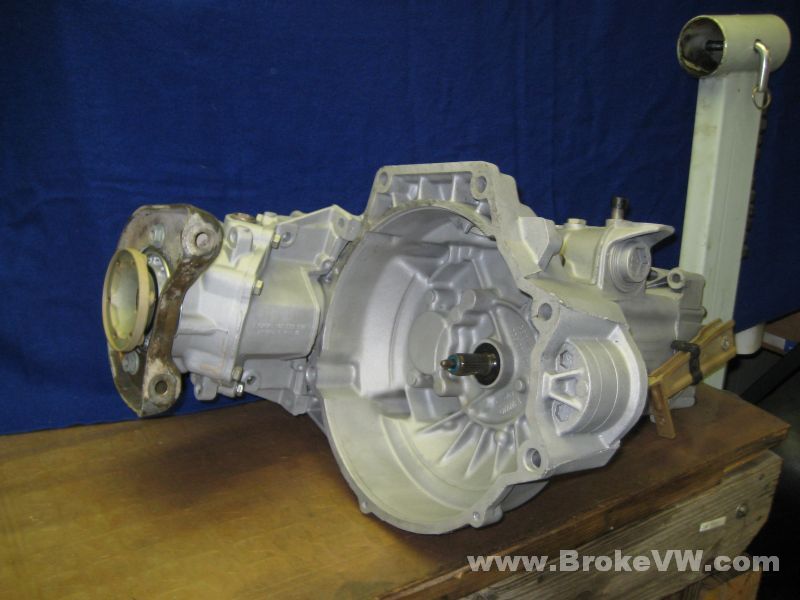
Mounted up on the rotisserie stand. The one drain plug on bottom has a magnet on it.

There is some metal deposited onto the magnet, but no chunks, and it looks pretty typical for a gearbox magnet to have that kind of sludge on it...
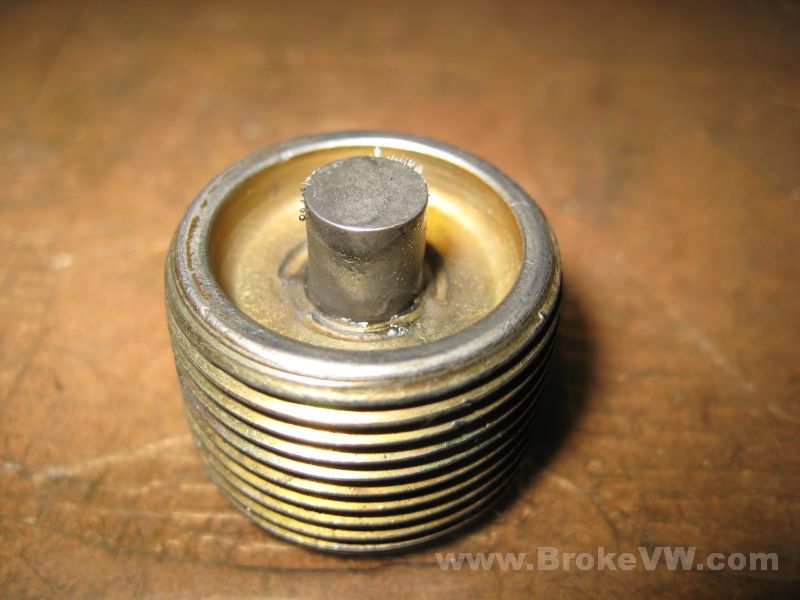
Cleaned of the oily sludge, leaving just a few bits of metal stuck on (I just wiped it off, the air line will clean it 100% later)...
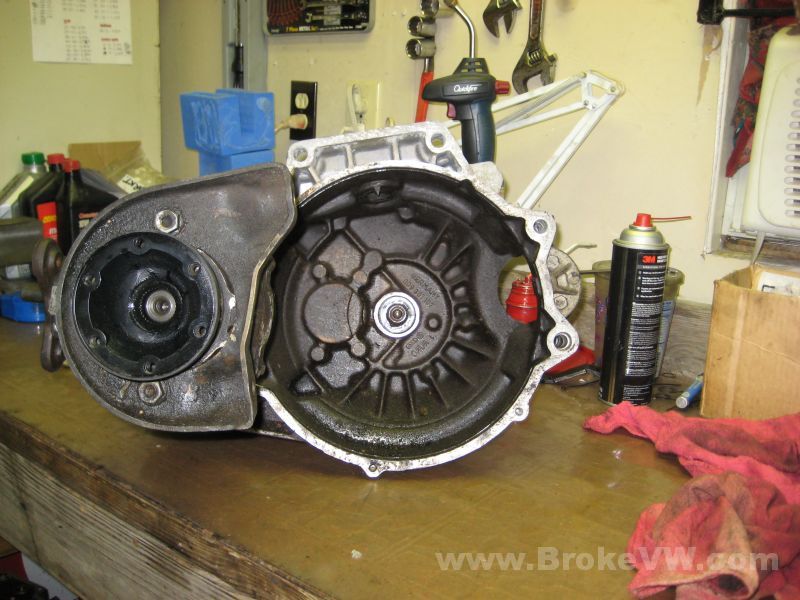
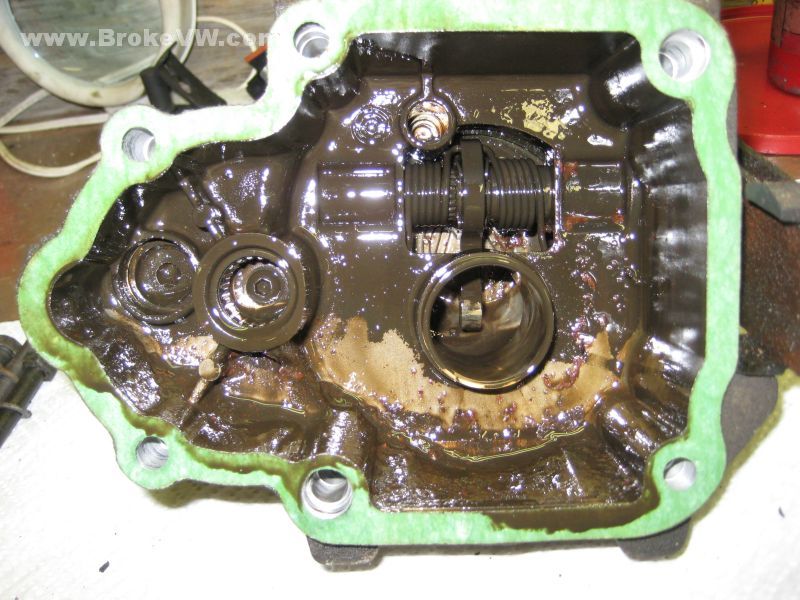
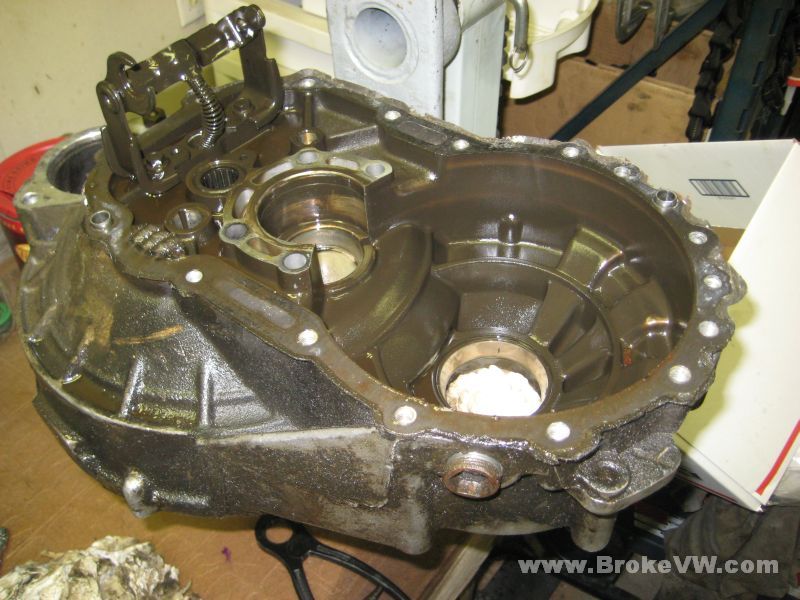
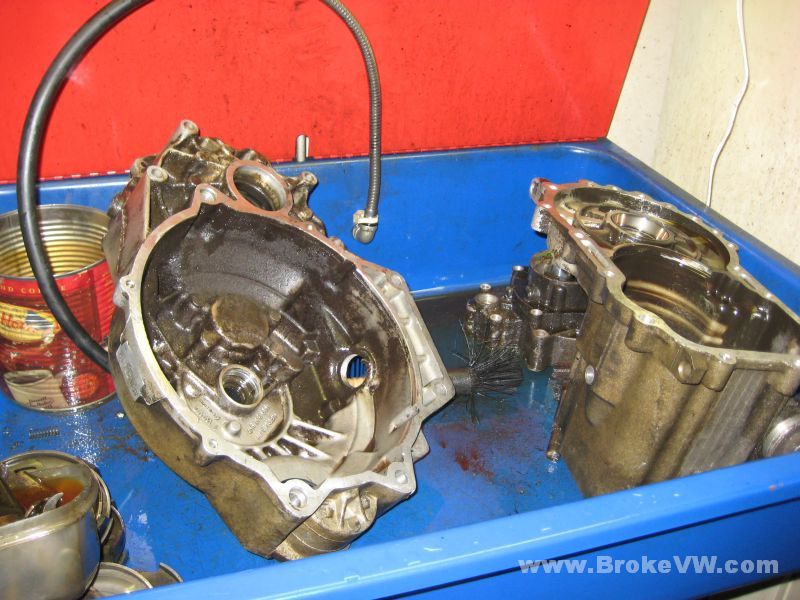
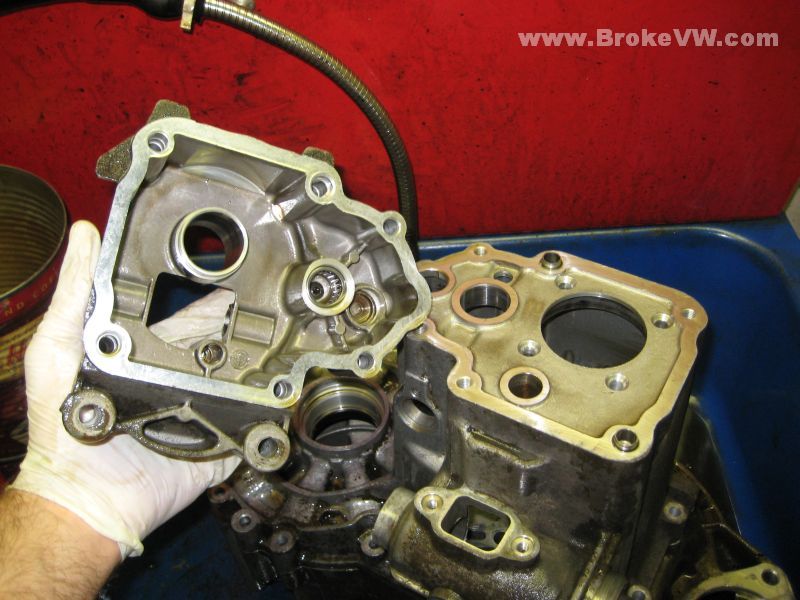
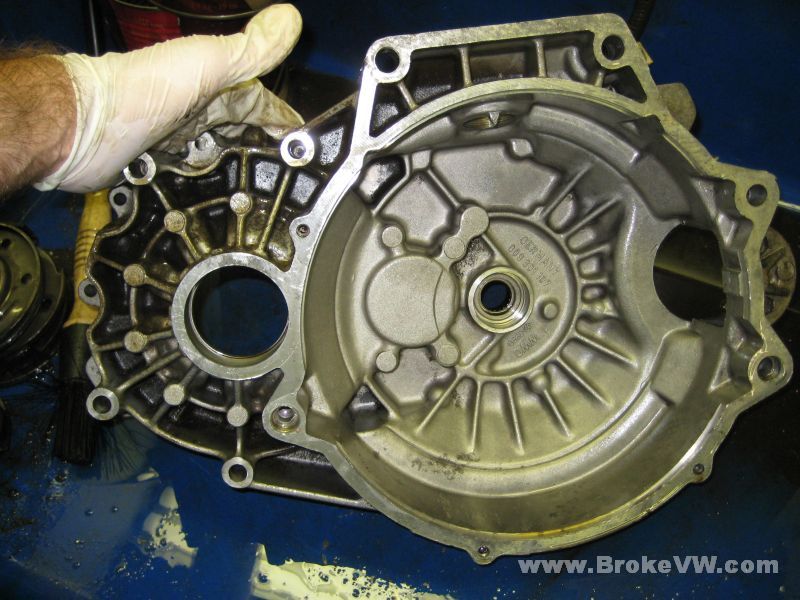
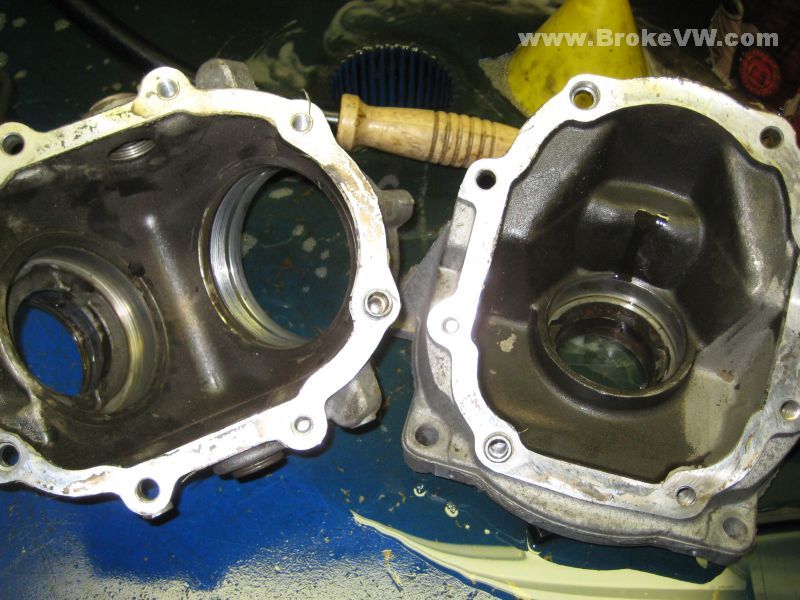
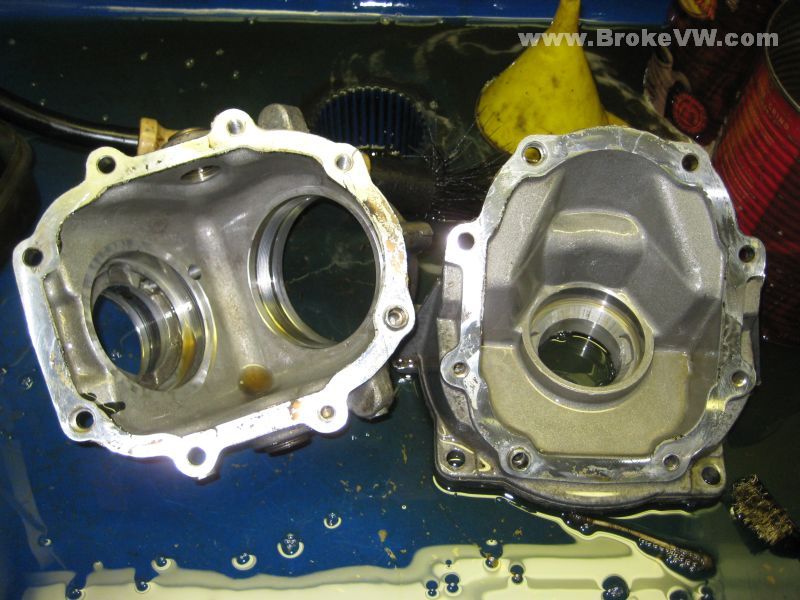
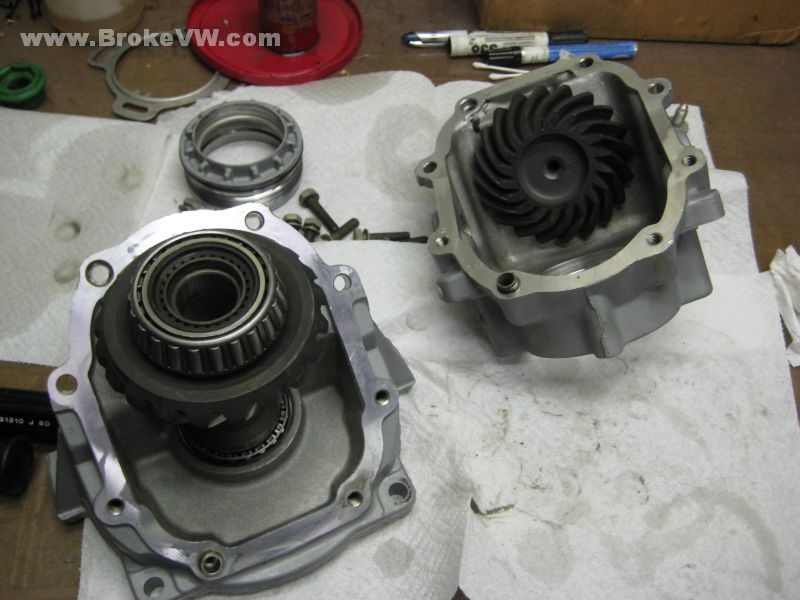
Cracking the transfer case open. 8 13mm bolts secure the casing together, 4 on one side, 4 on the other....

This pic shows how it sat, the oil stained the case where it contacted it, so the small portion on the left in the pic below indicates that was the "top" when it was sitting in storage, so it must have been stored upside down for some time at EIP...
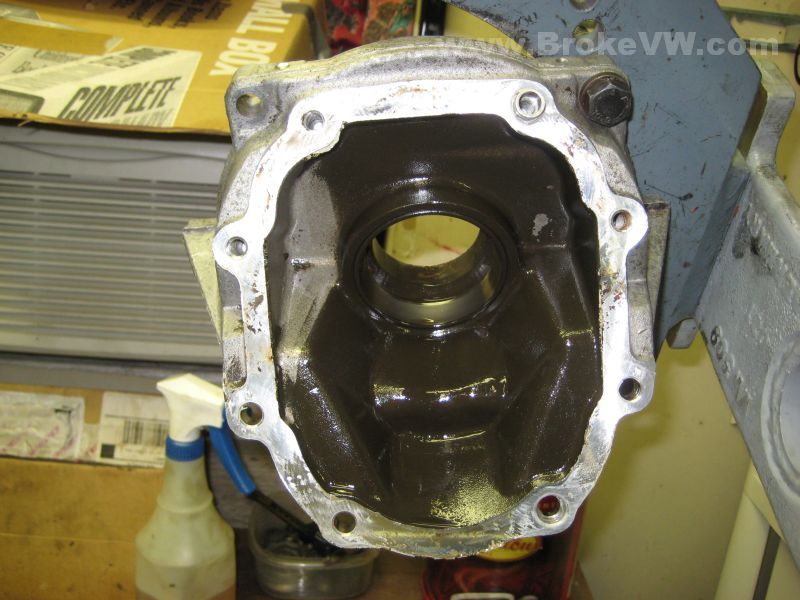
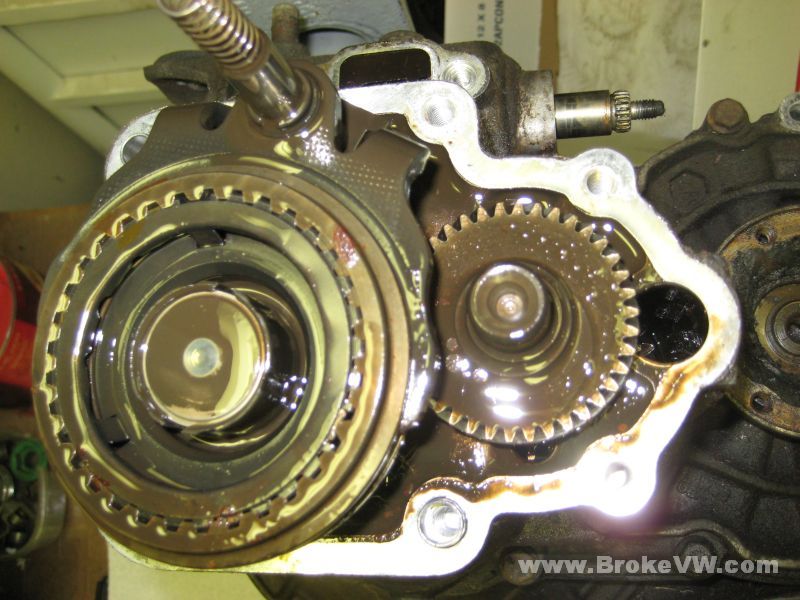
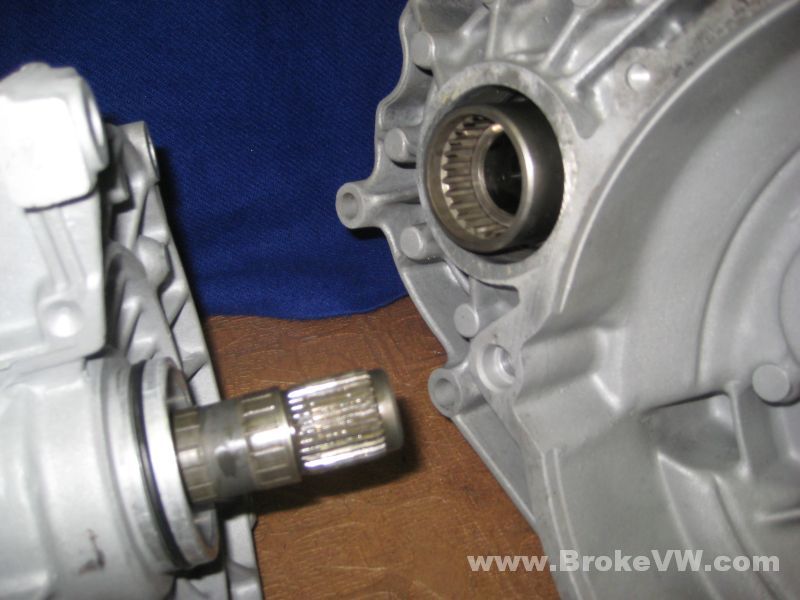
The 2 big gears that make up the transfer case...
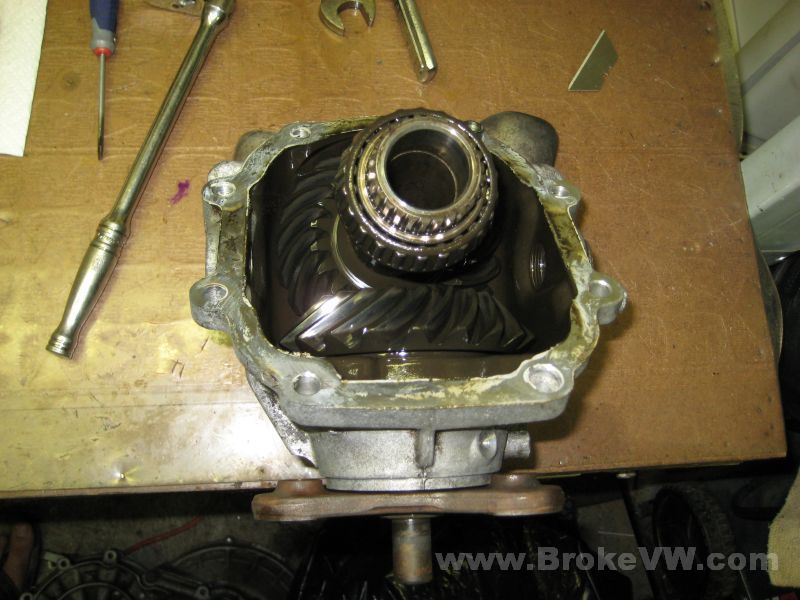
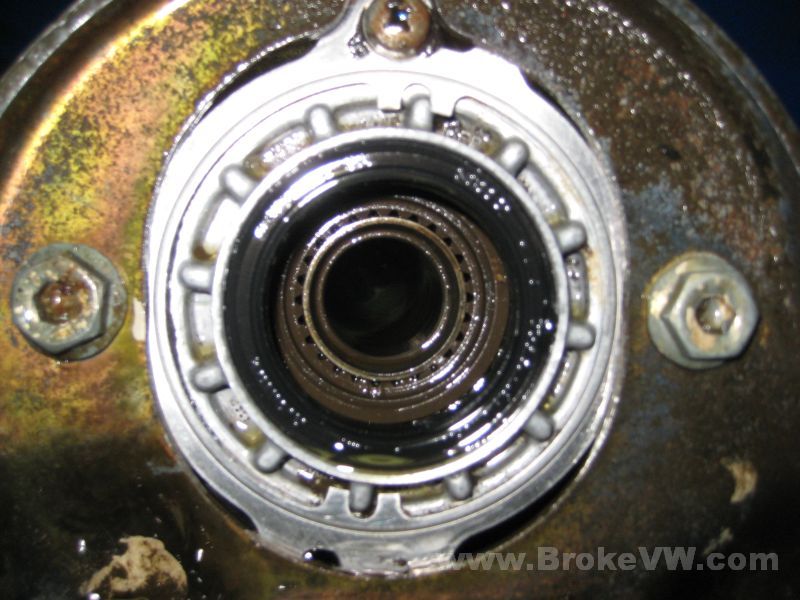
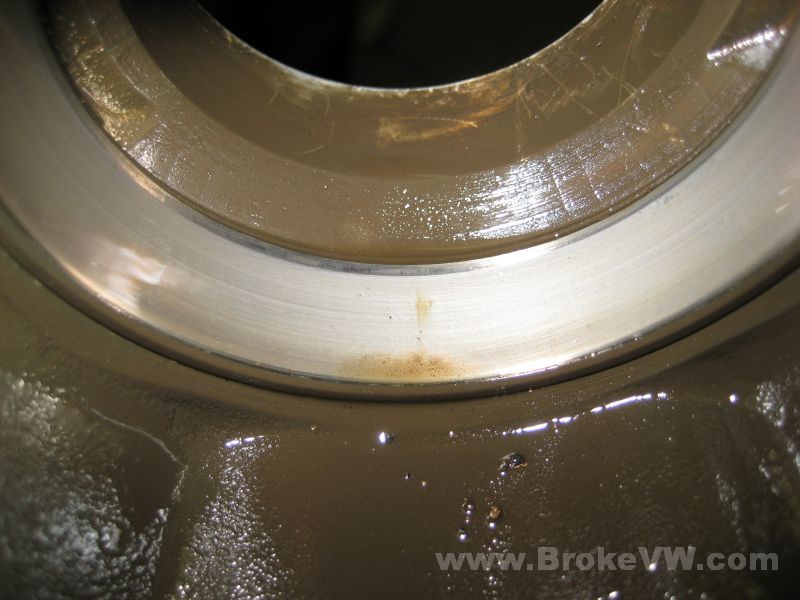
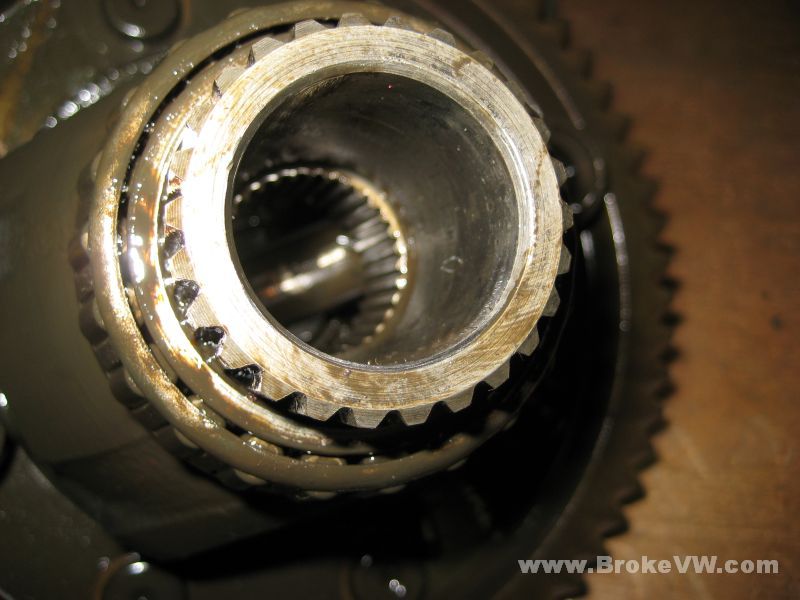
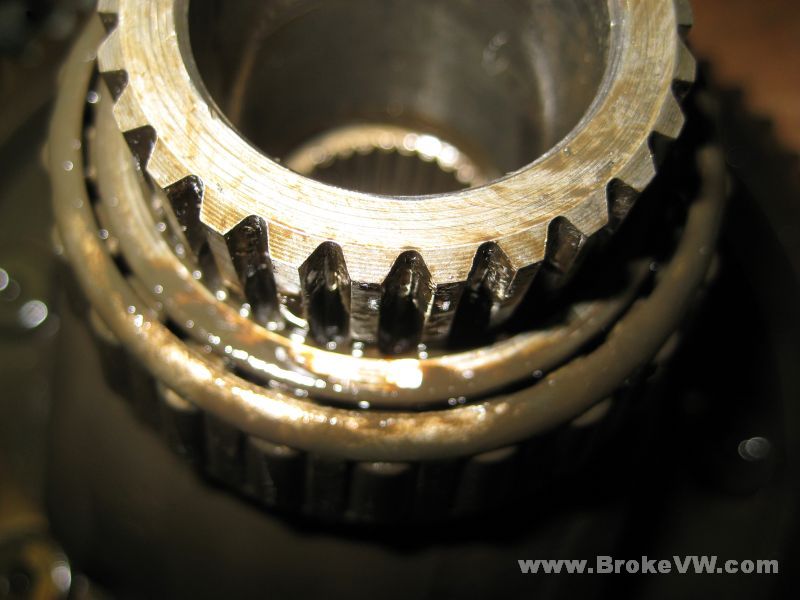
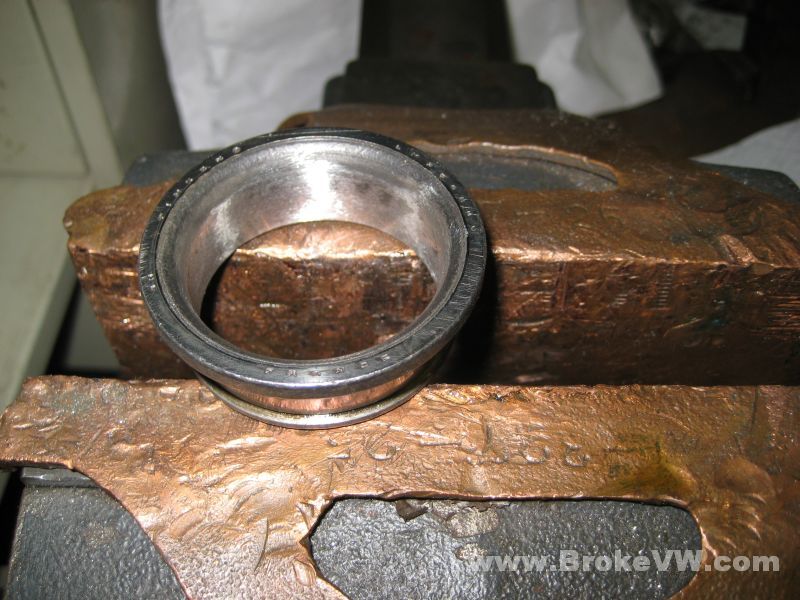
The bearing race is worn, but nothing alarming about it....
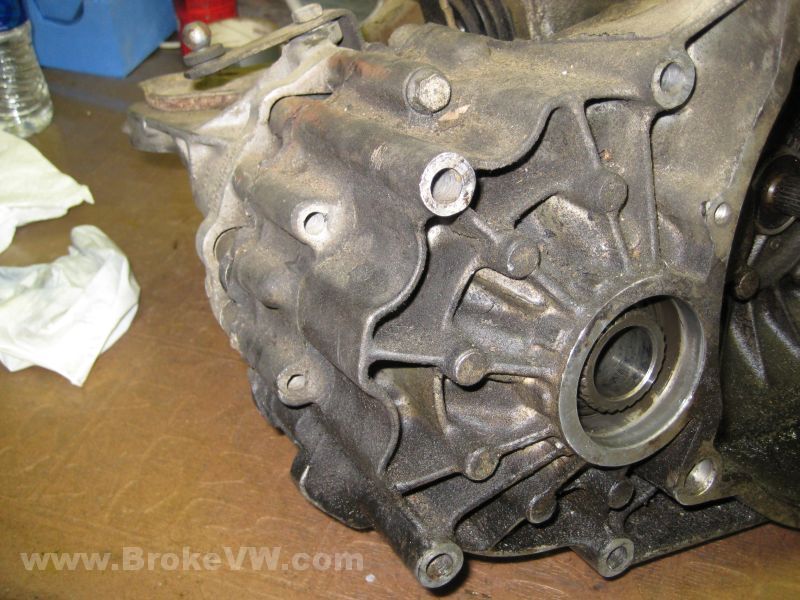
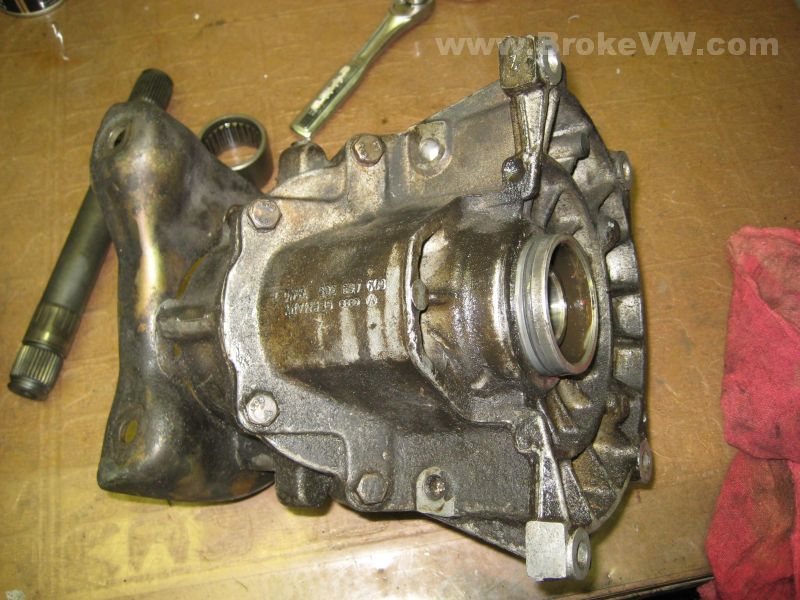
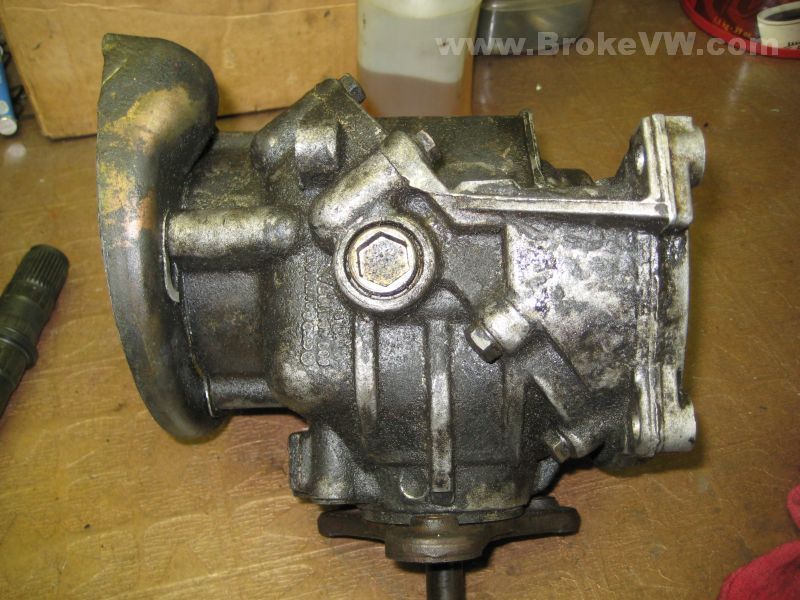
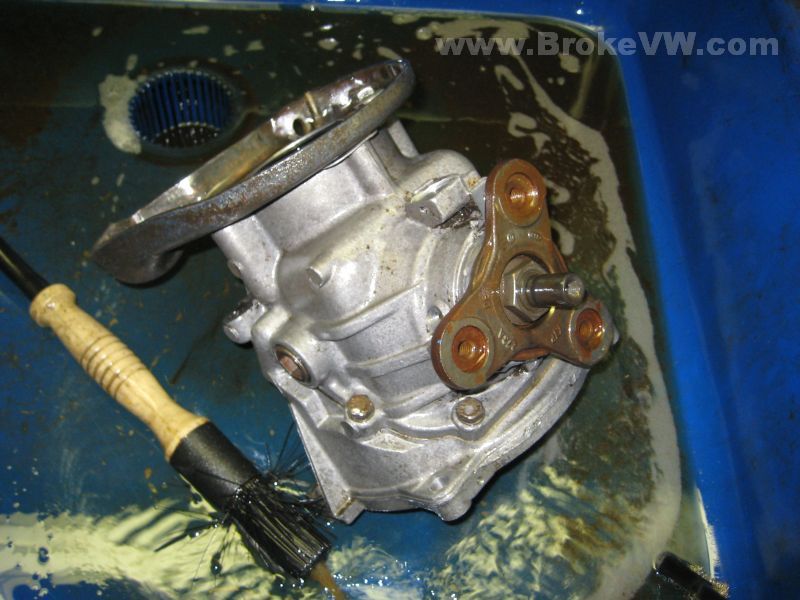
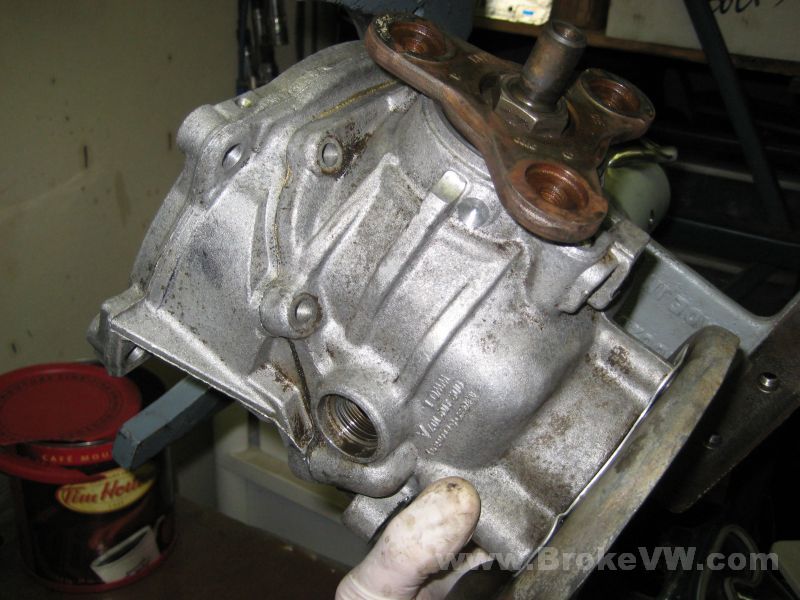
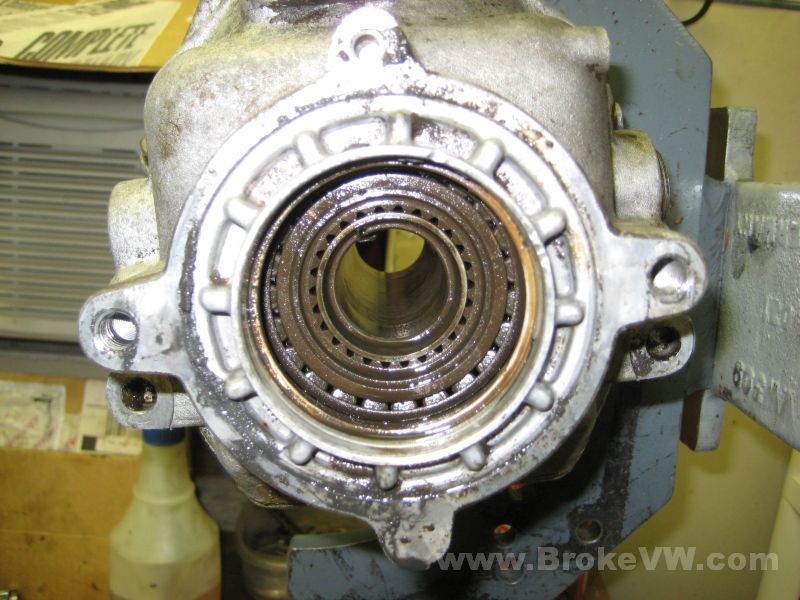
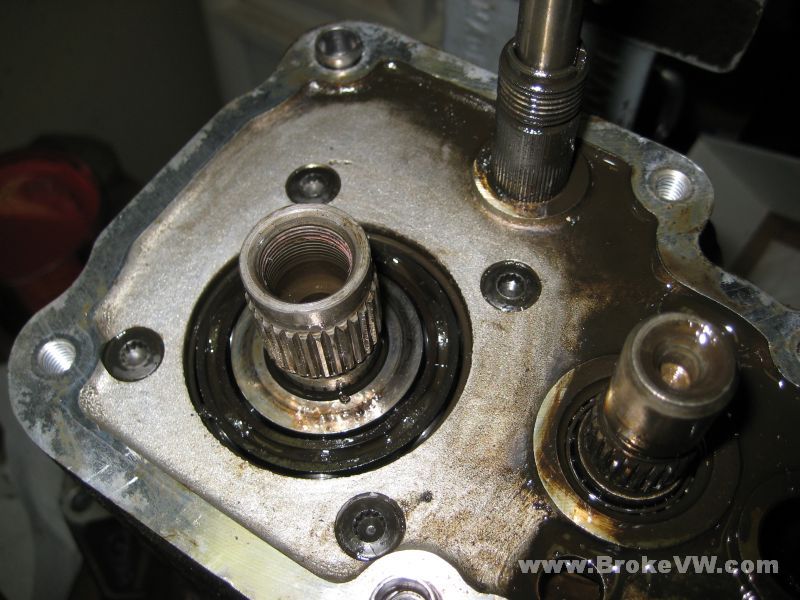
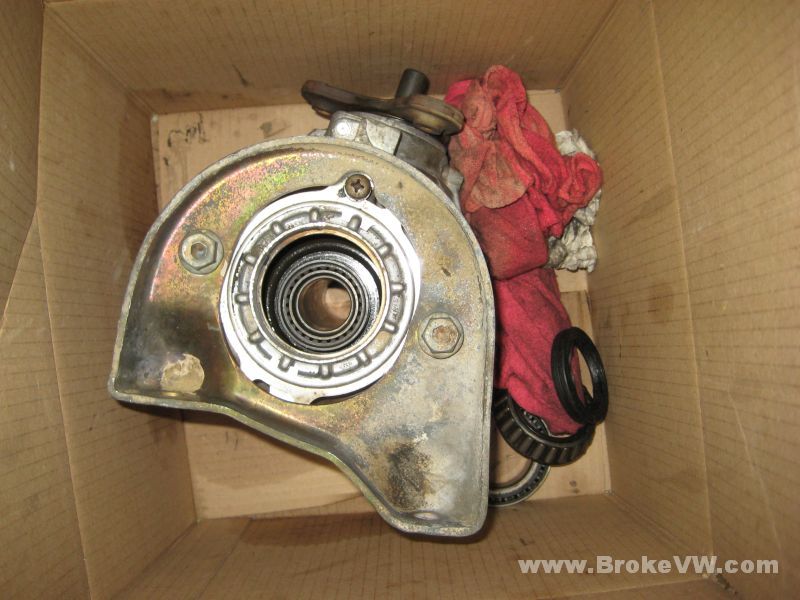
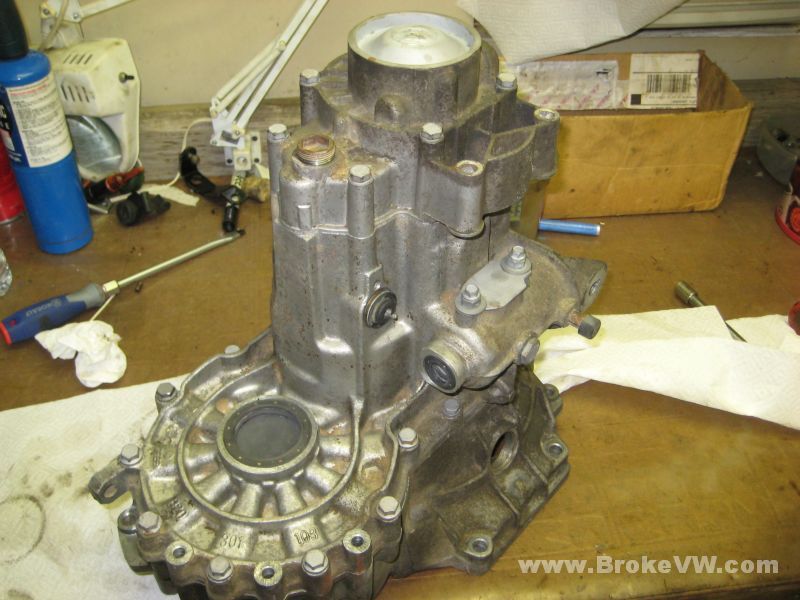
These pics show the end the right front flange attaches to...
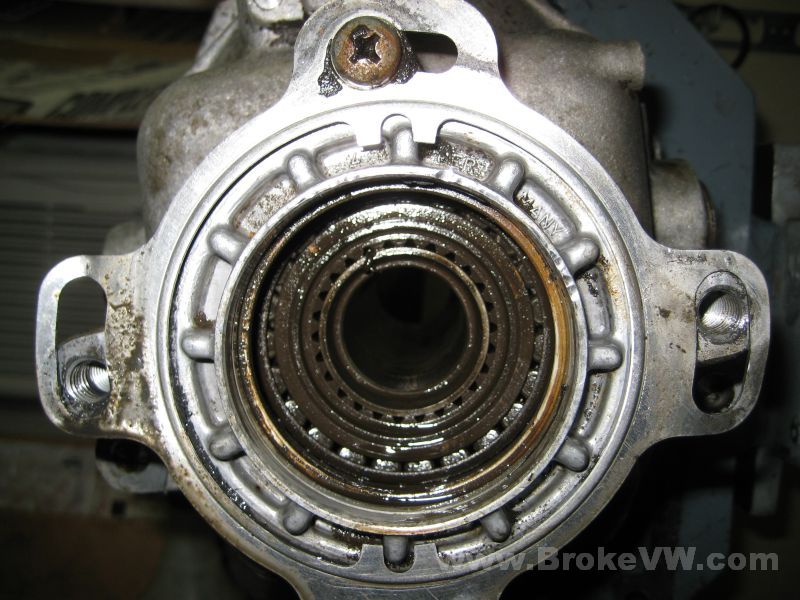
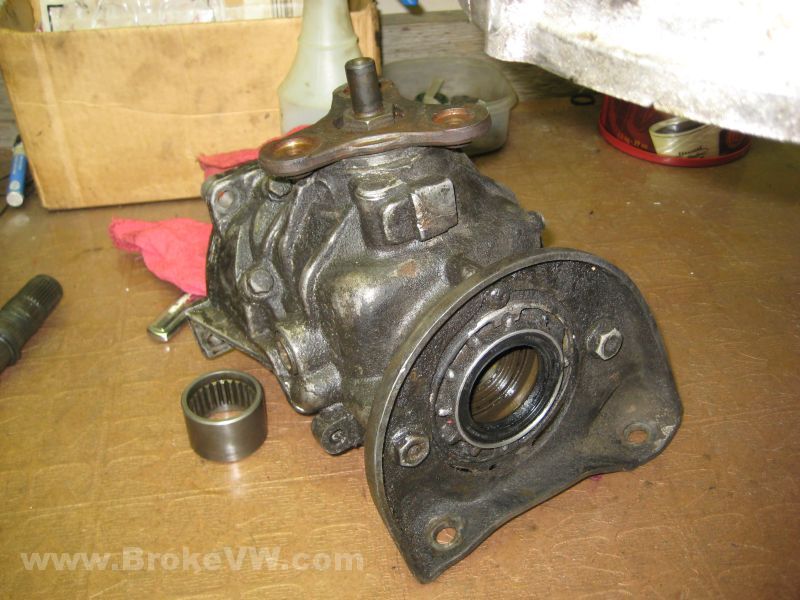
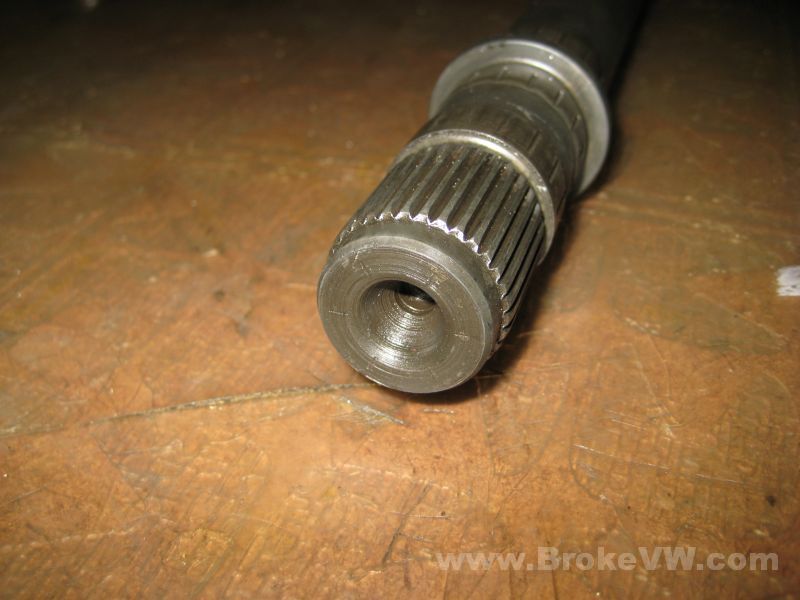
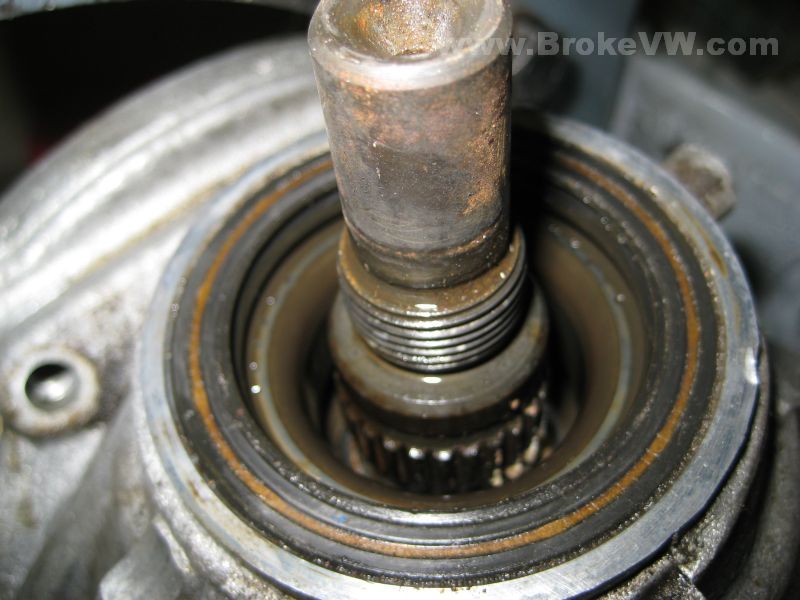
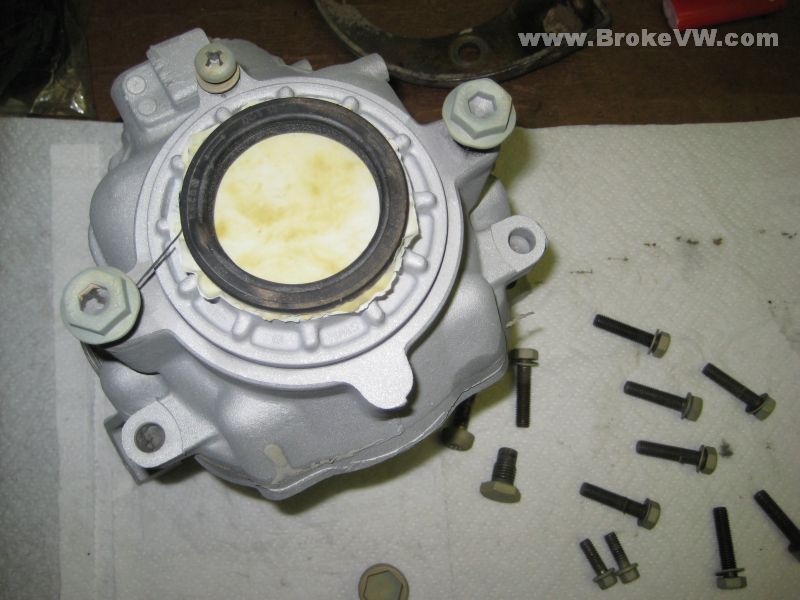
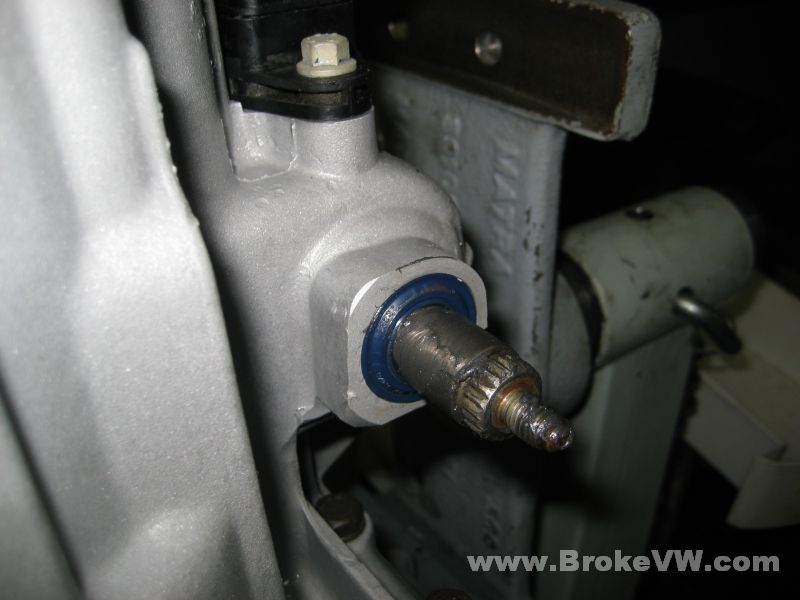
Removing the big nut to allow the rear prop shaft flange to be removed, it lifted right off the splines once the nut was removed...

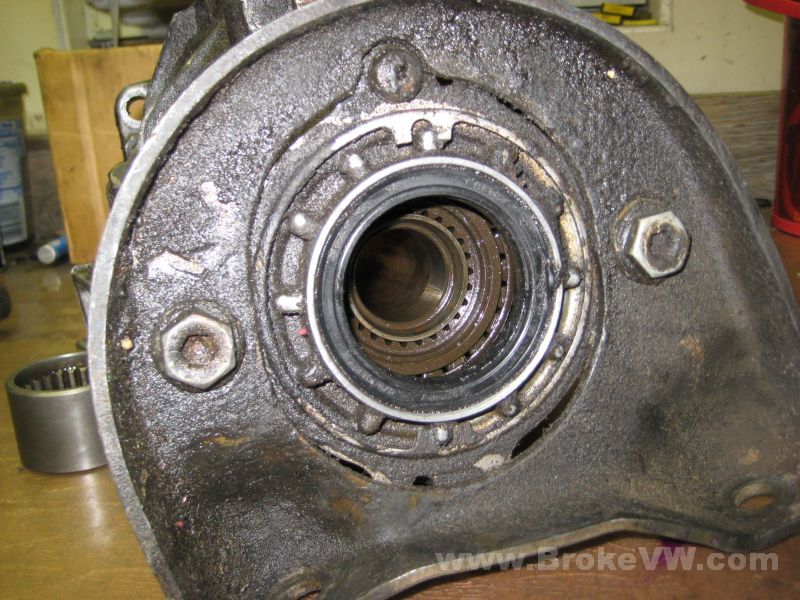
This seal isn't a standard 020 seal, and what's more, it doesn't appear to have any markings on it, giving the size, but I'll have a closer look later...
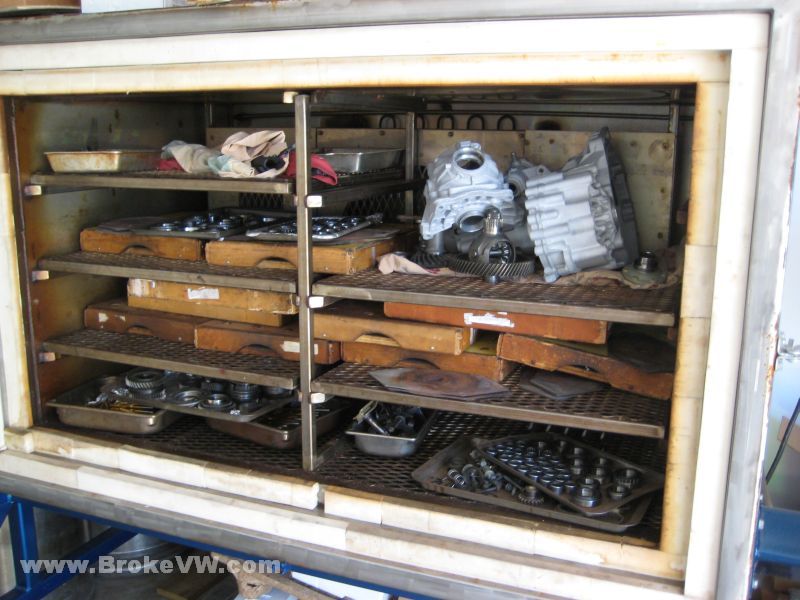
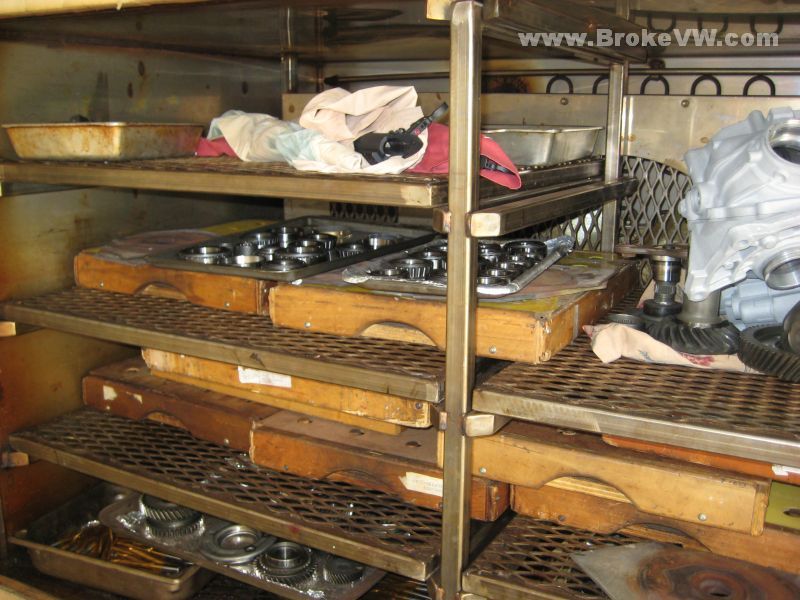
I'm done messing with it for a little while, I just wanted to open the transfer case and see inside of it... I actually have a MK3 2.0L trans on the bench, but I scooted some of the parts to the side to allow me to open the transfer case.
Update 08/08/08 (oooh, freaky!)
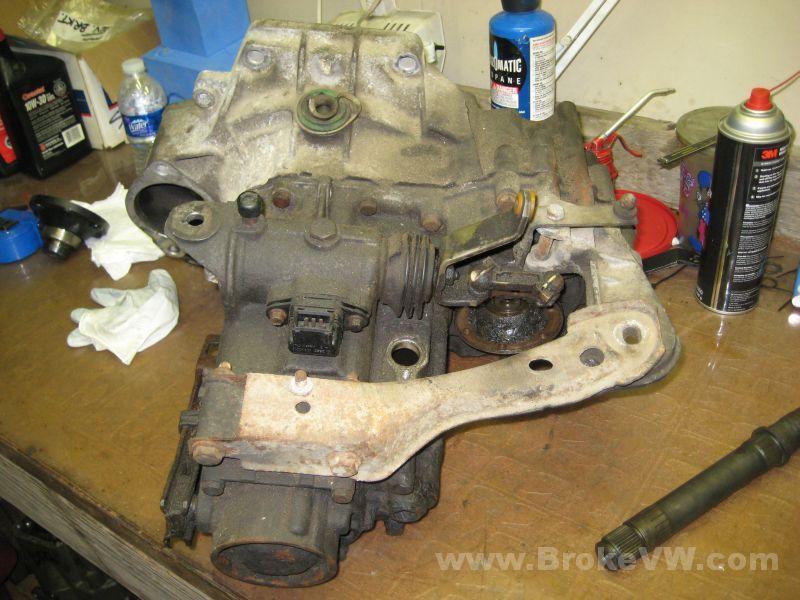
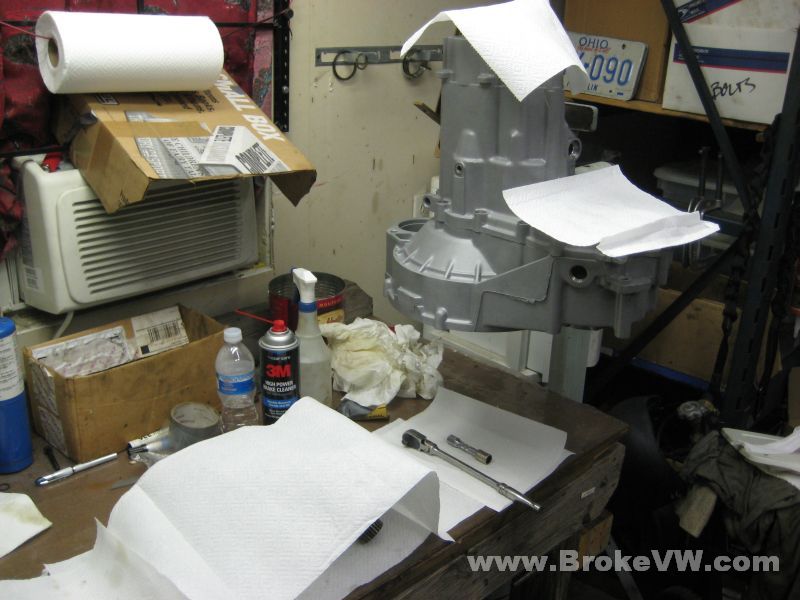
I've put your trans up on the bench, and have started taking it apart, everything is crazy tight on it. I have the 5th housing off, the shift linkage and trans mount arm off, the selector out, and have pulled the 5th gears off....

The inside of the 5th housing shows some substantial gunk inside, more than the usual film coating of grime, this has more chunks in it...
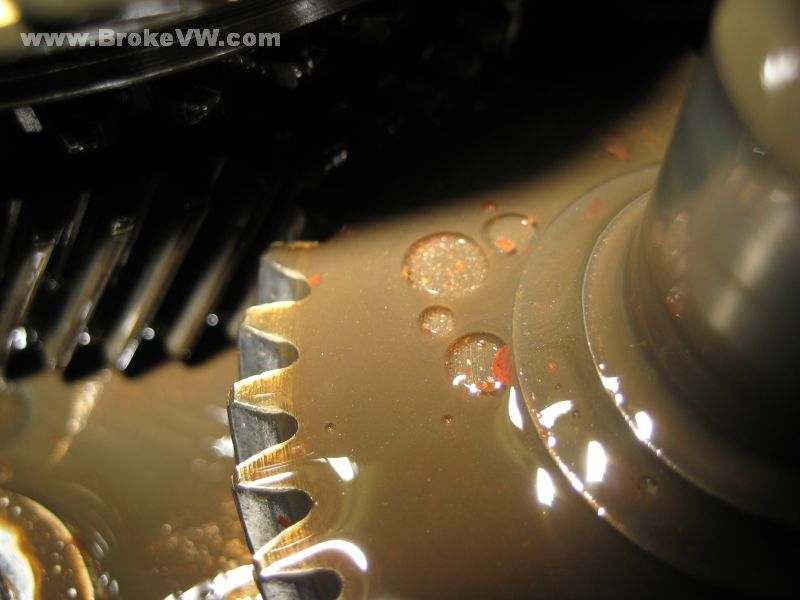
5th gears exposed, nothing stripped out there, but I noticed something strange with the oil, it looks like there is water mixed into it, or something, as there are strange bubbles in it...
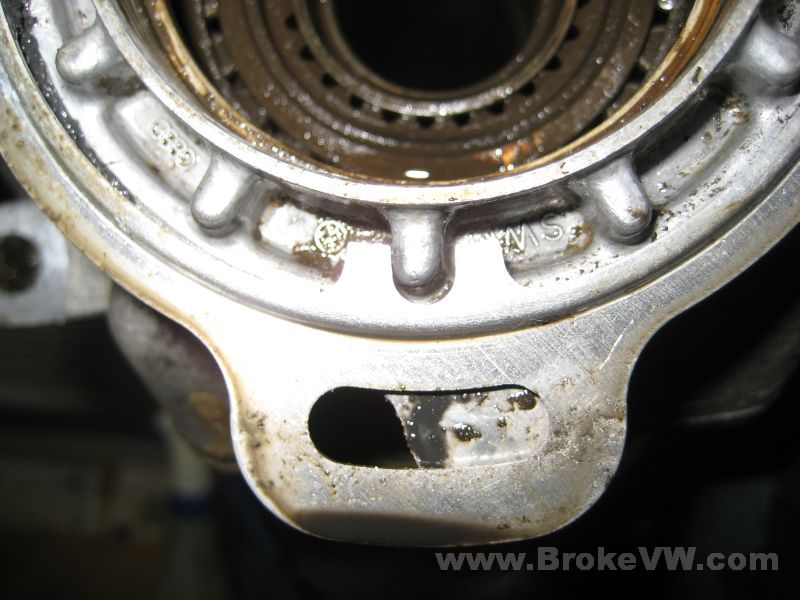
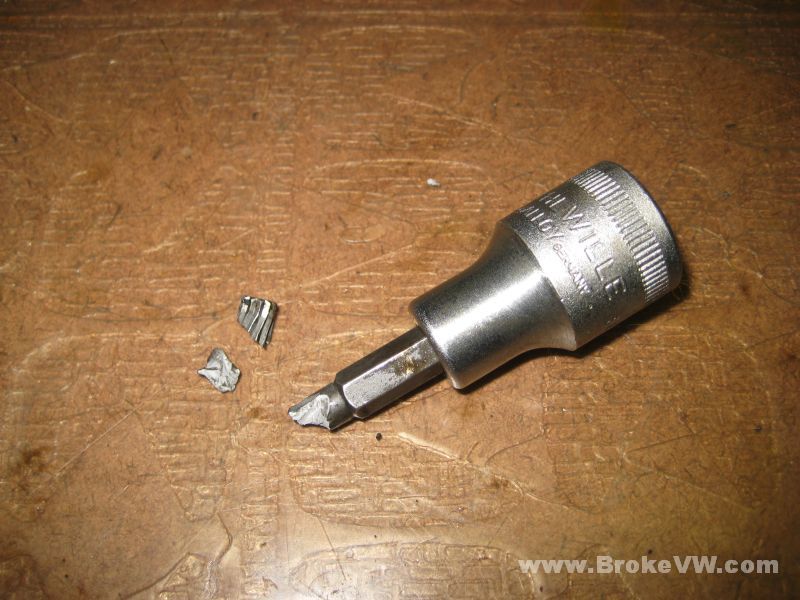
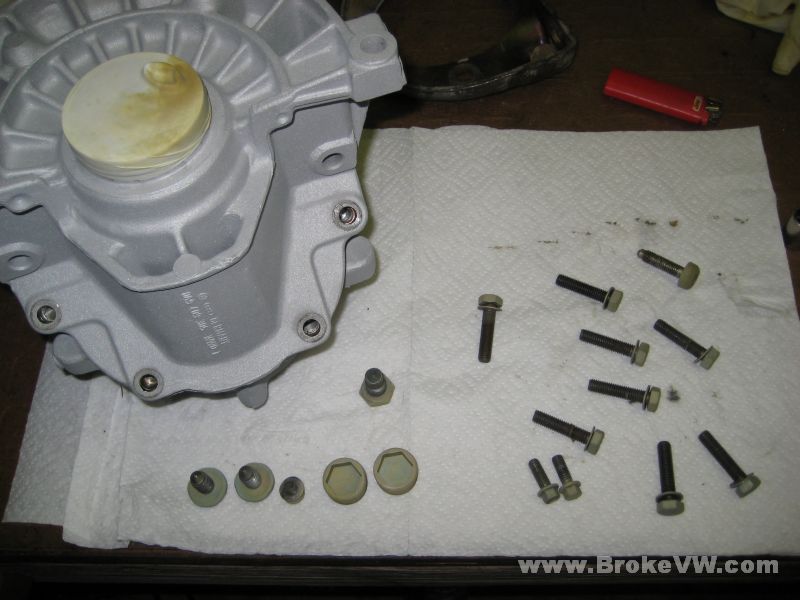
These little guys seem to always strip on everyone. I've never stripped one yet, but I use a kick ass Stahlwille tool from Germany. I've used the same tool for every 020 I've worked on, and it has never failed to get a good bite, as it is made properly. YOUR trans, because everything is silly tight, has presented the hardest challenge yet for the tool.
The key is cleaning the bolt heads out fully of any oil, so the tool can seat fully, and get a good bite. The entire point of the XZN screws, which everyone seems to hate because they strip so easily... is for maximum strength between the tool and the bolt! The splines equal up to a much greater tool-to-bolt surface contact area, thus it gets a better bite. They've used them in the aviation industry for ages, and cars are now starting to use them more and more.... anyway, clean the heads up real well...
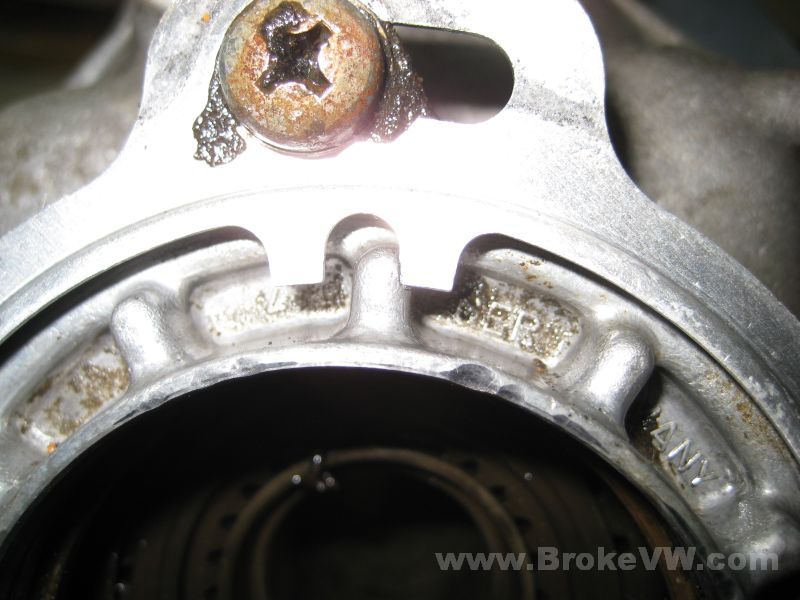
This one.... this is the one. The other 3 came out with a mighty crack-k-k-k-k! which never usually occurs. This one... did not.
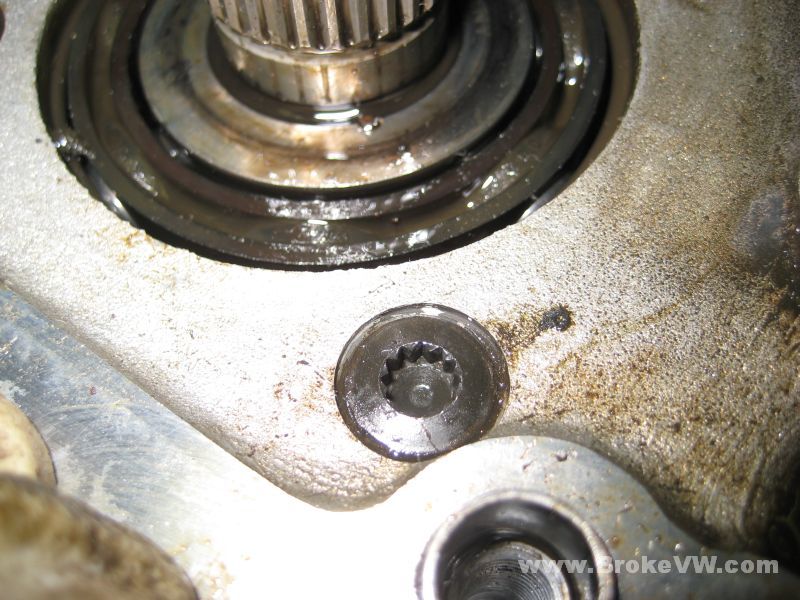
The above pic of the bolt head is AFTER the tool shattered. Notice the 100% non-damaged bolt head. Perfect german tool fitting a perfect german bolt, with no slipping. So much grip, the shank of the tool twisted and shattered before the splines stripped. Splines are what sends 100% of the engine power to the wheels via the input shaft, so they're very strong. The end of the tool began twisting, the splines were curved and then it failed. It has just reached the end of it's useful life, it has removed a LOT of those bolts, so it is about time to replace it!
That's it. Your trans broke my tool, I can't carry on now :) I've got to order another new Stahlwille driver, and get that other bolt out (I hope it doesn't strip, but it is EXTREMELY tight in there), and get the trans split. I'll update with more pics as I continue.
Update 8/19/08
My new Stahlwille tool finally arrived, I forgot how sharp the splines are on the new tools, it fit very snugly, tapped in and was an absolutely perfect fit. It removed the bolt. The bolt was stupid tight. It tore up the brand new tool. I've called Stahlwille, they'll cover it again, but said I would need to find an impact version, they won't be able to keep covering these tools. I explained that this trans was out of the ordinary and they usually don't cause that many problems.
The tool I had in my possession for all of 4 minutes before I twisted the splines on it. Notice the bolt has been removed though!

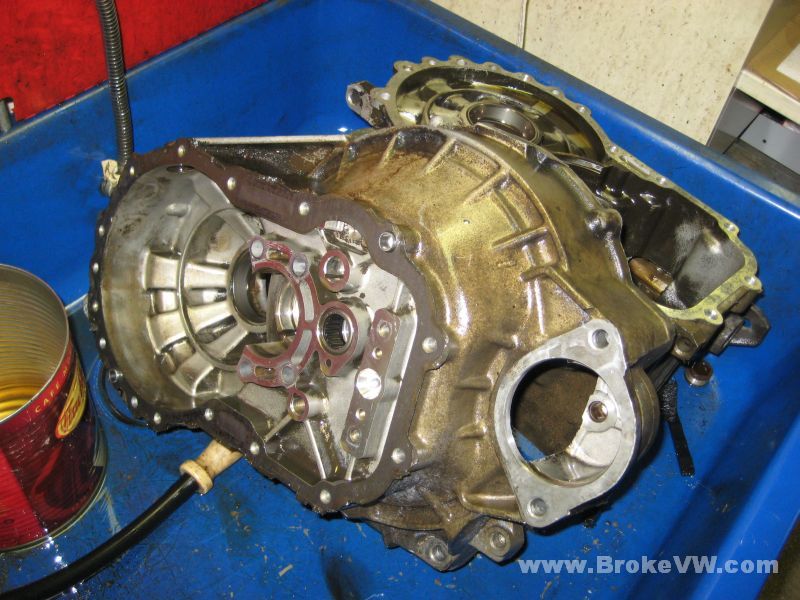
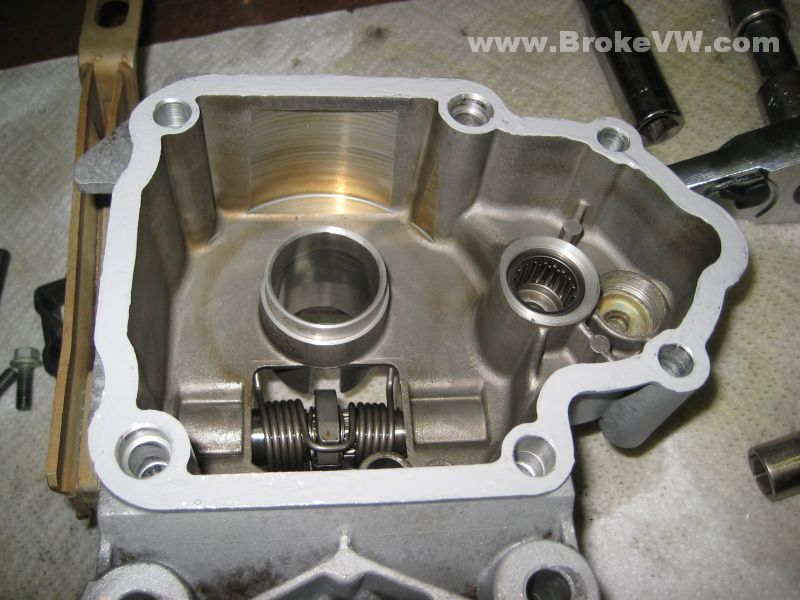
Back where I was last week, the case ready to be split, I finally was able to crack it in half...

I was afraid there would be a lot of rust inside the box from the water that has been inside it, but the rust seems to be located just on the bearing clamping plate. I've not fully stripped and cleaned the parts yet, but the only signs I've seen thus far are on the clamping plate...

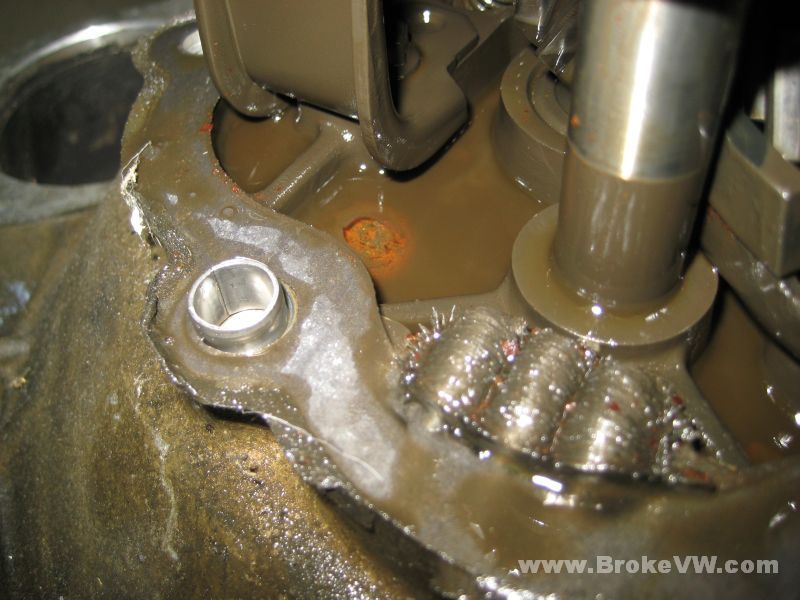
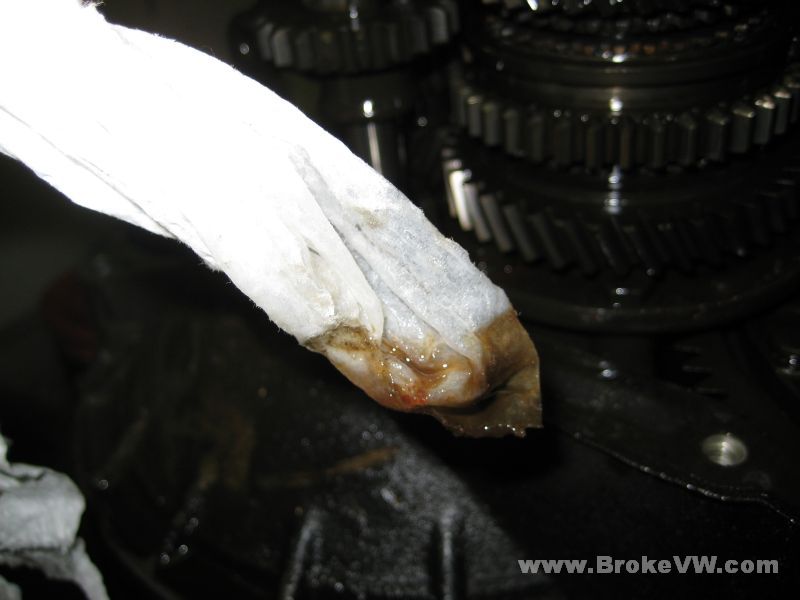
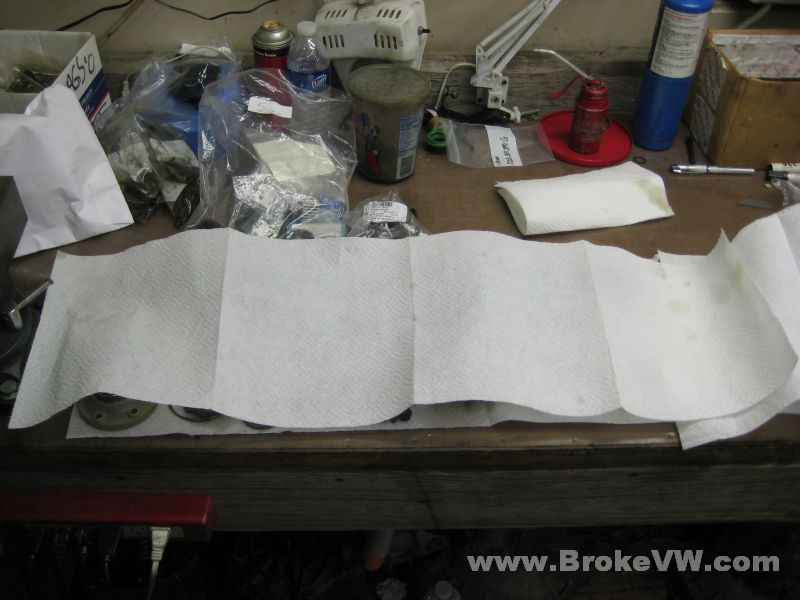
Here is an attempt to show how much water was in the trans. I had spilled quite a bit out onto my bench, when I tipped the box over one day and didn't have the flange hole plugged up. At first I thought I had spilled a bottle of water, but then figured out it was coming out of your trans.
This pic shows what looks to be a drop of water in a pool of oil, but it is actually mostly water there...
You can see how the towel is wet, but still white, as it wicks the water up leaving the heavier oil....
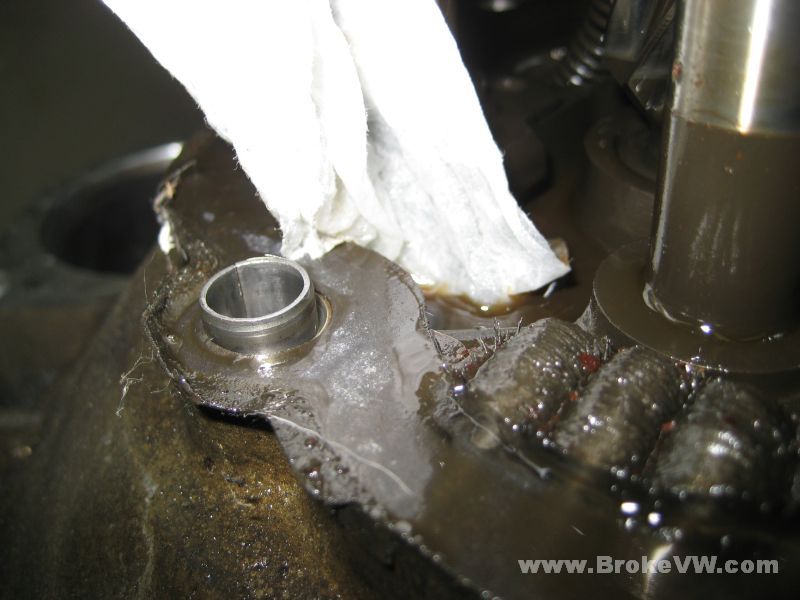
It started wicking the oil up near the end...
At any rate, the rust doesn't seem to bad at all, the plate I have plenty of, so no real problems there.
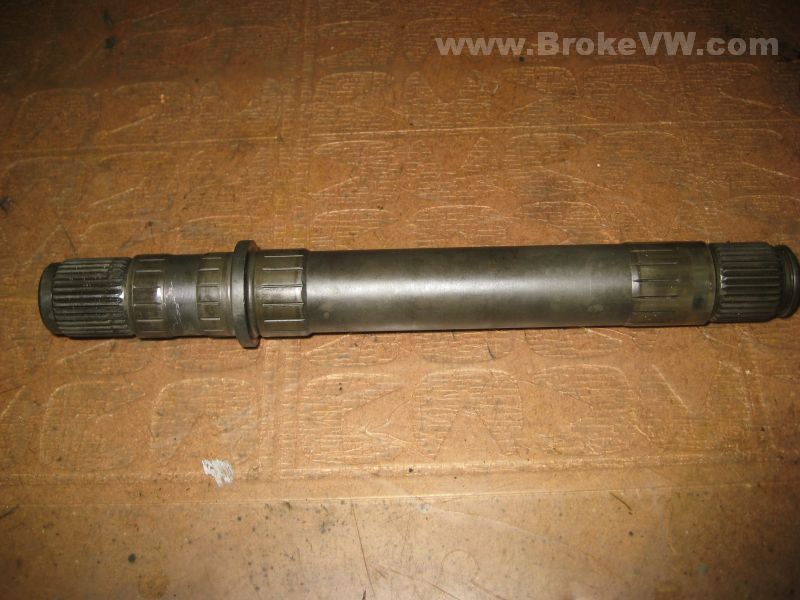
The input shaft lifted out with the shift forks removed...
These are large, high-res pics of the bearing races. I leave them huge so you can really get in close and see the damage on the races.
Your diff carrier bearing wear isn't bad, about normal really...
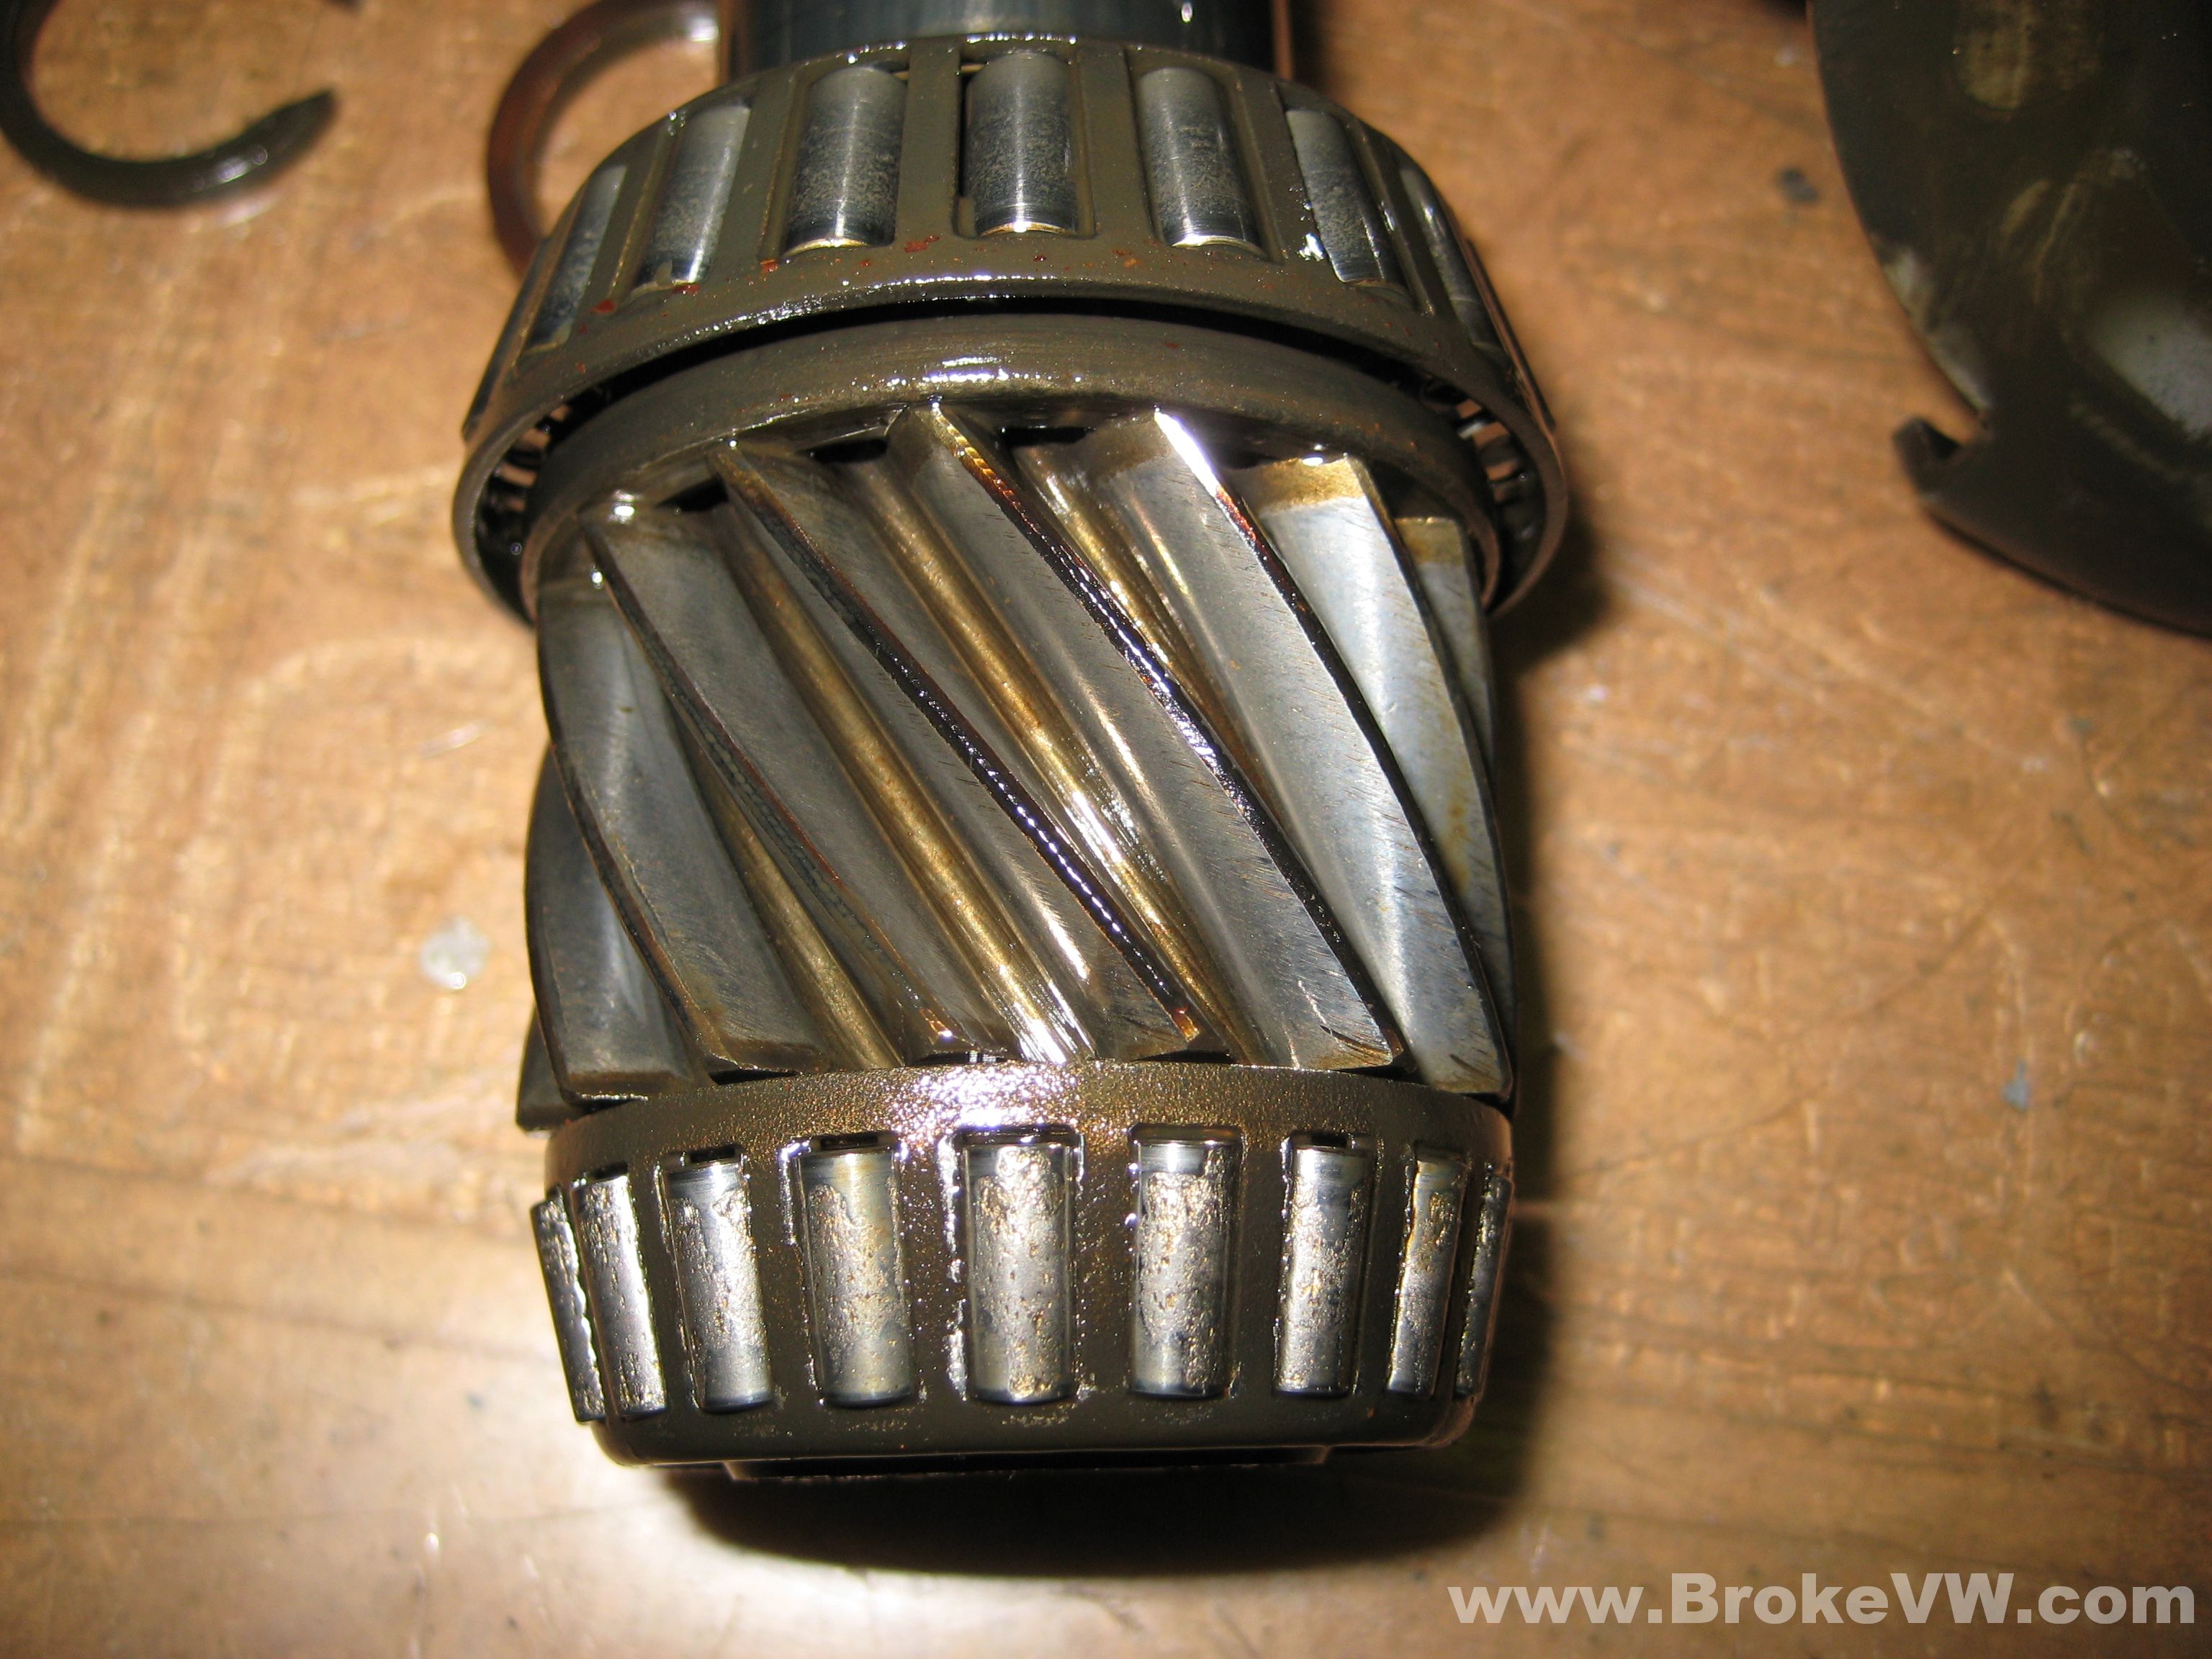
The large taper bearing race for the output shaft is a little worse off than the diff bearings...

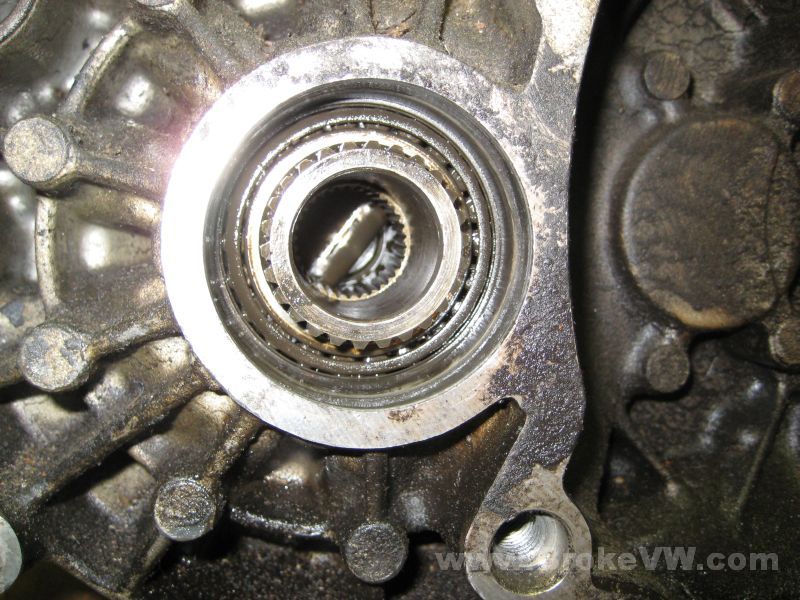
Your small output shaft bearing was close to complete failure, when it let go, the rollers would have escaped and got between the R&P set, killing it. You've lucked out and these are all still contained, but are badly flaking and pitting from wear. The bearing is very small, and under load anytime the car is in gear without throttle applied... anytime engine overrun is occurring, or engine braking. I was very happy to see that the trans was saved in time!

A "before" shot of the inside of the dirty casing...
Close up pics of the diff, more for myself than anything else...

The rivets all look good, they've secured the cross shaft in the diff with both large rivets, and with the snap rings on the ends. Some trans had only the large rivets, and the shaft was free to slide and beat on those rivet heads until they fail. The other cause of rivet failure is simply stress, and the head of them (large and small head rivets both) will fracture off, and get spun around.

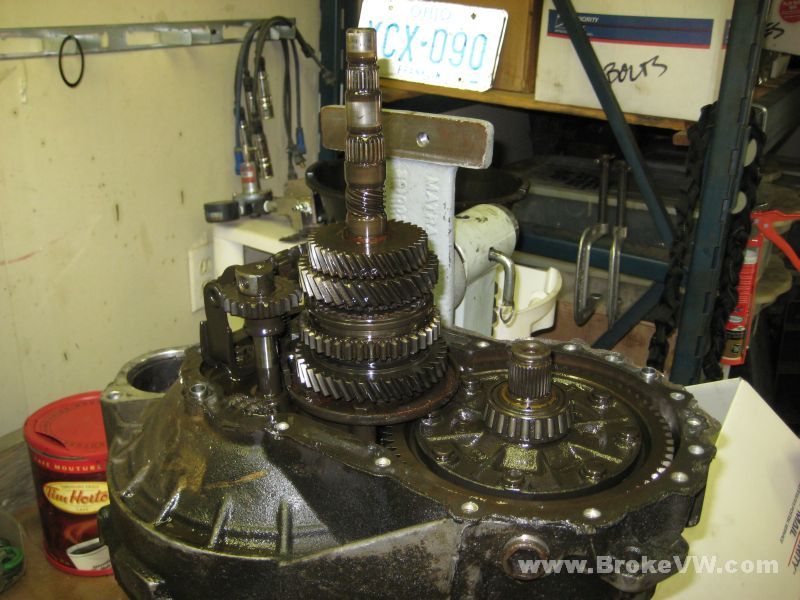
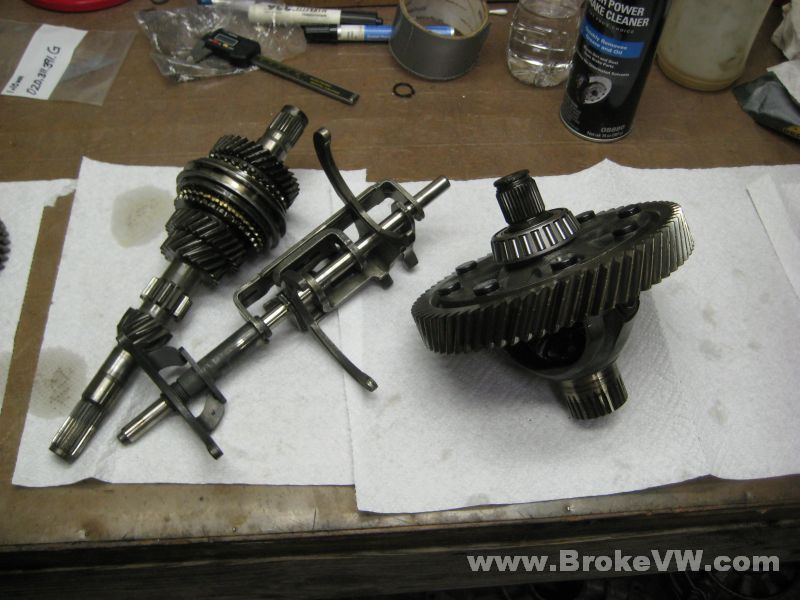
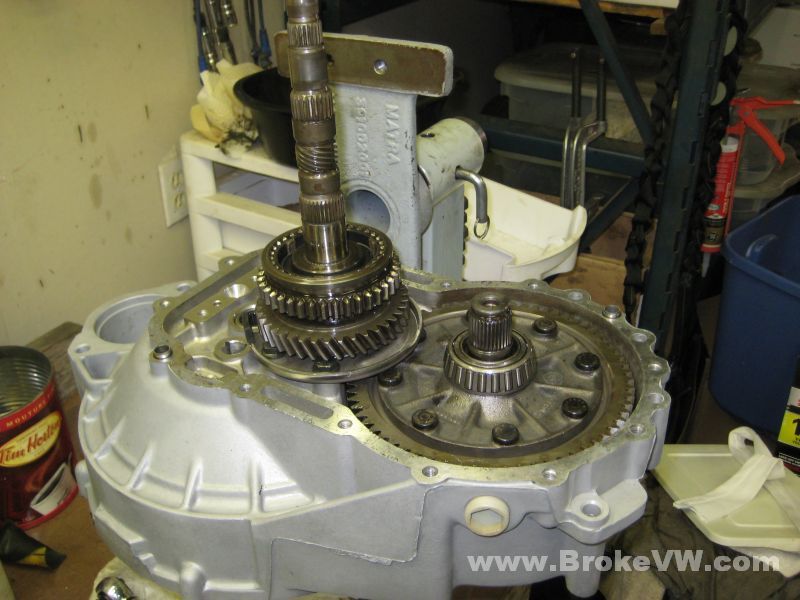
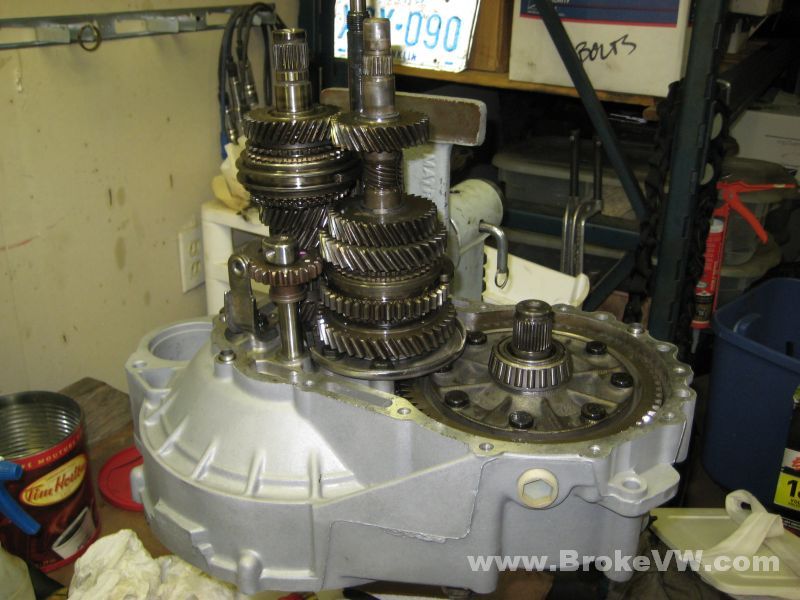
Your box, split apart and the shafts lifted out. I've not split anything up, I wanted to get it all out and have a look, next I'll go through and split the parts up and get everything cleaned so it can be inspected...
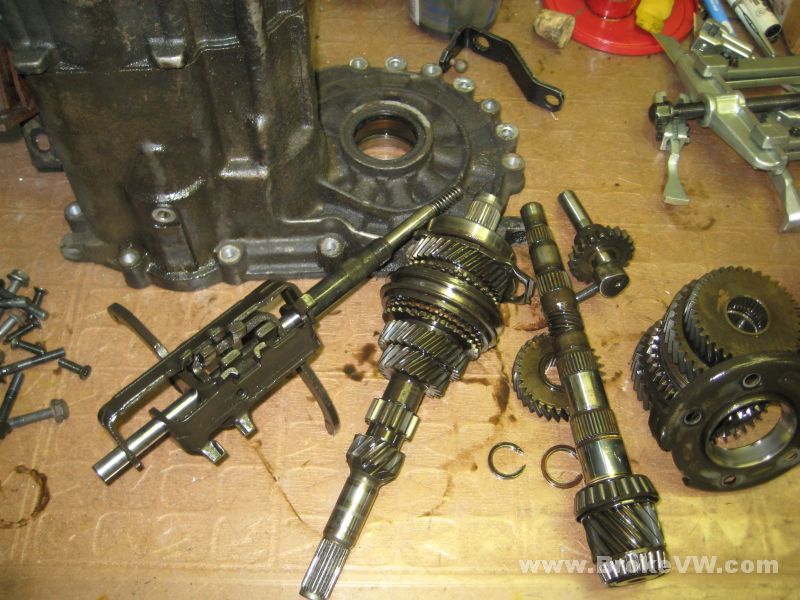
This pic was supposed to be a shot showing how nice the reverse gear teeth are, but it caught the teeth for 2nd, which show some strange wear patterns or just the way the oil has stuck to the teeth, but I'll find out more when I take everything apart and clean it.
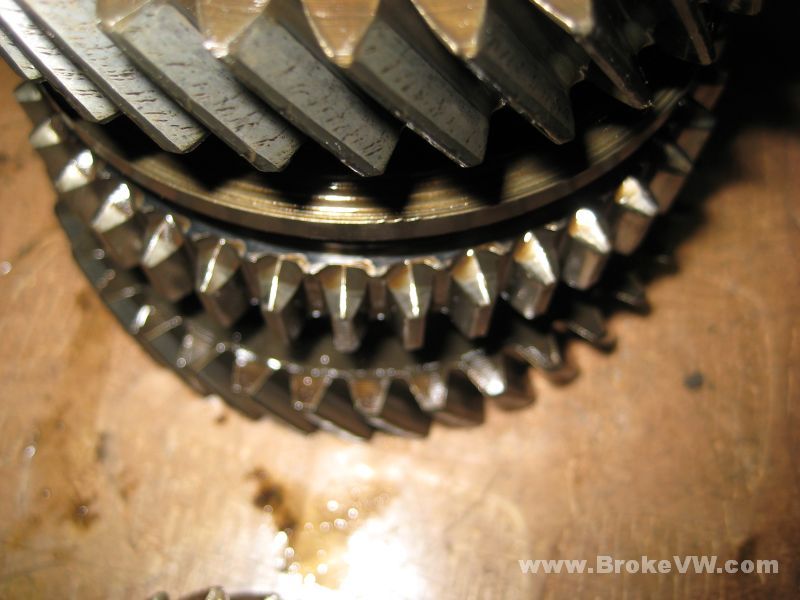
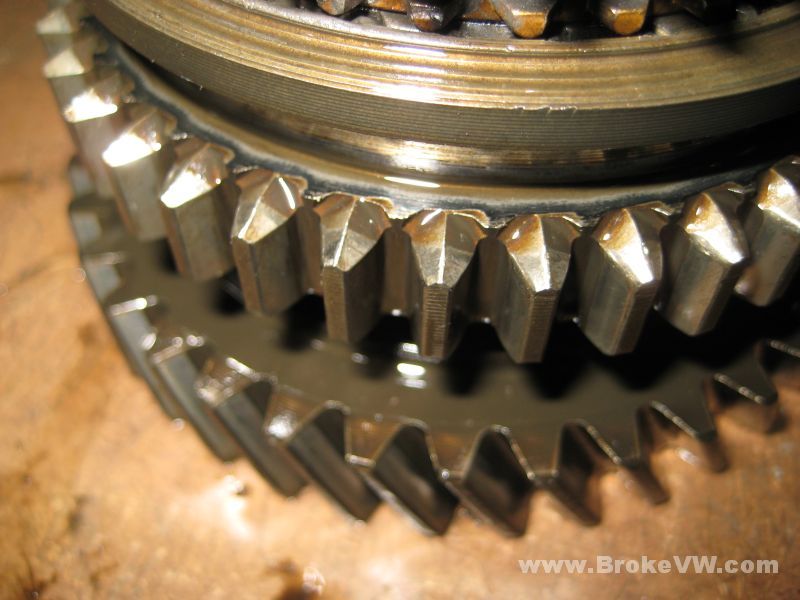
Here is the pic of the reverse teeth, they look to be in just great shape! Someone took care of the trans, didn't shift it while moving, and made sure the clutch was always operational, good job to them!
OK, that's it for right now, I'll post more pics as I carry on.
Update 8/26/08
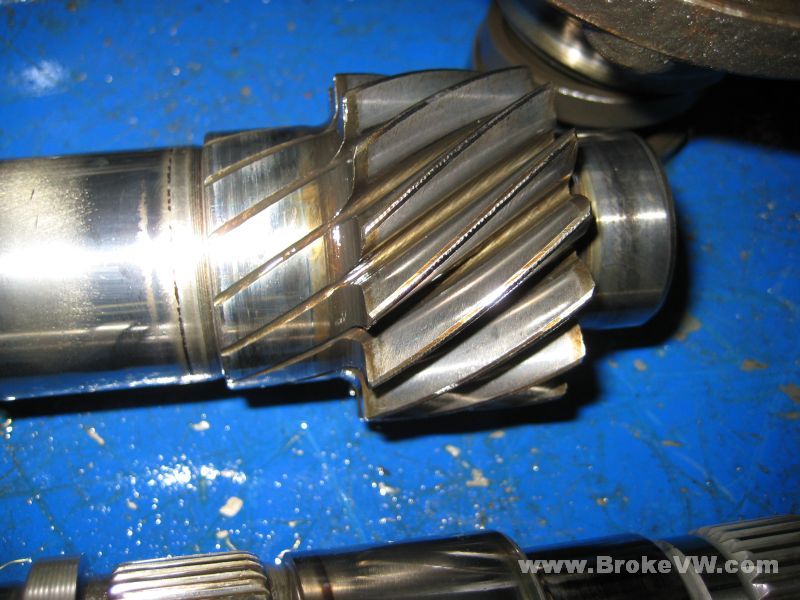
Just some pics as I go about cleaning parts. The small tooth count of your pinion gear resulted in the machining work extending into the bearing area, which isn't very common. I have seen it only on very low ratio R&P sets. Your 4.467 R&P ratio is pretty darn low.
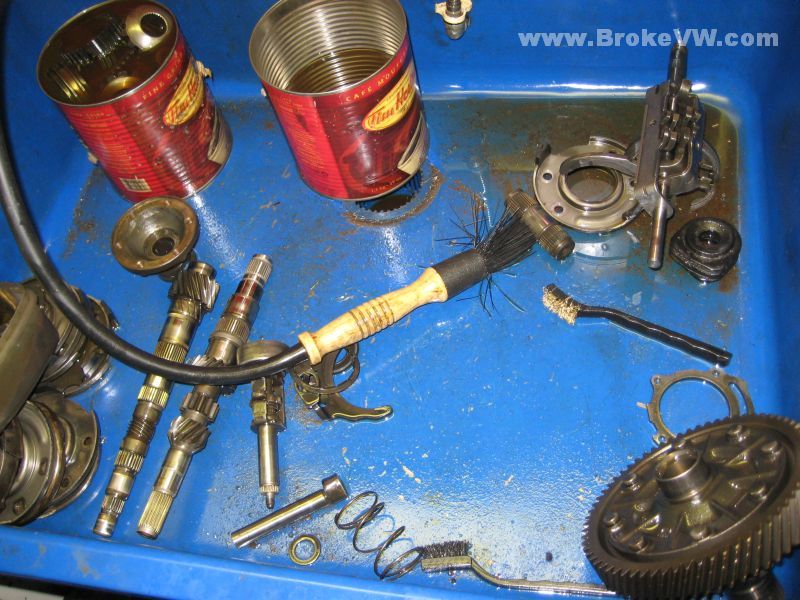
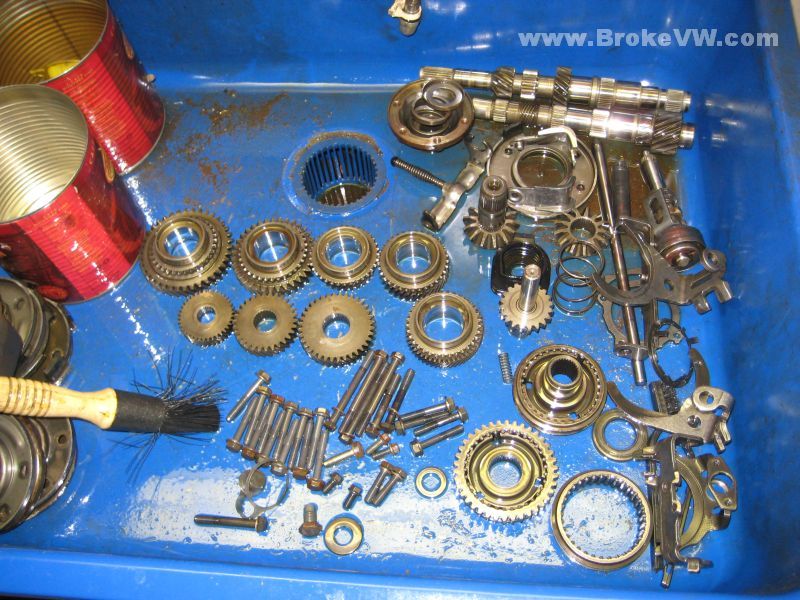
A pic of the parts being put into the washer, the gears and small parts soak in the cans for a bit before I start scrubbing them.
The internal parts are scrubbed, and need rinsed then dried to be ready for the cryo treatment...
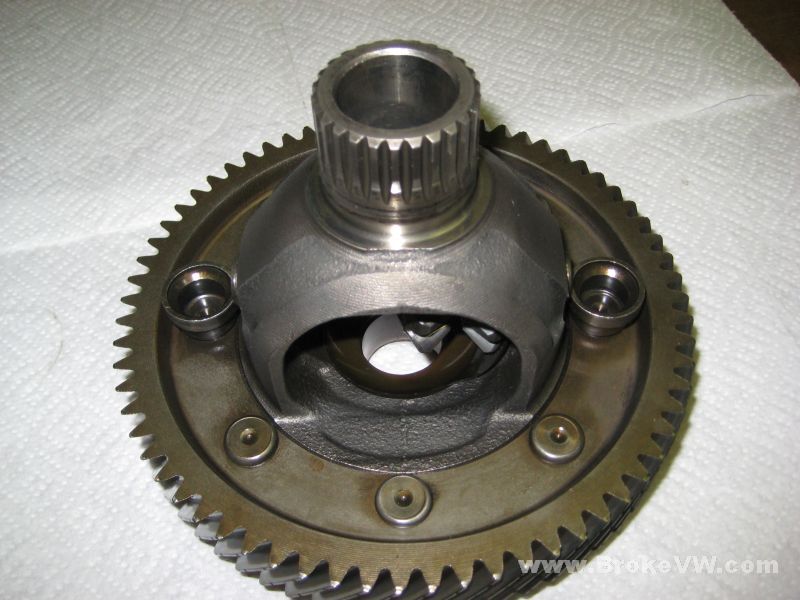
The diff, not completely cleaned, just clean enough to work with. I need to drill the rivets and install the bolt kit.

The side of the diff carrier that sets it apart from the other 020 carriers...
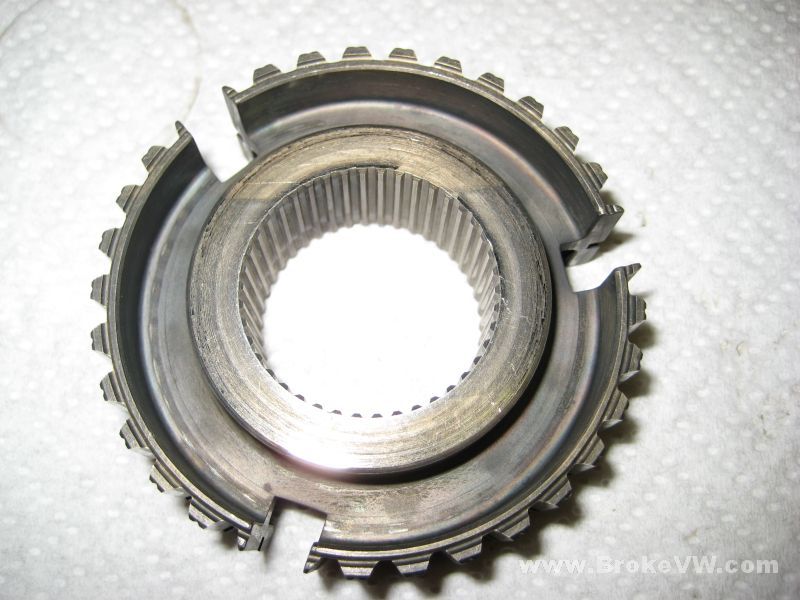
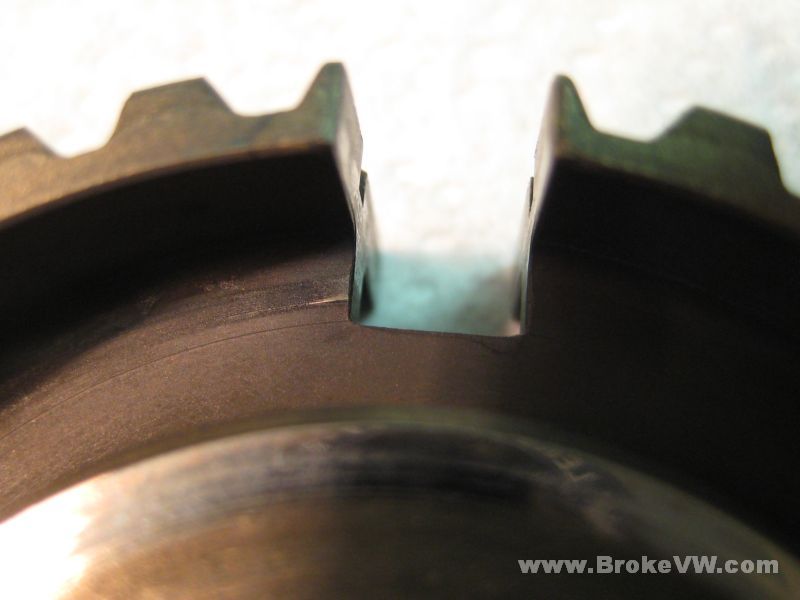
Your 3rd/4th sync hub. The old style, like yours, used square cuts for the sync keys. They were prone to cracking and failing in the corners of the cuts from stress. VW later changed this to a rounded cut which relieved stress in the corners, and prevented the cracking.
Your hub has a single hairline crack in one corner. To find them easily, without looking through a magnifier, I soak the hubs in kerosene for a bit, then clean them as usual with a brass bristle brush. To rinse the parts, I use super hot water, it washes the kerosene off the part, and heats it up. Hitting the part with a compressed air line, coupled with the internal heat of the steel, and the part is flash dried instantly with zero rust or oil on it.
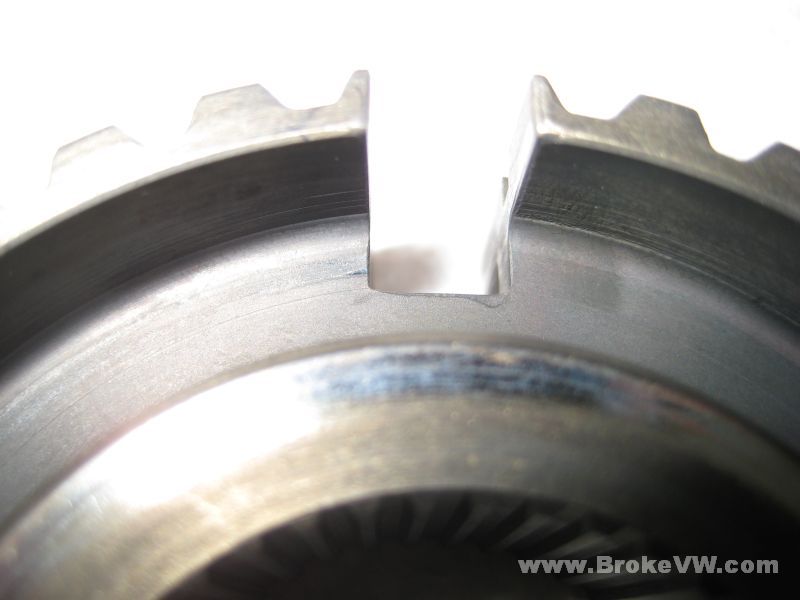
Once cleaned and dried, you only need to let it sit about 5 or 10 minutes, then have a look. The kerosene caught in the micro cracks will bleed out onto the perfectly dry steel gear, wicking itself out of the crack. You'll see a wet spot following a line starting from the corner.
On your hub, it was tricky to spot, but the oil was there, and looking closer with a 60x-100x scope I use, I could see the crack, so you need an updated hub.
The crack is on the left, heading from the bottom corner of the key slot towards the bottom left corner of the pic.
The crack would be on top in this pic, just a faint dark line...

In this pic you can see it pretty good on the left again, just a short dark line there. That is the crack which can grow until the hub fails.
I don't have pics yet, but I found the rust. Where I looked originally, I didn't see any, and where I thought I found it, there was none. I originally thought the 5th gear parts, but they looked oily and OK. I opened the trans, found the rust colored gunk on the steel bearing plate, thought it sat and the oil ran off and it rusted, but when I cleaned the plate, it is completely rust free. I knew I'd eventually find the rusted part somewhere, and when I cleaned the 5th sync hub, I found the rust.
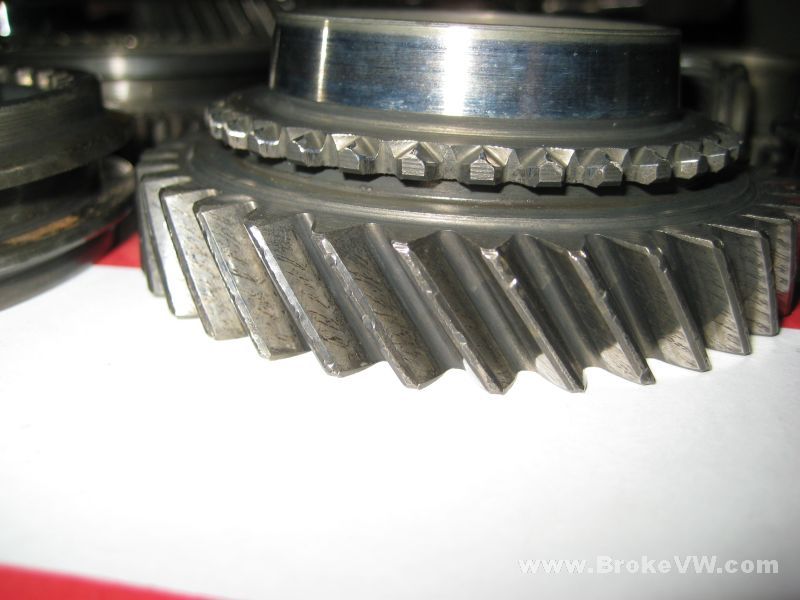
Also, that possible wear on 2nd gear shown earlier in this pic is actually wear, and not just oil. It doesn't come off, the gear has worn that way, which I don't see very much, so I am going to ask around about it, and see what would cause it, and what it is exactly. Thankfully that is a standard 020 2nd ratio, a 1.944, and I have gears that we can use, BUT, 2nd is also a part of the input shaft, so to do it by the book, both gears gets replaced as a set, which means the 2nd gear and the input would be replaced. The input doesn't show the same wear at all, which is also strange to me.
I'll get pics of the 2nd gear and the rusted 5th hub uploaded later this evening.
Update 8/28/08
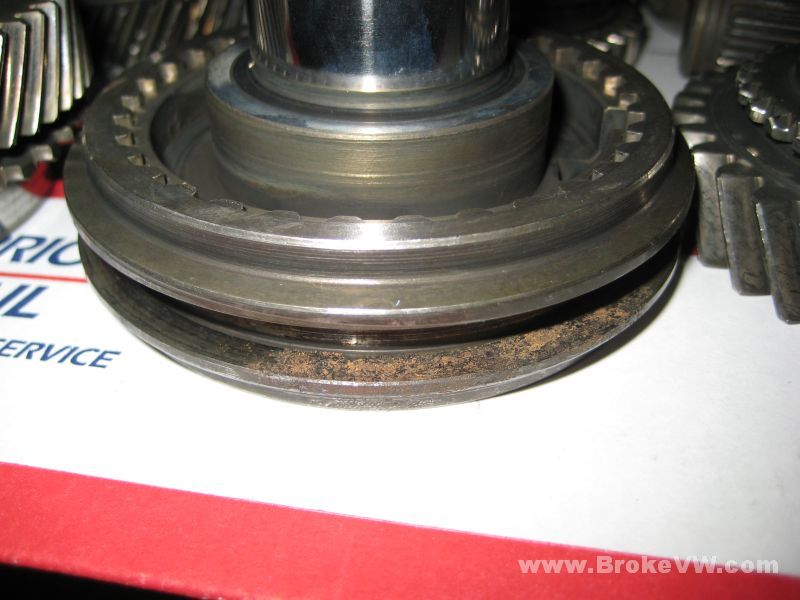
A pic of the rust on the 5th sync sleeve... I would probably replace it, because it isn't a special syncro part, and I have good used ones available if needed ...
The 2nd gear with the odd wear on the teeth. I would probably
replace it if it were mine. It would require another 2nd gear, and another 8V
input shaft, which also means another 1st gear, because 1st and 2nd are machined
as part of the input shaft, so you can look at the input + 1st + 2nd as all one
unit, if you go by the book and keep worn gears together, and don't mix used
gears.
I might also add, this would also give you the chance of changing 2nd ratio.
Right now you have a 1.944 ratio, which is the taller one (because of the wicked
low R&P ratio the ARM uses), but you could swap in a GTI close ratio 2nd gear
set, which is a 2.118 ratio. 1st gear is the same in all of them, a 3.455, so
nothing would change there. Use this
calculator to punch in the ratios and see if it is something you'd want to
change or not.
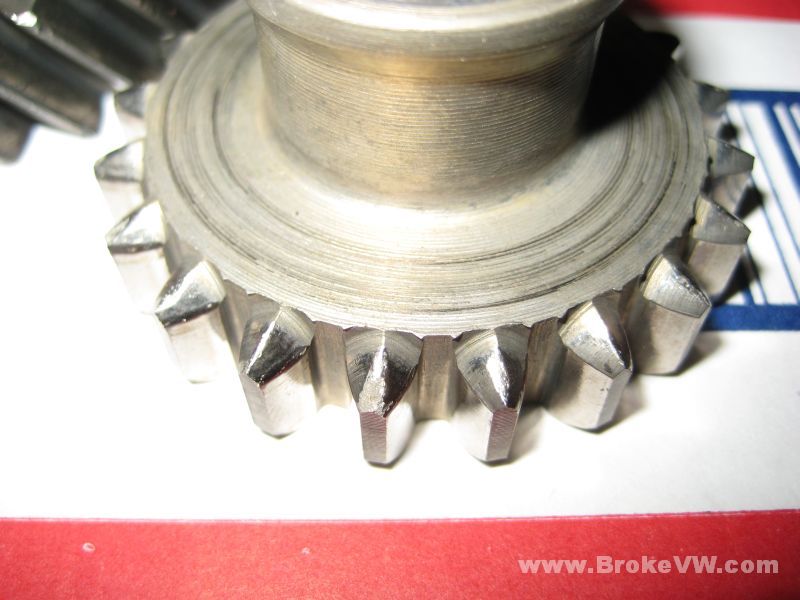
Reverse gear does have a few little chips in it, nothing major, they come in much worse than this. It would work just fine, considering reverse is only selected when stopped and has limited use, but if it is something you want to replace, I have new reverse idlers I keep in stock, I have both Chinese made aftermarket, and I have one OE VW gear in stock, but it isn't German, it's Japanese, as VW are making trans there now. It came from the dealer, there are no German to be had.
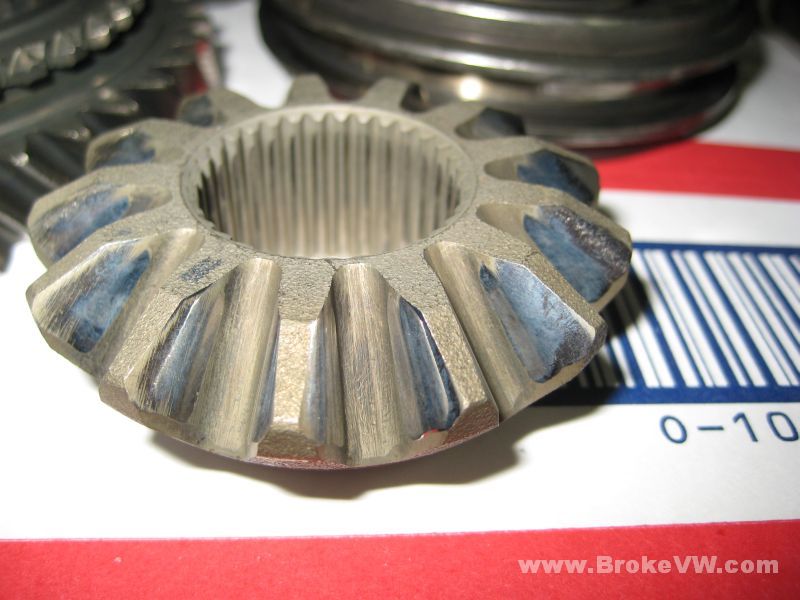
Your diff gears look good, 9 out of 10 times they have cavitation damage or are flaking and peeling but other than a few slight rough spots on the teeth, they look good...
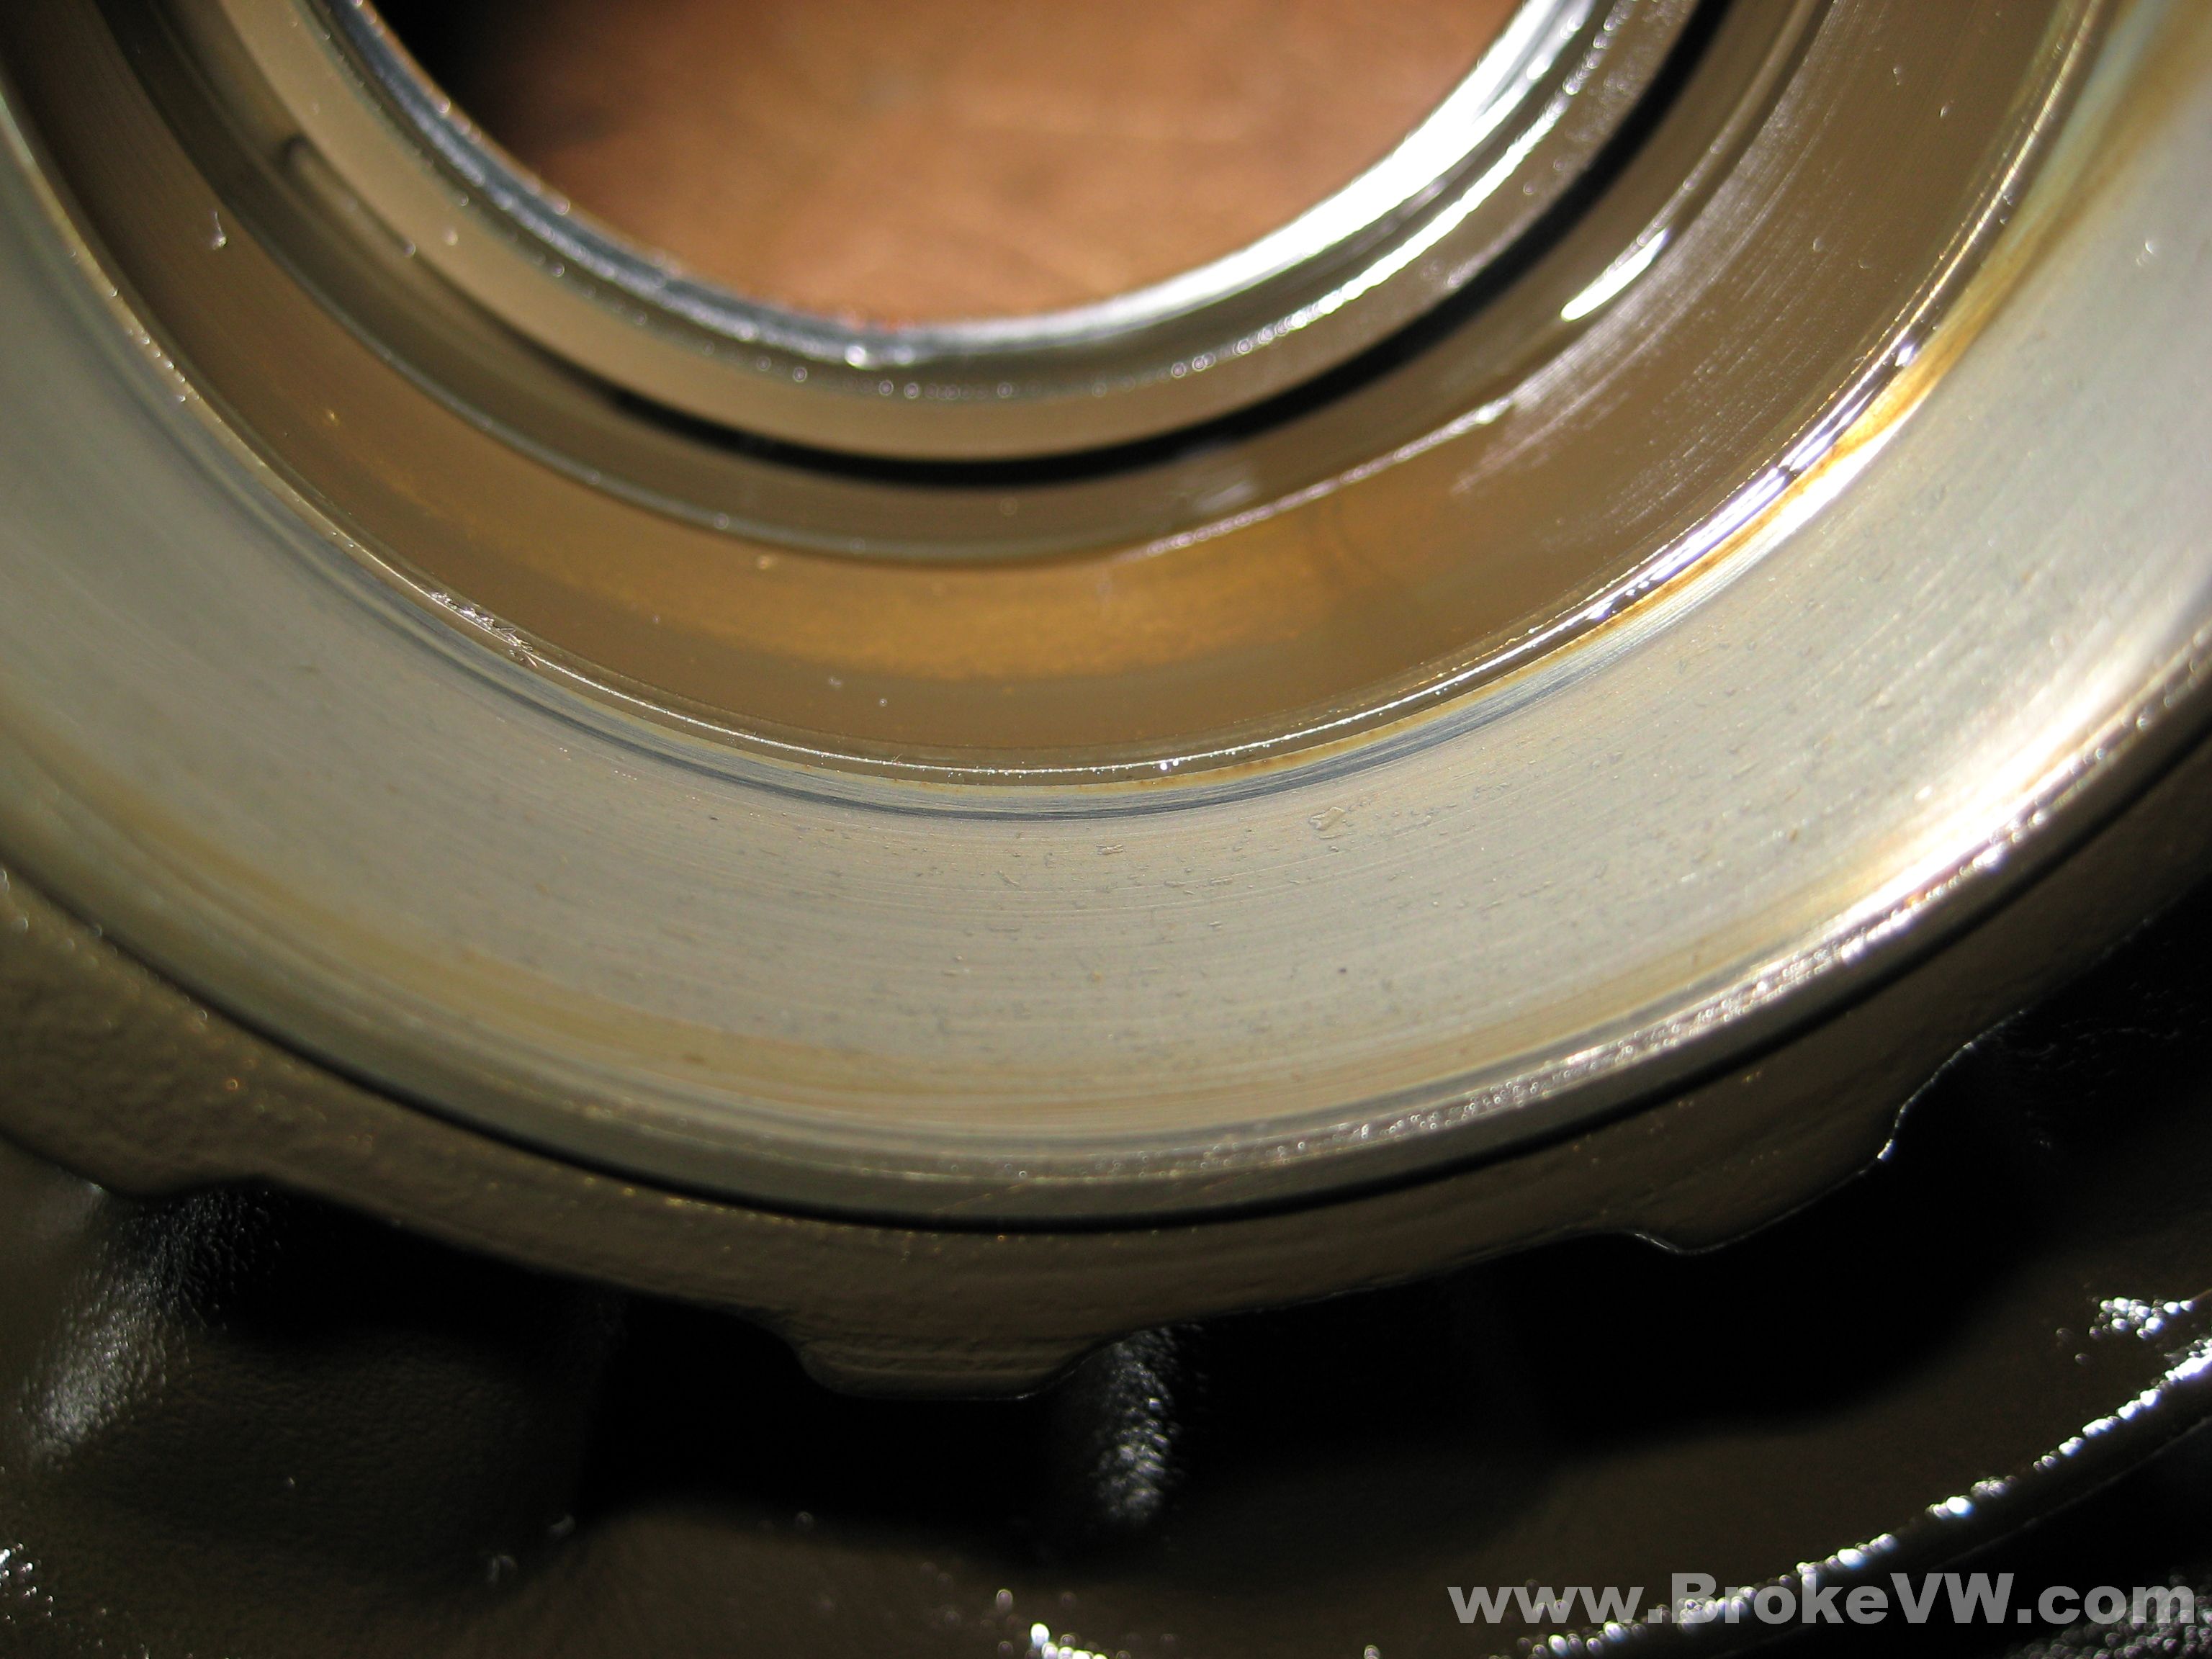
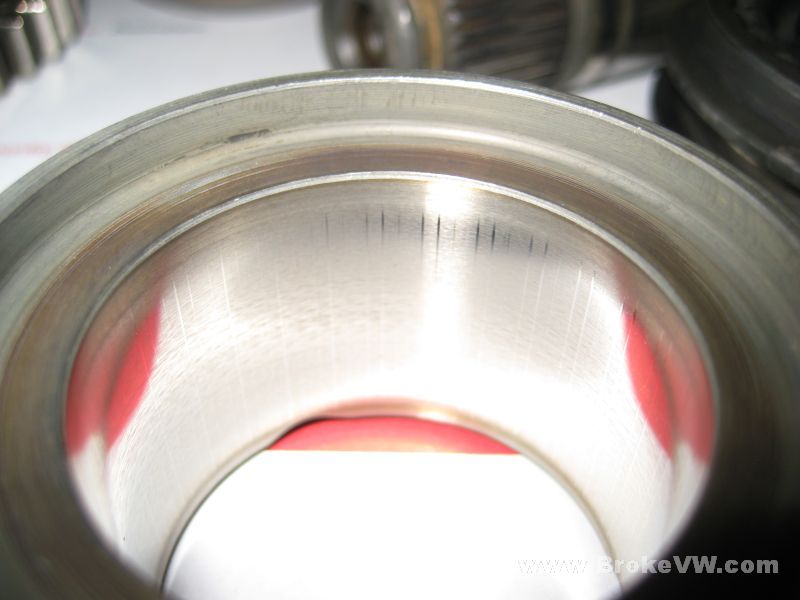
A shot of the inside of 2nd gear where the needle bearing rides.
You can see some slight indents in the race from the rollers. This isn't common,
but it is possible, and as best I can tell, it is what is known as False Brinell
damage.
It looks like Brinell damage (a hard impact from a hard object causing
deformation of the steel with a low spot at the impact site, and raised areas
around the low spot, from the material being forced up on impact), but it
doesn't have the raised area around the indents, so it would be False Brinell,
and would likely be caused while 2nd is engaged, and locked to the shaft. The
needle isn't being used, and the oil film between the needle rollers and the
gear race doesn't exist, so any vibrations or oscillations of the right
resonance will cause wear damage from the rollers contacting and rubbing the
race on a very minute level.
In other words, if there is a bit of play between the bearing and shaft and gear, and the bearing isn't in use (the rollers actually 'hydroplane' in the oil film when in motion on a molecular level, thus when not it motion, they don't ride on that film, and metal to metal contact occurs), it is possible for there to be damage like this.
I have seen worse, where you could actually feel the indents, but yours can just barely be seen. Probably more than you cared to know, but there you go :)
Your output shaft teeth look great, no pic of the ring gear, as it is still on the diff, I've not drilled the rivets yet. I'm waiting a bit to let my hand heal, the last diff I drilled made my hand numb. I might rig the drill up in the press and see if that works, but once it is cleaned and so on, I'll get pics of that as well.

Your internal parts cleaned and dried, and brought inside to keep them from rusting. Normally they are dry only about 30 secs and then they get oiled, but your parts need cryo treated, which means they have to be dry, which means they come into the house and into my PC room with me, in the climate controlled area. The garage isn't so bad things rust if they are oily, but if they aren't oily, the garage can get humid, so I've brought your parts in the house.
Parts that are cleaned, but not rinsed and dried and oiled....
Time for the case to get a bath to knock the big stuff off...
Can you guess which side I've scrubbed on? :P

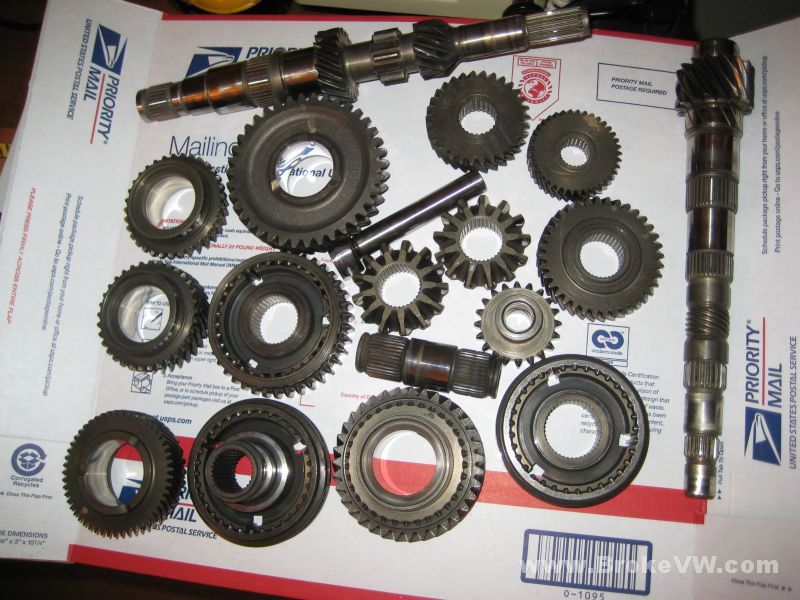
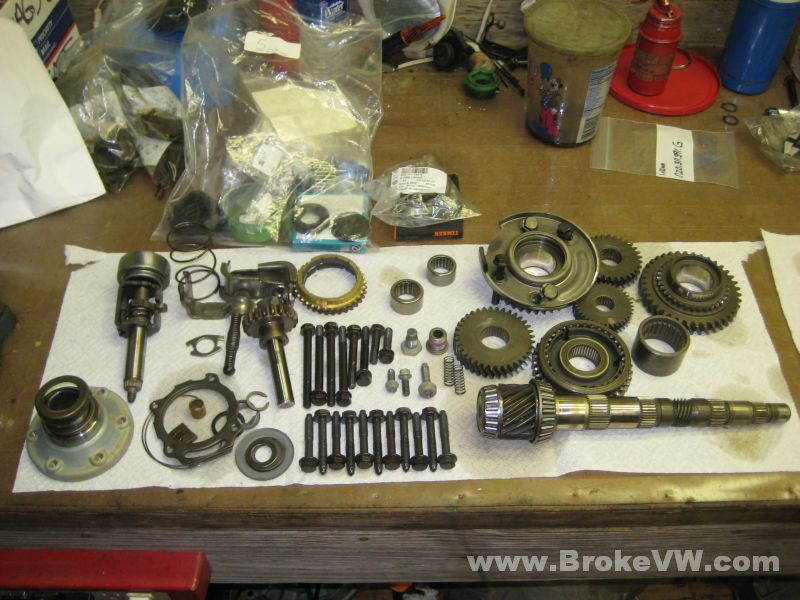
Parts removed from your trans so far. The 1st gear sync was original, the rivets were still in place, and everything was tight with clean holes under the bolts, so either it was rebuilt a long time ago, or it hasn't been rebuilt yet.
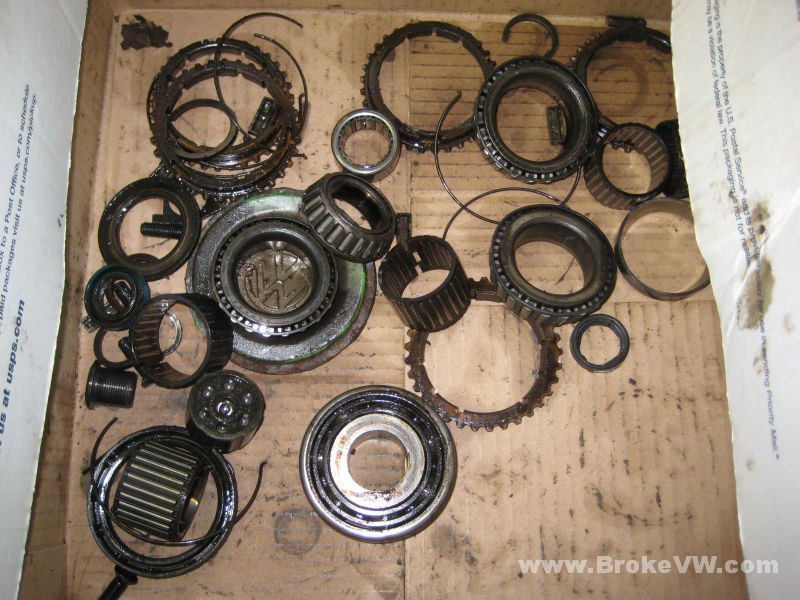
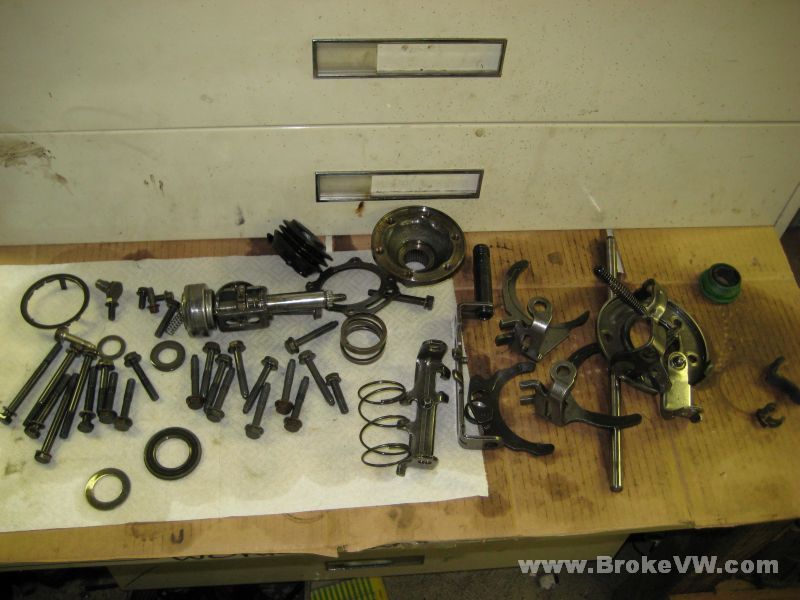
The parts from the trans that need to go back on before it heads out of here, but aren't actually part of the rebuild... stuff on the outside of the trans basically...
Angle drive waiting its turn...
I've drilled and punched the rivets out, and have knocked the ring gear from the carrier, everything can be cleaned and treated and then bolted together again...

I'll let you know when I get more pics and update the page again.
Update 9/02/08
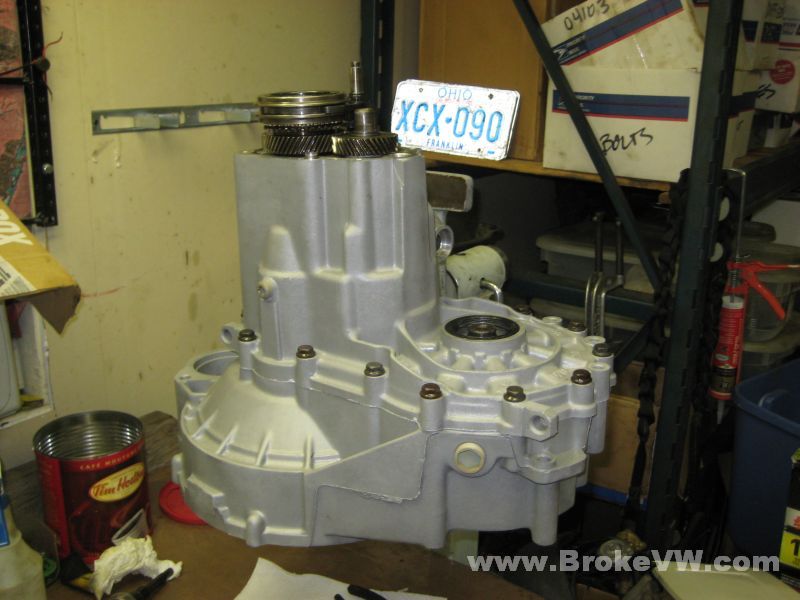
A few more pics of the case being cleaned, I have nearly all of the internal parts cleaned and dried and ready for cryo, the case is cleaned, it will be dried, then it will be assembled, sealed, and sand blasted. Once the stain is removed with sand blasting, I'll hit it with glass bead to make it have a nice finish, and then the case will be ready for cryo treatment.
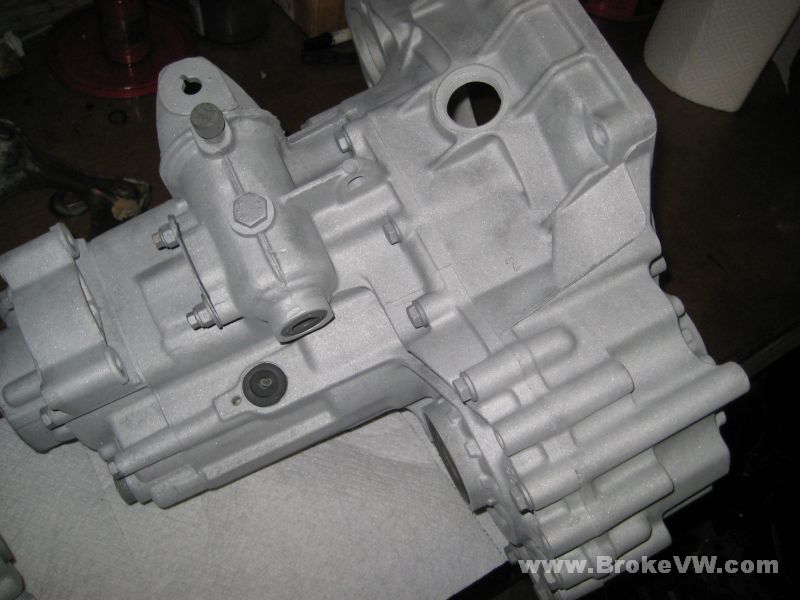
95% of what you see on the case here is staining, there is some oil/grime that is easily removed down in the little crevices, but most of that is corrosion which needs blasted off....

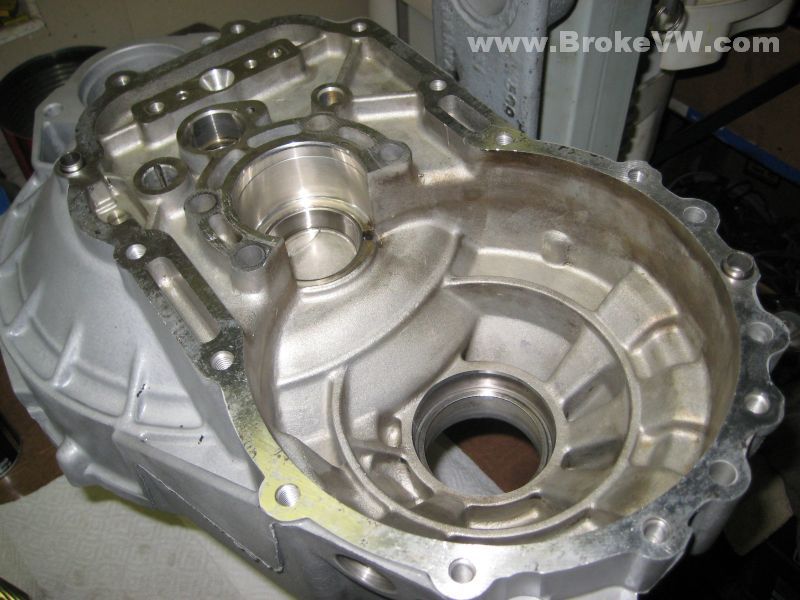
The inside of the case is pretty much cleaned out, I've cleaned it with the brush and q-tips, and it has cleaned up nicely back to fresh aluminum. I have a few spots I still need to get to with the q-tips and brake cleaner later on, but it is clean enough inside to seal it up and blast the case...

I'm hoping the blaster gets down in between the ribs of the case around the diff there where the angle drive bolts on, and cleans that area up nicely...
9/8 Update
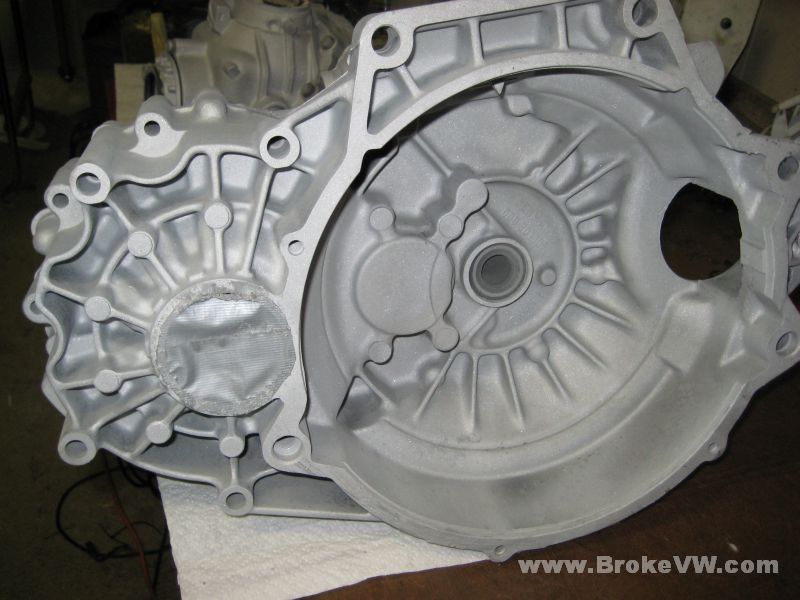
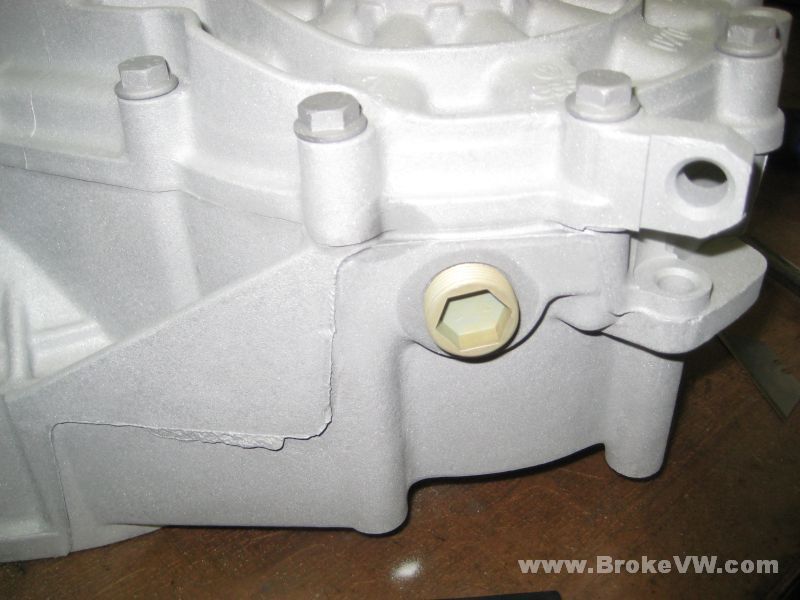
A couple pics showing the case sealed up ready to be blasted...
I usually tape these out, but I had the idea of using rubber over them, and since I have plenty of used latex gloves, I thought I would give this a try. It'll either work, or the sand will rip right through it. Usually rubber is pretty good at resisting blasting. I still need the other flange to blast and plate it...

Another shot of the parts waiting to be blasted...
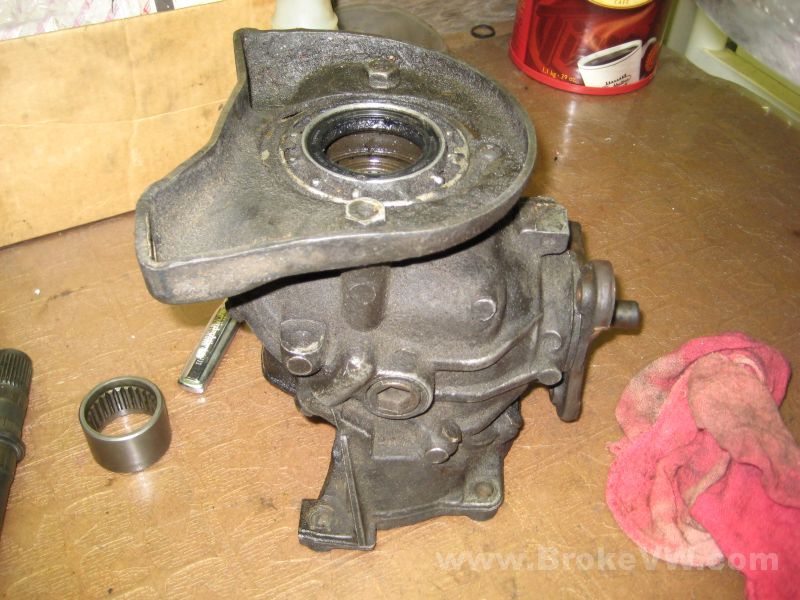
I need to clean the inside of the angle drive case before blasting, so it gets stripped and the gears and case get cleaned...

Before....
After...
Sealed up again with latex...

A pic of the internal parts clean, dry, and ready for cryo. They're assembled roughly how they go in the trans...

Update 9/10
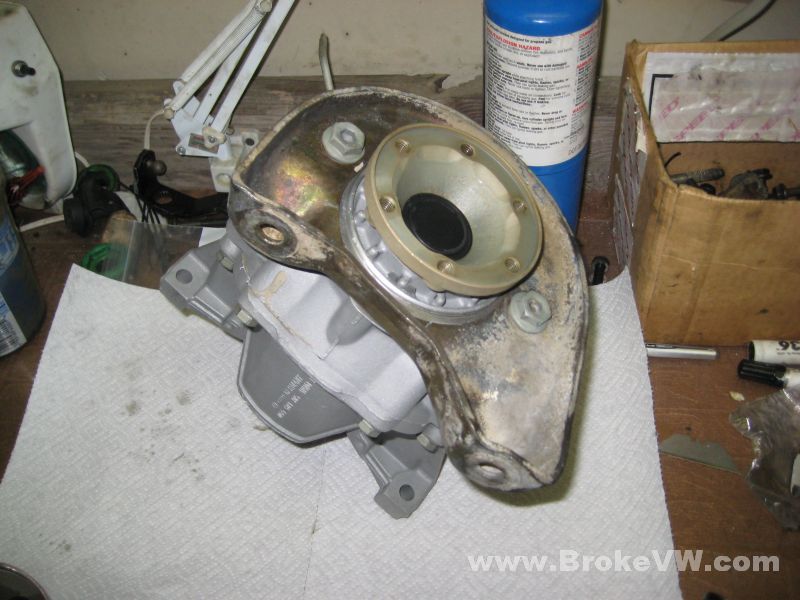
I've got the angle drive case sand blasted, along with the release arm and the output flange. I still need to blast the tri-flange shown in the pic above, as it looks old and nasty. The big mounting plate in the pic below on the bench behind the angle drive is nasty as well, but I can't plate it, I could only sand blast and paint it. I can blast it and leave it bare as well if you wanted to do something else to it. I can just leave it as it is also:) Let me know what you want done with it.
The angle drive is OK, but the trans was pretty corroded, and where there is corrosion, you'll see it as a splotchy look to the trans...
So you can see the case side-by-side, here is a pic of it prior to blasting again...
A few of the spots will possibly be removed when I blast it again with the glass bead, but there still may be some finish issue when it is all said and done, but there isn't much I can do with it, as it is too deep for the blaster to dig into. One spot I think will be removed is seen below, right at the bottom of the bellhousing there. I took the pic to show how well the blaster did in getting into the nooks and crannies. Just look at those nooks... and the crannies! So clean (compared to before) ;)
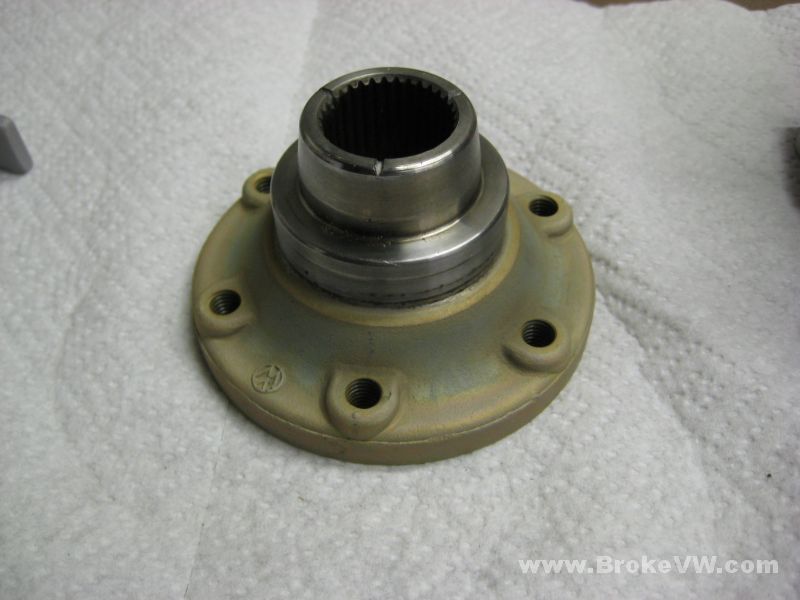
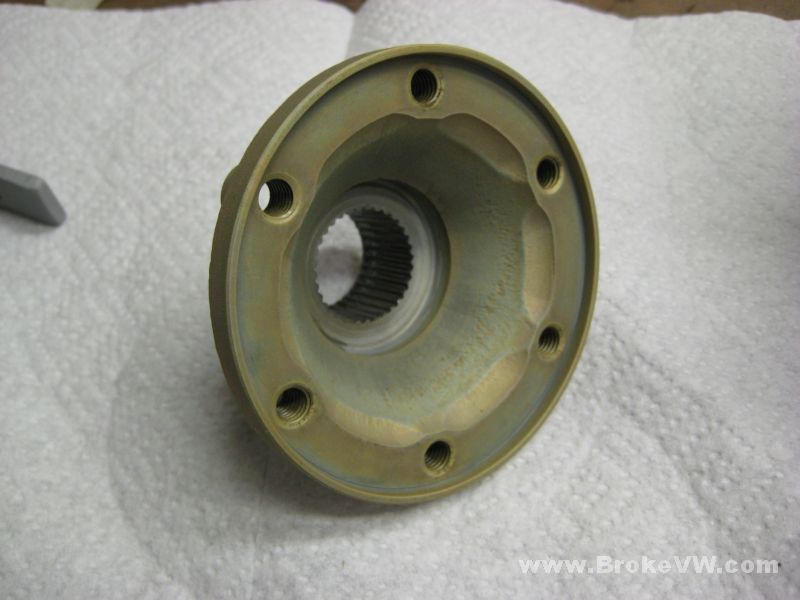
I've plated the release arm and flange tonight, and have decided not to try the tri-flange because of the use of a seal race, which I have never seen before. Basically, it is a bearing race pressed onto the tri-flange which the seal then rides on. It is from INA, a bearing mfg. in Germany (and maker of all the needle bearings in the trans, a part of the FAG bearing group), and it has a bearing race number, but I don't see it listed in etka, so I'm not messing with it, and I won't risk it in plating or blasting on it.
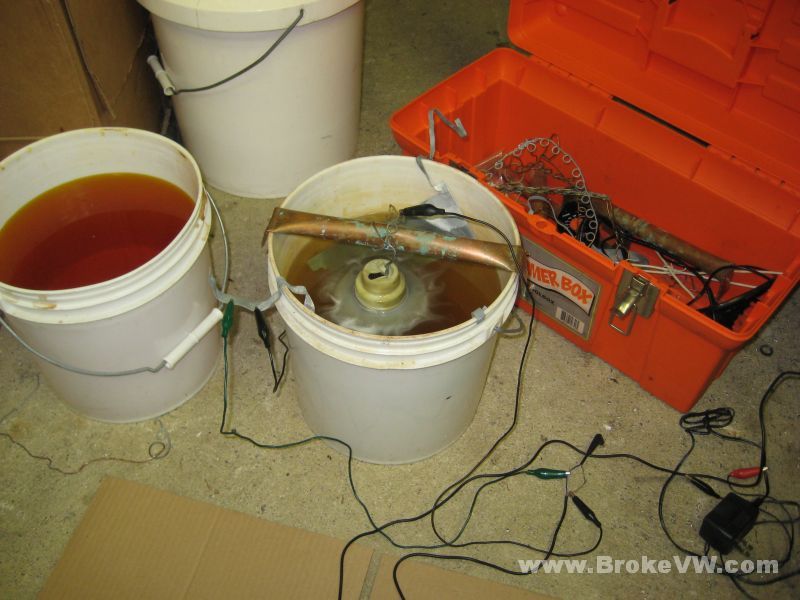
I decided to go ahead and snap a pic while waiting on the flange to plate. The bucket with the flange is the zinc plating mixture (the zinc plates are hanging on the sides of the bucket in the solution), and the other bucket is the yellow chromate dip...
The plated flange...
Bare blasted release arm next to plated flange...
And both of them plated and dipped. I think the deeper color on the arm might be due to how long I was digging on it with the blaster trying to get the rust off. I think it gave it a different texture, and thus a different color.

While not as nice as a factory new part, I think they look better than what they looked like this morning...!
OK, so the cases need sealed again (the gloves worked, but are
fragile, if I double them up, they'll probably be just fine), then I can glass
bead blast them.
Once that is done, I have to plate the bolts on the angle drive (I don't usually
do the bolts) because I had to use them to secure the case halves, so they've
been blasted which means they are raw steel, and need plated. The bolts in the
trans are a set I use over and over for blasting. I'll then get everything rinsed
off, and the case will be ready, the internals are ready, the new parts are
here, and the next step will be to go to the cryo place. I will be ready to go
there next Friday, but we still need that other flange, so stick that in the
mail and I'll get it taken care of, and hopefully by the week after next, I can
start the build.
Update 9/11
I've finished blasting the cases with glass bead, they need rinsed and dried, I've also plated the bolts for the angle drive and the drain plugs on the trans...
Here are a few pics showing the plated parts next to the bead blasted cases...

The wet spot around the plug is from the trace amounts of kerosene inside the case wicking out onto the very porous and dry surface of the trans. I normally coat the cases with light oil right after blasting, to protect it from oxygen and further corrosion, and also to allow an easy clean-up of any oily or greasy finger prints on the case during the build. Without the case being wet with the light oil, the dirt would get right onto the case, and stain it. The light oil keeps it off the case and easy to clean up.
You can see the blaster just can't get into every portion of the bolts, and this is where the rust will begin on them, but I've hopefully added some more time to them before they rust out again...
Update 9/26/08
Your parts have all made the trip safely to the cryo facility, I loaded them in myself, and will likely be the person to remove them from the unit as well, I was there when the heat cycle was started, they opened the door at the last minute so I could get some pics!
The processor unit and tanks....
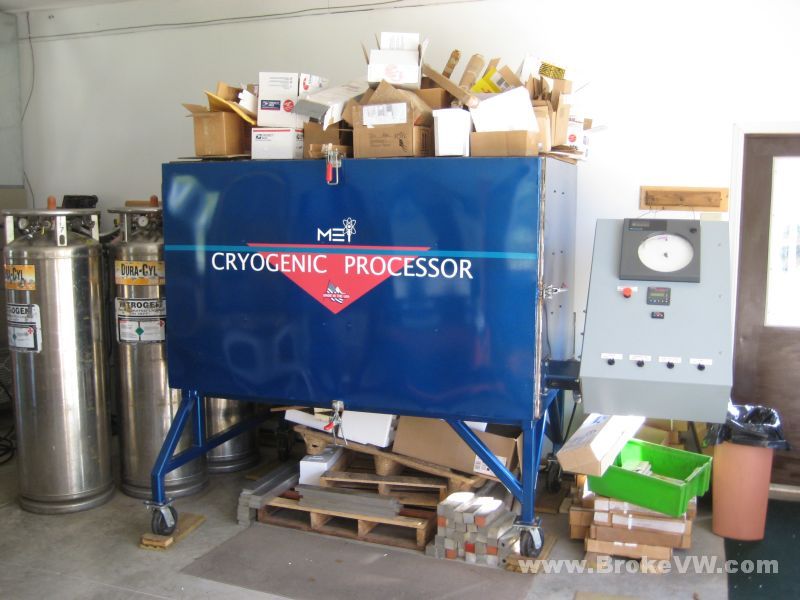
Everything packed in ready to be frozen for 16 hours!
Update 9/30/08
The parts ready to be assembled, I already have heated and pressed the taper bearings onto the shafts...
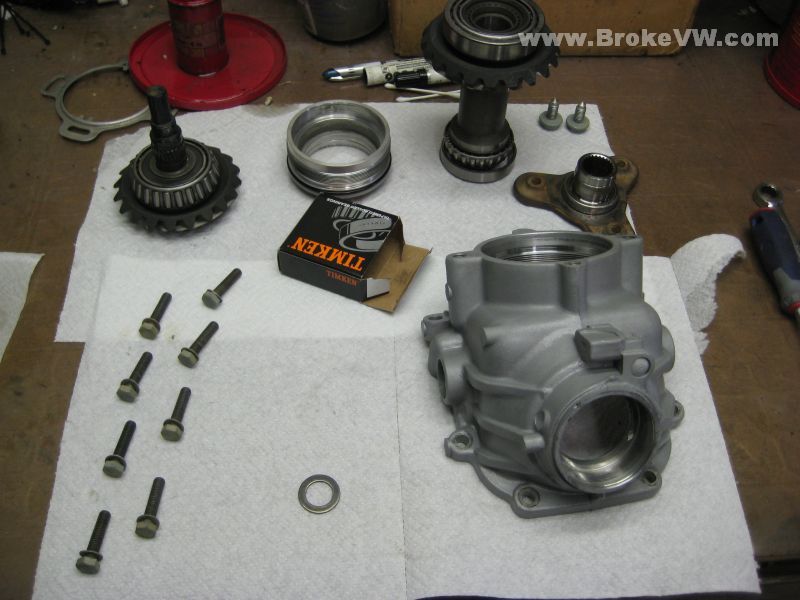
A pic of the "tools" I used to install the new bearings... you can't ask for a better fit than the old bearing! You can also see where I used a dremel to notch the inside of the old race so I could use a drift to knock it out of the case. It worked very well, and they lifted right out...

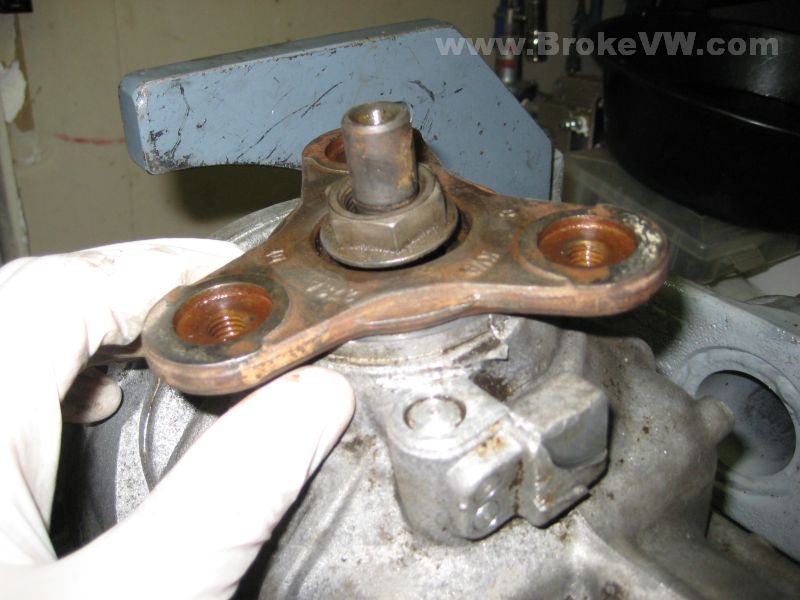
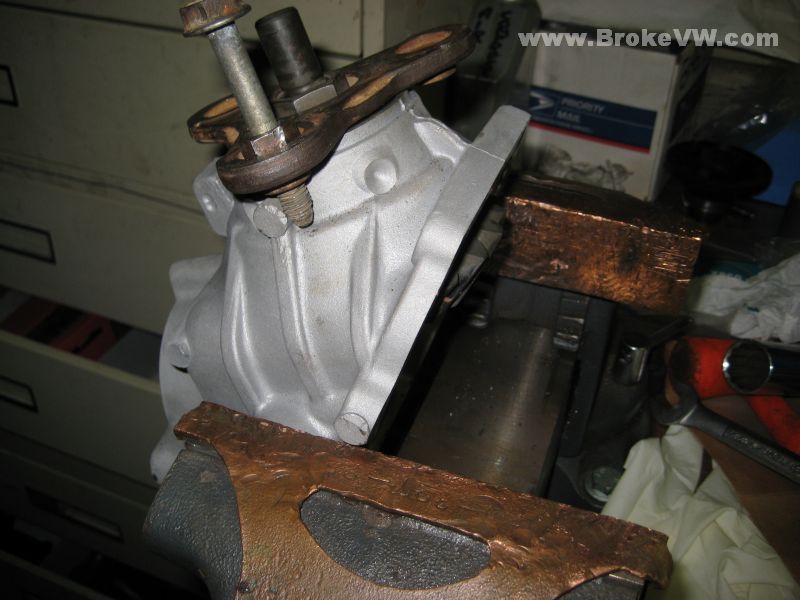
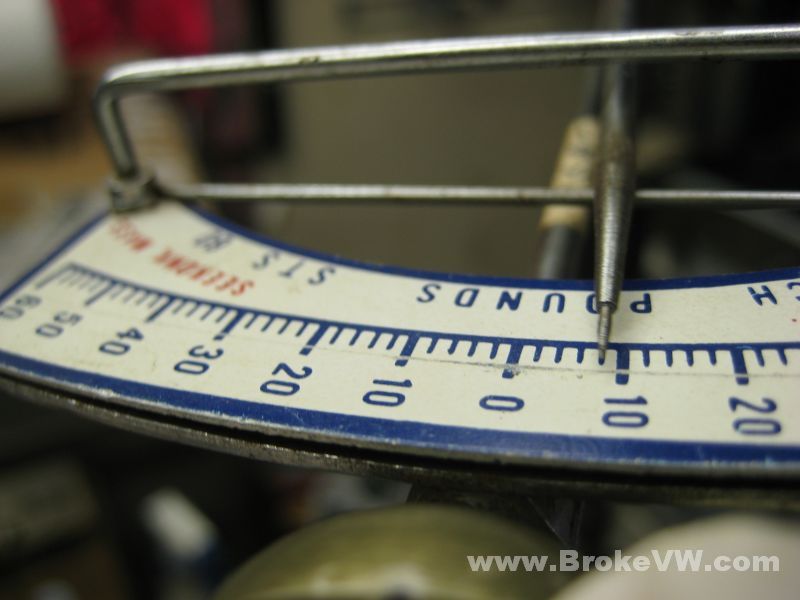
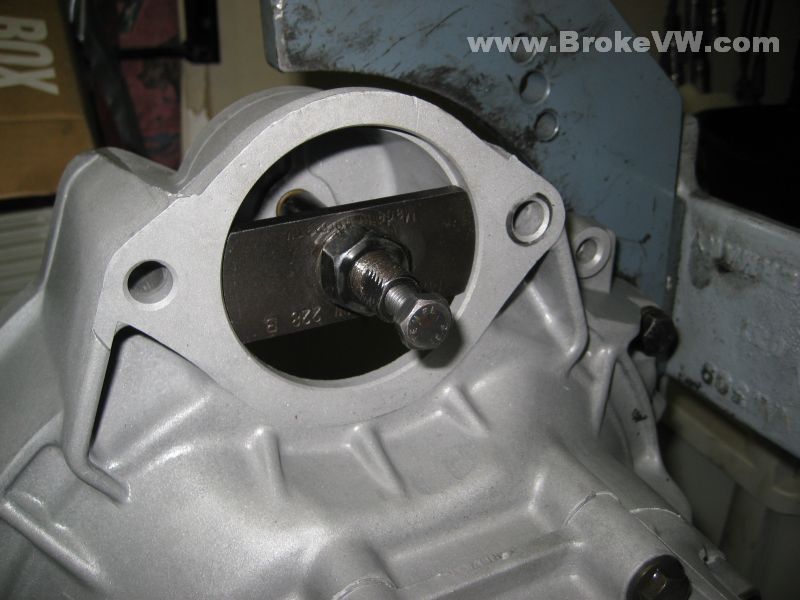
A pic of the preload for the tri-flange, spec is 18-22 in-lbs, and your preload is about 20.5-21 in-lbs, I'm happy with that...

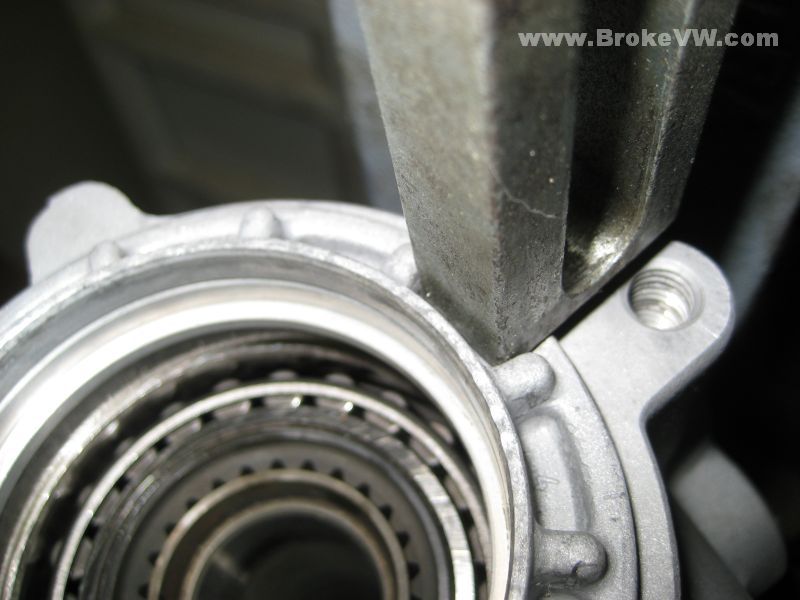
The VW procedure calls for the unit half to be mounted in a vise as shown, and the tri-flange is to be locked with a bolt and nut, the bolt extends past the flange and is stopped by that chunk of casing. I was nervous about THAT failing, but that's how they show it done. For the rebuild, you basically put the single large gear and shaft in the one half of the casing, bolt the flange on, and measure the turning torque. You want the spec outlined above.
The press work for both shafts completed...
The special tool I "made"... it is the support bar under the 020
when the case halves are pressed together. The bar supports the input shaft. I
found it was the perfect width to fit between the tabs on the ring nut, and I
used it to adjust the preload on the other shaft. That went perfectly as well, I
started at 20 in-lbs (the setting from before), then tightened the ring nut,
until it raised the preload to 40 in-lbs, meaning I added 20 more, and I only
changed the one shaft via the ring nut, so I know I have 20 on each one, perfect
spec.
As you tighten the ring nut, it drives the taper bearing race tighter into the
shaft, increasing preload.
For those looking for the specs for setting gear lash and so forth, that is done with the set of shims under the bearing race at the other end of the long shaft in the angle drive. Both ends have taper bearings... one end is the ring nut, so it moves, the other end is set with shims. This is where the lash is adjusted. You move the entire long shaft back and forth in the angle drive case, and set it with the shims. Then the preload is created as you mash the ring nut bearing race onto the shaft.
You set the tri-flange preload first, by itself... using the shims and so on, then you know it is 20 in-lbs to spin, so you go about setting the preload on the other shaft with the angle drive assembled.... with the ring nut just loose or just contacting the long shaft bearing, the preload when you spin the tri-flange is still 20... nothing added. Tighten the ring nut, and the long shaft gets harder to turn... and you see this as an increase up from 20 on the turning torque of the tri-flange, as it spins everything in the angle drive.
Crank the ring nut tighter, and you keep adding. When you get to 40 total, you know you have 20 on the first tri-flange shaft by itself, and then 20 more on the long shaft, and you're done.
I'd go into detail on the lash setting, but frankly, I didn't do it on this box, it didn't seem to need it, and I don't have the $3500-$5000 in VW tools needed just for the lash procedure! You can do it without the special tools, but my luck is poor, so I try to use the special tools when I can :)

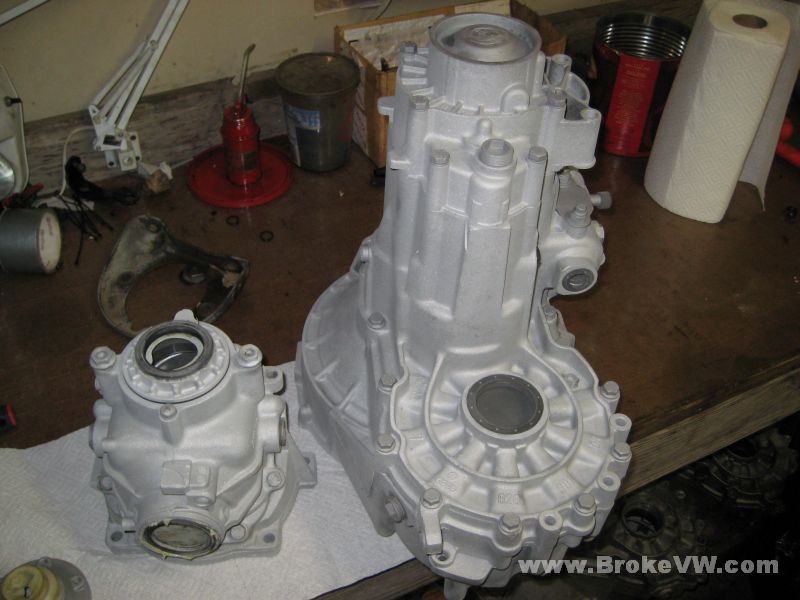
Update 10/22/08
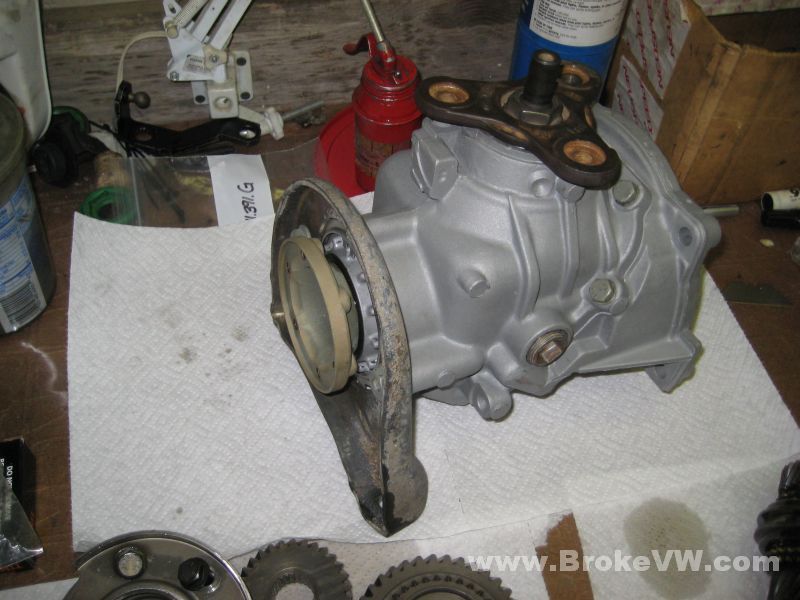
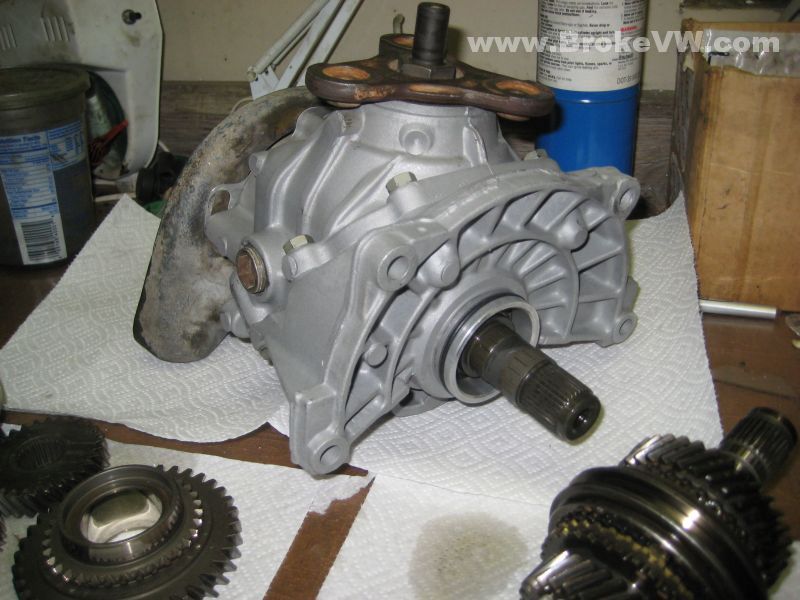
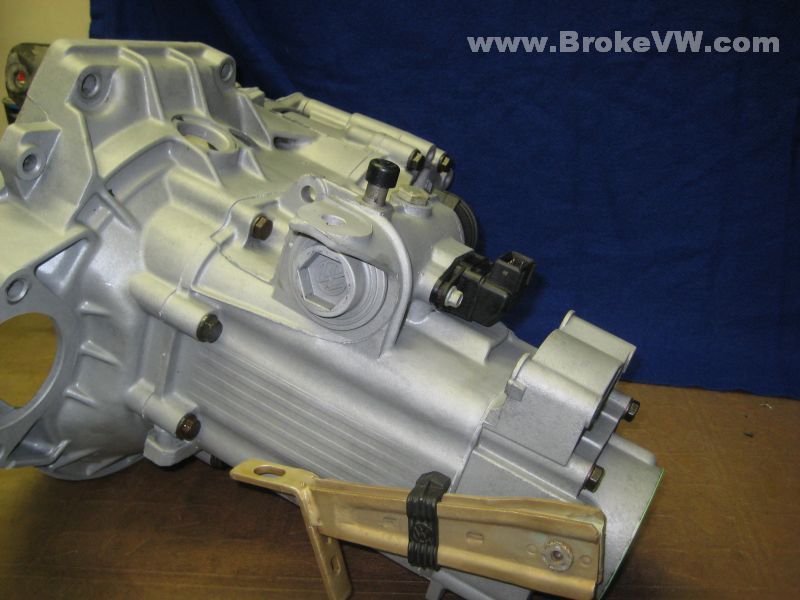
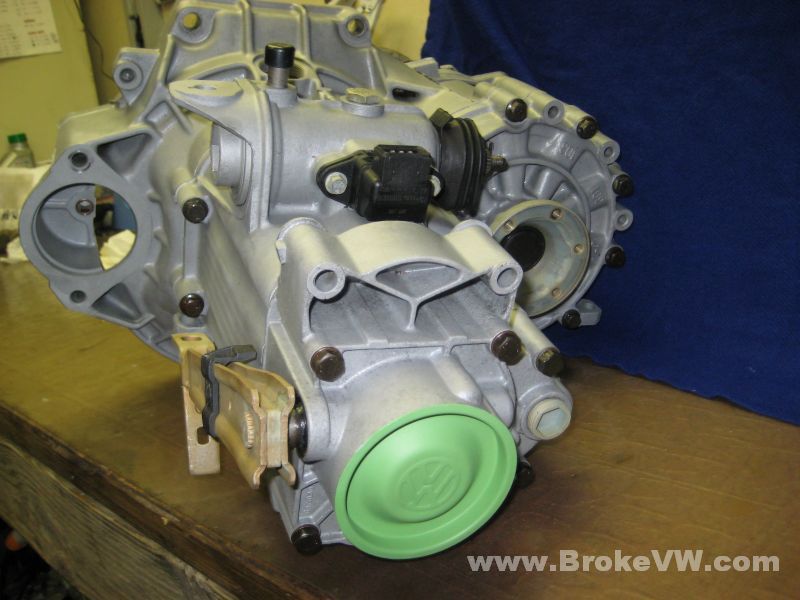
OK, I have the angle drive built, as I explained in the email (or here, I forget) the flange was left alone because of a seal race, so no blasting or plating, and the other steel parts I wasn't sure what your plan was, so the mount on this angle drive, and the other parts on the trans I haven't done anything with but clean the grime from... anyway, pics of the completed angle drive...
Pics of the rest of the trans that needs built, just waiting on that one bearing to arrive for the diff carrier...
How everything is left when I'm done working on it.... everything is covered with towels to stop any dust or debris in the air from settling onto the parts...
Another "tool" I made... I used one of the old bearings, cut the rollers and cage off, leaving just the inner race, then I used a grinder wheel on the inside to open it up, so it wouldn't get stuck onto the diff when I pressed the good new bearing on...
Pressing in the input shaft roller bearing...
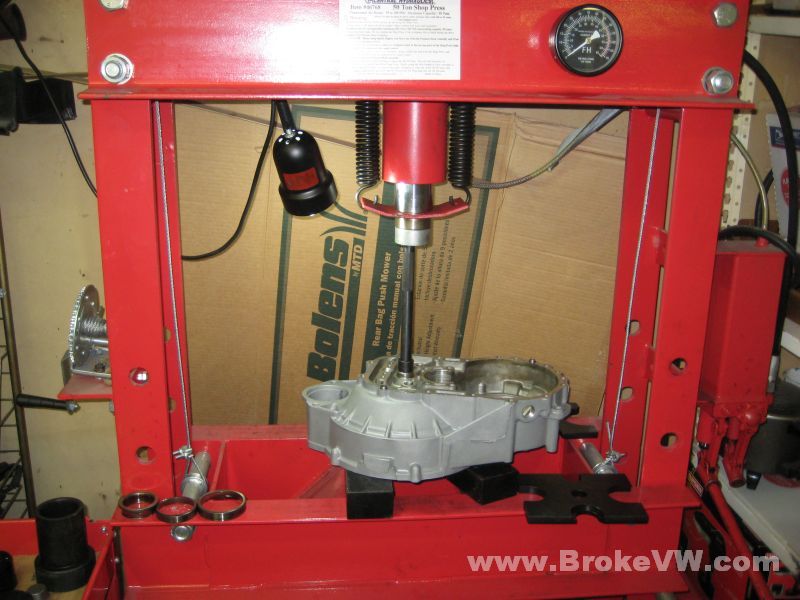
The bearing arrived, and I could get started again. The case installed to check the diff bearing preload...
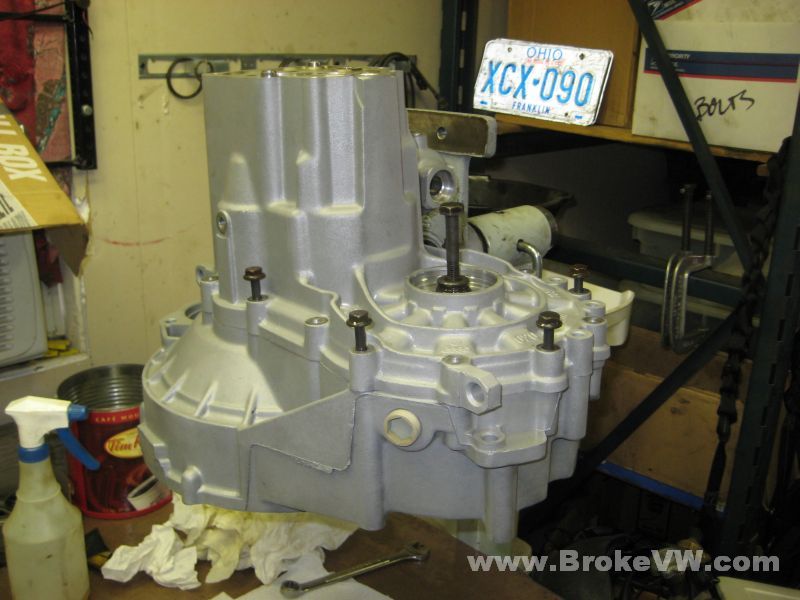
Tools of precision for exact checking of the play in the bearings so the right shim can be used...

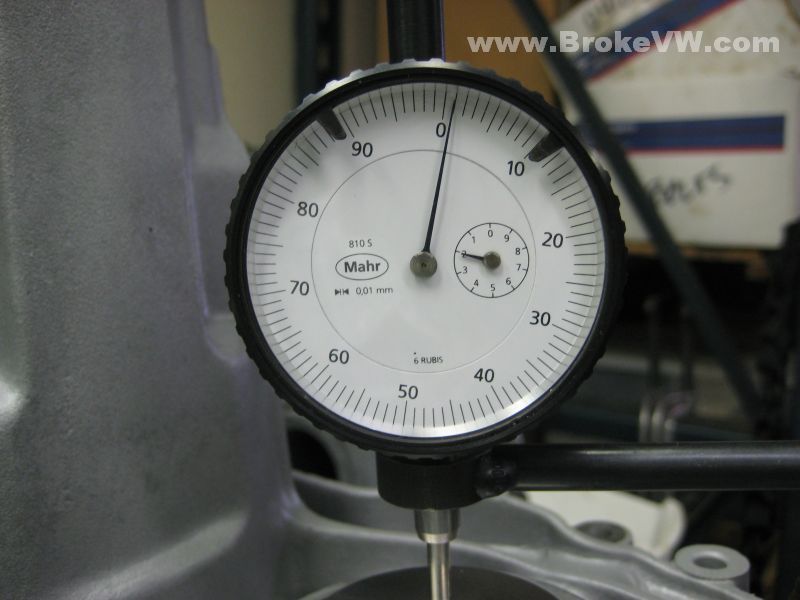
Install the stand, install the perfectly flat disc on the output shaft, and mount the DTI and preload it with 1.0mm of preload...
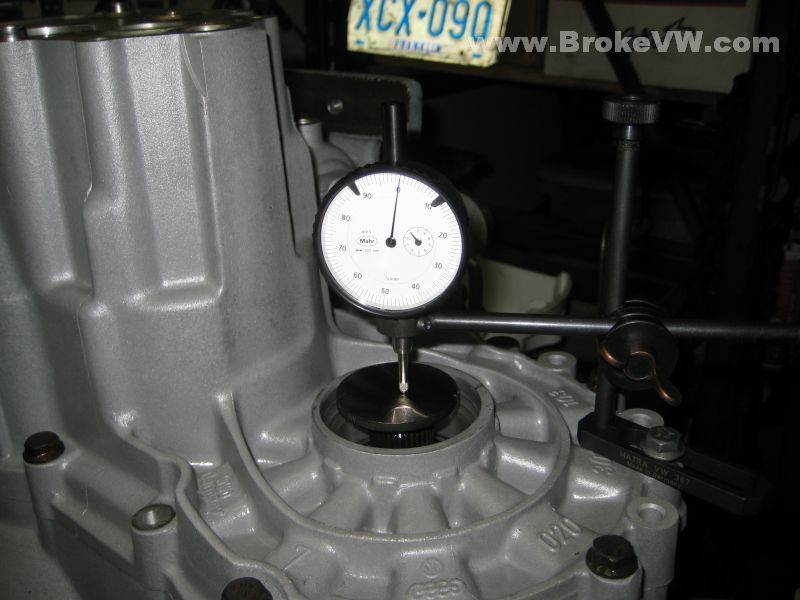
Lift the diff in the case, and measure the change. We started at 1.00mm, and it reads 2.01mm, so we have a slop of 1.01mm. VW calls for 0.40mm preload on top of any slop, so we need 1.40mm worth of shims...
We install the 2 shims (0.80mm and 0.60mm makes 1.40mm), and bolt it all up again, lube the bearings, and check the turning torque. Your syncro box is the same as any 020, even though it uses one bearing on the diff slightly larger than the 020. Spec for new bearings is 11-31 inch-pounds. Right dead in the center of the range from VW is about 21 in-lbs.... your preload adjusted out to just a touch over 20. Perfect:)
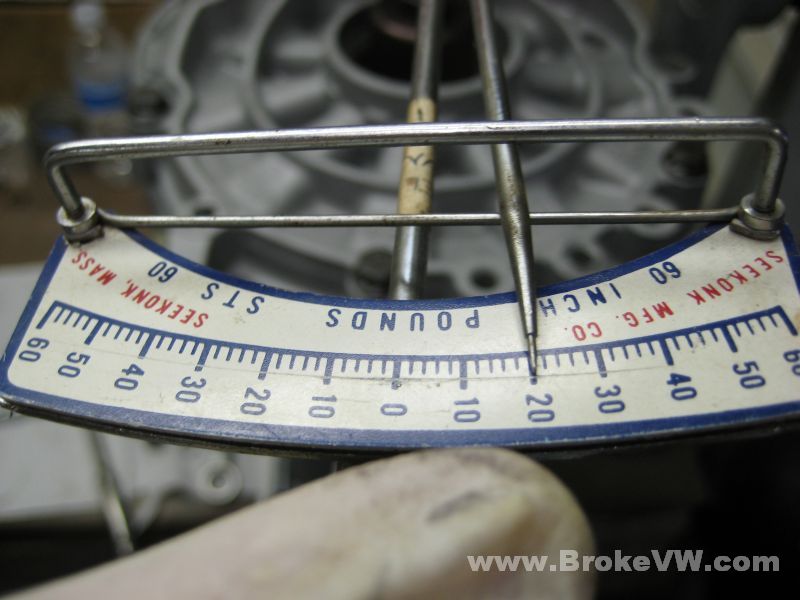
I had adjusted the output shaft preload while waiting on the diff bearing... I checked the turning torque again, the spec from VW is 4.4-13.3 inch-pounds making dead center about 8.9 in-lbs... your preload is about as close to dead center perfect as I could hope for... :)
Preloads all done, now the build starts... 1st gear installed, followed by the 1/2 sync hub assembly...
The input shaft I had built waiting on the bearing (along with the forks and 5th assembly), so slide on the rest of the gear onto the output shaft, then drop the input shaft in while installing 4th on the output shaft. Install the new cryo treated reverse idler and the forks, and there is where we are....
Clean the gasket surfaces off and apply the VW sealant, and press the case together. Follow that with the install of the 5th assembly, and we're at this point...
The VW sealant... it goes on like a thick runny paint. You have to be very careful with it. One, it is expensive! Two, you don't want it squeezing a bunch out inside the trans. I use the tube and 'dot' the tip of it onto the surface, as shown here...

Wipe the goo around and it'll "paint" the silver aluminum the gray color of the sealant... because it is somewhat runny, in about 60 seconds, it'll "flatten" out and flow and become smooth and nice...
Blasted and plated reverse switch bolts, and your old switch installed. The selector shaft seal installed and the shaft coated in axle grease, to keep it shiny for years to come...
Pulling the old starter bushing out...
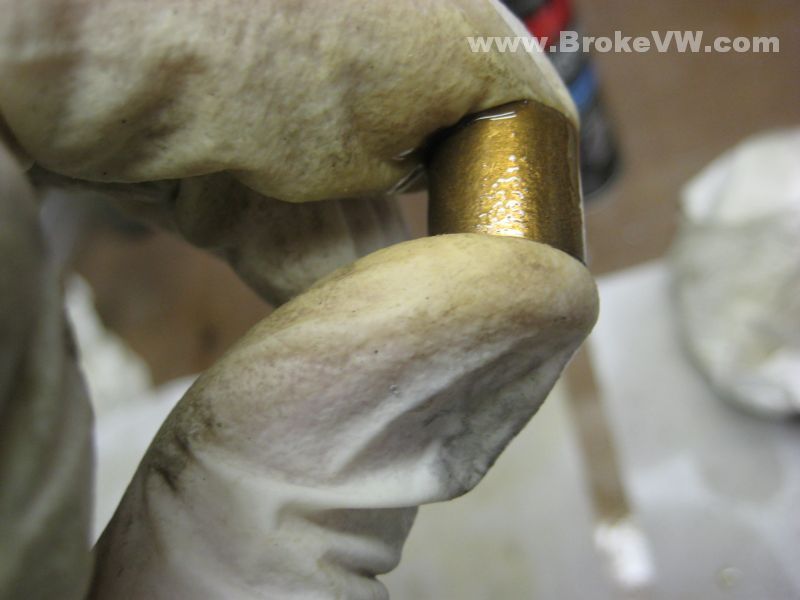
Lubricating the new bronze bushing. This is a neat trick an old mechanic showed me... brass and bronze are self lubricating, but you can help by impregnating the metal with oil. It is porous, so you can hold it on your thumb, fill it with oil to the top, then put your finger into the oil, and squeeze. The oil will not compress (hello hydraulics!), and as your finger is pressed into the oil, it has nowhere to go, so it is forced out of the pores of the metal, and you can see the bushing "sweat" the oil out as you squeeze.... cool, isn't it? :)
New oiled bushing installed...

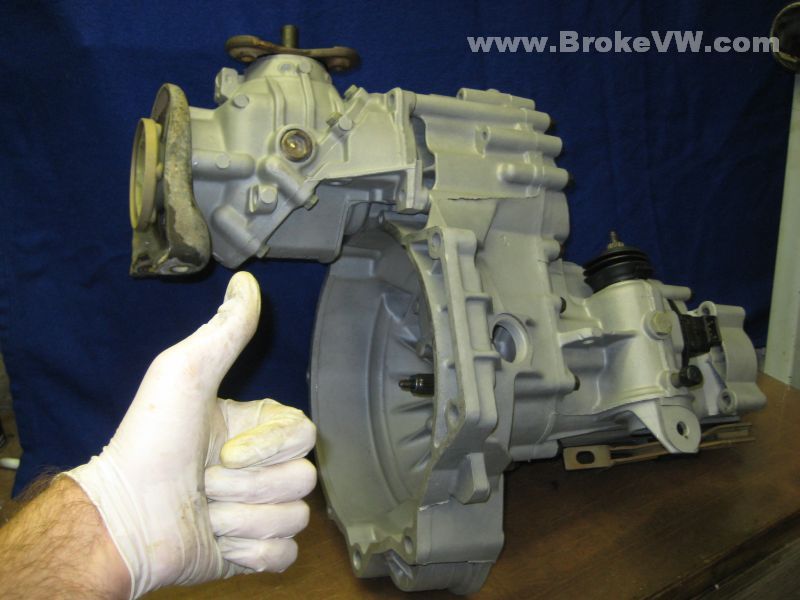
Done. Pay up sucka'

This is that one tab we talked about earlier... there is a very slight gap between the trans and angle drive. Very slight, but I like perfection, so I gave it some though, and came up with a solution...
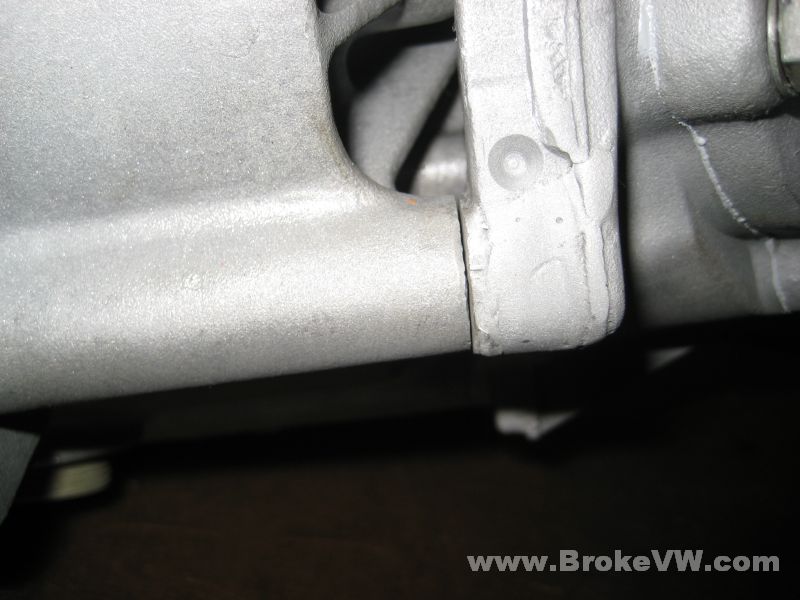
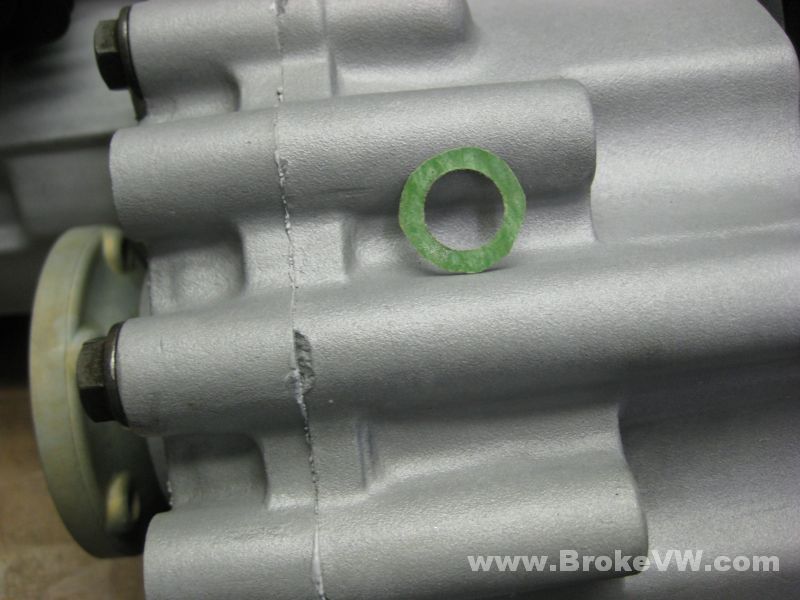
One home made shim :P Yes, I cut it out of an old 5th housing paper gasket! It is just the right thickness, and it is oil resistant so it isn't like normal paper and won't break down, and it should do the trick. Plus, it is cheap, I can offer you a lifetime supply for free of little bolt hole gaskets I've cut out from old 5th housing gaskets :D
More done pics...
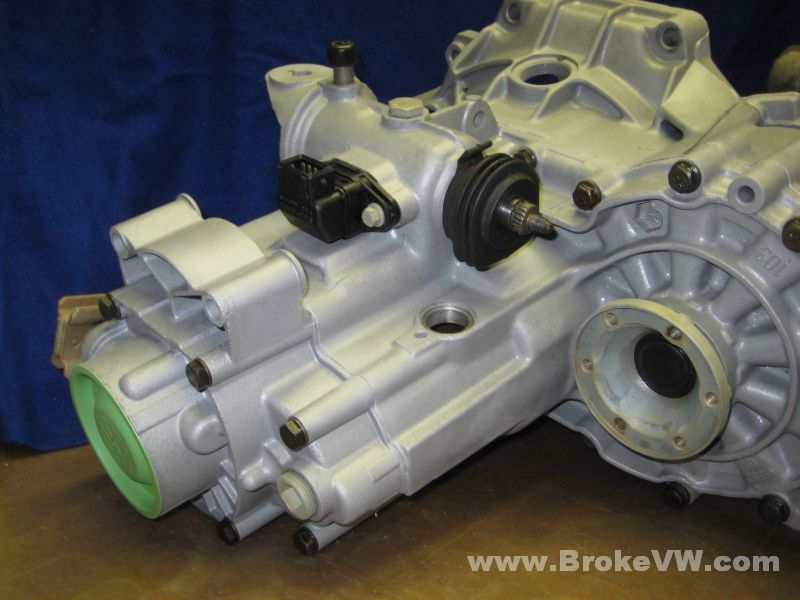
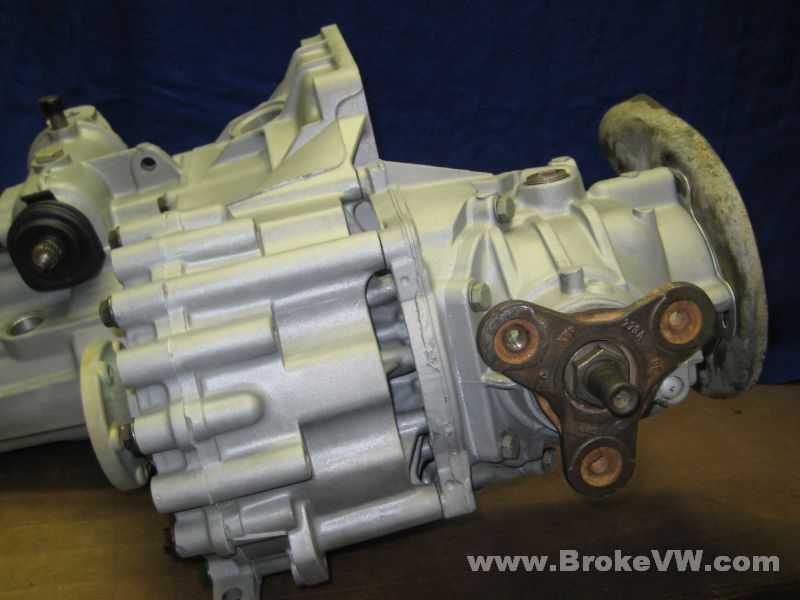
Woot.
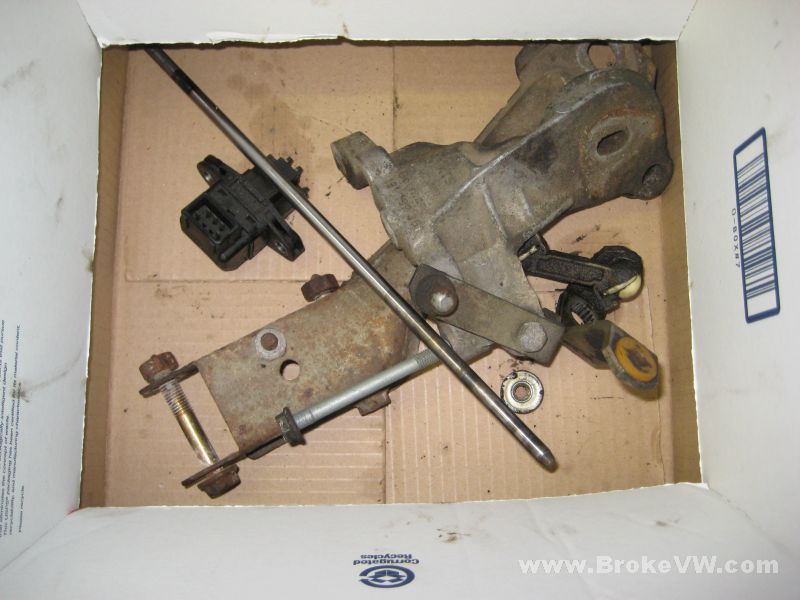
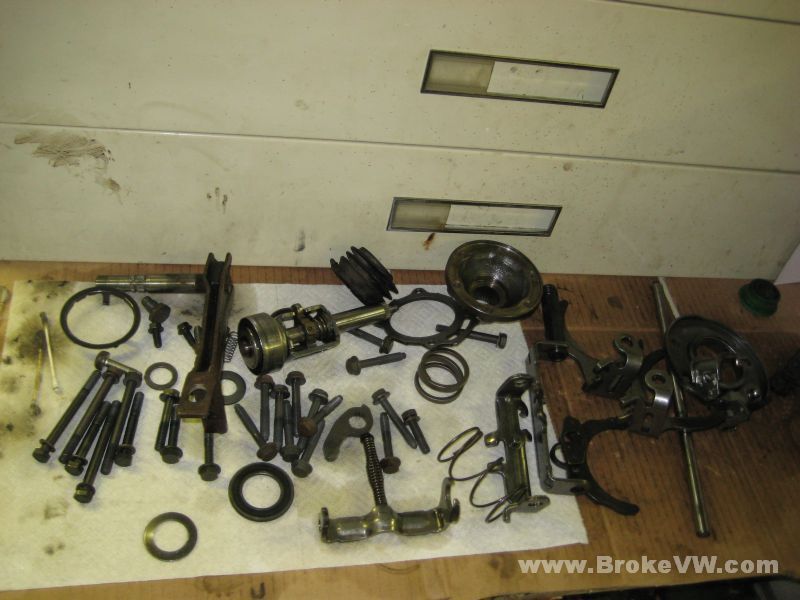
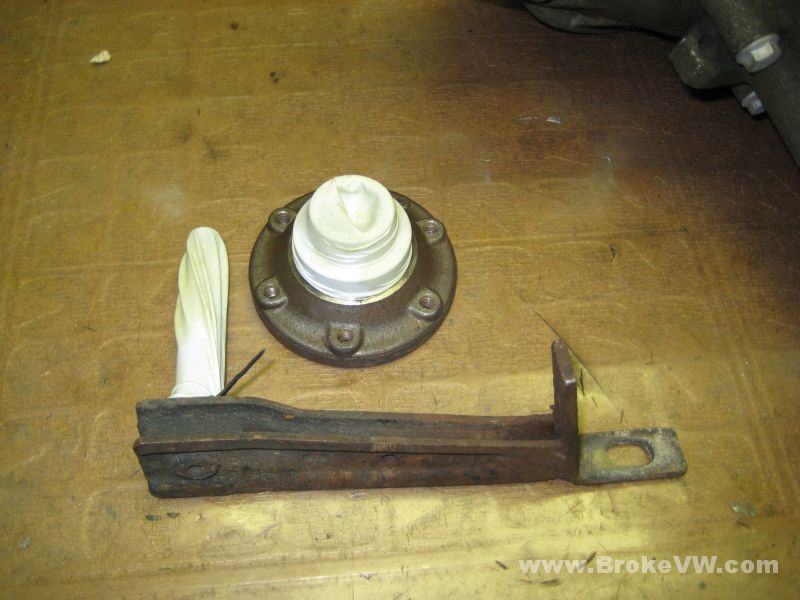
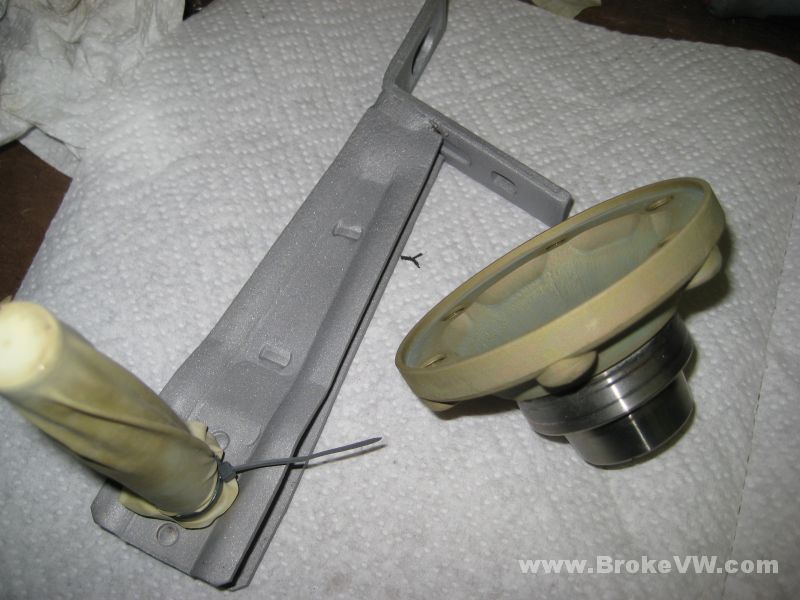
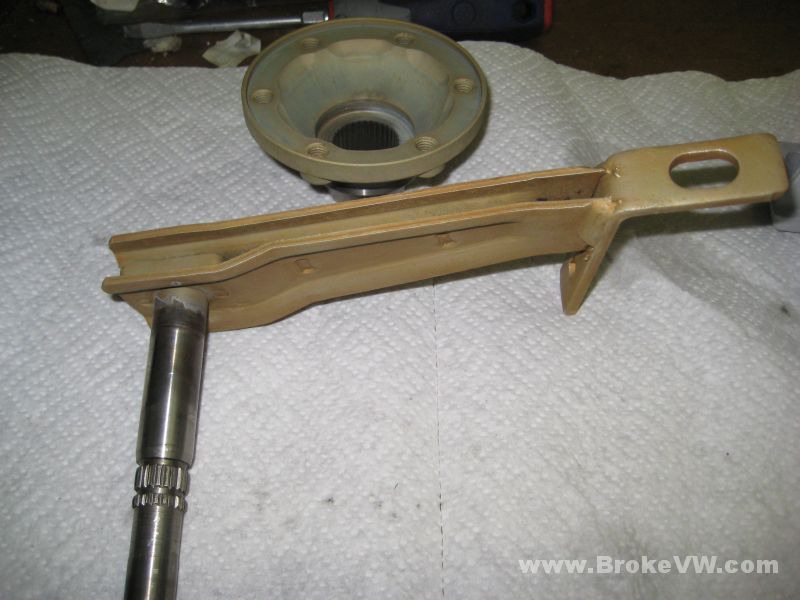
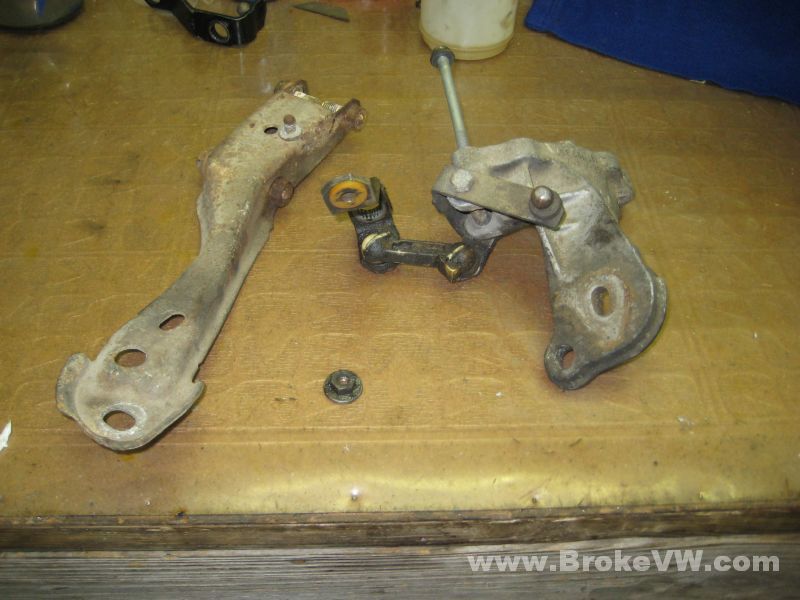
Oh crappy... I forgot about these little guys... the linkage parts I'll de-grime, the long support I won't do anything with, and the aluminum chunk I'll try to get blasted so it matches... then put the ugly steel parts back on it. You can powder coat or spray paint them or whatever the plan is for those parts.
That's it. It's been a lot of fun working on this one, and learning how it works and so on, thanks! You can pick it up when you are ready :)
Brian